How to Stop Running Water From Tap: Quick Fixes and Permanent Solutions
To stop a running tap, first identify the cause, which could be worn washers, O-rings, cartridges, high water pressure, or mineral buildup. Begin by shutting off the local valve and tightening any loose fittings. For a more permanent solution, disassemble the faucet to inspect seals and replace any damaged components. Consider installing pressure regulators or upgrading your fixtures for long-term relief. Continue reading for detailed step-by-step repair instructions, associated costs, and maintenance tips.
Why Your Tap Keeps Running Quick Overview of Common Causes
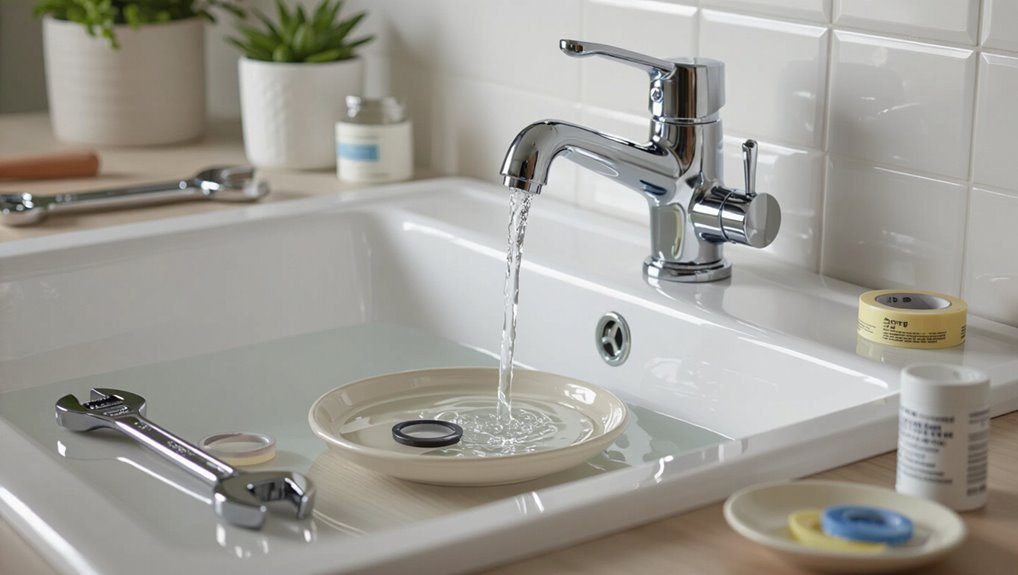
Persistent tap dripping often traces to simple mechanical failures such as worn washers and O-rings or a faulty cartridge or valve seat.
Excessive water pressure, corrosion or mineral buildup in pipes, and loose or broken handle components can also prevent a proper seal and keep water flowing.
Identifying which of these issues is present guides whether a quick part replacement or more extensive plumbing work is required.
Worn or Damaged Washers and O-Rings
Inspecting the washer and O-ring is a quick way to diagnose a continuously running tap: these small rubber components create the seal that stops water flow, and when they harden, tear, or compress they can allow water to bypass the valve.
Replacing worn washers or O-rings is a common how to stop running water from tap step; cleaning the area and fitting correct-size replacements restores a reliable seal.
Faulty Cartridge or Valve Seat
A malfunctioning cartridge or worn valve seat often causes a tap to run continuously because these parts control the shutoff mechanism inside the faucet.
When the cartridge sticks, cracks, or the seat becomes corroded or pitted, water can bypass seals and flow even with the handle in the off position.
Replacement or resurfacing restores proper sealing; inspection identifies scoring, mineral buildup, or broken retaining clips requiring part-specific repair.
High Water Pressure and Its Effects
While a worn cartridge or corroded valve seat can let water bypass seals, excessive household water pressure presents a different mechanism for taps that continue to run: pressure forces open or deforms internal seals and causes minor leaks to become continuous, overwhelms check valves and pressure-balancing components, and accelerates wear on washers and O-rings.
High pressure also stresses faucet bodies, shortens component life, and increases leak frequency.
Corroded Pipes or Mineral Buildup
Many household taps fail to seat properly when internal passages accumulate corrosion or mineral scale, which narrows flow paths, disrupts valve operation, and prevents seals from closing fully.
Mineral deposits or rust can form on valve seats, cartridges, and aerators, causing persistent drips or reduced shutoff.
Cleaning, descaling, or replacing affected parts restores proper sealing; extensive corrosion may require pipe or fixture replacement.
Loose or Broken Handle Components
Loose or broken handle components can prevent a tap from fully closing by disrupting the linkage between the user control and the valve mechanism.
Worn splines, stripped screws, fractured cartridge stems or loose retainers allow incomplete valve seating. Tightening, replacing fasteners, or swapping damaged cartridges/handles typically restores proper motion.
Inspection, correct parts and secure reassembly resolve most handle-related leaks without disturbing supply lines.
Issues with the Shutoff Valve or Supply Lines
Check the shutoff valve and supply lines when a tap continues to run despite a functional handle or cartridge: faults in these components can allow water to bypass the faucet and sustain flow.
Inspect shutoff valves for partial closure, corrosion, or broken stems.
Examine flexible supply lines and connections for leaks or kinks.
Replace defective valves or lines and retest flow; call a plumber if shutoff fails.
Immediate Quick Fixes to Stop a Running Tap
The section outlines immediate steps a homeowner can take when a tap runs, starting with shutting off the local shutoff valve and, if necessary, the main supply.
It then covers quick temporary measures—using an adjustable wrench to tighten fittings, wrapping cloth or rubber to reduce dripping, and fitting simple replacement parts like washers or cartridges.
Guidance also explains when the problem requires an emergency plumber rather than a DIY fix.
How to Shut Off Water at the Tap and Main Supply
Reach for the tap handle and close it firmly; if water continues to run, locate and turn off the fixture’s shutoff valve beneath the sink or behind the toilet to stop flow immediately.
If that fails, shut the home’s main water valve—usually near the meter, garage, or perimeter wall.
Confirm all taps are closed, then contact a plumber for inspection and permanent repair.
Temporary Fix Using Adjustable Wrench and Tightening Techniques
Use an adjustable wrench to snug accessible packing nuts and valve stems, applying firm but controlled turns to stop minor leaks without disassembling the fixture.
Work slowly, testing the tap between adjustments to avoid over-tightening. If leaks persist, note component condition for later repair or replacement.
- Test after each small turn
- Avoid excessive force
- Record location and severity for follow-up
Using a Cloth or Rubber to Reduce Drip Until Repair
When tightening nuts and stems fails to fully stop a leak, a simple cloth or a small piece of rubber can reduce dripping until a proper repair is made.
Folded into a pad and pressed against the spout or wrapped around the valve stem, these materials absorb and slow water, directing drips into a container.
Replace promptly and arrange permanent repair to prevent mold or damage.
Simple Replacement Parts You Can Install Quickly
Installable replacement parts such as washers, O-rings, cartridge inserts, and rubber seats often stop common tap leaks quickly and with minimal tools; these components are inexpensive, widely available, and typically fit standard faucets. This allows a homeowner to restore a tight seal in a single short visit without full disassembly or professional help.
- Replace worn rubber washers for compression taps.
- Swap leaking O-rings on stem assemblies.
- Insert a new cartridge for single-handle faucets.
When to Call an Emergency Plumber
How urgent is the situation? If water cannot be stopped at the shutoff, flows into ceilings or electrical areas, or rises toward appliance motors, an emergency plumber is required immediately.
Also call if visible pipe bursts, major leaks start overnight, or neighborhood supply issues cause pressure surges.
For slow drips, scheduled repairs suffice; for uncontrolled flooding or safety hazards, professional emergency response is essential.
Step-by-Step Repair: Fixing Common Tap Types
The following section outlines step-by-step repairs for the most common tap types: compression (two-handle), cartridge, ball, and ceramic disc faucets.
Each repair sequence highlights key disassembly steps, typical worn parts to replace, and reassembly tips to restore a watertight seal.
A concise tools-and-parts checklist is provided to guarantee the homeowner has the necessary items before starting.
Repairing a Compression (Two-Handle) Faucet
Start by turning off the water supply to the faucet and opening both handles to relieve any remaining pressure.
The repairer removes decorative caps, unscrews handles, extracts stems, inspects and replaces worn rubber seats or O-rings, and reassembles, testing for leaks.
Common tools:
- Adjustable wrench, screwdriver, and replacement seats/O-rings
- Penetrating oil for stuck parts
- Clean cloth and plumber’s grease
Repairing a Cartridge Faucet
Begin by shutting off the water supply and opening the faucet to drain remaining water and relieve pressure.
Remove handle, bonnet, and retaining clip to extract the cartridge.
Inspect O-rings and seals; replace worn parts and re-lubricate with plumber’s grease.
Reassemble and test for leaks, adjusting seating as needed.
- Use correct replacement cartridge
- Keep small parts organized
- Test under full pressure
Repairing a Ball Faucet
After servicing a cartridge faucet, attention can turn to ball-type faucets, which use a rotating ball and multiple seals rather than a cartridge.
Repair involves isolating water, removing handle and cap, inspecting ball and seals, replacing worn springs and seats, and reassembling with lubricant and a new cam if needed.
Test for leaks and adjust tension.
- Gather parts and tools
- Replace seals methodically
- Test under pressure
Repairing a Ceramic Disc Faucet
Diagnose the ceramic disc faucet by first shutting off the water and confirming the handle moves smoothly.
These faucets rely on two precision discs and minimal seals, so leaks usually stem from damaged discs, worn O-rings, or debris between the discs.
Remove the handle, inspect discs for scratches, clean seating surfaces, replace O-rings or discs if worn, reassemble, and test for leaks.
- Clean seating surfaces carefully
- Replace worn O-rings
- Reassemble and test
Tools and Parts Checklist for Home Repairs
Gather essential tools and parts before attempting tap repairs to guarantee efficient, safe work and to avoid mid-job trips to the hardware store.
A concise checklist prevents mistakes and speeds repairs across cartridge, ceramic disc, and ball taps. Include quality replacements and basic tools to match tap type and fittings.
- Adjustable wrench, pliers, screwdriver set
- Replacement cartridges, O-rings, seals
- Plumber’s grease, thread tape, small flashlight
How to Diagnose Tap Problems Before Repair
Before attempting repairs, a clear diagnosis establishes whether the issue lies with the faucet or the wider plumbing.
The diagnostic process includes identifying the faucet type, carefully inspecting internal components to avoid damage, testing water pressure to reveal systemic faults, and noting signs—such as multiple affected fixtures or sudden pressure loss—that point away from the faucet.
Accurate assessment prevents unnecessary parts replacement and guides the correct repair approach.
How to Identify the Faucet Type
Which type of faucet is installed determines the likely causes and fixes for a running tap.
Identification involves noting handle count (single, double), operation (ball, cartridge, ceramic disc, compression), visible parts (spout style, aerator), and mounting (deck, wall).
Recording brand or model markings aids parts replacement. Photographs help remote diagnosis.
Accurate identification narrows likely failure points and required repairs.
How to Inspect Internal Components Without Causing Damage
With the faucet type identified, the next step is a careful inspection of internal components to determine the fault without introducing damage.
The inspector works methodically: shut water, clear visible debris, photograph assemblies, and handle parts gently. Use correct tools, avoid prying, and note wear. Document findings for parts replacement or professional referral.
- Check seals and O-rings
- Inspect valve seats
- Examine cartridge or stem
Testing Water Pressure and Detecting Systemic Issues
A systematic pressure test helps separate localized faucet faults from wider plumbing issues by measuring flow and static pressure at the fixture and comparing results to expected values.
Use a pressure gauge and timed flow measurement, record cold and hot readings, and check for fluctuations when other fixtures operate.
Persistent low or unstable pressure suggests broader supply or valve problems requiring further diagnostic steps.
Signs That the Problem Is in the Plumbing, Not the Faucet
After recording pressure and flow, the next step is to distinguish faucet-specific faults from broader plumbing problems.
Signs pointing to plumbing issues include:
- multiple fixtures affected
- intermittent pressure throughout the house
- discolored or sputtering water
- persistent leaks in walls or ceilings
- sudden changes after municipal work
These indicate supply-line, valve, or pipe corrosion issues rather than a single faulty faucet.
Permanent Solutions and Upgrades to Prevent Future Leaks
The article shifts to long-term fixes that reduce recurring tap leaks and improve system reliability.
Options include replacing a faulty faucet with a higher-quality model, choosing water-saving or pressure‑balancing faucets, and installing pressure regulators or water softeners to protect fittings.
If supply lines are corroded or damaged, rerouting or replacing them completes a durable solution.
Replacing Faucet with a Higher-Quality Model
Consider replacing an aging or low-quality faucet with a higher-grade model to eliminate persistent drips and reduce future maintenance.
A durable faucet with robust cartridge or ceramic disc valves, quality seals, and solid construction minimizes wear and leak risk.
Professional installation guarantees proper fit and alignment.
Investing in a reputable brand reduces callbacks and prolongs service life, preventing recurrent repairs.
Upgrading to Water-Saving or Pressure-Balancing Faucets
Upgrade to water-saving or pressure-balancing faucets to address chronic leaks and protect plumbing systems from pressure-related wear.
These faucets reduce flow, lowering strain on valves and seals, and maintain consistent output during pressure fluctuations.
Installing low-flow aerators and ceramic-disc cartridges further minimizes leakage risk.
Selection should match existing plumbing dimensions and water habits; professional installation guarantees ideal sealing and long-term performance.
Installing Pressure Regulators and Water Softeners
Installing pressure regulators and water softeners provides durable protection against leaks by controlling two common root causes: excessive supply pressure and mineral buildup.
Regulators stabilize mains pressure, reducing stress on valves and seals. Softeners remove hardness minerals that cause scaling and valve obstruction.
Proper sizing, professional installation, routine maintenance, and periodic pressure checks guarantee long-term performance and lower risk of future faucet failures.
Rerouting or Replacing Corroded Supply Lines
Rerouting or replacing corroded supply lines stops ongoing leaks at their source and prevents recurring damage from failing pipes.
A plumber assesses pipe condition, selects modern materials (PEX, copper), and plans a route minimizing bends and exposure to corrosive elements.
Replacement restores flow integrity; rerouting avoids future stress points.
Proper installation, insulation, and accessible shutoffs reduce leak recurrence and simplify maintenance.
Cost, Time, and Difficulty Estimates
Typical out-of-pocket costs for DIY parts versus professional repair vary widely, with basic cartridges or seals costing a few dollars and full-service calls reaching into the hundreds.
Repair time depends on faucet type and complexity, ranging from 10–30 minutes for a simple compression tap to several hours for ceramic-disk, pull-down, or wall-mounted units.
Guidance on when replacement is more cost-effective than repair will compare cumulative repair expenses, expected remaining lifespan, and labor intensity.
Typical Cost Range for DIY Parts vs Professional Repair
Costs and time required to stop a tap that keeps running vary widely depending on the cause and the chosen approach: a DIY fix for a worn rubber washer or cartridge typically costs $5–$40 and takes 15–60 minutes for someone with basic tools, while hiring a plumber for cartridge replacement, valve seat repair, or more complex issues generally runs $100–$350 and may take 30 minutes to a few hours plus travel and diagnostic time.
| Option | Typical Cost |
|---|---|
| Washer replacement | $5–$15 |
| Cartridge DIY | $10–$40 |
| Professional service | $100–$350 |
| Valve seat repair | $150–$300 |
Estimated Time to Fix by Faucet Type
After outlining cost differences between DIY parts and professional service, the time and difficulty to stop a running tap will vary considerably by faucet type. Cartridge and ceramic disc mixers often take 15–45 minutes for DIY; ball and compression faucets can require 30–90 minutes. Complex widespread or corroded valves may need professional attention.
| Faucet Type | Typical Fix Time |
|---|---|
| Cartridge | 15–45 min |
| Ball | 30–60 min |
| Compression | 30–90 min |
| Ceramic disc | 15–45 min |
When Replacement Is More Cost-Effective Than Repair
Assess whether replacement is more cost-effective than repair by comparing the remaining lifespan, parts and labor costs, and the time and difficulty required for a reliable fix.
If repairs approach half the price of a new unit, require specialized tools or repeated visits, or the faucet shows corrosion or obsolete parts, replacement usually saves money and time while restoring long-term reliability.
Maintenance Schedule and Preventive Measures
A simple maintenance schedule helps prevent taps from running and extends fixture life.
It should include a regular inspection checklist for faucets and valves, routine cleaning to remove mineral buildup and treat corrosion, and seasonal plus long-term tasks such as winterizing and cartridge replacement.
Following these preventive measures reduces emergency repairs and preserves water efficiency.
Regular Inspection Checklist for Faucets and Valves
Regular inspections of faucets and valves should occur at consistent intervals to catch wear, leaks, and buildup before they cause continuous running or failure.
Inspect handles, spouts, and seals for looseness or drips. Check shutoff valves for smooth operation and no seepage. Verify water pressure and listen for unusual sounds.
- Tighten loose fittings
- Replace worn washers or O-rings
- Test shutoff function
How to Clean Mineral Buildup and Prevent Corrosion
Begin by scheduling routine descaling and corrosion inspections based on local water hardness and fixture age—typically every 3–6 months for hard-water areas and every 6–12 months for soft-water regions.
Use vinegar or commercial descalers for aerators and showerheads, replace sacrificial anodes where applicable, apply corrosion-resistant fittings, flush lines after treatment, and document dates to track effectiveness and anticipate component replacement.
Seasonal and Long-Term Maintenance Tips
When seasons change, homeowners should adjust maintenance routines to protect plumbing from temperature swings and cumulative wear.
Inspect pipes, valves, and exterior faucets each season; insulate vulnerable lines before winter; flush water heaters annually; replace worn washers and seals proactively; test pressure regulators and shutoff valves; schedule professional inspections every few years.
Consistent preventive care reduces leaks, corrosion, and unexpected failures.
Common Mistakes to Avoid When Fixing a Running Tap
When addressing a running tap, common errors can worsen the problem or cause new damage.
Over-tightening fittings, fitting the wrong replacement parts, overlooking deeper plumbing faults, and failing to shut off the water supply properly are frequent pitfalls.
A careful, methodical approach prevents these mistakes and reduces repair costs.
Over-Tightening Components and Causing Damage
Over-tightening fixtures or fasteners may seem like a quick fix for a dripping tap, but it often causes stripped threads, cracked seats, or warped seals that make leaks worse.
Excessive force can deform cartridges, damage valve bodies, and fracture ceramic components. Use appropriate torque, hand-tighten then snug with the correct tool, and stop when resistance increases to avoid creating more extensive, costly repairs.
Using Incorrect Replacement Parts
After correcting torque-related errors, attention must turn to parts selection: installing mismatched cartridges, seals, or washers is a common cause of persistent leaks and recurrent repairs.
Using incorrect or generic components can impair fit, sealing surfaces, and valve operation. Technicians should verify model numbers, dimensions, and material compatibility before replacement to guarantee reliable performance and avoid needless callbacks.
Ignoring Underlying Plumbing Problems
Many technicians overlook deeper issues—such as corroded supply lines, worn valve seats, hidden blockages, or systemic pressure fluctuations—focusing instead on the visible faucet components. This oversight can allow symptoms to return despite replacing cartridges or seals.
A thorough assessment should include inspection of supply lines, shutoff valves, pressure regulators, and potential mineral buildup. Addressing root causes prevents repeat leaks and costly callbacks.
Failing to Turn Off the Water Supply Properly
Failing to shut the water supply fully before attempting repairs can turn a simple faucet fix into a messy, potentially damaging task.
Homeowners who rely on partially closed valves risk sprays, contaminated work areas, and worsened leaks.
Always locate and close the correct shutoff (local or main), confirm zero flow by testing, and use appropriate tools to avoid accidental reopening during repairs.
When to Hire a Professional Plumber
If the tap issue shows signs of corrosion, persistent leaks, low water pressure, or water damage, a professional plumber should be contacted.
Homeowners should ask plumbers about licensing, warranty terms, estimated costs, and the expected scope of work before hiring.
The plumber’s estimate should specify parts, labor, timeline, and whether repair or full replacement is recommended.
Red Flags Indicating a Professional Is Needed
When should a homeowner stop troubleshooting and call a professional plumber? Persistent leaks, sudden pressure loss, or recurring drainage backups signal expertise is required; these issues risk damage and indicate underlying system faults.
Immediate professional assessment prevents escalation.
- Repeated fixes fail to stop the leak
- Water pressure drops dramatically or intermittently
- Sewage smells or frequent backups
Questions to Ask and Estimates to Request
Why ask specific questions before hiring a plumber? Homeowners should request licensing, insurance, and references, plus experience with faucet valves and relevant warranties.
Ask for a written estimate detailing labor, parts, permits, and timeline. Clarify payment terms, diagnostic fees, and contingency for hidden damage.
Compare at least two bids to guarantee fair pricing and scope before authorizing work.
What a Professional Repair or Replacement Should Include
A professional repair or replacement should include a clear scope of work, documented parts and labor, and verification of leak resolution by the plumber.
The estimate should list part brands, quantities, warranties, and labor rates.
Work must comply with local codes, include pressure testing, and offer a written warranty.
A final invoice and before/after photos complete professional accountability.
Quick Reference: Parts Names, Tools, and Where to Buy Them
Clear labeling of faucet components and corresponding tools streamlines diagnosing and repairing running taps.
A concise parts and tool list helps homeowners and pros source replacements quickly from hardware stores or online retailers. Identify cartridges, seats, O-rings, valve stems, adjustable wrenches, basin wrenches, and silicone grease before shopping to match sizes and finishes for reliable fixes.
- Cartridges, O-rings, seats — plumbing supply, big-box stores
- Wrenches, plumber’s grease — hardware stores, Amazon
- Specialty parts — manufacturer, local parts counter
Conclusion
When a tap keeps whispering at night, quiet attention can turn murmurs into silence. Gentle temporary measures soothe the symptom; careful diagnosis reveals the true nerve. Thoughtful repairs and thoughtful upgrades tuck away future complaints, and a small rhythm of maintenance keeps pipes content. Avoid brusque tinkering that aggravates the mood, and consult a seasoned hand when uncertainties persist. In time, a well-tended tap resumes the calm of domestic order.