How to Turn Off a Leaking Water Heater Fast: Step-by-Step Guide to Stop the Leak
To quickly stop a leaking water heater, first turn off the power by switching off the breaker or closing the gas valve. Next, close the cold-water supply valve at the tank. Attach a hose to the drain valve and open a hot faucet to relieve pressure, then drain the tank to a safe location. Use towels, buckets, or a wet/dry vacuum to contain any pooled water, and make sure to wear gloves and eye protection. Inspect the temperature and pressure (T&P) valve, fittings, and the tank base to identify the leak source. Follow the step-by-step temporary fixes and safety precautions outlined below.
What to Do Immediately When Your Water Heater Is Leaking
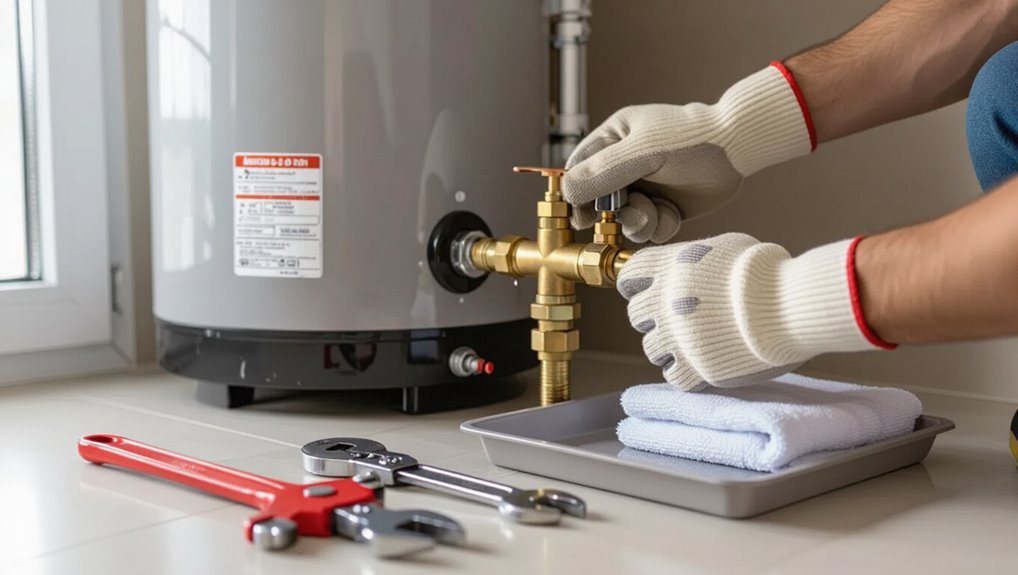
When a water heater begins to leak, the first priority is to cut power—switch off the breaker for electric units or turn the gas valve to “off”—and then shut the cold water supply to stop more water entering the tank.
Next, the tank should be drained as quickly as possible to reduce volume and the risk of rupture.
Finally, standing water must be contained and removed to protect the surrounding area and limit damage.
Turn off the power source (electric and gas) safely
Shut off the water heater’s power immediately to prevent electrical shock or gas hazards.
For an electric unit, switch off its circuit breaker at the main panel; label helps.
For a gas heater, turn the gas valve to OFF and extinguish nearby pilot flames if safe.
This guidance on how to turn off leaking water heater focuses solely on power isolation before further action.
Shut off the cold water supply to the heater
Locate and close the cold-water supply valve feeding the heater to stop incoming water and limit the leak. The valve is typically atop the tank or on its cold inlet pipe; turn it clockwise until fully closed.
Verify flow has stopped by opening a nearby hot faucet briefly.
If the valve is seized or damaged, shut the home’s main water supply and call a plumber immediately.
Drain the tank quickly to minimize water damage
Start draining the tank immediately to reduce flooding and limit structural damage.
A hose should be attached to the drain valve and routed to a safe drain or outside.
Open a hot water faucet in the house to allow air in, then open the tank drain valve slowly.
Monitor flow and close the valve once empty or when professional help arrives.
Contain and clear standing water to protect the area
Contain standing water immediately to prevent further damage and hazards.
The person places towels, rags, or absorbent pads to block spread and soaks up pools with a wet/dry vacuum or mop.
Electronics and valuables are moved to dry ground.
Use buckets and a pump for large volumes, then dry the floor and ventilate the area to discourage mold and structural harm.
Quick Checklist: Tools and Supplies to Stop a Leak Fast
A concise kit of tools and materials can stop a leaking water heater long enough for a proper repair or service call.
This checklist covers emergency shutoff tools, temporary sealing options, and basic safety and damage-prevention items. Having these on hand reduces response time and limits water damage.
- Adjustable wrench and pipe wrench for valves and fittings
- Waterproof tape, epoxy putty, and a pipe clamp for temporary seals
- Gloves, eye protection, and a flashlight for safe handling and inspection
- Buckets, towels, and a wet/dry vacuum to control and remove spilled water
Essential tools for emergency shutoff and temporary fixes
Gathering a compact set of tools and supplies can make the difference between a quick temporary fix and a worsening flood when a water heater leaks.
Essential items include an adjustable wrench and pliers for shutoff valves, screwdrivers for access panels, a flashlight, sturdy gloves, a bucket and rags to collect water, a utility knife, and a portable water pump or wet/dry vacuum for rapid removal.
Materials for temporary sealing (tape, epoxy putty, pipe clamps)
Keep a small kit of proven temporary sealing materials—self-fusing silicone tape, waterproof repair tape, epoxy putty, and adjustable pipe clamps—to slow or stop leaks until permanent repairs are made.
Self-fusing tape molds to contours; waterproof tape adheres to wet surfaces.
Epoxy putty fills pinholes and bonds to metal.
Adjustable pipe clamps compress saddles or patched areas for immediate pressure control pending professional repair.
Safety gear and items to prevent property damage
Essential protective gear and targeted items can limit injury and water damage while addressing a leaking water heater: waterproof gloves and eye protection, durable knee pads for working near puddles, absorbent pads or towels to contain runoff, a wet/dry shop vacuum for quick removal, a thermometer or IR gun to verify scald risk, bucket(s) and large plastic sheeting to divert flow, plus a flashlight or headlamp for visibility in dim utility spaces.
Protective footwear, GFCI extension cords, moisture meter, quick‑use pipe blankets, and clear access to shutoff valves help prevent further damage and guarantee safer, faster response.
Step-by-Step Emergency Procedures to Stop a Leaking Water Heater
The following emergency procedures outline clear, sequential actions to halt a leaking water heater and reduce damage.
First, cut power—turn off the circuit breaker for electric units or shut the gas supply and pilot for gas models—then close the cold water inlet valve to stop inflow.
Next, open a hot faucet to relieve pressure, drain the tank via a hose to a safe location, and apply temporary patches to common leak points as needed.
Step 1 Cut power: Electric and gas shutoff steps
Shut off the water heater’s power immediately to eliminate electrical shock risk and prevent gas-related hazards.
For electric units, switch off the dedicated breaker at the main panel.
For gas units, turn the gas control knob to “OFF” and close the appliance shutoff valve if present.
If smell of gas is detected, evacuate and contact the gas company before re-entering.
Step 2 Close the cold water inlet valve correctly
Locate and close the cold water inlet valve immediately to stop the flow into the tank and limit further leaking.
The person identifies the valve—typically a lever or wheel on the pipe entering the top—and turns it clockwise or aligns the lever perpendicular to the pipe until fully shut.
Confirm no water flows into the heater and secure the area for next steps.
Step 3 Open a hot water faucet to relieve pressure
After closing the cold water inlet, one of the hot faucets in the house should be opened to relieve pressure in the tank and stop further leaking.
A bathroom or kitchen sink faucet is ideal; open it fully on the hot side.
This reduces internal pressure, slows or halts the leak, and prevents water hammer while preparing for drainage or repairs.
Step 4 Drain the tank: how to attach a hose and where to drain
Begin draining the tank by attaching a garden hose to the water heater’s drain valve and directing the other end to a safe discharge location (floor drain, utility sink, outdoor area sloped away from the foundation, or a bucket for small amounts).
Open the drain valve slowly, monitor flow, and keep the faucet open to prevent vacuum.
Watch for hot water, sediment, and hose kinks; stop if leaks worsen.
Step 5 Apply temporary patching methods for common leak locations
With the tank drained or water flow reduced, attention turns to temporary patching methods for the most common leak points—valves, fittings, the drain valve, and small tank weeps.
Tighten loose fittings with an adjustable wrench, apply plumber’s tape to threaded joints, use a rubber patch and hose clamp for drain valve drips, and wrap epoxy putty or self-fusing silicone tape over small tank weeps as a temporary fix.
Identifying the Source of the Leak
Next, attention turns to locating where the water is escaping. Common sources include the top connections (cold/hot inlet or outlet and the T&P valve), the bottom components (drain valve, tank seams or corrosion), and external fittings such as pipes or appliance connections.
Identifying the exact source guides whether a quick shutoff, a temporary repair, or full replacement is needed.
Leaking from the top connections: inlet/outlet or T&P valve
Several common leaks originate at the water heater’s top connections—specifically the cold-water inlet, hot-water outlet, and the temperature-and-pressure (T&P) valve—and identifying which fitting is at fault is the first diagnostic step.
Inspect for dripping, corrosion, loose compression nuts, or failing valve seals.
Tighten fittings gently, note incoming versus outgoing pipe wetness, and isolate the T&P valve as a separate source before shutting off supply.
Leaking from the bottom: drain valve, tank corrosion, or seams
If top connections are ruled out, attention should shift to the heater’s base where leaks commonly originate from the drain valve, rusted tank walls, or seam failures.
Inspect the drain valve for drips or loose fittings.
Check the tank exterior for rust, bulges, or wetness indicating internal corrosion.
Seams showing corrosion or weeping usually signal tank failure requiring replacement rather than repair.
Leaking from the pressure relief (T&P) valve
A small but steady stream from the temperature-and-pressure (T&P) relief valve often indicates excess pressure or a faulty valve rather than a tank breach.
The valve vents when temperature or pressure exceeds safe limits; mineral buildup, a stuck mechanism, or thermal expansion can cause leakage.
Inspect for drips at the discharge pipe, check tank pressure, and replace the valve if it fails to seat or continues leaking.
Leaking from fittings, pipes, or appliance connections
Beyond issues with the T&P valve, many leaks originate at external connections where fittings, pipes, or attached appliances meet the heater.
Inspect hot and cold inlet/outlet joints, union fittings, and hose connections for drips, corrosion, or loose nuts.
Check nearby appliance hoses and drain lines.
Tighten fittings, replace worn seals, or shut off supply and call a plumber if leak persists.
Temporary Repair Methods by Leak Location
Temporary fixes vary with where the water is escaping and aim to stop or slow the leak until professional repair or replacement can occur. Common short-term measures address threaded fittings, valves, and small tank breaches using tools and sealants that can be applied quickly. Each location requires a specific approach to maximize safety and effectiveness until a permanent solution is arranged.
- Fix threaded fittings and pipe connections with pipe tape, joint compound, or tightened couplings.
- Seal a leaking drain valve or hose bib using replacement washers, packing nuts, or a temporary clamp.
- Patch small tank leaks with epoxy putty or a drain plug designed for emergency sealing.
- Manage T&P valve leaks by checking for debris, tightening connections, or installing a temporary cap while relieving pressure.
Fixing threaded fittings and pipe connections
Inspect the threaded fittings and pipe connections for visible corrosion, loose threads, or mineral buildup before attempting any repairs.
Tighten joints with an appropriate wrench, avoid overtightening, and replace damaged fittings.
Apply plumber’s tape or pipe dope to male threads when reassembling.
For minor pinhole leaks, use epoxy putty as a temporary patch.
Verify repairs by slowly restoring water and checking for drips.
Sealing a leaking drain valve or hose bib
After addressing threaded fittings and pipe connections, attention should turn to leaks at the drain valve or hose bib, which are common failure points on water heaters.
Temporarily stop flow by closing upstream supply and draining remaining pressure.
Tighten the valve packing nut, replace a worn hose washer, or wrap threads with plumber’s tape.
If leakage persists, cap the valve or install a shutoff clamp until permanent repair.
Patching small tank leaks with epoxy or drain plug
For small pinholes or hairline cracks in the outer tank, a quick stopgap is to apply epoxy or install a threaded drain plug designed for temporary sealing.
Confirm the area is dry, clean, and free of rust; mix and apply epoxy per manufacturer instructions or thread in a snug, gasketed plug.
Monitor frequently and arrange permanent repair or replacement promptly.
Dealing with leaks at the T&P valve
Address leaks at the temperature-and-pressure (T&P) relief valve promptly, since a malfunctioning valve can discharge water continuously or fail to relieve excessive pressure.
Isolate the heater, drain enough water to drop tank pressure, then inspect the valve and discharge pipe for debris or corrosion.
Tightening the valve bonnet or replacing the valve temporarily stops leaks; permanent replacement by a qualified person is recommended.
When a Temporary Fix Is Not Enough: Signs You Need Professional Repair or Replacement
Visible tank corrosion, large or worsening leaks, or repeated failures after repairs indicate a temporary patch is insufficient.
A gas odor, electrical faults, or any condition that feels unsafe requires immediate professional assessment.
In those cases, a qualified technician should evaluate whether repair or full replacement is necessary.
Extensive rust or corrosion on the tank
Extensive rust or corrosion on a water heater tank signals structural failure rather than a minor leak, and it typically cannot be resolved with patching or sealants.
Visible flaking, deep pits, or bulging indicate the tank’s metal integrity is compromised.
Professional assessment is required to determine if repair is feasible; often, replacement is the safest, long-term solution to prevent sudden rupture and water damage.
Large or worsening leaks despite emergency steps
When rust or corrosion has compromised a tank, replacement is often the only safe option; however, even relatively intact heaters can develop leaks that worsen despite immediate measures.
Rapidly increasing flow, pooling under the unit, or leaks from seams and fittings after shutoff indicate structural failure. In such cases, professional assessment and likely replacement prevent flooding, safety hazards, and secondary water damage.
Repeated leaks after repairs or age-related failure
Repeated or recurring leaks after attempted repairs often signal that temporary fixes have run their course and deeper issues—such as degraded tank metal, failing internal components, or compromised seals—are at play.
Persistent leakage, increasing frequency, or leaks at different points indicate systemic failure.
Professional assessment can determine whether targeted repair, warranty-covered service, or full replacement is the safer, more cost-effective long-term solution.
Gas smell, electrical issues, or unsafe conditions
If a faint or strong gas odor is present, or if electrical components spark, trip breakers, or emit burning smells, these are immediate hazards that go beyond routine maintenance and demand professional intervention.
Evacuate the area, shut off the gas at the meter and power at the breaker if safe, and call emergency services or a licensed plumber/electrician.
Do not attempt repairs.
How Professionals Diagnose and Repair Water Heater Leaks
Professionals use targeted tests to identify leak sources, assess component condition, and determine whether repair or replacement is most cost‑effective. Typical repairs — such as replacing valves, sacrificial anodes, or heating elements — have varied lifespans, while tank corrosion often prompts replacement. The decision to repair or replace hinges on test results, repair cost versus remaining service life, and overall safety.
| Diagnostic Tests | What They Reveal |
|---|---|
| Pressure and temperature checks | Valve or T&P issues, overheating |
| Visual inspection and dye test | Source of external leaks, tank cracks |
Common diagnostic tests and what they reveal
Several targeted diagnostic tests quickly narrow the cause of a water heater leak, each revealing distinct failure modes that guide repair decisions.
Visual inspection locates corrosion or loose fittings.
Pressure testing exposes valve or system overpressure issues.
Dip tests and moisture sensors detect hidden tank breaches.
Thermostat and heating-element checks identify internal component failures.
Anode rod assessment shows advanced corrosion risk.
Typical repair options and expected lifespans
After narrowing the leak to a specific cause using the diagnostic tests described above, technicians choose from a set of standard repairs with predictable service lives.
Common fixes include tightening or replacing fittings (5–10 years), replacing sacrificial anode rods (2–5 years), repairing or replacing drain valves (5–15 years), and patching or replacing heating elements and pressure relief valves (5–10 years), each depending on water quality and installation.
When replacement is recommended vs. repair
When should a leaking water heater be repaired rather than replaced?
Professionals recommend repair for localized issues: faulty valves, loose fittings, sacrificial anode depletion, or replaceable heating elements.
Replacement is advised for widespread tank corrosion, repeated failures, age over 10–15 years, or when repair costs approach replacement value.
Safety, efficiency loss, and future reliability guide the decision.
Preventing Future Leaks and Extending Water Heater Life
A regular maintenance routine can greatly reduce the risk of future leaks and prolong a water heater’s service life.
Recommended tasks include an annual flush of sediment, inspection and replacement of the anode rod as needed, and periodic checks of fittings, valves, and pressure; installing a pressure regulator can protect against high-pressure damage.
Upgrading corroded or outdated valves and connectors further minimizes leak risk and simplifies future repairs.
Recommended maintenance schedule and tasks
Establishing a regular maintenance schedule helps prevent leaks and extends a water heater’s service life by addressing wear before it becomes a failure.
Inspect valves, fittings, and connections every three months; check pressure relief valve operation and drain valve tightness biannually; verify thermostat and controls annually; monitor for corrosion or drips monthly; replace sacrificial anode and perform thorough service every 3–5 years.
How to flush the tank and check the anode rod
Although often overlooked, flushing the tank and inspecting the anode rod are two of the most effective ways to reduce sediment buildup and corrosion that lead to leaks.
Performing these tasks at recommended intervals helps maintain efficiency and prolong the heater’s service life.
Drain several gallons to clear sediment, remove and assess the anode for heavy pitting or depletion, and replace it if markedly corroded.
Monitoring water pressure and installing pressure regulators
Monitor incoming water pressure regularly, since excessive or fluctuating pressure stresses tank seams, valves, and fittings and accelerates leaks.
Install a pressure gauge at the main supply and observe readings during peak use; ideal residential pressure is 40–60 psi.
If pressure spikes or exceeds limits, install a pressure-reducing regulator and consider a thermal expansion tank to stabilize system pressure and protect the heater.
Upgrading fittings and valves to prevent leaks
Upgrade threaded connections, replace aged valves, and fit corrosion-resistant components to reduce leak risks and extend a water heater’s service life.
Use compression or sweat fittings where appropriate, install a reliable shutoff valve, and consider dielectric unions to prevent galvanic corrosion.
Regularly inspect solder joints, replace rubber gaskets, and choose brass or stainless fittings to minimize deterioration and future maintenance.
Cost and Time Estimates for Emergency Response, Repairs, and Replacement
Emergency calls for a leaking water heater typically incur a fast-response fee and one to two hours of labor for a temporary shutoff or valve replacement. Repair estimates commonly range from modest parts-and-labor costs to several hundred dollars, while full replacement often totals $800–$2,500 and restores another 8–15 years of service. The table below illustrates typical emergency, repair, and replacement time and cost relationships.
| Service type | Typical cost range | Typical time/lifespan impact |
|---|---|---|
| Emergency shutoff/patch | $75–$200 | 1–2 hours; short-term fix |
| Minor repair (valve/element) | $150–$500 | 1–3 hours; extends life 1–5 years |
| Major repair (tank/controls) | $400–$800 | Several hours; varies |
| Full replacement | $800–$2,500+ | 4–8 hours; adds 8–15 years |
Typical emergency fix costs and timeframes
Many homeowners can expect a rapid-response callout for a leaking water heater to cost between $100 and $300 for a service visit, with emergency dispatch or after-hours fees pushing that total to $200–$600.
Simple repairs like tightening fittings or replacing a valve typically take 30–90 minutes, while more involved fixes such as replacing a pressure relief valve or patching a small tank leak may require 1–3 hours.
Typical parts run $10–$150; hourly labor often ranges $75–$150, influencing total emergency expense and duration.
Average repair vs. replacement pricing and lifespan trade-offs
A typical decision between repairing and replacing a leaking water heater hinges on age, extent of damage, and cost: repairs often range from $100–$800 for parts and labor, while full replacements commonly fall between $800–$3,500 depending on tank vs. tankless units and installation complexity.
Generally, repairs suit units under ten years with localized faults; replacements favor older, heavily corroded, or inefficient systems for longer lifespan and warranty.
Safety Precautions and When to Evacuate
The section outlines clear signs of electrical or gas hazards—such as sparking, burning smells, hissing gas, or tripped breakers—that warrant immediate caution.
It also covers safe handling to avoid scalds from hot water and guidance on isolating valves and power sources.
Finally, it specifies when to contact the gas company or emergency services and when occupants should evacuate for safety.
Electrical and gas hazard signs to watch for
When should occupants treat a leaking water heater as an immediate evacuation risk?
Visible sparking, burning smell, smoke, hissing gas, rotten-egg odor, or a pilot light that won’t stay lit indicate electrical or gas danger.
If any of these signs appear, leave immediately, avoid using electrical switches, extinguish open flames only if safe from a distance, and call emergency services from outdoors.
Safe handling of hot water and scald risks
Handle hot water cautiously: escaping water from a leaking heater can reach temperatures that cause severe burns within seconds.
Individuals should avoid contact, keep children and pets away, and use barriers to redirect flow if safe.
Wear protective gloves and sturdy shoes if necessary.
If scalding occurs, cool the area with running water for at least 10 minutes and seek medical attention for severe burns.
When to call gas company or emergency services
After addressing immediate scald risks and securing people away from escaping hot water, attention must turn to hazards that require outside intervention, such as gas leaks, electrical sparking, or uncontrolled flooding.
If a rotten-egg odor, hissing, visible flame, exposed live wiring, persistent water inundation, or inability to isolate utilities occurs, evacuate immediately and call the gas company and emergency services.
Remain upwind and keep others clear.
Checklist to Follow After the Leak Is Stopped
Once the leak is contained, the homeowner should document all visible damage with photos and notes to support insurance and warranty claims.
Next, confirm that repairs are complete and perform system checks—including pressure, temperature, and a brief hot-water run—before resuming normal use.
Finally, arrange a professional inspection and set a schedule for ongoing maintenance to prevent recurrence.
Document damage for insurance and warranty claims
Several clear steps help guarantee thorough documentation for insurance and warranty claims after a water heater leak has been stopped.
Photograph damaged areas, appliances, flooring, and the water heater from multiple angles with timestamps.
Record serial numbers, model, purchase receipts, and repair estimates.
Keep written notes of discovery time, actions taken, and contractor contact information.
Preserve damaged items when possible for inspection.
Verify repairs and run system checks before restoring normal use
With documentation completed, attention shifts to confirming that repairs were performed correctly and the water heater system functions safely before returning it to normal service.
Inspect repair sites for leaks, test pressure relief valve and thermostat operation, restore power or gas briefly to verify heating, and check for unusual noises or odors.
Record test results and retain photos for reference.
Schedule professional inspection and ongoing maintenance
Schedule a qualified technician to perform a thorough post-repair inspection and establish a routine maintenance plan to prevent future leaks and preserve system efficiency.
The technician documents repairs, checks pressure relief valve, tank integrity, fittings and anode condition, and recommends replacement if needed.
Arrange regular inspections, sediment flushing, and component servicing.
Keep records and follow scheduled maintenance to extend lifespan and reduce emergency risks.
Conclusion
Like a watchful gardener rescuing a drenched sapling, the homeowner acts with steady hands: valves closed, power cut, and pooled water swept away. Quick diagnosis and temporary fixes buy time while plans for repair or replacement unfold. Learning from the spill, maintenance routines become seasons of care, preventing future flooding. In this calm aftermath, measured steps restore order and preserve the home’s quiet growth, warding off silent, slow ruin.