How to Measure for a New Kitchen Faucet: Step-by-Step Guide for a Perfect Fit
To ensure a perfect fit for your new kitchen faucet, follow these essential measuring steps:
- Count the Holes: Determine how many holes your sink has for the faucet installation.
- Measure Spacing: Check the center-to-center distance between the holes.
- Determine Hole Size: Measure the diameter of the faucet holes.
- Assess Deck Thickness: Note the thickness of your sink or countertop.
- Spout Height and Reach: Measure the height and reach of the spout, considering any backsplashes or window sills.
- Handle Swing Clearance: Ensure there’s enough space for handle movement without obstruction.
- Under-Sink Clearance: Check the area beneath the sink for sufficient space for installation.
- Supply Line Sizes: Measure the size of your supply lines and note the locations of shutoff valves.
- Spray Hose Length: Measure the length of the spray hose if applicable.
- Thread Types: Identify the types of threads on the valve connections.
Document all measurements and take photographs of your setup for reference. By following this checklist, you can avoid common pitfalls and ensure compatibility with your new faucet model.
How to Measure for a New Kitchen Faucet: Quick Overview
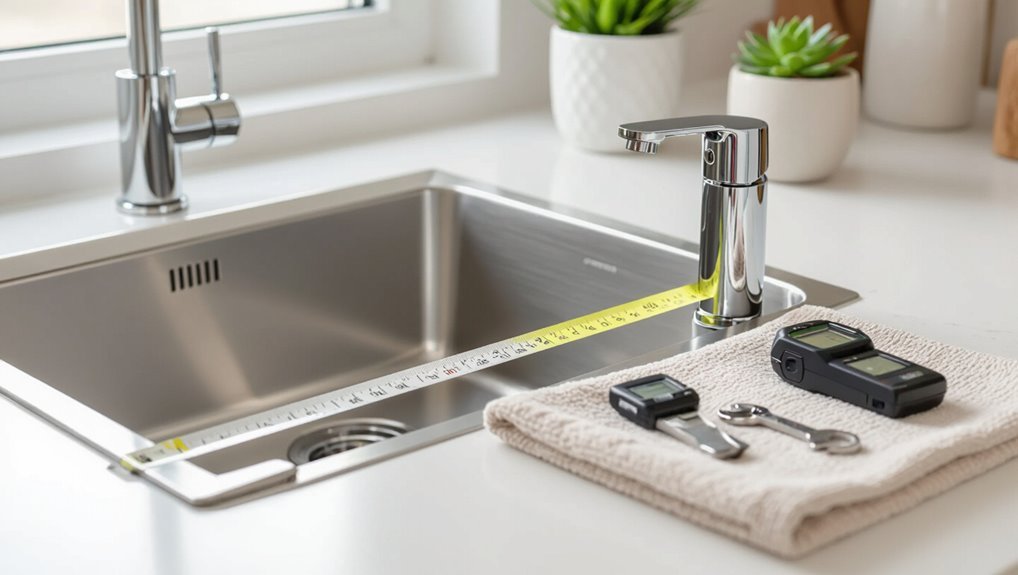
Measuring a kitchen faucet guarantees compatibility with sink holes, countertop clearance, and supply line connections before purchase.
Key measurements typically include the number and spacing of mounting holes, overall spout height and reach, and the distance to backsplash or window sills.
Recording these at the start prevents fit issues and reduces return or modification needs.
What measuring your faucet accomplishes
Determining the exact dimensions and configuration of an existing kitchen faucet confirms compatibility with replacement models, prevents installation issues, and identifies necessary parts like escutcheons or deck plates.
Measuring clarifies hole count, spout reach, and mounting type, informing purchase decisions and avoiding returns. Clear measurements speed installation, reveal adapter or extension needs, and guarantee proper water line connections when learning how to measure for new kitchen faucet.
Typical measurements you’ll need at a glance
A few key dimensions provide everything needed to choose a compatible replacement: hole count and spacing, deck-to-spout height, spout reach, and the diameter of each mounting hole.
Also note sink thickness for mounting hardware, clearance to backsplash or windowsill, and supply line connection size.
Record measurements in inches, photographing existing installation for reference during selection and installation.
Tools and materials needed before you start
Before measuring, the necessary tools and materials should be gathered: a tape measure, ruler, and calipers for accurate dimensions.
A notebook, camera, and flashlight help record and clarify existing conditions.
If measurements are complex or plumbing obstacles appear, a professional should be consulted.
Measuring tools (tape measure, ruler, calipers)
Several essential measuring tools confirm faucet fit and function: a tape measure for overall distances, a rigid ruler for straight-edge checks, and calipers for precise hole and shank diameters.
The tape measures sink width, countertop depth, and spout reach. The ruler verifies alignment and deck clearances.
Calipers confirm hole diameters, shank thickness, and thread sizes to ascertain compatible mounting and fittings.
Additional supplies (notebook, camera, flashlight)
After confirming measurements with tape, ruler, and calipers, the installer should gather a few simple supplies to document and illuminate the work.
A small notebook captures dimensions and notes; a camera (or smartphone) records mounting holes, supply lines, and clearance from multiple angles; a compact flashlight or headlamp reveals underside cabinet details.
These items prevent measurement errors and simplify installation verification.
When to call a professional
A homeowner should call a professional when the job requires tools, skills, or access beyond routine DIY—such as soldering, handling pressurized plumbing, electrical work for touchless faucets, or working in cramped or damaged cabinets where cutting or structural repair may be needed.
A technician is also advised for persistent leaks, corroded supply lines, inaccessible shutoffs, code compliance questions, or when confident measurements and secure connections are critical.
Identify your current sink and faucet configuration
First, determine whether the sink has a single hole or multiple holes to match the faucet base.
Next, note if the faucet mounts to the deck or the wall, since supply connections and clearances differ.
Finally, identify the faucet style—centerset, widespread, or mini—to guarantee the replacement will fit the hole spacing and aesthetic.
Single-hole vs. multiple-hole sinks
When measuring for a kitchen faucet, determine whether the sink and existing faucet use a single hole or multiple holes, since this affects mounting style, deck plates, and accessory compatibility.
Single-hole sinks accept combined faucet units; multiple-hole sinks may require a spout, separate handles, or a deck plate to cover unused openings.
Count holes, measure spacing, and note hole diameters for proper replacement.
Deck-mount vs. wall-mount faucets
Having noted whether a sink uses single or multiple holes, the next step is to identify whether the faucet mounts to the sink or the wall.
Deck-mount faucets attach to the sink or countertop surface; measurements focus on hole spacing and deck thickness.
Wall-mount faucets require plumbing placement above the sink and measurement from wall studs, rough-in height, and spout reach for proper alignment and clearance.
Centerset, widespread, and mini-styles explained
Sink configurations fall into three common styles—centerset, widespread, and mini—each defined by the spacing and arrangement of the faucet components.
Centerset combines spout and handles on a single base, typically fitting three-hole sinks with 4-inch spacing.
Widespread separates spout and handles, usually 8–16 inches apart.
Mini faucets are compact, suited for small sinks or prep areas with limited deck space.
Step 1 Measure faucet mounting holes
The first step is to count the faucet mounting holes and note their arrangement.
For sinks with two or three holes, measure the center-to-center distance between holes to determine compatibility with replacement faucets.
Also record each hole’s diameter and whether it is round, oval, or irregular to guarantee a proper fit and escutcheon coverage.
How to measure number and spacing of holes
Before measuring, identify how many faucet holes are present in the countertop or sink and whether any are occupied by accessories like a sprayer or soap dispenser.
Next, count total holes and note configuration (single, centerset, widespread). Measure edge-to-edge spacing only if replacing with a different hole-count faucet.
Record hole diameters to guarantee new faucet and escutcheon fit without enlarging or filling extra openings.
Measuring center-to-center distance for 2- and 3-hole sinks
If the layout includes two or three mounting holes, measure the center-to-center distances to determine compatibility with replacement faucets.
Using a rigid ruler or tape, record distance between hole centers horizontally; for three-hole setups measure outer-to-outer and center-to-center pairs.
Note whether measurements are standard (4″, 8″) or custom.
Take photos and double-check to avoid ordering incompatible faucets.
Recording hole diameter and shape
When measuring faucet mounting holes, document both diameter and shape precisely, since these determine whether a new faucet will sit flush or require adapters.
Use calipers or a ruler to record inner diameter to the nearest millimeter or 1/16 inch. Note whether holes are perfectly round, oval, countersunk, or irregular.
Photograph each hole and label its position for installer reference.
Step 2 Measure countertop or sink thickness
At the mounting point, the thickness of the countertop or sink must be measured directly where the faucet will sit.
The measurement determines whether the chosen faucet can be secured properly, since many models specify minimum and maximum deck or sink thicknesses.
Verify the faucet’s installation range against the measured thickness before purchase.
Measuring thickness at mounting point
Begin by placing a straightedge across the mounting hole and using a caliper or ruler to measure the distance from the underside of the straightedge to the countertop or sink surface at the hole’s center.
Record that thickness.
Repeat at opposite sides of the hole to check for taper or unevenness.
Note material layers (laminate, adhesive, deck plate) that add to total thickness for installation considerations.
Minimum and maximum thickness limits for faucets
Many faucets specify a minimum and maximum deck thickness that must be met for secure mounting and proper operation.
The manufacturer’s specifications list acceptable ranges—commonly 0.75″ maximum for thin sinks up to 1.5″ or more for thick countertops.
Measure with calipers or a ruler. If outside range, use extension kits, spacer plates, or choose a model designed for thicker or thinner decks to guarantee stability.
Step 3 Check under-sink clearance and supply line access
The installer should measure cabinet height and the clear space beneath the sink to guarantee the chosen faucet and any faucet-mounted accessories will fit.
They should locate the hot and cold supply lines and shutoff valves to confirm accessibility and condition.
Finally, measure the distance from the mounting hole to the supply connections to verify the reach of the supply hoses or extensions.
Measuring cabinet height and space below sink
Before selecting a faucet, inspect the cabinet interior and measure the vertical clearance from the sink basin or countertop underside to the cabinet floor, noting any obstructions such as garbage disposals, P-traps, or shelf brackets that reduce usable space.
Record width and depth around the plumbing to guarantee the new faucet’s body and any pull-down spray can retract and clear interior fittings without interference.
Locating water supply lines and shutoff valves
With cabinet obstacles and clearance confirmed, attention shifts to locating the water supply lines and shutoff valves beneath the sink.
The inspector notes valve type, position, and accessibility, confirming isolation for each hot and cold feed.
Flexible supply hoses, rigid piping, and any adapters are identified.
Obstructions, corrosion, or nonfunctional shutoffs are recorded for repair before faucet selection and installation.
Measuring reach to supply connections
Several measurements confirm the new faucet will comfortably reach the existing supply connections beneath the sink.
Measure vertical distance from mounting hole to shutoff valves, horizontal offset to supply lines, and available hose length from underside of deck to connection points.
Note any obstructions—garbage disposals, brackets, or storage—to guarantee flexible supply hoses or extensions fit without strain or sharp bends.
Step 4 Measure faucet height and spout reach for functionality
The writer measures overall faucet height from the countertop to the highest point to guarantee it clears overhead cabinets and fits beneath vents.
They then measure spout reach and spout height from the sink rim to verify water lands inside the basin and clears large pots or an adjacent dishwasher.
These dimensions are compared to sink depth, pot sizes, and dishwasher placement to select a faucet with appropriate height and reach.
How to measure overall faucet height
Overall faucet height determines how comfortably large pots and tall pitchers fit beneath the spout, so measuring it early prevents clearance issues.
Measure from the countertop or sink rim up to the highest point of the faucet body or handle when closed. Record that vertical dimension and compare to cabinet undersides, shelving, and any overhead fixtures to guarantee unobstructed operation.
Measuring spout reach and spout height from sink rim
One essential measurement is the spout reach—the horizontal distance from the faucet’s centerline at the base to the point where water exits—which determines how well the stream lands in the sink basin.
Measure from the base center to the nozzle tip.
Then measure spout height from the sink rim to the lowest point of the spout outlet.
Record both to guarantee clearance and practical coverage.
Choosing height and reach for pots, sinks, and dishwashers
While selecting faucet height and spout reach, consider how pots, sink depth, and nearby appliances will affect everyday use.
Measure tallest pots and guarantee clearance for filling and maneuvering.
Verify spout reaches center of primary basin without splashing.
Check dishwasher lid and cabinet clearances to avoid interference.
Confirm spray hose length for loading large items and comfortable rinsing.
Step 5 Determine handle swing and clearance
Next, assess the handle swing and required clearance so the faucet operates without obstruction.
Measure side and rear distances to guarantee the handle can rotate fully without hitting surrounding counters or fixtures.
Also verify that the faucet’s handle movement clears any backsplash, window sill, or shelving behind the sink.
Measuring side and rear clearance for handle movement
Handle swing and clearance determine whether a faucet’s lever or knob can move freely without striking walls, backsplashes, or adjacent fixtures.
Measure from the center of the faucet base to nearest side obstruction and to the rear wall. Record maximum handle travel radius and compare to manufacturer dimensions.
Include allowance for future countertop accessories and rotation needed for cleaning or pot filling.
Verifying faucet fits with backsplash, windows, or shelves
Several inches of clearance behind and above a faucet are often required to guarantee full handle travel without interference from backsplashes, windowsills, or wall-mounted shelves.
Measure handle rotation arc and mark required clearance on counter and wall.
Account for window trim, ledges, tile lips, and shallow shelves.
If clearance is insufficient, choose a lower-profile handle, extend spacing, or select a faucet with limited-swing controls.
Step 6 Verify spray hose and accessory requirements
The installer should confirm the required length and reach of any pull-down or pull-out spray hose to guarantee it operates freely without catching under the sink.
They must also account for additional holes or deck space needed for soap dispensers, side sprayers, or filtered water taps.
Measuring these hose lengths and accessory locations before purchase prevents clearance issues and extra drilling later.
Measuring pull-down/pull-out hose length needs
When measuring pull-down or pull-out spray hose length, account for the distance from the faucet base to the farthest point the spray head must reach, plus slack for smooth retraction and any under-sink routing around obstacles.
Measure vertical drop to sink bottom and horizontal reach across the basin.
Include extra length for swivel connections and to avoid tension from sprayer use.
Space and hole needs for soap dispensers, side sprayers, filtered water taps
Because countertop accessories require dedicated clearance and mounting, homeowners should verify available deck space and hole configurations for soap dispensers, side sprayers, and filtered-water taps before finalizing faucet choices.
Measure hole diameters, spacing, and distance from the sink edge.
Confirm underside clearance for mounting hardware and tanks.
Account for hoses, valves, and access for installation or future maintenance to guarantee compatibility.
Compatibility checklist before purchasing
Before purchasing, the homeowner should verify that the faucet’s mounting type matches the number and spacing of the sink holes.
They should also confirm valve and supply line compatibility, including thread sizes and connection types.
Finally, check whether a deck plate is required or optional for proper fit and appearance.
Matching mounting type to sink holes
A quick check of the sink’s hole pattern and deck configuration prevents costly returns and installation headaches.
Determine count, spacing, and hole diameter: single-hole, 2-hole with escutcheon, 3-hole centerset, or widespread.
Verify deck thickness and whether a deck plate or adapter is needed.
Confirm whether faucet mounting hardware and gasket types align with the sink’s material and hole finishing.
Confirming valve and supply line compatibility (thread sizes)
With the sink’s hole pattern and deck configuration confirmed, attention shifts to the fittings beneath the countertop: valve inlets and supply lines.
Measure existing shutoff valve outlet thread (commonly 1/2″ or 3/8″ NPT/OD) and supply hose connectors.
Verify faucet tailpiece thread and included adapters.
Confirm tubing length and diameter to reach valves without stress.
Note compression versus flare fittings.
Deck plate requirements and options
Although often overlooked, the deck plate (escutcheon) must match the sink’s hole configuration, countertop thickness, and faucet mounting footprint to guarantee a proper seal and clean appearance.
Buyers should verify hole count (single, three, or universal), plate dimensions, and gasket or mounting hardware inclusion.
Consider material finish, removable versus fixed plates, and compatibility with undermount or top-mount sinks before purchase.
Common measurement mistakes and how to avoid them
Common measurement errors can lead to a faucet that doesn’t fit or operates poorly.
Frequent pitfalls include misreading center-to-center spacing, overlooking under-sink obstructions, and failing to allow sufficient handle clearance.
Addressing these issues early prevents costly returns and tricky rework.
Misreading center-to-center spacing
How far apart are the faucet handles actually measured?
The writer explains center-to-center spacing as the distance between the exact centers of adjacent holes, not edge-to-edge. Misreading occurs when using overall hardware width or estimating visually.
To avoid errors, measure with a ruler across hole centers, double-check against faucet specs, and record millimeters and inches for accurate replacement compatibility.
Ignoring under-sink obstructions
One critical but often overlooked step is checking for under-sink obstructions that can prevent a chosen faucet from fitting or being installed properly.
Inspect supply lines, shutoff valves, mounting hardware, and garbage disposal placement. Measure vertical and lateral clearance and note tight access spaces.
Document obstacles and verify compatible faucet shank length, hose routing, and required tools to avoid surprises during installation.
Not accounting for handle clearance
After checking under-sink obstructions, attention must turn to handle clearance, a frequent source of installation headaches.
Measure distance from backsplash or wall to full handle rotation, including spray wand swing where applicable.
Verify faucet base position allows unobstructed movement and consider raised handles for deep sinks.
Account for cabinetry, soap dispensers and window sills to prevent restricted operation or damage over time.
Comparison: Measurement requirements for popular faucet styles
A quick comparison clarifies how measurement priorities shift between faucet styles and mounting types. For example, single-handle pull-downs demand clearance above the sink and hose reach, while two-handle widespreads require precise hole spacing; wall-mounts focus on wall-to-sink distance versus deck-mounts that center on hole layout. The following simple table highlights the emotional weight of choosing the right measurements.
| Style/Type | Measurement Focus |
|---|---|
| Single-handle pull-down | Clearance, reach, spout height |
| Two-handle widespread | Hole spacing, deck width |
| Wall-mount vs deck-mount | Wall setback vs hole alignment |
Single-handle pull-down vs. two-handle widespread
Many homeowners choosing between a single-handle pull-down and a two-handle widespread faucet should focus first on hole count and deck space:
Single-handle models need one to two holes and less clearance for the spout and spray head.
Two-handle widespread faucets require three holes spaced typically 8–16 inches and more deck area for separate handles.
Measure hole spacing and reach to guarantee proper fit and function.
Wall-mount vs. deck-mount measurement differences
Beyond hole count and deck clearance considerations for single- versus two-handle faucets, wall-mount and deck-mount styles require fundamentally different measurement approaches.
Wall-mount measurement focuses on distance from sink rim to supply outlets, mounting plate spacing, and wall thickness.
Deck-mount measurement prioritizes hole locations, deck thickness, clearance behind the faucet, and spout reach to guarantee proper sink coverage and ergonomics.
Step-by-step checklist to bring to the store or installer
A concise checklist helps guarantee the faucet fits and functions as designed when consulting a retailer or installer.
Essential items to bring include exact measurements, clear photos, and a list of questions for the professional.
The following quick list summarizes what to prepare:
- Hole count and spacing, countertop thickness, and supply line dimensions
- Photos of the sink, underside plumbing, and mounting area
- Notes on any obstructions or special mounting hardware needed
- Questions about warranty, installation cost, and compatibility with existing valves
Exact measurements to record
Checklist-focused measurements guarantee installers and store specialists have the exact data needed to match a kitchen faucet to the sink and plumbing.
Record sink hole count and spacing (center-to-center), deck thickness, distance from holes to backsplash, spout reach and height required, supply line thread size and hose length, clearance under sink for valve bodies, and distance to water shutoffs.
Photos and notes to capture
With measurements documented, the next step is to compile clear photos and succinct notes that show exactly how the sink and plumbing are configured.
Photograph sink from above and below, capture mounting holes, faucet deck, and clearance to backsplash.
Note water line positions, shut-off valve locations, hose lengths, and any obstructions.
Include material type and finish for accurate replacement matching.
Questions to ask the retailer or plumber
Which questions should be raised at the store or on-site to guarantee a proper fit and installation?
The shopper asks about hole count, spout reach, deck thickness, and clearance for soap dispensers.
They confirm supply line sizes, connector types, and need for adapters.
Warranty, installation time, required tools, and compatibility with garbage disposals and water filtration are verified before purchase or scheduling.
Final tips for a perfect fit and installation readiness
The final checklist notes when an adjustable escutcheon or deck plate is appropriate to cover extra holes and guarantee a clean fit.
It advises clearing and drying the sink area, checking mounting surfaces, and confirming supply line access before the installer arrives.
It also recommends identifying required replacement parts or thread adapters in advance to avoid installation delays.
When to choose adjustable escutcheons or deck plates
Although many sinks appear ready for a straightforward faucet swap, choosing an adjustable escutcheon or deck plate is essential when hole alignment, size, or finish discrepancies could affect fit and function.
Select adjustable plates to cover multiple or oversized holes, mask minor misalignments, and match finishes.
Confirm plate thickness and mounting compatibility with the new faucet to guarantee a watertight, stable installation.
Preparing the sink area before installation
Several quick checks verify the sink area is ready for faucet installation: surfaces must be clean and dry, mounting holes free of old putty or debris, and surrounding cabinetry accessible for wrenching and hose routing.
Measure clearance beneath the sink for supply lines and tools, confirm shutoff valves operate, protect countertops with tape, and stage necessary tools to streamline installation and prevent damage.
When replacement parts or adapters are needed
With the sink prepped and tools staged, attention turns to identifying any replacement parts or adapters required for a proper fit.
Measure existing hole diameters, supply line sizes, and mounting configurations. Note outdated valve stems, corroded nuts, or nonstandard shanks.
Source matching escutcheons, deckplates, flexible hoses, or threaded adapters.
Verify compatibility with faucet specifications before purchasing to avoid delays.
Conclusion
With heroic precision, the homeowner approaches the sink like a cartographer mapping uncharted territory. Measurements are not mere numbers but battle plans that vanquish leaks and wobble. A well-measured faucet fits as if forged by the gods—no gaps, no surprises—bringing domestic harmony so profound the kitchen could sing. Armed with a tape, calipers, and checklist, installation becomes a triumphant march rather than a clumsy stumble into plumbing chaos.