How to Fix Hot Water in the Toilet Tank: Causes, Quick Fixes & When to Call a Plumber
If your toilet tank is hot, it’s likely due to heat from nearby hot-water lines, misrouted supply lines, or a faulty fill valve. Start by measuring the tank’s temperature and inspecting the supply lines and valve orientation. To quickly address the issue, consider insulating the pipes, repositioning the lines, adjusting your water heater, or replacing the fill valve. If the warmth persists or if you notice cross-connections or unexpected temperature spikes, it’s best to call a plumber for a thorough assessment.
Why Your Toilet Tank Water Is Hot: Quick Explanation
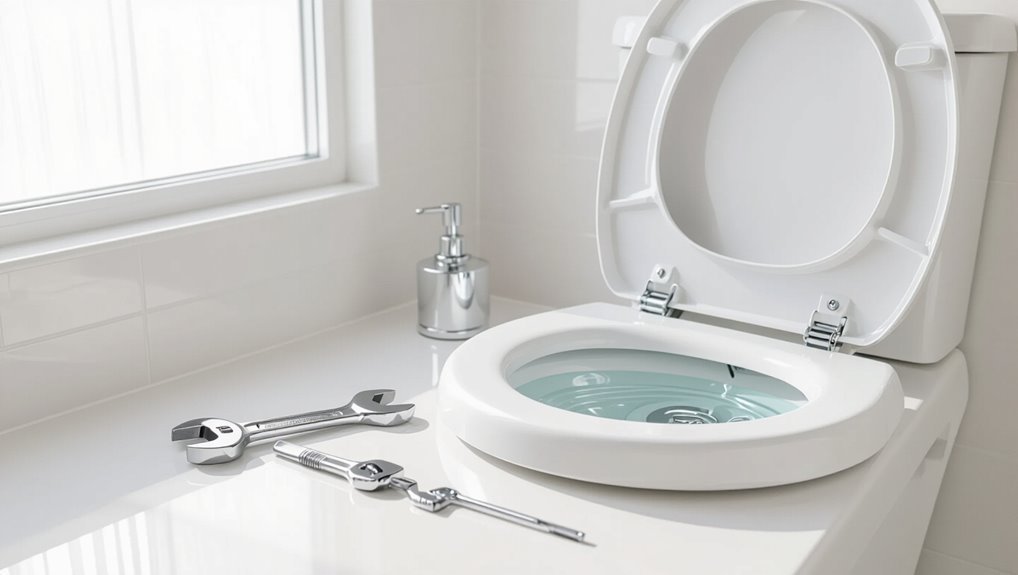
A simple cause of warm water in the toilet tank is heat transfer from nearby hot-water pipes or a water heater thermostat set high, which allows hot supply water to reach the tank.
Plumbing layouts that run hot and cold lines close together or loop back near the tank can raise its temperature during routine use.
Everyday scenarios—such as a water heater set above 120°F, hot water recirculation systems, or fixtures fed from the same hot line—commonly explain why the tank feels warm.
How thermostat and plumbing layout can cause warm tank water
Consideration of the home’s thermostat settings and the layout of hot and cold water lines explains many cases of warm toilet tank water.
High house thermostat or nearby heating pipes can raise ambient and pipe temperatures, warming inlet supply.
Proper inspection suggests repositioning cold supply, adding insulation, or rerouting lines.
For practical guidance on how to fix hot water in toilet tank, consult system diagrams or a plumber.
Common household scenarios that raise tank temperature
When toilet tank water runs warm, common household factors often explain it: proximity to heating elements or hot water lines, heat transfer from warm rooms or sun-exposed walls, thermal conduction through shared supply piping, and occasional backflow or cross-connection with the hot water system.
Other scenarios include attic or basement heat, nearby radiators, insulated or uninsulated pipes, and intermittent hot-water circulation loops raising tank temperature.
How to Check and Diagnose Hot Water in the Toilet Tank
Before opening the tank, the reader should perform basic safety checks such as shutting off water and avoiding electrical contact.
They should then measure the tank water temperature with a reliable thermometer and note whether warmth is constant or intermittent.
Finally, nearby hot-water appliances and supply lines should be inspected for cross-connections or heat transfer that could explain the problem.
Safety checks before inspecting the tank
A few simple safety checks reduce risk and guide an effective inspection of a toilet tank that feels unusually warm.
Verify water supply shutoff works, turn valve off, and flush to lower tank level.
Confirm electrical devices nearby are unplugged and appliances using hot water are off.
Wear gloves and safety glasses; guarantee good lighting and stable footing before lifting the lid.
How to measure tank water temperature accurately
With safety checks completed and the lid removed, the next step is to measure the tank water temperature accurately to determine whether the warmth is normal or indicative of a problem.
Use a waterproof instant-read thermometer inserted gently into the tank, avoid touching metal parts, wait 30–60 seconds for a stable reading, and record temperature.
Repeat at different times for consistency.
Inspecting nearby hot-water appliances and supply lines
Several nearby fixtures and supply lines should be inspected to determine whether external hot-water sources are warming the toilet tank.
Examine adjacent sinks, showers, water heaters, and laundry hookups for shared supply routing, cross-connections, or valve misalignment.
Check supply-line insulation, mixer valves, and shutoff positions.
Note visible hot pipes, recent plumbing work, or thermostatic mixing devices that could introduce warm water into the cold line.
Identifying intermittent vs. persistent heating patterns
How often does the toilet tank warm up, and is the change steady or sporadic?
The observer notes timing, duration, and recurrence: constant warmth suggests a persistent supply issue or cross-connection; sporadic spikes point to intermittent backflow, nearby appliance cycles, or thermal stratification.
Record occurrences, water use patterns, and appliance activity to correlate events.
Use these logs to guide targeted inspection or professional diagnosis.
Immediate Quick Fixes You Can Try Right Now
When hot water is found in the toilet tank, there are a few immediate actions that can reduce temperature and limit further warming.
These quick fixes focus on stopping heat transfer and using temporary adjustments while a permanent repair is arranged.
The following concise steps illustrate practical, fast options to try right away.
- Turn off or adjust nearby hot-water sources to prevent hot supply from warming adjacent plumbing.
- Flush and refill the tank to replace the warm water with cooler supply temporarily.
- Insulate exposed hot water pipes and reposition or secure supply lines away from hot pipes to reduce heat conduction.
- Adjust water heater settings briefly (or lower thermostat) as a temporary measure while diagnosing the cause.
Turn off or adjust nearby hot-water sources
Check and, if necessary, shut off or adjust any nearby hot-water sources to stop warm water from entering the toilet tank.
Inspect adjacent sinks, showers, washing machines and supply lines for mixing valves, crossover leaks or shared plumbing.
Temporarily turn off or reduce hot-water output, isolate fixtures, and observe tank temperature.
If warming persists, suspect a concealed crossover or faulty valve and consider professional diagnosis.
Flush and refill to cool the tank temporarily
Flush the bowl and let the tank refill several times to lower the water temperature quickly; each flush replaces warm water with cooler supply water and can provide immediate relief while diagnosing the underlying cause.
Repeat until the tank feels cooler, observing whether hot water returns. If temperature normalizes, document when it occurs; persistent warming indicates a source requiring further inspection or professional help.
Insulate exposed hot water pipes near the toilet
Wrap exposed hot water pipes near the toilet with foam or fiberglass insulation to reduce heat transfer into the tank and surrounding cold-water lines.
Measure and cut sleeves to fit, secure with tape or zip ties, and seal seams.
Insulation limits conductive warming of nearby plumbing, helping maintain cooler tank refill temperatures and reducing repeated thermal mixing that can warm the toilet tank.
Reposition or secure supply lines away from hot pipes
Move or fasten the toilet’s water supply line so it runs away from any nearby hot pipes to prevent heat transfer into the tank.
A metal or flexible line touching a hot pipe can warm incoming water. Secure the line with clips or brackets, reroute gently around heat sources, and add a short insulated sleeve where clearance is limited.
Recheck after several hours for cooler inflow.
Adjust water heater settings as a temporary measure
How quickly can lowering the water heater temperature reduce warm inflow to a toilet tank?
Reducing thermostat settings can lower household supply temperature within hours, reducing heat transfer into cold lines.
As a temporary measure, set heater to 120°F (49°C) or lower, then monitor tank temperature.
This is stopgap only; long-term solutions require insulating lines or relocating hot pipes and professional assessment.
Step-by-Step Repair Options for Homeowners
The homeowner can address hot water in the toilet tank through targeted repairs such as replacing or adjusting the fill valve and swapping the supply line between flexible and rigid options.
Additional measures include installing insulation or a thermal barrier around the tank, adding a mixing or tempering valve on nearby hot lines, and evaluating whether the toilet should be replaced when its design promotes heat transfer.
The following steps outline practical, sequenced actions for each option.
Replacing or adjusting the fill valve
Begin by shutting off the water supply and draining the tank to create a safe workspace before inspecting the fill valve assembly; this prevents accidental flooding and makes it easier to identify whether adjustment or replacement is required.
Check float height and inlet for debris; adjust or replace the valve per manufacturer instructions, secure connections, test for proper shutoff and refill, and verify there are no leaks.
Replacing the toilet supply line (flexible vs. rigid)
After confirming the fill valve functions and the tank refills properly, attention can shift to the supply line, which often causes hot water to enter the tank when mixing or heat from nearby pipes occurs.
Homeowners should inspect for cross-connections, corrosion, or flexible hose heat transfer. Replace with a short rigid copper/PEX run or a braided stainless flex line with proper shutoff; tighten fittings and test for leaks.
Installing a thermal barrier or insulation around the tank
Install a thermal barrier or insulation around the toilet tank to reduce heat transfer from nearby hot-water lines and keep the tank water cool.
Measure tank dimensions, select closed-cell foam or reflective insulation, cut to fit, and secure with waterproof tape or adhesive.
Guarantee access to flush components and trim openings for bolts.
Verify insulation avoids contact with moving parts or electrical components.
Adding a mixing valve or tempering valve to nearby hot lines
Adding a mixing or tempering valve on nearby hot-water lines controls water temperature entering the toilet tank by blending hot and cold to a safe, consistent level.
A homeowner can install a thermostatic mixing valve at the branch serving nearby fixtures to limit maximum temperature, preventing heat transfer to the tank.
Professional calibration guarantees correct setpoint and code compliance; routine checks maintain performance.
When to replace the toilet if design causes heat transfer
When is replacement preferable over repairs when a toilet’s design itself promotes heat transfer into the tank?
Replacement is advised if metal tanks, thin plastic, or exposed hot-water lines are intrinsic to the model and insulation or valve changes won’t stop warming.
Choose a thermally insulated or redesigned unit when recurring heat, corrosion, or persistent condensation indicates repairs are temporary and costly.
Causes Related to House Systems and When to Investigate Further
Systemic plumbing issues can cause hot water to reach a toilet tank, including cross-connections between hot and cold lines or shared supply risers in multi-story buildings.
Proximity to a boiler, water heater, or an active hot-water recirculation loop can also introduce heat into nearby cold feeds.
Homeowners should consider faulty valves or pressure imbalances that allow backflow and investigate these possibilities when on-site fixes do not resolve the problem.
Cross-connection between hot and cold water lines
Inspecting a cross-connection between hot and cold supply lines is essential when warm water appears in the toilet tank without a clear fixture-level cause.
A misrouted valve, improper plumbing work, or a failed mixing device can feed hot water into the cold branch.
Verify shutoff valves, trace piping, and test for temperature at adjacent fixtures.
Call a licensed plumber if crossover is confirmed.
Shared supply risers in multi-story buildings
In multi-story buildings, shared supply risers can allow fluctuations or backflow between units that introduce warm water into a toilet tank even though the fixture’s own cold feed appears intact.
Investigators should consider pressure changes, simultaneous usage patterns, and faulty check valves in the riser system.
Coordination with building maintenance or management is often required to inspect risers, install isolation valves, or repair backflow prevention devices.
Proximity to boiler, water heater, or hot-water recirculation loop
When a toilet’s cold supply runs close to a boiler, water heater, or an active hot-water recirculation loop, heat transfer or pressure interactions can raise tank water temperature and mimic a supply fault.
Investigators should consequently assess piping layout, insulation, and whether the recirculation loop uses a thermostatic or timed bypass that could allow hot water to reach nearby cold lines.
Check pipe spacing, add insulation, or reroute.
Faulty valves or pressure issues causing backflow of hot water
Any number of failures in valves, check devices, or pressure-regulating equipment can allow hot water to be forced into a toilet’s cold supply, raising tank temperature and signaling a system-level fault rather than a local one.
Inspect thermal mixing valves, backflow preventers, and pressure-reducing valves for wear, incorrect setpoints, or bypassed seals.
Persistent symptoms warrant plumber diagnosis and replacement to prevent cross-connection.
Wear, Damage and Component Failures to Watch For
Wear and damage to tank components can allow hot water into the toilet tank or accelerate deterioration when exposed to higher temperatures.
Regular inspection and timely replacement of vulnerable parts reduce the risk of leaks, malfunctions, and cosmetic damage.
The following common failures should be checked when hot water is suspected in the tank:
- Worn fill valves and seals
- Corroded or kinked supply lines
- Faulty mixing valves or check valves
- Tank material or paint degradation due to heat exposure
Worn fill valves and seals
Inspect the fill valve and its rubber seals for cracking, mineral buildup, or softening, since these failures are among the most common causes of persistent leaks, slow refills, or noisy tanks.
Worn seals fail to seal water flow; valves may stick or flutter. Replacement of the valve assembly or seals restores reliable shutoff and refill timing.
Use compatible parts and test after installation.
Corroded or kinked supply lines
After ruling out worn fill valves and seals, attention should shift to the supply line connecting the shutoff valve to the tank.
Corrosion, mineral buildup, or kinks can restrict flow or allow hot water to enter the tank unexpectedly. Inspect visually and feel for stiffness; replace braided or flexible lines showing damage.
Tighten fittings carefully and test for leaks before restoring normal operation.
Faulty mixing valves or check valves
Several common failures in mixing valves and check valves can allow hot water to enter the toilet tank or prevent cold water from isolating properly.
Worn seals, spring fatigue, debris buildup or cracked housings compromise one-way flow. Intermittent sealing can cause sporadic hot-water intrusion.
Inspection, cleaning or replacement of the faulty valve restores isolation; persistent or inaccessible failures require professional diagnosis and replacement.
Tank material or paint degradation due to heat exposure
When exposed repeatedly to hot water or elevated temperatures, toilet tank materials and finishes can deteriorate: painted surfaces may blister, flake, or discolor, while plastic and composite tanks can warp, craze, or become brittle.
Such degradation weakens structural integrity, accelerates leaks, and can release paint chips or microfragments into the bowl.
Replacement of damaged tanks or refinishing by a professional is recommended to restore safety and function.
When to Call a Plumber: Clear Decision Criteria
Persistent signs like unexplained heat in the tank, intermittent hot water, or evidence of cross-connections and backflow indicate the need for professional diagnosis.
Issues involving recirculation loops, complex valve configurations, or suspected code violations are best handled by a licensed plumber.
Homeowners should expect a plumber to assess the system, identify the fault, outline the repair scope and cost, and perform or recommend corrective work during the service visit.
Signs that require professional diagnosis
If a toilet tank shows signs that suggest underlying plumbing or heating system problems, a professional diagnosis is warranted to prevent damage and guarantee safety.
Persistent hot water after multiple flushes, sudden temperature spikes, discoloration or corrosion inside the tank, unexplained mineral buildup, recurring leaks, or simultaneous hot-water anomalies elsewhere in the house merit expert inspection to identify hidden faults and correct systemic issues.
Problems best handled by a licensed plumber (cross-connections, backflow, recirculation loops)
Several common toilet-tank heat issues indicate a need for a licensed plumber: cross-connections between potable and non-potable lines, faulty backflow prevention, and improperly installed recirculation loops.
These conditions risk contamination, code violations, and systemic heating.
A professional should verify piping layouts, test and replace backflow devices, and correct recirculation loop configurations to restore safe water separation and compliant operation.
Estimated repair scope and what to expect during a service visit
When should a homeowner call a plumber for hot water in the toilet tank?
A professional visit typically includes inspection of supply lines, valves, mixing devices, and water heater settings.
Diagnosis of cross-connections or recirculation issues, and testing for backflow.
Expect 30–90 minutes, a written estimate, parts replacement if needed, and clear repair versus replacement recommendations with upfront costs and warranty details.
Cost Estimates and Timeframe for Common Repairs
Typical repair options range from quick DIY fixes to full professional service, each with different costs and time commitments. The table below summarizes common repairs, approximate price ranges, and expected time to complete. Homeowners can use this as a quick reference when deciding whether to attempt the repair or hire a plumber.
| Repair Type | Typical Price Range | Typical Time Required |
|---|---|---|
| Replace flapper/valve | $5–$30 (DIY) / $75–$150 (pro) | 10–30 minutes (DIY) / 30–60 minutes (pro) |
| Adjust/replace fill valve | $10–$40 (DIY) / $100–$200 (pro) | 15–45 minutes (DIY) / 30–90 minutes (pro) |
| Replace entire tank/overflow assembly | $50–$200 (parts DIY) / $200–$600 (pro) | 1–3 hours (DIY experienced) / 1–4 hours (pro) |
DIY fixes vs. professional repairs: typical price ranges
Cost is the primary factor guiding the choice between DIY fixes and hiring a professional for a hot-water-in-the-toilet-tank problem.
DIY parts (valves, flappers, seals) typically cost $10–$50; homeowners often save labor costs but risk mistakes.
Professional repair ranges from $75–$250 for common fixes, $200–$600 for complex valve or fill-line work.
Warranty, safety, and guarantees justify higher fees.
Time required for each repair type
After outlining how price influences the DIY-versus-pro decision, the next consideration is how long each repair typically takes and how that affects labor costs and household disruption.
Simple tasks—flapper replacement or adjusting fill valve—often take 15–30 minutes.
Float or chain fixes: 10–20 minutes.
Seal or flush-valve replacements: 30–60 minutes.
Full tank or valve rebuilds: 1–2 hours, possibly longer with complications.
Preventive Measures to Keep Toilet Tank Water Cool
Preventive measures focus on plumbing layout and insulation to limit heat transfer from nearby hot-water lines.
A simple routine maintenance checklist — inspecting pipe insulation, checking for warm bleed points, and ensuring proper venting — helps catch issues early.
Long-term upgrades like rerouting supply lines, installing thermal barriers, or using insulating tank liners further reduce the risk of warm tank water.
Best practices for plumbing layout and insulation
When designing plumbing runs to minimize heat transfer into a toilet tank, route cold-water supply lines away from heat sources and favor shorter, straighter paths that reduce exposure and conductive loss.
Insulating pipes and the tank itself further limits warm-water infiltration and helps maintain lower temperatures in the cistern. Use foam pipe insulation, thermal wraps, and barrier sleeves; cluster hot lines separately and ventilate warm areas to prevent ambient heat buildup.
Routine maintenance checklist for toilet and nearby pipes
Maintaining cool water in the toilet tank relies as much on routine upkeep as on initial layout and insulation choices; regular checks catch issues that let warm water into the cistern or degrade insulation performance.
Inspect supply lines for heat sources, tighten fittings, test and replace faulty fill valves, verify shutoff valve operation, check nearby hot-water pipe proximity, clear vents, and document service dates for consistent preventive care.
Upgrades that reduce heat transfer long-term
Because heat transfer into a toilet tank is largely a function of materials and placement, upgrading components and insulation offers the most reliable, long-term reduction in water temperature.
Replace metal fill lines with braided or PEX cold-water lines, install tank-insulation kits or foam liners, relocate hot pipes away from the fixture, and fit a thermal barrier around adjacent hot-water elements to minimize conductive and radiant heating.
Troubleshooting Scenarios and Solutions
The following scenarios outline common patterns that indicate different causes of a hot toilet tank and guide appropriate responses. Each situation points to specific checks—pipe routing, valve settings, recent work, or persistent heat sources—that help isolate the problem.
Practical fixes and next-step actions are suggested for each case.
- Tank warms only during hot-water use elsewhere — check shared supply lines, cross-connections, and heat transfer from nearby hot pipes.
- Tank is consistently hot day and night — investigate hot-water line misrouting, thermal seep from adjacent heated spaces, or a faulty mixing valve.
- Hot tank after recent plumbing work or renovation — inspect new connections, temporary cross-connections, or swapped supply lines.
- If simple checks don’t resolve it — consider installing an anti-thermal crossover device, insulating exposed pipes, or calling a plumber for diagnostics.
Scenario: Tank warms only during hot-water use elsewhere
When the toilet tank becomes warm only while hot water is being used elsewhere in the house, it indicates a cross-connection between the hot and cold plumbing or a failing fill-valve assembly that allows heated water to backflow into the tank.
Diagnosing this requires checking nearby fixtures for common supply lines, testing the shutoff and fill valves, and inspecting for a faulty anti-siphon or mixing device.
Confirm by isolating fixtures, replacing a defective fill valve, or correcting shared supply connections; call a plumber if checks fail or if mixing valves are involved.
Scenario: Tank is consistently hot day and night
If a toilet tank remains hot day and night, it signals a persistent source of hot water entering the cistern rather than intermittent backflow.
This steady warmth most often results from a misrouted hot supply, a permanently stuck fill valve, or an internal mixing device that is malfunctioning.
Inspect supply lines and valves, shut off hot feed, replace or rebuild the fill valve, and call a plumber if internal piping swaps or mixing devices are suspected.
Scenario: Hot tank after recent plumbing work or renovation
A recent renovation or any plumbing work introduces a higher likelihood that a hot and cold line was crossed, a supply connection was loosened, or a fill valve was disturbed, producing a suddenly warm tank that did not exist before.
Inspect visible connections, verify correct supply lines at the shutoff and manifold, tighten fittings, and confirm fill valve orientation.
If uncertainty or persistent heat remains, call a plumber.
Tools, Parts, and Materials You May Need
A brief set of common tools, replacement parts, and safety items can help identify and correct instances of hot water in the toilet tank.
The list below highlights typical probes, valves, supply components, insulation, and when to evaluate tempering or check valves. Proper selection depends on the symptom and local plumbing codes.
- Digital temperature probe or thermometer, flashlight, mirror, and basic inspection tools.
- Replacement fill valves, float assemblies, and flexible supply lines.
- Pipe and tank insulation materials, heat-resistant tape, and plumber’s grease.
- Mixing/tempering valve or one-way check valve for backflow prevention and temperature control.
Temperature probe/thermometer and inspection tools
Measure the water temperature in the tank with a handheld probe or digital thermometer to confirm whether heat, not another fault, is causing the problem.
Use a long probe to reach water without removing the lid. Pair with a flashlight and mirror to inspect hidden fittings, corrosion, or sediment.
Record readings and observations to guide diagnosis or when consulting a plumber.
Replacement fill valves, supply lines, and insulation supplies
If the tank temperature readings and visual inspection point to internal components or incoming cold-water heat gain as the source, replacement fill valves, supply lines, and insulation supplies become the focus.
Recommended parts include a compatible fill valve assembly, braided stainless supply line, foam pipe insulation, and adhesive-backed tank wrap.
Basic tools: adjustable wrench, screwdriver, bucket, and towel.
Parts should match tank inlet size and pressure ratings.
When to use a mixing/tempering valve or check valve
Consider a tempering or check valve when persistent hot water migration, backflow, or scald risk is identified in the toilet tank system; these valves control mixed-water temperature and prevent reverse flow from nearby hot lines into the cold supply.
Use a tempering valve if mains hot intermittently heats the cistern, and install a check valve to stop backflow from adjacent hot fixtures or shared branch lines.
Summary: Fast Actions and Next Steps
The article recommends immediately shutting off the toilet’s water supply and flushing to replace hot water with cooler supply water.
If the tank remains warm or symptoms recur, schedule a plumber and be ready to report tank temperature, recent plumbing work, and any visible valve or fill-valve issues.
These details help the professional diagnose whether a simple repair or more extensive service is needed.
Immediate actions to cool the tank
A few immediate steps can quickly reduce the water temperature in a toilet tank and prevent damage: turn off the cold-water supply at the shutoff valve, flush to drain hot water from the tank, and avoid using nearby fixtures that feed the same line.
If safe, add cool tap water gradually to lower temperature. Monitor for leaks or warped components while cooling.
When to book a plumber and what information to provide
If hot water persists after initial cooling steps or if visible damage, persistent leaks, warped plastic parts, or unusual noises occur, contact a licensed plumber promptly to prevent further damage and confirm safe repairs.
Provide clear details: model/age of toilet, recent repairs, visible damage photos, water temperature behavior, shutoff valve status, and whether other fixtures are affected.
Request estimated timeline and cost.
Conclusion
When toilet tank water runs hot, the homeowner should treat it like a flashlight unexpectedly left in sunlight: investigate the batteries and wiring before assuming the worst. Quick checks of shutoff valves, float and fill valve settings, and nearby hot-water piping often reveal the cause. If simple adjustments don’t cool the tank, call a plumber to inspect mixing valves, recirculation loops, or appliance cross-connections to prevent damage and restore normal temperatures.