How to Fix a Disconnected Air Duct: Step-by-Step Repair Guide for Homeowners
To fix a disconnected air duct, first locate the leak and turn off the HVAC power. Inspect the duct for loose joints, kinks, or tears. For rigid ducts, realign them, secure with sheet-metal screws, and seal with mastic or foil tape. For flexible ducts, trim them as necessary, attach to collars using clamps or zip ties, and seal with foil tape. After the repair, run the fan to check airflow and use smoke or soapy water to identify any remaining leaks. This guide also covers essential tools, safety tips, challenging locations, and advice on when to hire a professional.
What Causes an Air Duct to Become Disconnected
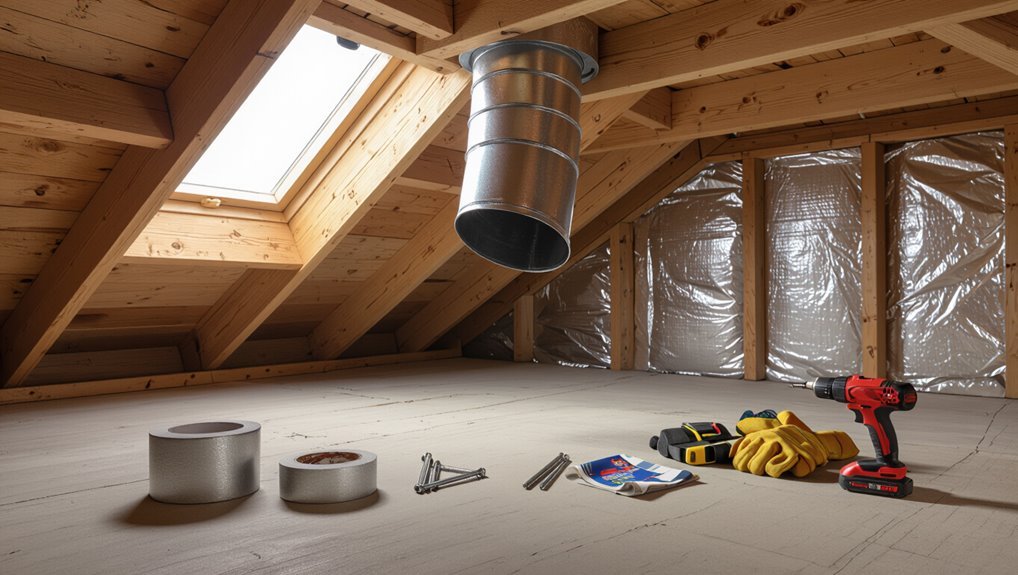
Mechanical issues such as loose joints, vibration, or poor installation often allow ducts to separate over time.
Environmental factors like temperature swings, building settling, or pest activity can also pull connections apart.
Disconnected ducts are usually indicated by cold or hot spots, unusual noises, and higher energy bills.
Common mechanical causes (loose joints, vibration, poor installation)
Loose or improperly fitted joints, persistent vibration, and substandard installation account for the majority of duct disconnections.
Technicians note that unsecured seams, missing fasteners, and incorrect duct sizing increase stress at connections. Repeated vibration loosens clamps and tape.
Homeowners searching for how to fix disconnected air duct should inspect joints, reinforce with mechanical fasteners, apply proper sealant, and correct alignment to prevent recurrence.
Environmental causes (temperature changes, settling, pests)
Although often less visible than installation faults, environmental factors play a significant role in duct separations. Repeated thermal expansion and contraction, gradual building settlement, and animal or insect activity can each create stress that weakens connections over time.
Seasonal temperature swings cause metal and flexible ducts to shift. Settling shifts seams and hangers. Pests chew insulation or dislodge fasteners, accelerating loosening.
Signs a duct is disconnected (cold/hot spots, noise, higher bills)
How can a homeowner tell when an air duct has come apart?
Visible signs include cold or hot spots in rooms, uneven airflow from vents, and unusual rattling or whooshing sounds.
Energy costs may rise as the system works harder.
Increased dust or debris near vents and inconsistent temperature cycling also indicate a disconnected or leaking duct needing inspection and repair.
How to Assess a Disconnected Air Duct Safely
Before touching the ductwork, the inspector gathers basic tools and safety gear—flashlight, gloves, sheet metal tape, foil tape, a screwdriver, and a multimeter—and confirms the HVAC system and power are turned off.
A systematic search follows, checking attics, crawlspaces, basements, and wall chases to locate the separated section while avoiding unstable surfaces and insulation hazards.
Finally, the condition of the break, accessibility, and any damaged connectors guide the decision whether a straightforward DIY repair is appropriate or a licensed HVAC technician is required.
Tools and materials needed for inspection and repair
Gather the right tools and materials to guarantee a safe, efficient inspection and repair of a disconnected air duct. Necessary items enable clear assessment and secure reconnection without entering HVAC shutdown procedures.
Recommended toolkit includes:
- Flashlight and inspection mirror
- Gloves, dust mask, and safety glasses
- Sheet metal screws, metal tape, and clamps
- Duct sealant and foil tape for airtight joints
How to turn off HVAC and ensure safe working conditions
To guarantee safety and prevent system damage, the HVAC unit should be fully powered down and isolated before any duct inspection begins; this includes switching the thermostat to “off,” cutting power at the furnace or air handler breaker, and labeling the breaker if others might restore power.
Verify no airflow or fan operation, wear gloves and eye protection, use a stable ladder, and confirm good lighting and ventilation.
How to locate the disconnected section (attic, crawlspace, basement, walls)
Where is the break in the system? Inspect accessible areas methodically: attic, crawlspace, basement, and visible wall openings.
Follow duct runs from the air handler toward vents, looking for disconnected joints, crushed sections, or missing straps.
Use a flashlight and mirror for tight spots. Note insulation, rodent damage, and nearby obstructions.
Mark the location for repair and safe access.
How to determine if repair is DIY or requires a professional
How can a homeowner decide whether a disconnected duct is a straightforward DIY fix or needs a professional?
Assess accessibility, duct material, and size of gap. Small flexible or sheet-metal reconnections in accessible areas with basic tools are DIY.
Call a professional if ducts are in hazardous spaces, attached to major trunk lines, damaged, poorly sealed, insulated, or if the system shows airflow, noise, or safety issues (carbon monoxide concern).
Step-by-Step Repair Guide for Rigid Sheet Metal Ducts
The procedure begins with preparing the area and cleaning the duct ends to guarantee a tight fit.
Next, the technician realigns and reconnects the metal sections, securing seams with duct screws and applying mastic.
Finally, joints are sealed with metal foil tape and mastic and reinforced using sheet metal collars or slip joints.
Preparing the area and cleaning duct ends
Before reconnecting a rigid sheet metal duct, remove nearby obstacles and guarantee the work area is well-lit and ventilated so access is safe and unobstructed.
Inspect both ends for damage, bent edges, or debris.
Use a stiff brush and vacuum to clear dust, insulation fragments, and insects.
Wipe exposed metal with a damp cloth and allow it to dry before applying sealant or fasteners.
Realigning and reconnecting metal ducts
Begin by aligning the duct sections so their collars and seams match precisely, ensuring a smooth airflow path and snug fit.
Once aligned, slide the male end into the female collar until the seams seat fully and any factory-installed tabs engage.
Verify the connection is flush all around, adjust bends or supports to remove stress, and test by gently tugging to confirm proper engagement before final sealing.
Securing seams with duct screws and mastic
Secure seams on rigid sheet metal ducts using a combination of self-tapping duct screws and water- or solvent-based mastic to create a mechanically strong, airtight joint.
Drive screws every 1–2 inches along lap seams, countersinking slightly.
Apply mastic over screw heads and seams, smoothing with a putty knife to guarantee full coverage and fillet formation.
Allow recommended cure time before restoring airflow.
Sealing joints with metal foil tape and mastic
Apply metal foil tape and mastic together to create a durable, airtight seal on rigid sheet metal duct joints.
Clean surfaces, remove dust and oil, then press tape firmly along seams, overlapping ends.
Immediately coat tape edges and exposed seams with HVAC-rated mastic using a brush or trowel.
Allow proper curing time.
Inspect for gaps and recoat thin areas to guarantee continuous, flexible adhesion.
Reinforcing with sheet metal collars or slip joints
Reinforcing a disconnected rigid duct with a sheet metal collar or slip joint restores structural alignment and creates a reliable mechanical connection before sealing.
The installer measures and fits a collar or sliding sleeve over the mating ends, secures it with sheet metal screws every few inches, checks for square alignment, and then applies foil tape and mastic to waterproof and prevent air leaks for long-term stability.
Step-by-Step Repair Guide for Flexible (Flex) Ducts
The section outlines how to assess flex ducts for tears, kinks, or improper length before proceeding.
It then describes cutting and preparing the duct end, securing it to the collar with zip ties and foil tape, and when to add crimp connectors.
Finally, it explains using clamps or specialized connectors for a stronger, longer-lasting bond.
Inspecting flex duct for damage and length issues
Begin by visually and manually inspecting the flex duct along its full run, focusing on kinks, crushed sections, punctures in the outer jacket, and separated or stretched inner lining that would reduce airflow.
Note tears, collapsed coils, and insulation gaps. Measure available slack versus required reach, identify sections too short or excessively long, and mark damaged zones for repair or replacement.
Trimming and preparing flex duct ends
After identifying damaged or improperly sized sections, attention turns to trimming and preparing each flex duct end for a secure reconnection.
The technician measures required length, collapses the duct to access the inner wire coil, and trims away frayed insulation and foil with tin snips.
The cut is square and clean. Inner liner is smoothed, and the outer jacket folded back neatly to expose the wire for attachment.
Attaching flex duct to collar with zip ties and foil tape
Secure the prepared flex duct to the collar using a combination of zip ties and foil tape to create an airtight, mechanically stable connection.
Slide the duct over the collar, seat the inner wire bead, cinch multiple zip ties evenly, trim excess tie tails, then wrap foil tape smoothly around the junction, overlapping turns to seal gaps.
Inspect for wrinkles and re-tension ties if needed.
Using crimp connectors and clamps for stronger bonds
For a more durable repair of flex duct connections, use crimp connectors and stainless-steel clamps to create a mechanical bond that resists pull-off and movement.
A crimped metal adapter slips into the rigid collar; the flex duct slides over it.
Tighten a worm-gear or t-bolt stainless clamp, trim excess material, then seal the joint with HVAC foil tape or mastic for airtight, long-lasting performance.
Repairing Ducts in Difficult Locations (Attic, Crawlspace, Between Walls)
When ducts sit in attics, crawlspaces, or between walls, accessing the connection often requires maneuvering through tight, insulated areas and planning for limited headroom.
The guide explains safe techniques for working overhead and in confined spaces, including proper support, lighting, and protective gear.
It also covers criteria for installing access panels or rerouting ducting when repairs are impractical.
Accessing ducts in tight or insulated spaces
Many ducts run through cramped, insulated cavities where limited clearance and fragile materials complicate inspection and repair.
Access requires careful planning: map routes, remove minimal insulation, and use mirror, inspection camera, or flexible probe.
Stabilize surrounding insulation and avoid tearing vapor barriers.
Where necessary, create small removable panels for future access.
Prioritize sealing and support once the duct is repositioned and reconnected.
Tips for working overhead and in confined spaces
Work overhead and in confined spaces demands deliberate preparation and strict attention to safety: assess clearance, lighting, and support points before entry, and use a headlamp, magnetic tool holster, and knee or back pads to maintain stability while reaching and manipulating ductwork.
Maintain three points of contact, ventilate dusty areas, wear a respirator and eye protection, plan tool placement, and work slowly to avoid strain or damaging insulation.
When to add access panels or reroute ducting
After confirming safe access and adequate lighting in attics, crawlspaces, or wall cavities, the technician should evaluate whether repairing the existing route is feasible or if installing access panels or rerouting the run will provide a more durable, serviceable solution.
Choose panels where future inspections or repairs are likely; reroute when original path causes sharp bends, moisture risk, or frequent damage.
Prioritize minimal structural alteration and clear labeling.
Materials, Tools, and Products That Work Best
The section outlines the specific tapes, mastics, and sealants best suited for permanent, air-tight duct repairs and which fasteners, collars, clamps, and screws provide secure mechanical connections.
It also explains when insulation wrap and vibration dampeners are appropriate to prevent heat loss and reduce noise or wear.
Recommendations prioritize long-term durability, code compliance, and ease of installation in confined spaces.
Recommended tapes, mastics, and sealants
Choose materials that match the duct type and pressure class to guarantee a durable seal; aluminum foil-backed HVAC tape and pressure-sensitive mastic are the industry-standard choices for sheet-metal and duct-board systems, while high-strength foil tape or heat-resistant cloth tape suit temporary repairs on flexible ducts.
- Butyl-based mastic for long-lasting, flexible seals
- Silicone sealant for high-temperature spots
- Foil-backed HVAC tape for permanent seams
- Acrylic mastic for easy application and painting
Fasteners, collars, clamps, and screws
Select fasteners, collars, clamps, and screws that match the duct material, size, and expected pressure to guarantee a secure, long-lasting connection.
Choose corrosion-resistant metals for longevity and stainless or galvanized options for outdoor or high-moisture areas.
Use self-tapping screws for thin metal, adjustable band clamps for round ducts, and sheet-metal collars for connections.
- Stainless or galvanized screws
- Self-tapping screws
- Adjustable band clamps
- Sheet-metal collars
When to use insulation wrap and vibration dampeners
After fastening, hardware secures the duct connection. Insulation wrap and vibration dampeners address thermal loss, condensation, and mechanical noise that fasteners alone cannot.
Use closed-cell foil-faced wrap on exposed or uninsulated runs to prevent heat transfer and moisture.
Install neoprene or rubber vibration isolators where fans, flexible connectors, or sheet-metal joints transmit buzzes.
Secure materials with HVAC tape and avoid compressing insulation.
Testing and Verifying the Repair
After reconnecting and sealing the duct, the system should be run to confirm noticeable airflow improvement at the vents.
Remaining leaks can be checked with a smoke pen or a soapy-water test around joints and seams.
Finally, measure changes in energy use and room comfort to verify the repair’s effectiveness.
How to run the system and check for airflow improvement
Start the HVAC system on its lowest fan setting and observe baseline airflow at several vents to establish a clear before-and-after comparison.
After repairs, run the system through low, medium, and high fan speeds, noting airflow strength and temperature consistency at each vent.
Record improvements, listen for unusual noises, and confirm consistent delivery to previously weak or dead vents before concluding the test.
Detecting remaining leaks with smoke pens or soapy water
Use a smoke pen or a simple soapy-water solution to pinpoint any remaining leaks around connections, seams, and repaired joints.
Observe for smoke drift or persistent bubbles while the system runs at normal fan speed.
Mark detected leaks, re-seal with mastic or foil tape, then retest.
Repeat until no leakage appears.
Record locations for future inspection and maintenance.
Measuring energy and comfort improvements
Measure the repair’s effectiveness by collecting objective data on energy use and indoor comfort before and after the duct fix.
Record HVAC runtime, thermostat setpoints, and kilowatt-hours for comparable periods.
Log room temperatures and humidity with dataloggers or smart thermostats.
Compare airflow readings at vents with anemometers.
Note occupant comfort changes and any shifts in utility bills to validate efficiency gains and comfort improvements.
Common Repair Mistakes to Avoid
Common repair mistakes can undermine ductwork performance and longevity.
Typical errors include using ordinary duct tape instead of foil tape or mastic, overstretching or kinking flexible ducts, and leaving gaps around vents and boots.
Addressing these issues prevents leaks, poor airflow, and repeated repairs.
Using duct tape instead of proper materials
Reaching for duct tape may seem like a quick fix, but it almost always fails to provide a durable, airtight repair for disconnected air ducts.
Duct tape degrades, loses adhesion, and allows leaks. Professionals recommend metal foil tape, mastic sealant, or proper clamps and connectors.
Using the right materials prevents energy loss, moisture intrusion, and repeated repairs, ensuring a safe, long-lasting connection.
Overstretching or kinking flexible ducts
After noting that improper materials like duct tape fail to hold a secure joint, attention must also turn to the shape and routing of flexible ducts.
Overstretching reduces airflow and stresses connectors; kinking creates sharp bends that trap debris and restrict flow.
Install ducts with gentle curves, maintain specified length and support intervals, and avoid compressing insulation to preserve performance and longevity.
Failing to seal around vents and boots
Failing to properly seal the connection between vents, boots, and ductwork allows conditioned air to leak into walls or attics, reducing system efficiency and creating uneven room temperatures.
Technicians or DIYers who omit foil tape, mastic, or appropriate gasketing risk energy waste, moisture issues, and pest entry.
Proper sealing restores airflow balance, improves comfort, and prevents long-term damage to insulation and structural elements.
When to Call a Professional HVAC Technician
When a disconnected duct is accompanied by uneven airflow, strange noises, or frequent system cycling, a professional should inspect for underlying HVAC failures.
The technician can also provide a clear estimate comparing repair versus replacement costs.
Homeowners should prepare a few key questions about warranties, timeline, and diagnostic fees before hiring a contractor.
Signs the disconnection indicates larger system problems
If a disconnected air duct coincides with persistent temperature imbalances, unusually high energy bills, strange noises in the system, or recurrent dust and moisture issues, these symptoms can signal deeper HVAC problems that warrant a professional inspection.
A technician can diagnose airflow restrictions, failing blower motors, refrigerant leaks, or insulation and ductwork degradation, determining whether targeted repairs or system-level intervention is necessary.
Estimating repair vs. replacement costs
Several factors determine whether repairing a disconnected air duct is cost-effective or if full system replacement is warranted. Age, extent of damage, energy loss, and recurring failures guide decisions; minor disconnections favor DIY or targeted repairs, widespread corrosion or multiple leaks often require professional replacement evaluation.
| Factor | Impact |
|---|---|
| Age | Higher replacement likelihood |
| Damage extent | Repair vs replace |
| Energy loss | Cost justification |
| Recurrence | Professional needed |
Questions to ask a contractor before hiring
Why hire a professional rather than attempt another DIY fix? A homeowner should ask about licensing, insurance, and HVAC experience specific to ductwork.
Request references, written estimates, timeline, warranty details, and confirmation of permit requirements.
Inquire about diagnostic methods, materials, and cleanup. Clarify payment terms and emergency service availability to guarantee transparency, safety, and long-term reliability.
Preventive Maintenance to Keep Ducts Connected
A simple preventive maintenance routine helps keep ducts connected and prevents common failures. Homeowners and technicians should follow a regular inspection schedule, checking joints, straps, and insulation, and take extra care to secure ducts during renovations or attic work.
Where feasible, upgrading to rigid runs and improved support systems will greatly reduce the risk of future disconnections.
Regular inspection schedule and what to look for
Because small issues compound over time, establishing a regular inspection schedule is essential to catch loosened or disconnected ducts before they degrade system performance.
Inspect quarterly and after severe weather. Focus on visible joints, tape condition, unusual noises, and airflow at registers.
- Visible joint separation or gaps
- Frayed or failing tape/sealant
- Rattles or whistling when fans run
- Weak or uneven airflow at vents
Securing ducts during renovations and attic work
When renovating or working in an attic, crews should proactively protect ductwork to prevent disconnections and damage that often occur from bumped joints, stepped-on runs, or shifted insulation.
Protective measures include marking duct paths, installing temporary walk boards, securing loose sections with straps or foil tape, and keeping tools/materials clear of runs.
Post-work inspections verify seals and insulation integrity.
Upgrades that reduce disconnection risk (rigid runs, better supports)
Consider switching to rigid duct runs and improved support systems to substantially lower the chance of disconnections.
Rigid metal or insulated hard ducts resist sagging and puncture, reducing joint stress. Combined with proper hangers, straps, and vibration isolators, they maintain alignment and airflow.
Upgrading connections to mechanical collars and sealed flanges further secures joints, minimizes leaks, and decreases maintenance frequency.
Quick Troubleshooting Checklist for Homeowners
Before calling a professional, a homeowner can run a short, systematic checklist to identify common causes of a disconnected air duct:
- Inspect visible joints for separation or loose fasteners.
- Check for crushed or kinked duct sections restricting airflow.
- Verify support straps and hangers are intact and aligned.
- Listen for unusual airflow noises while HVAC runs to pinpoint leaks.
Conclusion
A disconnected air duct often seems minor but can cut HVAC efficiency dramatically; studies show leaky ducts can reduce system efficiency by up to 20%. Homeowners who assess risks, follow the appropriate rigid or flexible duct steps, and avoid common mistakes can restore airflow, improve comfort, and lower bills. For hard-to-reach locations or uncertainty, calling a licensed HVAC technician prevents improper repairs. Regular inspections and sealing keep ducts functioning and efficient.