How to Drain Outside Faucet for Winter: Step-by-Step Guide to Prevent Frozen Pipes
To effectively drain your outside faucet for winter and prevent frozen pipes, follow these steps: First, shut off the indoor valve for the exterior spigot. Next, open the outdoor faucet to drain any remaining water. Disconnect any hoses and open small bleed ports to release trapped water. For frost-free spigots, close the interior valve, operate the exterior valve to clear the line, and insulate the spigot with a foam cover. Finally, check for leaks or damage and replace any faulty valves. Detailed steps and necessary tools are provided for safe winterizing.
What Happens If an Outside Faucet Freezes and Why Draining Matters
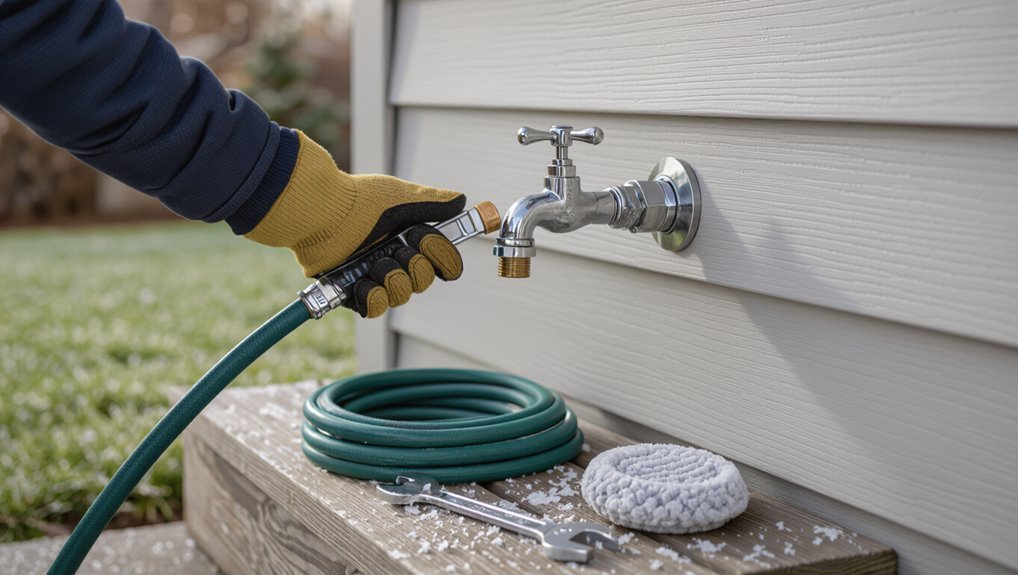
When water inside an outdoor faucet or its connecting pipe freezes, it expands and can crack valves, fittings, or the pipe itself.
Visible signs of partial freezing or rupture include reduced or no flow, ice at the spout, wet spots or icicles on the wall, and sudden water leaks once ice thaws.
Draining the line before cold weather prevents trapped water from freezing and greatly reduces the risk of costly pipe damage.
How freezing damages outdoor faucets and pipes
Even a small amount of water trapped in an outdoor faucet or its connected pipe can expand as it freezes, exerting enormous pressure on metal and joints.
Freezing forces crack soldered seams, splits pipes, and deforms valve seats, causing leaks and failures.
Proper how to drain outside faucet for winter procedures relieve internal pressure, prevent structural damage, and reduce repair costs.
Common signs of partially frozen or burst outdoor plumbing
Detecting a partially frozen or burst outdoor faucet often begins with subtle but telling signs: reduced or trickling water flow, ice near the spigot, or a sudden absence of discharge despite the handle turning.
Additional indicators include frost on exposed pipes, bulging or cracked pipe fittings, dampness or unexplained pooling near the foundation, and sudden spikes in indoor water pressure or leaks when thawing occurs.
Quick Answer: Simple Steps to Drain an Outside Faucet for Winter
A brief sequence outlines shutting off the indoor supply, opening the outdoor tap to drain remaining water, and insulating the fixture to prevent refreezing.
If the valve is corroded, the shutoff is inaccessible, or pipes show signs of damage, a professional plumber should be contacted.
Otherwise, the homeowner can usually complete the steps quickly with basic tools.
One-paragraph summary of the process
Shut off the water supply, open the outdoor spigot to drain remaining water, disconnect hoses, and drain any inline shutoff or vacuum breaker; then insulate or cover the faucet and, if present, shut off and drain the interior shutoff valve and winterize the supply line.
After draining, test for residual moisture, replace or cap fittings, and apply faucet insulation or a protective cover to prevent freezing.
When to call a professional instead of DIY
After completing the basic shutoff and drainage steps, homeowners should assess whether the job remains suitable for DIY or requires professional help.
Call a plumber if pipes remain wet, valves are stuck, multiple outlets are affected, insulation is damaged, or the shutoff valve is inaccessible.
Also seek help when unsure about winterization methods, to prevent damage and guarantee compliant, safe repairs.
Tools and Materials You’ll Need
The following list outlines the tools and materials typically required to shut off and drain an outside faucet for winter.
It covers basic items most homeowners will need as well as optional tools useful for older or more complex plumbing systems.
Readers can use this as a checklist before beginning the procedure.
Basic tools for most homes
A small collection of hand tools and a few simple materials will handle most outdoor faucet winterization tasks.
A homeowner should gather essentials to shut off, drain, and protect the spigot efficiently.
- Adjustable wrench
- Slip-joint pliers
- Flathead screwdriver
- Teflon tape and faucet cover
These items cover basic shutoff, loosening fittings, and insulating exposed components.
Optional tools for complex or older systems
For older homes or complex plumbing layouts, specialized tools and extra materials can simplify winterization and reduce the risk of damage.
- Flexible drain snake for clearing indoor shutoff lines.
- Low-pressure compressor or shop vac for blowing water from longer runs.
- Threaded faucet cap adaptors to test and seal spigots.
- Pipe insulation sleeves, heat tape, and additional shutoff valves for stubborn or exposed piping.
Identify Your Faucet Type and Shutoff Location
The homeowner should first distinguish between a frost‑free (freeze‑proof) spigot and a standard sillcock, since the maintenance steps differ.
Next, locating the indoor shutoff valve that controls the exterior line—often in a basement, crawlspace, or utility room—will allow the line to be drained.
Finally, check the exterior faucet for a visible vacuum breaker or backflow preventer, as those components affect how the fixture should be winterized.
Frost-free (freeze-proof) spigots vs. standard sillcocks
Homeowners should first determine whether an outside faucet is a frost-free (freeze-proof) spigot or a standard sillcock, since the two require different shutdown and drainage procedures.
Frost-free spigots have a long stem keeping water inside the heated wall; they drain toward the house when shut off.
Standard sillcocks extend through the wall and must be fully emptied or isolated to prevent freezing and damage.
Locating the indoor shutoff valve for the exterior faucet
Several simple steps let a homeowner locate the indoor shutoff valve that controls an exterior faucet.
Inspect the wall behind the faucet inside the basement, crawlspace or utility room for a short copper or PVC line leading to a single valve.
Check near the main water line, garage walls, and under sinks.
Label the valve for winter use and test closure.
How to tell if your faucet has an integrated vacuum breaker or backflow preventer
After locating the indoor shutoff valve, attention turns to the exterior spigot itself: many hose bibs include an integrated vacuum breaker or backflow preventer that affects how the line should be drained.
Inspect the spout for a small capped or ridged collar, angled port, or stamped label. If unclear, consult faucet documentation or photograph and ask a plumber to confirm before winterizing.
Step-by-Step Guide to Drain an Outside Faucet (Standard Sillcock)
The standard sillcock is drained using a few straightforward steps to prevent freezing and pipe damage.
First, the indoor shutoff is closed and the exterior spigot opened to relieve pressure. Hoses and attachments are removed and emptied, and any bleed holes or the packing nut are opened or loosened as needed.
Once water has drained, the spigot is insulated to finish the winterization.
Step 1 Turn off the indoor shutoff valve
Locate the indoor shutoff valve that controls the outdoor faucet and close it fully to stop water flow to the sillcock.
The valve is typically in a basement, crawlspace, or utility room near the exterior wall.
Confirm closure by feeling for firmness or using a wrench if needed.
Shutting this valve isolates the outdoor line so subsequent draining steps are effective.
Step 2 Open the outside faucet to relieve pressure
Open the outside faucet fully to release any remaining water and pressure from the sillcock.
After the indoor shutoff is closed, leaving the outdoor spigot open guarantees residual water drains out and air enters the line, preventing vacuum lock.
Observe until flow stops and only occasional drips occur.
This step reduces the chance of trapped water freezing inside the exterior valve assembly.
Step 3 Disconnect hoses and drain attachments
Disconnect hoses and remove attachments from the sillcock to prevent trapped water from freezing and to allow complete drainage.
Remove garden hoses, caps, spray nozzles, and backflow preventers. Coil hoses and store them indoors.
Inspect connections and threads for damage or corrosion. Shake fittings to expel residual water.
Leave the faucet open per prior step until the line is confirmed drained.
Step 4 Open bleed/weep holes or remove packing nut if applicable
If the sillcock design includes bleed or weep holes—or if access to the packing nut is possible—release the remaining water by carefully exposing these outlets; this relieves trapped water in the valve seat and stem area so the line can drain fully.
Use a small screwdriver or wrench, loosen gently, catch drips with a towel, then re-secure fittings slightly open to prevent pressure buildup.
Step 5 Insulate the spigot after draining
With the valve seat and stem area drained and any bleed holes or packing nut loosened to release trapped water, the next step is to protect the exposed spigot from freezing and weather.
Fit an insulated cover or foam sleeve over the spigot, secure with tape or zip ties, and add a weatherproof cap if available.
Inspect periodically for damage and replace insulation as needed.
Step-by-Step for Frost-Free Spigots and Specialized Fixtures
Frost-free spigots use an extended stem to keep the valve inside the heated wall, so winter preparation and draining differ from standard sillcocks.
The procedure outlines shutting the supply, operating the valve to release trapped water, and confirming the internal stem is clear.
Special attention is required for hose bibs with anti-siphon or backflow devices, which may need separate isolation and drainage steps.
How frost-free spigots work and when draining is different
Several common outdoor spigots are designed to keep the valve seat and water supply deeper inside the wall so that the exposed portion drains and is less likely to freeze; these units rely on a long stem and a shutoff inside the house rather than at the exterior handle.
Frost-free spigots minimize retained water but still require different draining considerations for long runs, backflow devices, and angled installations.
Draining steps for frost-free spigots
A clear, methodical sequence simplifies draining a frost-resistant spigot: shut the interior shutoff, open the exterior handle to relieve pressure, remove any attached hoses or backflow preventers, and then open the small bleed or vacuum-relief port (if present) to allow trapped water to escape from the long stem.
Verify flow has stopped, close bleed, restore interior valve slightly if recommended, and test.
Handling hose bibs with anti-siphon/backflow devices
Begin by identifying whether the exterior bib has an integrated anti-siphon/backflow device or an attached vacuum breaker, since the draining sequence differs slightly for each type; on integrated units, the bleed port and stem must be used, while attached devices often need removal before the bib can fully drain.
For integrated units, open bleed and drain; for attached breakers, remove, drain, reinstall or store indoors.
Winterization Alternatives and Additional Precautions
The section considers additional winterization options such as insulated faucet covers to reduce heat loss around external spigots.
It compares when to leave a faucet slightly open (to relieve pressure and prevent freezing in certain setups) versus fully closed and drained.
It also reviews using heat tape or pipe insulation on exposed exterior lines as an extra precaution.
Use of insulated faucet covers
Install insulated faucet covers to provide a simple, effective barrier against freezing for outdoor spigots. They fit over valves, trap warm air, and reduce ice formation.
Consider material, fit, and attachment method for reliability. Regularly inspect covers for damage and replace as needed.
- Choose durable foam or hard-shell
- Guarantee snug fit
- Secure with straps
- Inspect monthly
Leaving the faucet slightly open vs fully closed when to use each
Many homeowners must decide whether to leave an outdoor faucet slightly open or fully closed for winter protection, a choice that depends on plumbing type, local temperatures, and whether the line is drained.
If lines are fully drained and shut off inside, fully closed is appropriate.
If residual water remains or freeze risk exists, leaving the spigot slightly open allows expansion and pressure relief, reducing burst risk.
Adding heat tape or pipe insulation to exterior pipes
If leaving a spigot slightly open or fully closed does not eliminate freeze risk, adding heat tape or pipe insulation offers a proactive layer of protection for exterior pipes.
Apply self-regulating heat tape per manufacturer instructions, avoid overlapping, and seal connections.
Alternatively, slip foam or fiberglass insulation over exposed pipes and secure with tape.
Combine methods where exposure or wind increases freeze risk.
Common Problems and How to Troubleshoot Them
Common issues that can arise during winterizing include an outdoor faucet that won’t shut off or an indoor shutoff valve that is seized, persistent leaks after draining, and signs of hidden pipe damage following a freeze.
The section outlines steps to diagnose a stuck valve, methods to stop or contain leaks, and indicators of concealed pipe rupture.
Practical troubleshooting and when to call a professional are summarized.
Faucet won’t shut off or indoor shutoff valve is stuck
When an outside faucet fails to shut off or the indoor shutoff valve refuses to move, water can continue to flow and risks freezing, flooding, or damaging the home’s plumbing.
Inspect the indoor valve for mineral buildup, apply penetrating oil, and attempt gentle back-and-forth movement. If seized, isolate water at the main, drain lines, and call a plumber to replace the faulty valve safely.
Persistent leaks after draining
After isolating a seized indoor shutoff or replacing a faulty valve, some homeowners still encounter water seeping from the exterior spigot or its supply line despite efforts to drain the system.
Persistent leaks often stem from trapped water in angled sections, a damaged washer or packing, or corroded fittings.
Inspect joints, tighten or replace seals, and reopen danned low points to fully evacuate residual water.
Signs of hidden pipe damage after a freeze
Detecting hidden pipe damage following a freeze requires attention to subtle, atypical clues that indicate stress beyond visible cracks.
Homeowners may notice reduced water pressure, unexplained moisture in walls or ceilings, new stains, or intermittent discolored water.
Unusual sounds—hammering, gurgling—or sudden spikes in water bills also signal concealed leaks or microfractures.
Prompt inspection prevents escalation and costly repairs.
When to Repair or Replace an Outdoor Faucet
When an outdoor faucet shows recurring leaks, corrosion, or freeze damage, the choice between repairing, replacing, or upgrading to a frost‑free model depends on severity and long‑term value.
Cost factors—including parts, labor, and potential savings from reduced winter damage—should be weighed against the expected remaining lifespan of the existing spigot.
A brief comparison of repair versus replacement options will clarify the most cost‑effective path.
Deciding between repair, replacement, or upgrading to frost-free models
Evaluating whether to repair, replace, or upgrade an outdoor faucet hinges on its age, leak severity, freeze history, and the home’s long-term needs. Minor leaks or worn washers often justify a repair, while persistent drips, internal corrosion, or repeated freeze damage indicate replacement or consideration of a frost-free model.
Decisions should weigh installation complexity, accessibility, and reliability for winter protection.
Cost factors and expected lifespan
Considerations of cost and lifespan hinge on materials, installation complexity, and local climate: basic replacement spigots typically cost $20–$75 plus labor, while frost‑free models range from $100–$300 installed; labor rises if access requires opening walls or rerouting piping. Expected lifespan: brass spigots 10–20 years, frost‑free 20+ years; labor and freeze damage shorten service.
| Item | Lifespan/Cost |
|---|---|
| Basic spigot | $20–$75 / 10–20 yr |
| Frost‑free | $100–$300 / 20+ yr |
Seasonal Maintenance Checklist for Exterior Plumbing
A concise seasonal checklist helps guarantee exterior plumbing survives winter and returns to service safely.
Recommended items include:
- Shutoff and drain outdoor faucets.
- Insulate exposed pipes and fittings.
- Reopen and test systems after thaw.
- Inspect for leaks, cracks, and frost damage.
Pre-winter checklist items and timeline
As temperatures begin to fall, a concise pre-winter checklist helps guarantee exterior plumbing is drained, insulated, and secured before freezing weather arrives.
The timeline below prioritizes tasks by urgency and weather window so homeowners can prevent burst pipes and costly repairs.
Inspect and close outdoor valves, disconnect hoses, drain lines, install insulated covers, test shutoffs, seal gaps, and schedule repairs.
Complete this 2–4 weeks before first freeze.
Post-winter inspection and what to look for
After completing the pre-winter checklist and ensuring outdoor faucets and lines were drained and protected, homeowners should inspect exterior plumbing once temperatures remain consistently above freezing.
Check faucets, hose bibs, and backflow preventers for leaks, corrosion, or cracks.
Examine exposed pipes and insulation, repair damaged insulation, replace failed vacuum breakers, test water flow, and address any foundation or siding penetration issues promptly.
Safety Tips and Best Practices
When preparing an outdoor faucet for winter, attention to personal safety in cold and slippery conditions is essential, including proper clothing, footwear, and taking breaks to avoid frostbite.
Care should be taken to direct drained water to appropriate areas to prevent soil erosion, ice hazards on walkways, or contamination of storm drains.
Clear, practical steps reduce risk to the person performing the work and to the surrounding environment.
Personal safety when working in cold weather
Work in cold conditions requires deliberate attention to personal safety to prevent hypothermia, frostbite, slips, and other injuries.
The worker should layer insulated, moisture-wicking clothing, wear gloves and waterproof boots with good traction, and protect extremities with a hat and insulated gloves.
Take frequent warm-up breaks, stay hydrated, use a buddy system when possible, and monitor for signs of cold-related illness.
Environmental considerations (draining into appropriate areas)
Because runoff from draining an outdoor faucet can affect soil, plants, and local waterways, the person performing the task should direct discharge into appropriate areas that allow safe absorption or collection.
Choose vegetated, permeable ground away from foundations, wells, and storm drains. Avoid paved surfaces and sensitive plantings.
If contaminants exist, capture water in containers and dispose of it per local regulations to prevent pollution.
Resources and When to Hire a Plumber
When homeowners encounter uncertainty or complex issues while draining an outside faucet for winter, locating a licensed plumber is recommended.
They can search local trade associations, state licensing boards, or verified online reviews and should ask about license numbers, insurance, experience with outdoor plumbing, and written estimates.
Professional help is typically justified for frozen or burst pipes, inaccessible shutoffs, or repairs beyond basic shutoff and draining.
How to find a licensed plumber and what questions to ask
How should a homeowner locate a licensed plumber for winterizing an outdoor faucet?
Search state licensing boards, local trade associations, and verified review sites.
Request proof of license, insurance, and bonding.
Ask about winterizing experience, specific methods used, estimated cost, timeline, and warranty.
Confirm emergency availability and written estimates.
Compare two or three candidates before hiring.
Typical service scenarios that justify professional help
After identifying and vetting candidates, homeowners should recognize situations where hiring a plumber is the safer, more cost-effective option for winterizing an outdoor faucet.
Complex repairs, inaccessible shutoff valves, suspected frozen or burst piping, retrofit installations, or multifaucet winterization across large properties warrant professional intervention.
Emergency winter damage, code compliance needs, or lack of proper tools justify scheduling licensed plumbing services promptly.
Conclusion
Draining an outside faucet before winter can save homeowners from costly repairs and frozen pipes. Following the outlined steps and checking shutoffs guarantees water is emptied and lines protected. If corrosion or leaks appear, replacement may be wiser than patching. Keep tools ready, inspect annually, and call a licensed plumber for complex or inaccessible shutoffs. With preparation, winter won’t catch anyone off guard—better to be safe than sorry.