How to Install Outdoor Water Spigot: Step-by-Step Guide for DIY Backyard Plumbing
Installing an outdoor water spigot is a straightforward DIY project that enhances your backyard plumbing. To do this, you’ll need to plan the spigot’s location, check local codes and frost depth, and decide between a frost-free or standard sillcock based on your climate. Begin by shutting off and draining the water supply, then drill a hole for the supply line. Next, run or tap the line, attach the spigot with the appropriate fittings, seal any exterior openings, and test for leaks. Finally, insulate exposed lines for winter protection and secure any necessary permits. Detailed guidance on tools, fittings, and troubleshooting is available to assist you throughout the process.
How to Install an Outdoor Water Spigot: Quick Overview
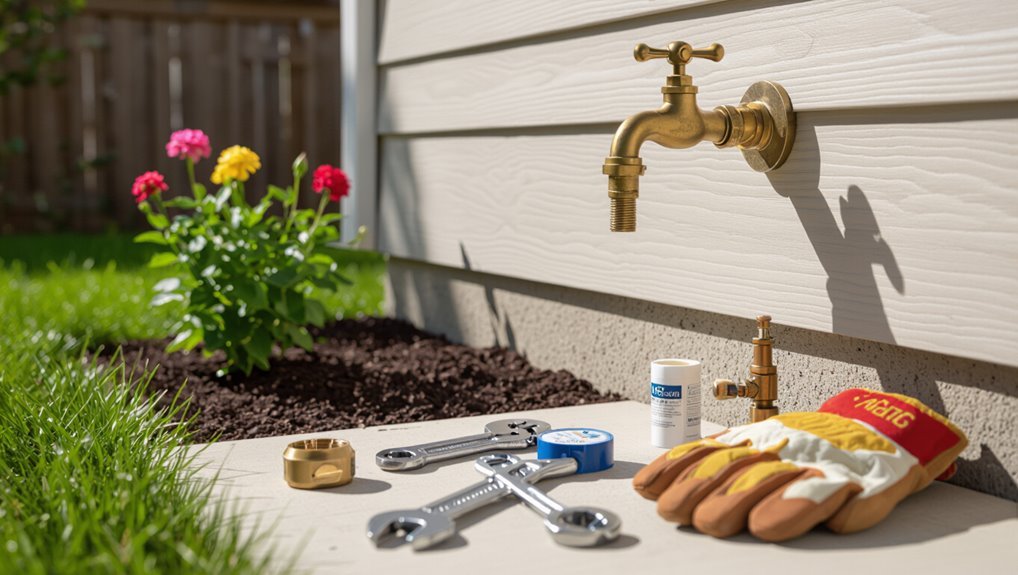
A spigot is an outdoor faucet used for garden hoses, irrigation, and washing tasks around the yard.
Installation can be performed by a confident homeowner with basic plumbing skills or by a professional for more complex connections or code compliance.
Typical installations take one to a few hours, require a few dozen dollars to a couple hundred depending on parts and labor, and need tools such as a drill, pipe cutter, wrenches, and sealant.
What a spigot is and common backyard uses
Outdoor water spigots, also called hose bibs or outdoor faucets, are threaded valves mounted on exterior walls or pipes to control garden hose flow.
They deliver water for irrigation, car washing, filling pools and pet bowls, and outdoor cleaning.
Homeowners often learn how to install outdoor water spigot for convenience, repair, or adding a new outlet without altering indoor plumbing.
Who can install it homeowner vs. professional
Although many homeowners can handle installing a simple spigot, the decision to DIY or hire a professional depends on skill level, local code, and site complexity.
Homeowners with basic plumbing experience and proper permits may install straightforward exterior faucets.
Complex scenarios—involving main-line work, freeze protection, or code-sensitive installations—are best handled by licensed plumbers to guarantee safety, compliance, and warranty protection.
Time, cost, and typical tools required
An installation typically takes between 2 and 6 hours for a straightforward sidewall or sillcock hookup. However, complex runs, freezing-proofing, or main-line tie-ins can extend the job to a full day or more.
Costs range from $50–$300 for DIY parts; professional labor raises total to $200–$800.
Typical tools: pipe cutter, wrench set, drill, drill bits, tape measure, Teflon tape, soldering or crimp kit, insulation.
Planning and Preparations Before You Start
Before any digging or fittings begin, the installer should verify local codes, permit requirements, and frost-line depth while locating the nearest supply line and shutoff valve.
They must choose an appropriate connection method—saddle valve, tapping the main, or adding a new branch—and compile a materials checklist.
Finally, basic safety precautions and recommended PPE should be identified and planned for.
Check local codes, permits, and frost-line considerations
Many municipalities set specific requirements for outdoor plumbing, so homeowners should confirm local building codes and permit rules before beginning work.
Check permit triggers, inspection schedules, and licensed-contractor requirements.
Verify frost-line depth to determine burial depth for pipes and required insulation or heat-trace.
Note setbacks, backflow-prevention mandates, and seasonal work restrictions.
Document approvals and keep permits on site during installation.
Locate the nearest water supply line and shutoff valve
With permits confirmed and frost-line requirements established, the next step is locating the nearest water supply line and shutoff valve.
A clear plan maps visible meter, main service, and branch lines; probe for buried pipe using a locator or gentle digging at utility access points.
Identify the nearest interior or exterior shutoff, verify operation, and mark locations for routing and future maintenance.
Decide between saddle valve, tapping a main, or adding a new branch
Evaluate three common methods for tapping the house water system—saddle valve, drilling/tapping the main line, or running a new branch—by weighing durability, leak risk, code compliance, and required skill.
Saddle valves are quick but prone to leaks and often disallowed.
Tapping the main requires precision and permits.
Adding a new branch is most reliable and code-friendly but demands more time, materials, and plumbing competence.
Materials and parts checklist
After choosing the tapping method, assemble a clear list of materials and parts to match that approach and local code.
Inventory includes fittings, pipe, valve, fasteners, and sealants specific to copper, PEX, or PVC runs.
Confirm quantities, sizes, and pressure ratings; include insulation and mounting hardware.
Verify compatibility with existing plumbing and local permit requirements.
- Pipe and fittings
- Outdoor faucet and valve
- Mounting, seals, insulation
Safety precautions and recommended PPE
Because working on exterior plumbing can involve pressurized water, sharp tools, and power equipment, a clear set of safety precautions and appropriate personal protective equipment (PPE) is essential before beginning work.
Gloves, safety glasses, ear protection, and sturdy footwear protect against cuts, debris, and noise.
Shut off and depressurize the water supply, verify utility lines, use grounded tools, and maintain a tidy workspace to prevent slips and accidents.
Types of Outdoor Spigots and Best Applications
Choosing the right outdoor spigot depends on climate, planned use, and local code requirements.
Frost-free (freeze‑proof) spigots are recommended for cold climates, while standard sillcocks and hose bibs remain common for mild areas despite some vulnerability to freezing.
Anti‑siphon/backflow‑prevention models protect potable water, and materials such as brass, stainless steel, or engineered plastics offer tradeoffs in durability, corrosion resistance, and cost.
Frost-free (freeze-proof) spigots when to use
When should a frost‑free (freeze‑proof) spigot be installed instead of a standard outdoor faucet?
A frost‑free spigot is appropriate where freezing temperatures risk pipe bursts, especially in climates with prolonged subfreezing periods, exposed exterior walls, or unheated crawlspaces.
Use when water lines cannot be reliably drained or insulated; select correct length to reach into heated interior and guarantee proper downward slope for drainage.
Standard sillcocks and hose bibs pros and cons
Standard sillcocks and hose bibs are the most common outdoor faucets and are valued for their simplicity, low cost, and ease of replacement; however, they differ in configuration and purpose, so homeowners should weigh durability, freeze vulnerability, and hose-attachment convenience when selecting one.
Standard sillcocks mount to exterior walls and are prone to freezing unless drained. Hose bibs are compact and convenient but often less durable; both require periodic maintenance.
Anti-siphon and backflow-prevention models
Installers and homeowners often prefer anti-siphon and backflow-prevention spigots for protecting potable water from contamination caused by pressure changes or submerged hoses.
These models incorporate vacuum breakers or backflow preventers to stop reverse flow. They are recommended where irrigation, chemical sprayers, or municipal codes demand protection.
Installation requires proper orientation and clearances; periodic inspection guarantees seals and check valves function reliably.
Material choices: brass, stainless, plastic
Material selection for outdoor spigots—brass, stainless steel, or plastic—affects durability, corrosion resistance, freeze performance, and cost.
Brass offers excellent durability, good freeze resistance when paired with proper installation, and broad compatibility.
Stainless steel resists corrosion and suits coastal or chemically harsh environments.
Plastic is lightweight, inexpensive, and freeze-prone; best for low-pressure, seasonal, or non-potable applications where cost matters.
Step-by-Step Installation for a Frost-Free Spigot (Exterior to Interior)
The following steps guide a frost-free spigot installation from the exterior face through to the indoor supply.
They cover marking the wall and selecting an appropriate mounting height, drilling through the wall and insulating the cavity, and routing the supply line to the spigot location.
Final tasks include making the indoor connection with the chosen fitting type (compression, sweat, or PEX) and securely mounting the spigot on the exterior.
Marking the wall and choosing the spigot height
Begin by standing at the planned exterior location and visualizing the spigot’s final position relative to landscaping, finished grade, and interior plumbing runs.
Measure height so the faucet sits above grade for hose access yet below freeze-line considerations. Transfer a level, plumb reference mark to the wall.
Note stud locations and interior pipe alignment, marking drill points and clearances for valves and mounting hardware.
Drilling through exterior wall and insulating cavity
Carefully drill a pilot hole through the exterior siding at the marked location, then enlarge it to the required diameter for the spigot pipe while keeping the bit plumb and centered.
Penetrate sheathing into the wall cavity, avoiding studs and wiring.
Remove insulation locally, clear debris, and inspect cavity for obstructions.
Restore insulation snugly around the pipe later without compressing it.
Running supply line to the mounting location
Run a continuous supply line from the interior shutoff to the drilled wall opening, positioning it to allow a gentle downward slope toward the spigot to prevent trapped water.
Thread the tubing through the wall, avoiding kinks and sharp bends. Secure the line with clips or straps inside the wall cavity, maintain slope, and leave extra length for final connection and fine positioning at the mounting flange.
Connecting to indoor supply (compression, sweat, or PEX fittings)
With the supply line positioned through the wall and trimmed to allow some slack at the mounting flange, the installer next joins it to the indoor water supply using the appropriate fitting type—compression, sweat (solder), or PEX—matching the home’s existing piping.
- For compression, tighten ferrule and nut while ensuring straight alignment.
- For sweat, clean, flux, and solder securely.
- For PEX, insert and crimp or use push-fit to verify leak-free connection.
Securing and mounting the spigot on the exterior
Position the frost-free spigot against the exterior wall, aligning its flange with the hole through which the supply line emerges, and verify the spigot’s backflow alignment and slope toward the house so water drains properly when shut off.
Fasten the flange with appropriate exterior screws into studs or masonry anchors. Confirm tight, even seating; torque screws evenly.
Attach handle and test mechanical operation before finishing.
Insulating, sealing, and caulking the penetration
Begin by inspecting the gap around the spigot penetration to determine its width, depth, and whether insulation, backer rod, or foam will be required to fill voids and prevent air and moisture infiltration.
Insert closed-cell foam or backer rod to within 1/4 inch of the wall surface, then apply exterior-grade silicone or polyurethane caulk evenly.
Tool the bead and wipe excess for a continuous weatherproof seal.
Testing for leaks and adjusting the packing nut
After the caulk has cured and any exterior sealants are inspected, water is turned back on at the main supply. The frost-free spigot is slowly opened to pressurize the line for leak testing.
The installer watches joints, valve stem, and packing area for drips. Tighten the packing nut incrementally until seepage stops, avoiding over-tightening.
Recheck after several cycles of opening and closing.
Step-by-Step Installation for a Standard Spigot (Shutoff Inside)
The section explains how to fit an indoor shutoff or vacuum breaker, mount the sillcock, and tie the spigot into the interior supply line.
It also covers connection methods and sealing to prevent leaks.
Finally, it outlines winterizing options and procedures for non-frost-free installations.
Installing an indoor shutoff or vacuum breaker
Install an indoor shutoff or vacuum breaker to protect the piping and allow winter shutoff without climbing under siding; this device isolates the outdoor spigot and prevents backflow or water freezing in the branch line.
The installer locates the branch, shuts main supply, cuts pipe, deburrs, fits the valve or vacuum breaker with appropriate connectors, fluxes/solders or tightens compression, then tests for leaks and operation.
Mounting the sillcock and connecting to supply
Positioning the sillcock and making the supply connection requires steady alignment and correct fittings to guarantee a leak-free, frost-resistant installation.
Mount the sillcock through the framed hole, secure flange to sheathing, and seal with exterior-grade caulk.
Connect to the indoor shutoff via copper, PEX, or threaded pipe using appropriate adapters and solder, crimp, or thread sealant.
Pressure-test and inspect for drips.
Winterizing options for non-frost-free installations
Once the sillcock is secured and the supply line tested, attention turns to protecting a non-frost‑free spigot from freezing temperatures.
Options include installing an interior shutoff valve and draining the exterior line, adding an insulated cover, applying heat‑tape rated for outdoor plumbing, or relocating the spigot higher inside the wall cavity.
Combine methods as needed and verify drainage before winter.
Installation Methods by Pipe Material
Installation techniques vary by pipe material and require matching fittings and tools for a secure spigot connection.
Copper joints are typically sweat-soldered.
CPVC/PVC use primer and solvent cement.
PEX employs crimp, cinch, or push-fit fittings.
Threaded iron or galvanized pipe is joined with tapered threads and appropriate sealant or tape.
Copper pipe connections (sweat soldering)
For copper pipe connections, sweat soldering provides a durable, leak-resistant joint by melting a lead-free solder into the annular space between cleaned pipe and fitting.
Proper technique requires flux application, thorough cleaning with emery cloth or a wire brush, heating evenly with a torch until solder flows, then cooling and wiping.
Pressure testing verifies integrity before burying or insulating the line.
CPVC and PVC connections (glue and primer)
Prepare CPVC and PVC joints by cutting squarely, deburring the pipe, and dry-fitting components to confirm alignment before bonding.
Apply primer to both pipe and fitting for PVC; CPVC primer or cleaner as manufacturer specifies.
Spread solvent cement evenly, push parts together with a quarter-turn, hold per cure time, and wipe excess.
Allow full curing before pressure testing or burying.
PEX connections (crimp, cinch, or push-fit)
After bonding PVC or CPVC, attention shifts to PEX systems, which use different fittings and joining methods.
PEX employs crimp rings with copper crimps, cinch (stab-in) clamps tightened with a special tool, or push-fit connectors for quick, tool-free joins.
Each method requires proper tubing cut, deburring, and inspection for leaks; follow manufacturer torque and spacing specifications for reliable outdoor spigot connections.
Threaded iron or galvanized pipe techniques
Installers commonly choose threaded iron or galvanized pipe for outdoor spigots where durability and mechanical strength are priorities. These systems rely on tapered male-female threads sealed with PTFE tape or pipe dope and tightened with pipe wrenches to create leak-resistant joints.
Corrosion-resistant fittings, correct taper engagement, and proper support prevent stress and leaks. Cut square, deburr, and test at operating pressure before burying or insulating.
Tools and Materials Checklist with Alternatives
The section outlines the tools and materials needed to install an outdoor water spigot, noting which items are essential and which are optional for faster work.
It also specifies recommended material grades and pipe sizes to guarantee a durable, code-compliant installation.
The list below organizes essentials, helpful extras, and sizing guidance for quick reference.
- Essential tools and consumables (wrench, pipe cutter, thread sealant).
- Optional tools that speed the job (torque wrench, heat gun, pipe freezing kit).
- Material grade and size recommendations (copper/PEX types, brass spigot, common pipe diameters).
Essential tools
Several basic tools and a few material options are required to install an outdoor water spigot safely and reliably.
Essential tools include an adjustable wrench, pipe wrench, tubing cutter or hacksaw, pipe deburring tool, tape measure, screwdriver, drill with bits, and pipe thread sealant or PTFE tape.
Basic fittings: copper, PEX, or threaded brass adapters; pipe clamps and insulation complete the essentials.
Optional tools that speed the job
Using a few optional tools can cut installation time and reduce frustration without changing the basic parts required. A cordless drill with hole saw, battery-powered tubing cutter, and compact reciprocating saw speed cutting and access.
A propane torch (for sweating copper), portable work light, magnetic bit set, and tubing deburring tool improve quality and efficiency. Choose durable, familiar tools to save time.
Material grade and size recommendations
Plumbing longevity depends on selecting appropriate materials and sizes for outdoor spigot installations: choose frost-resistant brass or stainless-steel spigots, Type K or L copper (or ¾–1″ PEX for easier bends) for supply lines, and schedule 40 PVC for non-pressurized venting or conduit runs.
Threaded fittings should match pipe material; use copper-to-PEX adapters where needed.
Prefer 3/4″ mains for sufficient flow; insulate exposed lines.
Common Problems During Installation and How to Fix Them
Common installation problems include leaks at fittings, spigots that freeze or drain poorly, low post‑hookup water pressure, and wall damage from improper sealing.
Diagnosis begins with inspecting connections, testing flow, and checking the freeze/drain path and wall penetration.
Fixes range from tightening or redoing joints and adding insulation or proper slopes to correcting pressure sources and resealing or repairing the wall.
Leaks at connections diagnosis and repair
Identify leaks at connections early to prevent water damage and wasted supply: they most often appear where the spigot threads into fittings, at compression joints, or where hoses attach.
Inspect joints, tighten fittings to spec, and replace damaged tape or washers.
For pinhole leaks, cut out and rejoin pipe or replace the fitting.
Pressure-test after repair and monitor for recurring seepage.
Frozen or poorly draining spigots prevention
After addressing connection leaks, attention should shift to preventing spigots from freezing or retaining water, since trapped moisture can rupture pipes or cause persistent drips.
Use frost-free sillcocks, slope supply lines slightly toward the valve, install insulated covers, and shutoff/bleed exterior lines before winter.
Guarantee proper drainage by avoiding low spots and testing shutdowns to confirm complete water evacuation.
Low water pressure after hookup troubleshooting
Troubleshooting low water pressure after hooking up an outdoor spigot requires a methodical inspection of the supply and fittings to pinpoint the cause.
Check shutoff valves, meter and main supply pressure, and hose bib connections for partial closures or kinks.
Inspect for debris in the spigot, trapped air, and undersized piping.
Replace faulty valves, clear blockages, and verify adequate supply pressure.
Wall damage or improper sealing remediation
Repairing wall damage and ensuring a watertight seal around an outdoor spigot requires careful assessment of the penetration, surrounding materials, and fasteners to prevent leaks, rot, and pest entry.
Damaged siding or sheathing should be replaced; flashing and backing installed. Use exterior-grade sealant and a corrosion-resistant escutcheon.
Confirm proper slope, test for leaks, and trim excess sealant for a neat, durable finish.
Winterization, Maintenance, and Longevity Tips
Proper winterization and regular maintenance preserve spigot function and prevent freeze damage.
Recommended steps include seasonal shutoff and draining, installing insulating covers or heat tape where needed, and following a simple routine maintenance schedule.
Guidance should also cover criteria for repair versus replacement to maximize longevity and avoid repeated failures.
Seasonal shutoff and draining procedure
Shut off the indoor valve and open the outdoor spigot to drain any remaining water before freezing temperatures arrive.
Then close the spigot and open any downstream bleed valves.
Drain and remove hoses, flush lines briefly, and leave spigot slightly open if frost-free design recommends.
Inspect connections for leaks, tighten as needed, and document shutoff date for spring reactivation.
Using insulating covers and heat tape
Install insulating covers and, where appropriate, heat tape to protect outdoor spigots from freezing and extend their service life.
Choose foam or hard-shell covers sized to fit, secure them snugly, and verify insulation ratings.
Apply UL-approved self-regulating heat tape along exposed pipe runs, following manufacturer instructions and local codes.
Use a ground-fault protected power source and test for safe operation before winter.
Routine maintenance schedule
Prepare a simple, seasonal maintenance schedule that covers winterization, periodic inspections, and routine repairs to prolong spigot life and prevent freeze damage.
Inspect fittings and seals each spring and fall. Lubricate valves. Drain and shut off supply before freezing temperatures.
Test flow and check for leaks monthly during active season. Replace worn washers promptly.
Document dates to track interventions and anticipate parts replacement.
When to replace vs. repair
Following the seasonal checklist, homeowners should weigh repair versus replacement when a spigot shows wear, recurring leaks, or poor performance.
Minor leaks, loose packing, or frozen gasket damage often justify repair.
Corroded bodies, repeated failures, obsolete valves, or persistent pressure loss indicate replacement for reliability and efficiency.
Consider material, labor cost, and anticipated longevity when deciding.
Cost Estimates, Permits, and When to Hire a Plumber
Typical DIY costs are summarized by materials (pipe, spigot, fittings), tools rental, and any trenching or insulation supplies.
Permit requirements and a basic inspection checklist are noted when work ties into the main water line, crosses property setbacks, or involves backflow prevention.
A licensed plumber is recommended for complex connections, persistent leaks, or when local codes or lack of experience make compliance uncertain.
Typical DIY cost breakdown
A basic DIY outdoor spigot installation generally runs between $50 and $300 in materials, with the final cost driven by pipe type, length, fittings, and any required trenching or frost protection.
Homeowners should factor permits, potential fixture upgrades, and the value of their time into that estimate.
Typical expenses:
- spigot ($10–40)
- pipe and fittings ($20–150)
- valves/insulation ($10–60)
- tools/rental ($0–50)
- sealant/fasteners ($5–20)
Permit triggers and inspection checklist
Check local building codes before cutting any pipes, since permit requirements commonly depend on whether the work ties into the house supply, alters pressurized piping, or involves new underground lines that cross property or utility easements. Permit triggers include new connections, trenching, and backflow devices. Inspectors verify seals, slope, and isolation.
| Trigger | Typical Permit | Inspection Focus |
|---|---|---|
| New tap | Yes | Leak test |
| Trench | Often | Depth/slope |
| Backflow | Yes | Device install |
Signs you should call a licensed plumber
Recognize when a project exceeds basic DIY scope by watching for permit triggers, complex fittings, or uncertain cost projections that suggest hiring a licensed plumber.
Call a professional if the job involves main shutoff modifications, soldering gas-adjacent lines, sewage proximity, inaccessible freeze-prone runs, or unclear code requirements.
Also hire when estimates exceed budget comfort, when inspections are mandated, or when prior repairs repeatedly fail.
Helpful Project Examples and Layout Options
Typical installations range from a single spigot placed near hose storage to multiple spigots creating split exterior zones for different yard areas.
Examples also include tying an outdoor spigot into existing irrigation or sprinkler systems for shared control and winterization.
Each layout carries different routing, valve, and control considerations that affect cost and complexity.
Single spigot near hose storage
Placing a single spigot near hose storage simplifies access and minimizes hose run length, making watering tasks faster and reducing potential tripping hazards.
This layout suits small yards or focused garden beds. It reduces material and installation time, concentrates maintenance at one point, and eases winterization.
Ideal placement is on an exterior wall near the shed or hose reel for efficient reach and protection.
Multiple spigots or split exterior zones
When outdoor needs extend beyond a single hose, homeowners often divide the exterior into zones served by multiple spigots to improve reach, water pressure management, and seasonal control.
Typical layouts place spigots near garden beds, patios, and outbuildings, each fed by branch lines with isolation valves.
This simplifies repairs, limits winterization to affected zones, and balances flow for simultaneous outdoor tasks.
Integrating spigot into irrigation or sprinkler systems
Integrating a spigot into an irrigation or sprinkler system requires coordinating supply lines, valves, and backflow protection so the outdoor faucet can serve hand-watering, hose connections, or auxiliary zones without compromising automated irrigation performance.
Designers recommend teeing from the main manifold with a dedicated ball valve, isolation for winterization, and a pressure-reducing or check valve to prevent system disturbance and contamination.
Useful References and Further Reading
A concise set of references helps confirm specifications and guarantee compliance when installing an outdoor water spigot.
Recommended resources include manufacturer instructions and model comparisons, local building code repositories, and video tutorials with step-by-step demonstrations.
Readers are encouraged to consult these sources before beginning work.
- Manufacturer instructions and model comparisons
- Local building code resources
- Video tutorials and step-demonstrations
Manufacturer instructions and model comparisons
Although manufacturer instructions vary in format and detail, they are the primary source for correct parts, clear step sequences, and safety requirements for a given spigot model.
Technical sheets, torque specs, and warranty terms should guide selection and installation.
Comparative charts highlight materials, frost-proof features, flow rates, and mounting styles.
Cross-referencing models reduces mismatches and guarantees compatible fittings and longevity.
Local building code resources
Manufacturer documentation and model comparisons inform the technical choices for a spigot, but installers must also verify compliance with local building codes before beginning work.
Consult municipal building department websites, plumbing code excerpts (IPC, UPC), and permit guides for frost line, backflow prevention, and installation clearances.
Contact local inspectors for interpretations, downloadable forms, and fee schedules to guarantee inspections and permits are properly obtained.
Video tutorials and step-demonstrations
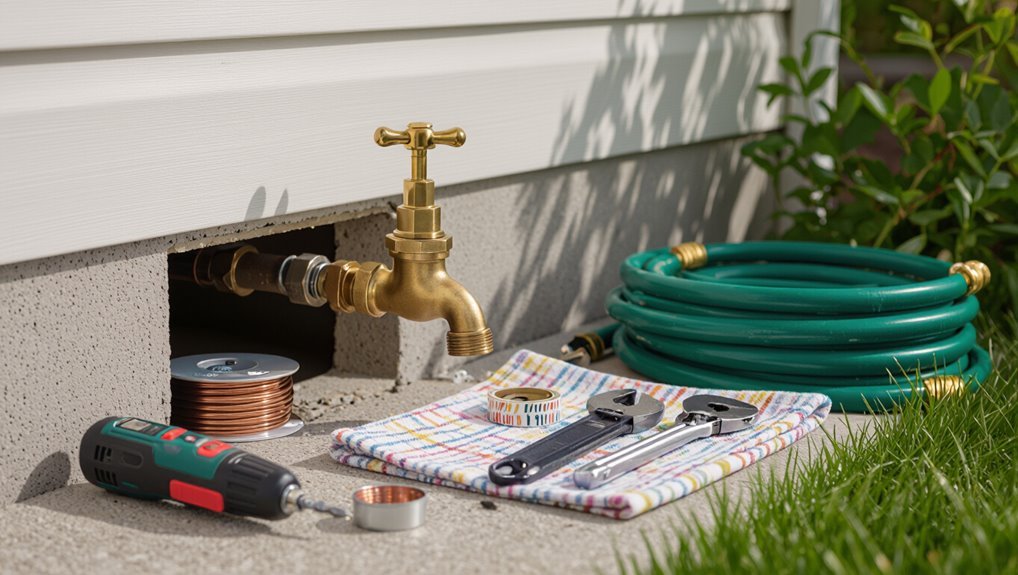
Consult instructional videos and step-by-step demonstrations to translate written guidance into clear, visual procedures for installing an outdoor spigot.
A curated selection of short clips, full walkthroughs, and time-lapse builds helps clarify tool use, soldering or compression fittings, frost-proof installation, and trenching.
Verify creators’ credentials, pause for technique review, and cross-reference with local code and manufacturer instructions before proceeding.
Conclusion
In the end, the backyard spigot saga concludes like a Shakespearean plumbing comedy: the frost-free hero stands tall, the indoor-shutoff plot twist saves the pipes, and the DIY protagonist, muffled in manuals, waves a wrench like a scepter. Neighbors applaud with garden hoses while permits file themselves politely. Practical tips and occasional plumber cameos guarantee water flows where planned and chaos remains decorative, not catastrophic — a tidy, wet tableau of sensible backyard sovereignty.