How to Fix a Natural Gas Leak Safely: Step-by-Step Emergency Guide
If you suspect a natural gas leak, prioritize safety by evacuating the area immediately. Shut off the gas at the meter, ensure proper ventilation, and avoid any sparks or electronics. From a safe distance, contact your gas company or emergency services, and keep others away until professionals arrive. While minor issues with appliance connectors can be handled by knowledgeable homeowners after confirming no gas flow, any significant or underground damage requires licensed technicians. For a comprehensive guide on inspection, repair steps, and post-repair monitoring, continue reading.
Recognizing a Natural Gas Leak Immediately
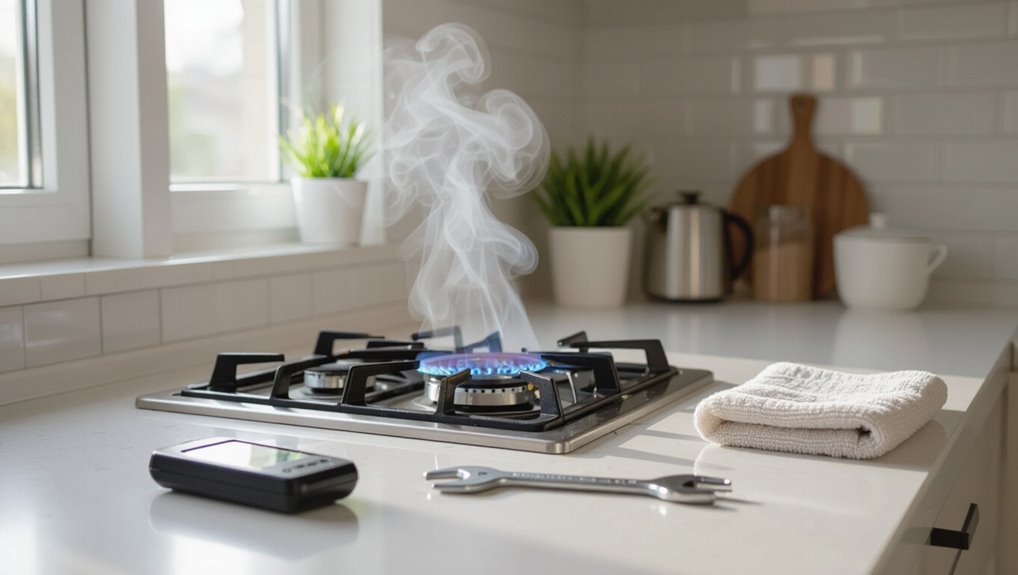
A reader should learn the common signs of a natural gas leak—the rotten-egg odor, hissing or whistling sounds near appliances or pipes, and sudden headache, nausea, or dizziness.
Guidance on using a handheld gas detector or vetted smartphone apps safely can help verify a leak without creating ignition risks.
Clear criteria for immediate evacuation versus cautious, limited investigation will determine whether to leave at once or take one controlled step to confirm the source.
Common signs of a gas leak (smell, sound, physical symptoms)
Many people notice a gas leak through one or more clear signs: the distinctive rotten-egg odor added to natural gas, a hissing or whistling sound near appliances or pipelines, and sudden physical symptoms such as dizziness, headache, nausea, or difficulty breathing.
Observers should promptly leave the area, avoid ignition sources, notify emergency services or the gas utility, and learn how to fix a natural gas leak safely.
How to use a gas detector and smartphone apps safely
Use a handheld gas detector or a smartphone app paired with a compatible sensor to confirm suspicions swiftly and accurately.
The user should verify device calibration, check sensor expiration, and follow manufacturer safety thresholds.
Maintain distance while scanning from low to high points, avoid open flames, and record readings.
If sensors fail or readings are inconclusive, treat the situation as hazardous and seek professional assessment.
When to evacuate versus when to investigate further
Recognizing when to evacuate versus when it is safe to investigate hinges on observable signs and the level of certainty about a gas presence. Immediate evacuation is required for strong odor, hissing, physical symptoms, or multiple alarms; limited, cautious checks may follow faint smells or single detector alerts if no source is found.
| Evacuate signs | Investigate cautiously |
|---|---|
| Strong odor/hiss | Faint smell |
| Physical symptoms | Single alarm |
Immediate Safety Actions to Take Before Repair
Before attempting repairs, the responder should perform an orderly emergency shutdown of the gas supply and confirm gas flow has stopped.
They should ventilate the area by opening windows and doors and using non-sparking fans while strictly avoiding any electrical switches, open flames, or devices that could create a spark.
Occupants must be notified and evacuated to a safe perimeter until the scene is secured and professionals arrive.
Step-by-step emergency shutdown of gas supply
One clear, immediate objective is to stop the gas flow to the affected area to eliminate ignition sources and reduce accumulation risk. Personnel locate the main valve, shut it off using appropriate tools, and confirm closure. Notify the utility, evacuate if needed, and await certified technicians before restoration.
| Step | Action | Responsible |
|---|---|---|
| 1 | Locate valve | Occupant |
| 2 | Shut off | Trained person |
| 3 | Notify utility | Occupant |
| 4 | Await tech | Everyone |
Ventilating the area safely (windows, doors, fans)
Although immediate shutdown of the supply reduces risk, ventilating the space remains essential to disperse any remaining gas.
Occupants should open windows and exterior doors to create cross-ventilation while avoiding electrical switches and open flames.
Use battery-powered or non-sparking fans positioned to draw fresh air in and push contaminated air out.
Maintain ventilation until odor and concentration visibly subside and professionals confirm safety.
Electrical and ignition source precautions (what to avoid)
Cut power and eliminate potential ignition sources immediately to prevent sparks that could ignite accumulated gas. The responder should avoid using phones, light switches, appliances, or pilot lights. Do not operate electronics or motors. Only use battery-powered flashlights if necessary. Follow utility shutoff procedures and await professionals before restoring power.
| Avoid | Examples |
|---|---|
| Electronics | Phones, switches |
| Flames | Candles, pilot lights |
Notifying occupants and establishing a safe perimeter
Alert occupants immediately and direct them away from the hazard zone to prevent exposure and reduce the risk of ignition.
A responsible person secures doors and windows, instructs evacuation routes, and accounts for everyone.
They establish a clear perimeter using visible markers or tape, keep bystanders and vehicles out, and communicate that reentry is prohibited until professionals confirm the area safe.
Contacting Professionals and Authorities
When a gas odor is confirmed or an alarm sounds, the gas company or emergency services should be contacted immediately.
Callers should give responders the exact address, description of the smell or leak, presence of occupants or ignition sources, and any actions already taken.
After calling, occupants should evacuate upwind to a safe distance and wait for professionals to arrive rather than attempting repairs.
When to call the gas company or emergency services
Recognize signs that require immediate professional involvement and act without delay: a strong rotten-egg odor, persistent hissing, visible gas escaping, dizziness or nausea among occupants, or any pilot lights that repeatedly go out.
Contact the gas company or emergency services immediately. Evacuate the area, avoid using phones or switches indoors, and wait at a safe distance for trained responders to assess and secure the scene.
What information to provide to first responders
After evacuating and notifying the utility company or emergency services, callers should be prepared to give clear, concise information to responders.
Provide the exact address and nearest cross streets, describe smell or visible gas, indicate whether anyone is injured or still inside, note pilot lights or appliances affected, report recent work on lines, and supply contact name and phone number for follow-up.
How long to wait for professionals and what to do while waiting
If emergency responders or the gas utility have been contacted, occupants should remain at a safe distance until qualified personnel arrive and declare the area secure; typical arrival times vary by location and urgency but can range from minutes for confirmed leaks to an hour or more for lower-priority calls, so callers must be prepared to wait. Stay upwind, avoid ignition sources, and account for everyone.
| Action | Priority | Notes |
|---|---|---|
| Evacuate | High | Move to safe distance |
| Notify neighbors | Medium | Warn nearby dwellings |
| Await responders | Ongoing | Do not reenter property |
Assessing the Leak Source (Safe Inspection Procedures)
A safe inspection begins with checking the most common leak locations—appliances, exposed pipes, fittings, and the meter—while keeping ignition sources off and the area ventilated.
Technicians and trained homeowners can use soapy water, handheld gas detectors, and careful visual or olfactory observation to pinpoint escaping gas.
Any fitting or pipe with active bubbling, a strong odor, or detector confirmation that cannot be reliably tightened or sealed should be replaced immediately rather than temporarily repaired.
Identifying common leak locations (appliances, pipes, fittings, meters)
Detecting where natural gas is escaping requires a methodical inspection of appliances, exposed piping, fittings, and the meter, prioritizing safety and minimizing disturbance.
Inspect connections at stoves, water heaters, furnaces, and dryers; examine visible pipe runs, threaded joints, valve stems, and regulator areas; check meter housings and service lines for corrosion, damage, or loose components; note unusual odors or hissing without touching.
Using soapy water, leak detectors, and visual signs for diagnosis
Begin by visually scanning the area for bubbling, frost, damaged insulation, or displaced fittings.
Apply a soapy water solution to joints and valves; observe for steady bubbles indicating a leak.
Use a handheld combustible gas detector to confirm and localize readings.
Note odor intensity and air movement patterns.
Record findings, avoid ignition sources, and evacuate if readings escalate or bubbles persist.
When a leak requires immediate replacement versus repair
When should a compromised section be replaced outright rather than patched?
A full replacement is required for corroded pipes with thinning walls, jagged or split service lines, recurring leaks after multiple repairs, damage from impact or ground movement, and fittings beyond accessible joints.
Replace when manufacturer limits, age-related degradation, or safety codes recommend replacement; temporary patches should be emergency, not permanent, fixes.
Step-by-Step Safe Repair Actions for Homeowners (Small Leaks Only)
The homeowner should first assemble required tools and protective equipment, then shut off the gas supply and confirm zero flow before any work begins.
For small leaks, replacing or tightening fittings and appliance connectors using approved sealants and gas-rated thread compounds is appropriate.
After repairs, the line must be pressure tested and checked with a reliable leak detector before restoring service.
Required tools and protective equipment
A small toolkit and appropriate personal protective equipment (PPE) are essential before attempting to address a minor natural gas leak, ensuring safety and minimizing risk.
Required items include an adjustable wrench, pipe sealant or approved repair tape, non-sparking tools, flashlight, and leak-detection spray or soapy water.
PPE: gloves, eye protection, and a respirator rated for organic vapors.
Keep a phone nearby for emergencies.
Turning off gas and verifying zero flow
Before attempting any repair, the homeowner must shut off the gas supply at the appliance and then at the service shutoff or meter valve to isolate the affected line. After waiting, they open a downstream appliance valve to confirm no flow and check with a leak detector or soapy water. If zero flow is verified, label the valve and ventilate the area.
| Action | Reason |
|---|---|
| Shut appliance valve | Isolate source |
| Close meter valve | Cut supply |
| Wait and test | Confirm zero flow |
| Label valve | Prevent accidental reopening |
Replacing or tightening fittings and appliance connectors
Begin by confirming that the gas supply remains shut and the work area is ventilated; only then proceed to inspect fittings and appliance connectors for visible damage, loose connections, or corrosion.
If threads or ferrules are intact, carefully tighten connections with appropriate wrenches without over-torquing.
Replace visibly damaged connectors with approved, rated parts.
After repair, restore ventilation and perform a leak check before restoring service.
Applying appropriate sealants and thread compounds
Consult the appliance manual and local codes to confirm which sealants and thread compounds are approved for use on natural gas fittings, then select a product specifically rated for gas service (pipe dope labeled for natural gas or an approved anaerobic thread sealant).
Apply per manufacturer instructions: clean threads, remove old compound, apply an even thin layer, assemble fittings fully, wipe excess, and allow recommended cure time before restoring normal operation.
Pressure testing and leak-checking after repairs
After applying approved sealants and allowing the manufacturer‑specified cure time, the repaired section must be pressure tested and checked for leaks to verify integrity before normal use is restored.
A low‑pressure gauge or manometer is used; introduce inert test gas or air within safe limits.
Monitor for pressure decay and inspect joints with a soapy solution.
If any leak persists, depressurize and rework the repair.
When to Hire a Licensed Professional
If the leak involves major line damage, underground piping, or any condition beyond basic homeowner repairs, a licensed professional should be called immediately.
Homeowners are advised to confirm a contractor’s license, insurance, and relevant certifications before work begins.
The professional’s response time, emergency service fees, and typical repair cost ranges should be discussed up front to avoid surprises.
Repair scenarios beyond homeowner scope (major line damage, underground leaks)
Recognize situations that exceed a homeowner’s skills—extensive damage to a gas main, suspected leaks in underground service lines, or any leak accompanied by soil disturbance, persistent hissing, or multiple appliance failures—because these pose high safety and regulatory risks and require a licensed gas professional with specialized equipment and permits.
| Scenario | Action |
|---|---|
| Major main damage | Evacuate, call utility |
| Underground leak | Secure area, await pros |
How to verify licenses, insurance, and certifications
Situations that exceed a homeowner’s abilities should prompt immediate contact with professionals.
When that call is made, it is important to confirm the contractor’s credentials before any work begins.
Verify state plumbing/gas licenses, ask for proof of current liability and workers’ compensation insurance, confirm certifications for gas appliance/service, check references and complaint history with regulators, and obtain a written scope and warranty before work starts.
Expected cost ranges and emergency service considerations
Cost is a key factor in deciding whether to call a licensed professional for a suspected gas leak: simple diagnostics and minor repairs often fall in the low-to-mid hundreds of dollars, while pipe replacement, meter work, or appliance reconnections can range from several hundred to several thousand depending on scope and regional labor rates.
Emergency response often carries higher after-hours fees; prioritize safety, immediate shutdown, and utility notification before scheduling repairs.
Post-Repair Safety Verification and Recommissioning
After repairs, a certified technician performs final leak tests and compares readings to accepted thresholds to confirm the integrity of the system.
Only when tests are satisfactory are procedures followed to safely restore gas service and relight appliances according to manufacturer and local code instructions.
A defined monitoring period follows, during which occupants and technicians watch for signs of escaping gas, pilot outages, odor persistence, or unusual appliance behavior.
Final leak tests and acceptable thresholds
Begin final leak testing only once repairs are complete, fittings torqued, and system components restored to serviceable condition.
Use calibrated electronic detectors and soap solution to verify zero detectable leak rate at tested joints.
Confirm pressure holds at specified test duration and allowable loss thresholds per local code (typically negligible or specified ppm/psi).
Document readings, inspector sign-off, and corrective actions if limits exceeded.
Steps to safely restore gas service and relight appliances
With final leak tests passed and documentation complete, restoration of gas service proceeds under a controlled, stepwise protocol to verify system integrity and appliance safety. Technicians open supply slowly, check manifold pressures, inspect appliances for proper combustion, and relight pilot lights per manufacturer procedures. Occupant education completed; paperwork signed.
| Step | Action | Verification |
|---|---|---|
| 1 | Open main valve | Meter/pressure |
| 2 | Inspect lines | Visual/scan |
| 3 | Relight appliances | Flame check |
| 4 | Document | Sign-off |
Monitoring period after repair and what to watch for
A defined monitoring period follows recommissioning to confirm repair stability and detect delayed leaks or equipment issues.
During 24–72 hours, technicians and occupants should check for odor, listen for hissing, re-scan with calibrated gas detectors, verify appliance combustion quality, monitor pressure gauges, and inspect fittings and vents.
Any anomaly prompts immediate shutoff, isolation, and professional re-inspection before normal use resumes.
Prevention and Maintenance to Avoid Future Leaks
A concise prevention plan emphasizes a routine inspection checklist for homeowners to catch wear, corrosion, or loose fittings before they become hazards.
Proper installation and regular appliance maintenance, performed by qualified technicians, reduce the risk of leaks from connectors, valves, and burners.
Attention to seasonal and environmental factors—such as ground movement, freezing temperatures, and pest activity—further guides targeted upkeep to prevent future failures.
Routine inspection checklist for homeowners
Several simple, regular checks can greatly reduce the risk of a natural gas leak in a home.
A concise routine helps spot issues early and prompts professional service when needed.
- Inspect visible gas lines for corrosion, dents, or damage.
- Check appliance connections and pilot lights for unusual behavior.
- Verify carbon monoxide and gas detectors are functional and batteries fresh.
- Confirm ventilation around gas appliances is unobstructed.
Proper installation and appliance maintenance tips
Guarantee correct installation and routine maintenance of gas appliances to minimize leak risk and prolong equipment life. A certified technician should install, use approved parts, follow manufacturer guidelines, verify venting, and test connections. Schedule annual inspections, replace worn components, and keep records. Simple homeowner checks complement professional service; never attempt major repairs without credentials.
| Task | Frequency | Responsible |
|---|---|---|
| Inspection | Annually | Technician |
| Filter/Seal | As needed | Technician |
| Recordkeeping | Ongoing | Homeowner |
Seasonal and environmental factors that increase leak risk
Cold weather, temperature swings, and seasonal humidity shifts can each raise the likelihood of natural gas leaks by stressing piping, seals, and fittings.
Frost, ground heave, and thermal contraction can loosen joints; spring thaw and heavy rain can corrode buried lines or expose damage.
Regular inspections timed with season changes, moisture control, prompt repair of weather-compromised components, and protective coatings reduce leak risk.
Health Risks and First Aid for Gas Exposure
The section outlines key symptoms of carbon monoxide and natural gas exposure, including headache, dizziness, nausea, confusion, and breathing difficulty.
It then summarizes immediate first aid steps—evacuate to fresh air, call emergency services, administer CPR if needed—and specifies when professional medical attention is required.
Finally, it recommends timelines for follow-up evaluation and long-term monitoring for persistent respiratory, neurological, or cardiac effects.
Symptoms of carbon monoxide and natural gas exposure
When exposed to carbon monoxide or a natural gas leak, individuals may experience a range of symptoms that can escalate quickly and require immediate attention.
Symptoms include headache, dizziness, nausea, weakness, confusion, impaired coordination, and shortness of breath.
Natural gas exposure may also cause eye and throat irritation, coughing, and a distinct rotten-egg odor; prolonged exposure can lead to loss of consciousness and death.
Immediate first aid steps and when to seek medical attention
Move affected persons to fresh air immediately and guarantee the scene is safe before administering aid.
Check responsiveness, call emergency services for unconscious, confused, or difficulty breathing.
Provide CPR if trained for absent pulse.
Loosen tight clothing, keep warm and calm.
If exposure was brief and symptoms are mild, seek medical evaluation; any worsening, chest pain, persistent headache, or neurological signs require urgent hospital assessment.
Long-term health monitoring recommendations
Following immediate care and emergency evaluation, ongoing health surveillance should be arranged to detect delayed or chronic effects from natural gas exposure.
Occupational or primary care follow-up at 1, 6, and 12 months is recommended, with respiratory, neurological, and psychological assessments.
Pulmonary function tests, cognitive screening, and mental health evaluation should be documented.
Any new or worsening symptoms warrant prompt re-evaluation and specialist referral.
Legal, Insurance, and Record-Keeping Considerations
Legal and regulatory obligations require prompt notification of utility providers and local authorities when a natural gas leak is suspected or confirmed.
Detailed records of inspections, repairs, and communications protect insurance claims and support property resale disclosures.
Clear understanding of liability and of tenant‑landlord responsibilities helps determine who must arrange and pay for remediation.
Reporting requirements to utility companies and local authorities
Notify the utility company and local authorities immediately when a natural gas leak is detected, as many jurisdictions mandate prompt reporting to expedite shutdowns, protect public safety, and create an official record.
Provide precise location, odor description, meter readings, and any symptoms.
Cooperate with responders, follow evacuation or shelter-in-place instructions, and retain incident numbers and contact names for follow-up and regulatory compliance.
Documenting repairs for insurance and resale purposes
Any repairs and related decisions should be thoroughly documented to protect insurance claims and future property transactions.
Records should include dates, contractor names, licenses, detailed invoices, before-and-after photos, and official gas-company or inspector reports.
Store originals and digital backups, note warranty terms, and obtain signed completion certificates.
Clear documentation expedites claim processing and reassures prospective buyers about safety and compliance.
Liability issues and tenant-landlord responsibilities
Documented repairs and official inspection reports also serve as primary evidence when determining responsibility after a gas-related incident, so owners and tenants should understand how liability is allocated.
Liability hinges on maintenance obligations, lease terms, and negligence.
Recommended actions:
- Preserve invoices and inspection reports.
- Notify landlord/tenant and utility promptly.
- Review lease and local statutes.
- Notify insurer and document communications.
Common Mistakes to Avoid During a Gas Leak Emergency
Common errors in a gas leak emergency include taking unsafe actions that can ignite gas, such as operating electrical switches or using open flames.
Misdiagnosing the source and relying on unapproved DIY fixes can worsen the situation and create hidden hazards.
Delaying professional help or improperly re‑commissioning gas systems after a repair increases the risk of leaks and explosions.
Unsafe actions that can trigger explosions
Avoid actions that can create sparks or flames, as even a small ignition source can trigger an explosion in a gas-filled space.
Individuals should not operate electrical switches, use lighters, smoke, or start engines.
Avoid using phones or doorbells indoors.
Do not attempt repairs without shutting off supply and evacuating.
Prioritize ventilating and contacting professionals immediately.
Misdiagnosis and reliance on unapproved fixes
Mistaking the source or severity of a gas leak and relying on unapproved fixes can transform a manageable problem into a deadly emergency.
Individuals may misidentify odorless leaks, tighten the wrong fittings, or apply makeshift seals that fail.
Only certified procedures and equipment should be used; unauthorized repairs, DIY patches, and cosmetic remedies risk escalation, toxin exposure, and catastrophic failure before qualified responders arrive.
Delaying professional help and improper re-commissioning
Waiting to call professionals or attempting to re-commission appliances without confirmation that the gas supply is secure multiplies danger and complicates repairs.
Delays increase explosion and poisoning risk; DIY restarts can mask ongoing leaks and void warranties.
Immediate evacuation, contacting emergency responders and the gas utility, and awaiting certified inspection and safe re-commissioning prevent harm and guarantee compliance with codes and insurance requirements.
Quick Reference Checklist for a Natural Gas Leak Emergency
Any person who suspects a natural gas leak should follow a concise, prioritized checklist to minimize risk and enable a swift emergency response.
- Evacuate immediately, avoiding sparks, phones, and engines.
- Shut off gas at the main valve if safe to do so.
- Call emergency services and the gas utility from a safe location.
- Do not re-enter until professionals declare the area safe.
Conclusion
Like a mariner steering by stars after fog lifts, the homeowner who recognizes odor, evacuates, notifies the utility, and awaits trained hands reclaims safety from hidden danger. Small, prudent checks—visual inspection from outside, leak detector use, documented calls—act as a compass until professionals take over. Remembering past disasters and established protocols turns panic into measured action, ensuring that repair, medical care, and records restore normalcy and protect lives and property.