How to Fix a Leaking Camper Toilet: Quick DIY Repairs to Stop the Drip
If you’re dealing with a leaking camper toilet, you can often fix it by identifying the source of the leak—typically worn seals, loose hose fittings, or cracked components. Start by shutting off the water supply and preparing your workspace with necessary tools like replacement seals, PTFE tape, and marine-grade sealant. For quick fixes, tighten connections, wrap threads, or seal small gaps. For more permanent solutions, you may need to replace the bowl seal, supply valve, or waste hose. Follow this guide for step-by-step checks, tools needed, and advice on when to consult a professional.
What Causes a Camper Toilet to Leak
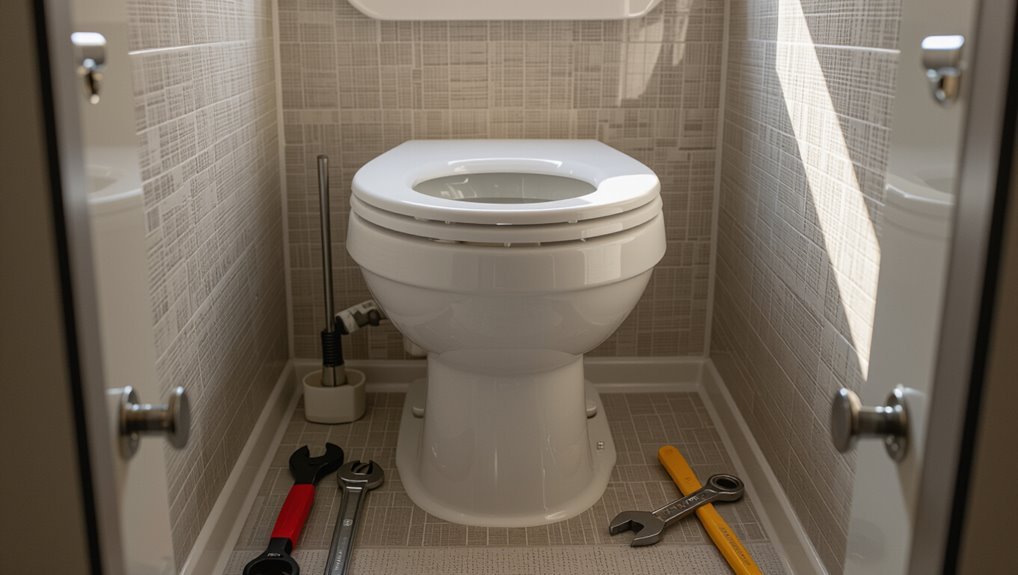
A leaking camper toilet can stem from several common sources, including worn seals, cracked fittings, and loose hose connections specific to RV plumbing.
Unlike residential systems, RV toilets rely on compact tanks, macerators, and flexible supply and waste lines that create different failure points.
Quick identification relies on noticing damp floors, persistent odors, and water stains or drips around the base and supply fittings.
Common leak sources in RV and camper toilets
Leaks in camper toilets typically stem from a handful of recurring sources: worn seals and gaskets, loose or cracked plumbing fittings, damaged toilet bases, and problems with the macerator or flush mechanism.
Common leak sources include deteriorated tank seals, deteriorating hose clamps, hairline cracks in porcelain or plastic, and failing flush valves.
Knowing these helps prioritize how to fix a leaking camper toilet efficiently.
How water systems differ between RVs and residential toilets
Because RV water systems are designed for limited space and variable supply, camper toilets rely on compact tanks, flexible hoses, and simplified valves rather than the gravity-fed, large-capacity fixtures used in homes.
These differences create distinct failure points: shrinkage-prone seals, hose fittings, pump-pressurized lines, and compact macerators.
Repairs focus on flexible plumbing, smaller seals, and pump or valve maintenance rather than large-bowl components.
Signs to identify toilet leaks quickly
Differences in RV plumbing create specific failure modes that show up as distinct signs when a camper toilet begins to fail.
Visible water under the bowl, damp floor, or pooled gray/black tank area indicate leaks.
Persistent odors, soft cabinetry, or unexplained fresh-water loss suggest seal or valve issues.
Intermittent dripping after flushes points to faulty flappers, seals, or loose fittings needing inspection.
Quick Safety and Preparation Steps Before Repair
Before beginning repairs, gather necessary tools and materials such as adjustable wrenches, replacement seals, plumber’s grease, and disposable gloves.
The water supply should be shut off and holding tanks secured or emptied to prevent spills and contamination.
Wear protective gear, use disinfectants, and follow basic sanitation practices to minimize exposure to waste and pathogens.
Tools and materials to have on hand
A compact kit of the right tools and materials makes the repair faster and safer:
basic hand tools (adjustable wrench, screwdrivers, pliers), replacement seals and gaskets specific to the toilet model, plumber’s grease, silicone sealant, Teflon tape, a small basin or bucket, clean rags, and disposable gloves.
- Confidence restored
- Quick relief
- Less stress
- Pride in fixing
How to shut off water and secure the holding tanks
With tools and materials gathered, the next step is to shut off the water supply and secure the holding tanks to prevent spills and contamination.
Close the RV’s interior water valve and, if present, the external city water inlet.
Empty and latch the black and gray tanks, engage tank valves, and use wheel chocks or stabilizers.
Verify no residual flow before starting work.
Safety precautions and sanitation tips
Several basic precautions should be observed to protect health and equipment when addressing a leaking camper toilet.
Wear gloves and eye protection, ventilate the area, and avoid inhaling fumes from cleaners or sealants.
Disconnect power and water sources, place absorbent pads under leaks, and use appropriate waste containers.
Clean and disinfect tools and surfaces after repairs to prevent contamination.
Fast Temporary Fixes to Stop the Drip
For immediate control of a camper toilet leak, the guide recommends straightforward temporary measures that can be applied on the road.
Plumber’s tape and marine-grade sealants can stop flange and hose weeps, while careful tightening of bolts and clamps reduces seepage without causing damage.
Short-term gasket patches and compact emergency repair kits offer quick containment until a permanent fix is completed.
Using plumber’s tape and sealants for flange and hose leaks
Addressing flange and hose leaks quickly often prevents further water damage and odor issues.
For small flange gaps, apply plumber’s tape around threaded connections and push joint surfaces together; use a marine-grade silicone sealant for non-threaded flange seams.
Wrap tape clockwise on threads, smooth sealant beads, and allow recommended cure time.
These are temporary measures until proper replacement or professional repair is performed.
Tightening bolts and clamps safely
A few quick turns of a wrench can halt many camper toilet leaks if bolts and hose clamps are tightened safely and methodically.
The technician inspects fasteners, hand-tightens first, then uses a wrench in small increments to avoid over‑stress.
Clamps are centered on hose barb ridges; bolts receive even, alternating tightening.
Rechecks follow a brief water test to confirm the stop.
Short-term gasket patching and emergency kits
Once bolts and clamps have been checked, attention can turn to quick, temporary measures that stop leaks until permanent repairs are possible.
A compact kit with silicone tape, rubber gasket strips, plumber’s putty, and spare O-rings enables immediate sealing.
Clean and dry the area, apply materials per instructions, tighten fittings gently, and monitor.
These are emergency solutions only; schedule proper gasket replacement promptly.
Step-by-Step Repairs for Common Leak Types
The following section outlines clear, step-by-step repairs for the most common camper toilet leaks, including base or floor flange failures and problems at the water inlet or supply hose.
It also covers replacing worn bowl-to-base seals or wax rings, fixing leaks from the waste outlet or piping, and addressing cracks in toilet components.
Each repair is presented with the tools, parts, and safety steps needed to complete the job.
Repairing a leaking base or floor flange
First, the flange and surrounding seals are inspected for cracks, corrosion, and gaps that could allow water to escape.
If the gasket is damaged or misaligned, it is removed and replaced or reseated to restore a watertight connection.
Careful reinstallation and torque of the mounting bolts are recommended to prevent recurrence.
Inspecting the flange and surrounding seals
Begin by removing any visible debris and drying the area around the toilet base to reveal the flange and seal condition.
Inspect for cracks, corrosion, warped flange edges, loose mounting bolts, and degraded or compressed seals.
Probe gently for movement or gaps and note water stains or foul odors.
Photograph damage, measure flange alignment, and determine if repairs are localized or require component replacement.
Replacing or reseating the flange gasket
Remove the toilet and clear surrounding area to access the flange before replacing or reseating the gasket; this guarantees a clean workspace and prevents contamination of the new seal.
Inspect flange for cracks or warping. Remove old gasket, clean mating surfaces, and apply compatible new gasket or sealant.
Reposition flange if needed, torque bolts evenly, and test for leaks after reinstallation and a brief water run.
Fixing leaks at the water inlet or supply hose
Attention should turn to the water inlet and supply hose when leaks appear, since loose fittings or a failing shutoff valve are common causes.
First, inspect and tighten or replace supply line fittings and hoses, using proper-size connectors and thread sealant where needed.
If leaks persist or the valve leaks at the stem or body, replace the water shutoff valve with a compatible RV-rated unit.
Checking and replacing supply line fittings
Inspect the supply line connection at the toilet’s water inlet for loose fittings, cracked hoses, or mineral buildup that can cause drips.
Tighten compression nuts with suitable wrenches, replace brittle or split hoses, and swap corroded ferrules or connectors.
Use proper-size replacement parts and thread sealant or tape where applicable.
Recheck for leaks under normal pressure before concluding the repair.
Replacing the water shutoff valve
When a worn or leaking shutoff valve is the source of water at the toilet inlet, replacing it restores reliable control and prevents further damage.
Drain the line, shut main supply, disconnect hose, remove old valve with wrench.
Install matching replacement, use thread sealant, tighten securely, reconnect hose, open supply and check for leaks.
Test operation and re-tighten if needed.
Replacing a worn bowl-to-base seal or wax ring
Before replacing a worn bowl-to-base seal, the toilet should be removed carefully and any water and power sources secured to prevent spills or electrical hazards.
A correctly sized new seal or wax ring is seated between the bowl and base, aligned to prevent gaps and guarantee an even compression.
The bowl is then re-bolted to manufacturer torque specs and checked for level and leaks before restoring water and power.
Removing the toilet safely
Although careful preparation reduces surprises, removing a camper toilet still requires a methodical approach to prevent damage and leaks. The process begins by shutting off water, draining the bowl and trap, and disconnecting power or sensors as applicable.
Next, unbolt mounting nuts, support the bowl to avoid stressing plumbing, detach supply and waste connections, lift straight up, and inspect the flange and surrounding floor for damage.
Installing a new seal and re-bolting procedures
Begin by seating a fresh seal—wax ring or rubber gasket—squarely on the flange, ensuring the tapered side faces the bowl and any built-in flange tabs align with the mounting holes.
The bowl is then lowered straight down onto the seal while the installer guides the bolts through the base to prevent displacing the seal.
Tighten nuts alternately to compress evenly, torque to manufacturer spec, trim excess bolt length, reinstall caps.
Repairing leaks from the waste outlet or piping
Attention turns to the waste outlet and plumbing when leaks appear beneath the camper toilet.
The inspection should focus on the waste hose, fittings, and clamps for cracks, looseness, or corrosion.
Damaged sections are then removed and replaced with properly sized hose and secure clamps to restore a watertight connection.
Inspecting waste hose and clamps
Start by visually and physically examining the waste hose and its clamps for cracks, soft spots, loose fittings, corrosion, or signs of leakage such as residue or dampness.
Check clamp tightness, looking for stripped screws or deformed bands.
Flex the hose to expose hidden damage and smell for wastewater odors.
Note any mismatched or aging materials needing replacement and mark problem locations for repair.
Replacing sections of waste plumbing
To replace a damaged section of waste plumbing, the technician isolates the toilet’s water and waste connections. They then remove the faulty hose or pipe segment and install a correctly sized replacement with new clamps or fittings to restore a secure, watertight joint.
After reattaching, they pressure-test the connection and inspect for leaks. If needed, they trim excess hose and secure routing to prevent chafing or future stress.
Addressing leaks caused by cracked toilet components
Cracked components in the bowl, tank, or base are common sources of camper toilet leaks and should be inspected visually and by touch for hairline fractures or damp spots.
Small hairline cracks or damage confined to non-structural parts can often be repaired with epoxy or replacement components, while deep fractures in the bowl, tank, or mounting flange typically warrant replacing the entire toilet.
The decision should weigh the extent of damage, repair cost and longevity, and the safety of continued use.
Identifying cracks in the bowl, tank, or base
Inspecting the toilet for hairline fractures begins with a careful visual and tactile examination of the bowl, tank, and base.
Check for damp spots, mineral streaks, or fine lines under bright light. Run gloved fingers along seams and mounting points.
Use a flashlight and magnifier for hidden areas.
Mark suspected cracks, dry the area, and test with a small water dye to confirm leakage.
When to repair vs. replace the entire toilet
After marking and confirming any fractures, determine whether a repair will restore reliable sealing or if replacement is safer.
Small, superficial chips or hairline cracks near non‑load areas may be epoxy‑patched and reinforced.
Structural cracks in the bowl, base mounting points, or multiple damaged components warrant full replacement for safety and sanitation.
Consider age, part availability, and repair cost versus new unit expense.
How to Diagnose Hard-to-Find Leaks
Detecting elusive toilet leaks starts with simple tests like water dye in the bowl, tissue or paper checks around seals, and tracing damp spots.
Technicians also perform pressure and vacuum checks to confirm plumbing integrity and locate slow or intermittent failures.
A focused visual checklist for hidden leaks—inspecting fittings, vents, holding-tank seams, and floor areas—complements testing to pinpoint the source.
Using water dye, tissue, and paper testing methods
To pinpoint elusive toilet leaks, technicians rely on simple, low-tech tests using water-safe dye, toilet tissue, and absorbent paper to reveal where water escapes.
Dye drops in bowl or tank show seepage paths; tissue applied around seals catches wetting; folded paper under fittings detects slow drips.
Observations after sitting or flushing localize faulty gaskets, cracked fittings, or loose clamps for targeted repair.
Pressure and vacuum checks for plumbing integrity
Several simple pressure and vacuum tests can quickly confirm whether a camper’s plumbing holds integrity or hides slow, hard-to-find leaks.
A hand pump or pressure gauge applied to sealed fixtures reveals drops indicating leaks. Likewise, a vacuum gauge checks for air ingress.
Isolate sections with valves, monitor readings over 10–15 minutes, then repair fittings or seals where pressure decays or vacuum fails.
Visual inspection checklist for hidden leaks
After pressure and vacuum checks narrow down suspect areas, a systematic visual inspection locates hidden leaks that tests alone might miss.
Inspect seals, hose connections, tank fittings, and toilet base for hairline cracks or corrosion.
Look for mineral deposits, damp tape, or discoloration on cabinetry and flooring.
Use a flashlight and mirror for tight spaces.
Mark findings and prioritize repairs by severity.
Parts and Products Recommended for Camper Toilet Repairs
A compact kit of gaskets, seals, and wax rings is essential for quick fixes and preventing repeat leaks. Trusted sealants, plumber’s tape, and robust clamps provide reliable stops for failing connections.
When repairs are no longer economical, compact replacement toilets or upgrade kits offer long-term peace of mind.
- Gaskets, seals, wax rings — readiness and reliability
- Sealants, Teflon tape, non-permanent adhesives — control and confidence
- Heavy-duty clamps and hose fittings — strength and security
- Replacement toilet models and upgrade kits — comfort and certainty
Gaskets, seals, and wax rings to keep in your toolkit
Keeping a small selection of accurate gaskets, seals, and a wax ring in the toolkit prevents many common camper-toilet leaks and speeds repairs.
Include bowl-to-floor wax rings (or RV-specific rubber rings), various rubber O-rings, flange gaskets, and shaft seals sized to the model.
Store replacements labeled by toilet model and measurement for quick swaps during roadside or campsite fixes.
Recommended sealants, tapes, and clamps
Once the right gaskets and rings are on hand, the next step is selecting compatible sealants, tapes, and clamps to finish and secure connections.
Use marine-grade silicone or RV-specific sealant for flexible, waterproof joints.
PTFE (plumber’s) tape for threaded fittings prevents leaks.
Stainless steel worm-drive clamps or 304 hose clamps provide corrosion resistance and adjustable pressure for hose and pipe connections.
Replacement toilets and upgrade options
Consider replacement and upgrade options based on durability, installation complexity, and compatibility with existing plumbing and holding-tank systems. Options include compact ceramic units, lightweight plastic models, and macerating toilets; evaluate water usage, odor control, and power needs. Professional-fit kits simplify swaps. Choose corrosion-resistant hardware and matched seals for leak-free performance.
| Type | Pros | Notes |
|---|---|---|
| Ceramic | Durable | Heavier |
| Plastic | Lightweight | Budget-friendly |
Step-by-Step Guide to Replacing an RV Toilet
The procedure begins with carefully removing the existing toilet to avoid damaging the camper floor and plumbing connections.
Next, the appropriate replacement is selected based on size, flange type, and RV-specific requirements.
Finally, the new unit is installed, sealed, and tested for secure mounting and watertight operation.
Removing the old toilet without damaging the floor
Begin by clearing the area around the toilet and disconnecting the water supply to prevent spills; this establishes a safe, dry workspace.
Loosen bolts, cut sealant with a utility knife, and gently rock the fixture to break the seal.
Support the bowl while lifting to avoid scraping the floor.
Inspect mounting holes and surrounding flooring for rot before proceeding with replacement.
Choosing the right replacement toilet for your camper
How should one pick a replacement toilet that fits a camper’s limited space, plumbing, and weight constraints?
Measure flange location, bolt spacing, and clearance; verify flush type compatibility with existing waste lines and water supply; prioritize lightweight, compact models designed for RVs; check bowl height for user comfort; confirm material durability and corrosion resistance; review manufacturer dimensions and weight ratings before purchase.
Installing, sealing, and testing the new unit
With the correct replacement selected and fit confirmed, attention shifts to removing the old fixture and installing the new one.
Bolts are torqued evenly, gasket surfaces cleaned, and a fresh sealant or rubber gasket applied per manufacturer instructions.
Reconnect water and waste lines, secure mounting, then test for leaks by flushing and pressurizing.
Inspect joints, retighten if needed, and confirm dry operation.
Common Mistakes to Avoid During Repairs
The author warns against several common errors that can turn a simple repair into a bigger problem.
Over-tightening bolts can crack fittings, using the wrong sealants or adhesives can fail or corrode components, and skipping proper tank and system flushing can leave debris that causes continued leaks.
Careful attention to torque, product compatibility, and thorough flushing prevents most repeat issues.
Over-tightening bolts and damaging fittings
Avoid overtightening bolts or forcing fittings together, as doing so commonly strips threads, cracks housings, and warps seals.
Technicians should tighten incrementally, follow torque specs when available, and use correct-sized tools. If a part resists, inspect alignment or debris rather than applying more force.
Damaged fittings often require replacement; continued stress worsens leaks and complicates future repairs.
Using incorrect sealants or adhesives
Choose sealants and adhesives based on material compatibility and the application’s exposure to water, chemicals, and temperature—using the wrong product can cause persistent leaks, degraded seals, or damaged plastics.
Using non-marine or incompatible adhesives can fail under flex, UV, or chemical exposure. Properly match silicone, polyurethane, or anaerobic sealants to surfaces, follow cure times, and avoid mixing incompatible chemistries.
Skipping proper tank and system flushing
Failing to thoroughly flush the black and gray tanks before and after repairs often leaves waste, chemicals, and residues that compromise seals, clog fittings, and produce corrosive conditions that shorten component life.
Technicians should rinse tanks, hoses, and valves until clear, run freshwater through the system, and perform test flushes.
Proper flushing prevents contamination, reveals hidden leaks, and guarantees replacement parts seat and seal correctly.
Preventive Maintenance to Keep Your Camper Toilet Leak-Free
A simple preventive plan can stop many leaks before they start by outlining a routine inspection schedule and a concise checklist for seals, fittings, and hoses.
Seasonal care, including proper winterization and spring reactivation, protects components from freeze damage and deterioration.
Consistent cleaning with recommended products and careful chemical use preserves seals and reduces buildup that leads to failures.
Routine inspection schedule and checklist
Regular inspections at set intervals help catch small issues before they become leaks, preserving the toilet’s seals, fittings, and waste system performance.
A concise monthly checklist reduces surprises and maintains confidence in travels.
- Inspect seals and gaskets for cracks or stiffness.
- Check bolts, mounts, and water lines for tightness.
- Test flush and valve operation for smooth action.
- Look for odors or damp spots under the bowl.
Seasonal care and winterization tips
After establishing a monthly inspection routine, attention shifts to seasonal care and winterization to prevent freeze damage and wear from temperature fluctuations.
Drain all water lines and the toilet’s holding tank before cold weather.
Add RV-safe antifreeze where recommended, insulate exposed plumbing and seals, check vent and roof seals for gaps, and store with lids secured to avoid rodents and debris intrusion.
Best practices for cleaning and chemical use
When maintaining a leak-free camper toilet, careful selection and conservative use of cleaners and chemicals preserve seals, sensors, and plumbing while controlling odors and buildup.
Use mild, non-corrosive cleaners and enzyme-based treatments; avoid bleach, drain cleaners, and abrasive pads.
Rinse thoroughly after cleaning, follow manufacturer recommendations, dose chemicals per instructions, and store products securely to prevent spills and seal deterioration.
Cost and Time Estimates for Typical Repairs
Typical repair costs and a concise parts list are presented to help readers estimate DIY expenses for seals, bolts, and valves.
Time estimates compare how long common fixes take for a competent DIYer versus a professional technician.
Guidance is provided on indicators that warrant calling a repair service rather than attempting a DIY repair.
Estimated DIY costs and parts list
Because camper toilet leaks stem from a few common sources, most DIY fixes require a short parts list and modest expense.
Typical items: replacement seals/gaskets ($5–$20), wax or silicone sealant ($5–$15), hose clamps ($2–$8), flexible hose ($10–$30), toilet flange kit ($15–$40) and basic tools.
Total typical cost ranges $20–$100 depending on parts quality and extent of replacement.
How long common repairs take for DIYers vs. pros
After estimating parts and costs, the next question is how long common repairs actually take for a DIYer compared with a professional.
Simple gasket or seal replacements typically take 30–90 minutes for a DIYer and 15–30 minutes for a pro.
Valve or flange swaps run 1–3 hours DIY, 30–90 minutes professional.
More complex leaks requiring access or plumbing adjustments may extend to half a day for most DIYers.
When to call a professional repair service
When should a camper owner call a professional repair service? A professional is recommended for persistent leaks, sewage odors, cracked bowls, damaged waste tanks, or failed seals after multiple DIY attempts.
Typical service costs range $100–$400; complex replacements can reach $600–$1,200.
Expect 1–4 hours for diagnostics and repair, longer for parts ordering or structural work.
Warranty, Parts Sourcing, and When to Upgrade
Before ordering parts or starting repairs, the owner should check manufacturer warranties and any RV service bulletins that may cover the leak.
Reliable replacement parts are best obtained from OEM dealers, reputable marine/RV suppliers, or verified online retailers with clear return policies.
If repairs become frequent, seals are unobtainable, or the bowl and flushing mechanism show extensive corrosion, replacement with a newer model should be considered.
Checking manufacturer warranties and RV service bulletins
Several camper toilet issues are often covered by manufacturer warranties or addressed in RV service bulletins, so confirming coverage and documented fixes should be an early step.
Owners should locate original purchase records, VIN, and model details, then check manufacturer websites and authorized dealer advisories.
If a bulletin matches the problem, follow prescribed remedies or claim warranty service before attempting irreversible DIY repairs.
Where to buy reliable replacement parts and components
After checking warranties and service bulletins, owners should know whether repairs require OEM parts covered by the manufacturer or can use aftermarket components.
Sourcing choices affect compatibility, longevity, and warranty status. Purchase from authorized dealers, RV supply stores, or manufacturer web portals for guaranteed fit.
Reputable aftermarket brands and specialty plumbing suppliers offer cost-effective options; retain receipts and part numbers for warranty claims and future maintenance.
Signs it’s time to upgrade to a new toilet model
When persistent leaks, chronic clogs, repeated seal or valve failures, or discontinued parts supply make reliable repairs impractical, it signals that a full toilet replacement is due.
Owners should weigh warranty limitations, parts availability, and total repair cost against the price and benefits of a new model.
Consider age, corrosion, and recurring labor costs; newer toilets offer improved seals, water efficiency, and easier access to parts under current warranties.
Conclusion
A camper owner who once blamed a dripping toilet for ruined camping plans discovers, by coincidence, that the leak was the same loose clamp they’d tightened months earlier — proof that small fixes return in unexpected ways. Having followed safety steps, tried a temporary patch, and completed the correct repair, they now pack a spare seal. The lesson sticks: routine checks and simple parts saved a trip, time, and the surprise of a soggy sleeping bag.