How to Lay Subfloor Around a Toilet Flange: Step-by-Step Guide for a Perfect Fit
To lay subfloor around a toilet flange, start by removing the toilet and inspecting the joists and flange. Next, cut and fit plywood around the pipe while ensuring precise measurements for a snug fit. Install treated blocking for support, fasten the panels securely at 6–8 inch intervals, and carefully trim the flange hole. Finally, reseat the flange using appropriate sealant or spacers to maintain a watertight seal. Follow this step-by-step guide for a perfect fit and optimal support.
What it Means to Lay Subfloor Around a Toilet Flange
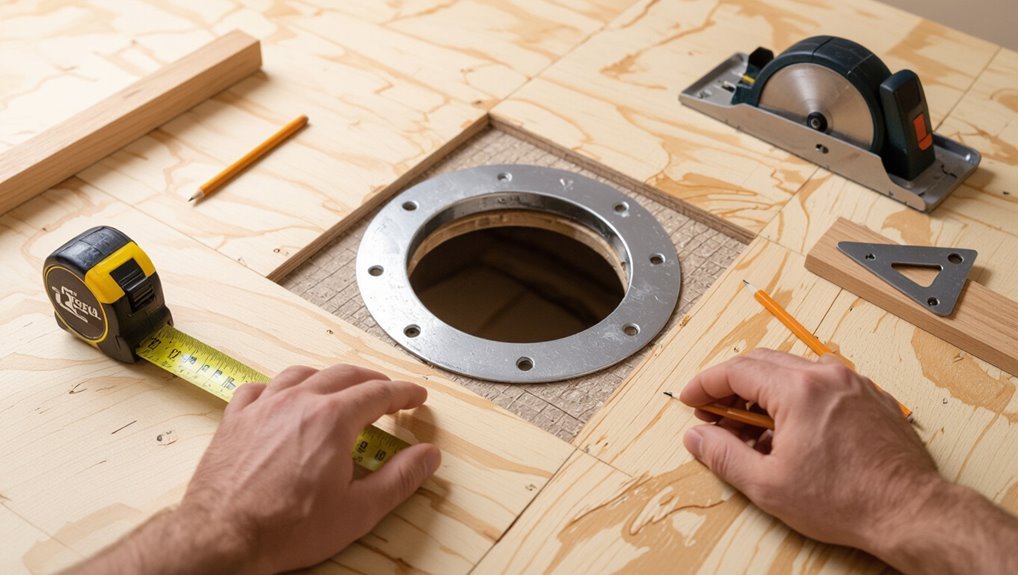
Laying subfloor around a toilet flange guarantees a stable, level base for the fixture and prevents leaks or movement that can damage the bathroom.
It becomes necessary during routine replacement, full bathroom renovation, or when water damage has compromised the existing structure.
Clear assessment and proper material choices are essential to restore function and long-term durability.
Why proper subflooring around a toilet flange matters
Ensuring the subfloor around a toilet flange is solid and correctly fitted prevents leaks, wobble, and premature flange failure.
Proper subflooring maintains drain alignment, supports wax ring compression, and resists moisture that undermines fasteners.
Learning how to lay subfloor around toilet flange reduces repair frequency, improves toilet stability, and preserves surrounding finishes, ensuring sanitary function and extending the lifespan of plumbing connections.
Typical scenarios requiring subfloor work (replacement, renovation, water damage)
Common triggers for subfloor work around a toilet flange include planned remodels, age-related replacement, and repair after water damage.
Other scenarios include uneven flooring from settling, soft spots signaling rot, flange relocation for layout changes, and replacing water-damaged plywood or particle board.
Contractors and homeowners assess structural integrity, moisture history, and finish height to decide between patching, full replacement, or reinforcement before reinstalling the flange.
Quick overview: How to fit subfloor around a toilet flange correctly
The process involves measuring and cutting the subfloor to fit snugly around the flange, fastening and sealing the edges, and ensuring the flange remains level and accessible for the toilet.
It requires basic carpentry skills—comfort with measuring, cutting plywood, and using a saw—and careful attention to fit.
Expect the task to take about one to three hours for a single bathroom fixture, depending on experience and site conditions.
One-sentence summary of the process
Start by cutting the new subfloor to clear the toilet flange, test-fitting access and alignment. Then secure the panel while maintaining flange height, sealing around the opening and reinstalling the flange hardware for a watertight, level surface.
The installer trims accurately, verifies flange elevation, fastens and gaps correctly, applies sealant, and reattaches bolts and wax ring to guarantee proper toilet seating and leak prevention.
Required skill level and time estimate
Moving from the cutting, fitting, and sealing steps, an installer should assess whether the job matches their skill set and schedule accordingly.
This task suits a moderately skilled DIYer comfortable with measuring, cutting plywood, and using basic power tools.
Expect 1.5–3 hours for a straightforward repair or replacement; complex layouts, rot repair, or tight access can extend time and may warrant a professional.
Tools and materials needed
The section lists the essential tools—saws, drills, measuring tools, and fastening equipment—required to cut and fit the subfloor around a toilet flange.
It specifies recommended materials and common thicknesses for plywood or OSB and appropriate underlayment.
It also notes optional tools and accessories, such as jigs, rotary cutters, and cordless impact drivers, that speed the job and improve finish quality.
Essential tools list
A concise set of tools and materials guarantees the subfloor around a toilet flange is cut, fitted, and fastened accurately.
The essential toolkit prioritizes measuring, cutting, drilling, and fastening with minimal redundancy: precise, durable, and safe.
- Tape measure, pencil, straightedge.
- Jigsaw or circular saw with fine blade.
- Drill, screws, flange-compatible fasteners.
Recommended materials and thicknesses
With measuring, cutting, and fastening tools assembled, attention turns to selecting appropriate materials and thicknesses for the subfloor around a toilet flange.
Preferred choices balance strength, moisture resistance, and stack height to match existing floor.
- 3/4″ exterior-grade plywood for joist-mounted subfloors.
- 1/2″ tongue-and-groove plywood for overlays.
- 3/8″ cement backer board under tile for moisture-prone areas.
Optional tools for faster, cleaner work
Consider adding a few specialty tools to speed the job and keep cuts, holes, and fastenings tidy: A compact oscillating tool, a quality hole saw set sized for flanges, and a pneumatic flooring nailer reduce effort, improve accuracy, and minimize splintering.
Use them selectively for clean cuts, precise flange openings, and rapid fastening to maintain subfloor integrity and streamline installation.
- Oscillating tool
- Hole saw set
- Pneumatic flooring nailer
Preparing the area before cutting and installing subfloor
Before cutting and installing the subfloor, the water supply should be shut off and the toilet removed following safe procedures.
The flange, drain, and adjacent joists must be inspected for cracks, rot, or other damage that could affect repair or attachment.
Finally, accurate measurements of the floor height and the existing flange position should be taken to guarantee the new subfloor and flange align correctly.
Turning off water and removing the toilet safely
Shut off the water supply at the shutoff valve or the home’s main if a local valve is corroded. Then flush the toilet to drain the tank and bowl and hold the lever down to remove residual water.
Disconnect the supply line, sponge remaining water, loosen tank-to-bowl bolts, remove caps, unbolt base flange nuts, lift the toilet straight up with assistance, and set it on a protected surface.
Inspecting flange, drain, and surrounding joists for damage
With the toilet removed, the installer should closely inspect the flange, drain opening, and nearby joists for cracks, rot, or corrosion that would affect a secure, watertight subfloor installation.
Check flange bolt slots, wax ring seat, and pipe connection for leaks or deformation.
Probe joists and rim joist edges for soft spots, mold, or insect damage; document defects and plan necessary repairs before cutting or laying subfloor.
Measuring floor height and existing flange position
One critical step is measuring the finished floor height relative to the top of the toilet flange and recording the flange’s exact position on the subfloor.
Technicians measure from finished flooring surface to flange top, note offset, and trace flange outline.
They verify drain center distance to walls and joists, mark cut lines, and document measurements to guarantee the new subfloor aligns flush without obstructing the flange.
Step-by-step procedure to lay subfloor around a toilet flange
The procedure begins with removing the damaged subfloor and cleaning the opening to expose the flange and surrounding structure.
Next, the condition of the joists or slab is assessed and any repairs are made before measuring and marking a replacement panel.
Finally, the panel is cut to fit the flange and drain pipe, test-fitted, and secured with blocking and supports around the opening.
Step 1 Remove damaged subfloor and clean the opening
Begin by turning off the water supply and flushing the toilet to drain the tank and bowl; then disconnect and remove the fixture to expose the damaged subfloor around the flange.
Cut out rotten or soft plywood with a circular saw or oscillating tool, leaving clean, square edges.
Remove debris, old flange remnants, and dust.
Dry the opening thoroughly and inspect for visible mold or contaminants.
Step 2 Assess and repair joists or slab as needed
Inspect the exposed framing or slab to determine the extent of structural damage and whether joist repair, sistering, or patching of a concrete slab is required.
Check joist rot, cracking, and fastening integrity.
Replace or sister compromised joists, install blocking for support, or grind and fill slab voids with appropriate patching compound.
Guarantee a level, solid perimeter for the replacement subfloor.
Step 3 Measure and mark the replacement subfloor panel
Measure carefully to guarantee the replacement panel fits around the toilet flange without interfering with the bowl or coupling.
The installer records precise panel dimensions, including offsets for joists, edges, and finished flooring height.
Using a square and pencil, they transfer measurements to the panel, marking cutlines and reference points for alignment.
All marks are double-checked before proceeding to cutting.
Step 4 Cut an opening for the flange and test-fit around the drain pipe
Mark and cut the opening for the flange carefully so the panel fits snugly around the drain pipe without binding the toilet coupling.
Using the marked outline, cut with a jigsaw or hole saw, leaving a hairline clearance.
Dry-fit the panel over the pipe, confirming flange alignment and level.
Trim as needed until the flange seats flush and the pipe remains unobstructed.
Step 5 Install blocking and supports around the opening
Install blocking and supports to reinforce the subfloor around the flange opening so the toilet will sit on a rigid, level surface and the flange remains securely fastened.
Measure and cut treated lumber to fit between joists, pack snugly, and toe-screw or glue blocks.
Add perimeter backing under panel edges and short struts beneath cut edges for cantilevered support, ensuring solid bearing and alignment.
Step 6 Fasten the new subfloor panel and ensure level alignment
Begin by positioning the new subfloor panel over the prepared opening so its edges rest squarely on the blocking and existing panels; make certain the flange sits within its cutout without binding.
Fasten with screws or ring-shank nails into blocking at 6–8 inch spacing, countersinking slightly.
Check for level with a straightedge and shim or plane high spots until the panel is flush and stable.
Step 7 Trim and file the flange opening for a snug fit
Carefully trim and file the subfloor opening so the toilet flange fits snugly without gaps or binding; this guarantees a stable seal and prevents uneven pressure on the flange when the toilet is set.
Measure clearance, cut excess with a jigsaw or oscillating tool, then smooth edges with a rasp and sanding block.
Check fit frequently and remove minimal material until the flange seats flush.
Step 8 Install flange adjustment ring or spacer if floor height differs
Once the flange seats flush against the trimmed opening, assess the finished floor height relative to the flange face. If the flange sits too low or high compared with the finished surface, an adjustment ring or spacer is used to bring the flange to the proper elevation.
Select a compatible ring, stack spacers if needed, tighten bolts evenly, and verify the top of the flange is level with the finished floor.
Step 9 Re-seat or replace the toilet flange and secure to subfloor
Re-seat or replace the toilet flange so its hub aligns squarely over the drain opening and its bolt slots face forward; the flange should sit flat on the finished subfloor with no rocking.
Fasten with corrosion-resistant screws into joists or blocking, using shims or sealant to eliminate gaps.
Confirm flange height matches spacer ring, trim excess, and verify bolt alignment before final tightening.
Step 10 Reinstall the toilet and test for leaks
Lower the toilet onto the flange with steady alignment so the closet bolts pass through the base slots and the wax ring compresses evenly beneath the bowl.
Tighten nuts alternately and evenly to avoid cracking. Reconnect supply line, open water, and fill tank.
Flush several times while inspecting base and supply connections for leaks. Torque bolts to specified tightness and shim if rocking persists.
How to handle different floor types and flange situations
Different floor substrates and flange conditions require tailored approaches to guarantee a secure, watertight toilet install.
Wood-joist subfloors and concrete slabs call for different fastening, moisture control, and height-adjustment methods, while offset or damaged flanges may need repositioning or reinforcement.
Common solutions include repair flanges, flange extenders, and repair rings selected to match the substrate and restore proper flange alignment.
Wood joist subfloor vs. concrete slab considerations
When planning subfloor work around a toilet flange, the underlying structure—wood joists or a concrete slab—dictates material choices, flange types, and attachment methods.
On wood, use plywood or OSB, secure flange to joist or blocking, and consider ring-style or flange adapters.
On slab, set a cast-iron or reinforced PVC flange with concrete anchors or epoxy, ensuring proper elevation and waterproofing for tile or thin-set finishes.
Working with offset or broken flanges
Addressing an offset or broken toilet flange requires evaluating flange condition, floor type, and final finish to determine whether repair, replacement, or an adapter is appropriate.
Inspect alignment, height relative to finished subfloor, and damage extent.
On wood subfloors, guarantee solid blocking and level mounting; on concrete, confirm anchor integrity and use appropriate anchors or sleeves.
Document measurements for correct replacement parts.
Using repair flanges, flange extenders, and flange repair rings
Select the appropriate repair flange, extender, or repair ring based on floor type, flange height, and damage:
Repair flanges and rings restore a cracked or corroded cast-iron or PVC flange to a solid mounting surface, while extenders compensate for flanges set below the finished subfloor or tile.
Match material to existing flange, guarantee watertight seals with wax or rubber gaskets, and secure to structural framing for stability.
Common mistakes to avoid
Common errors include cutting too close to the flange or drain pipe and failing to install solid support beneath the flange.
Differences in finished floor height that affect toilet fit are often overlooked, as are waterproofing details that allow slow leaks to go unnoticed.
Addressing these issues early prevents flange instability, leaking, and costly rework.
Cutting too close to the flange or drain pipe
Cutting the subfloor too close to the toilet flange or drain pipe risks damaging the flange, cracking the pipe, or creating gaps that compromise the wax ring seal.
Precision cutting leaves a clean, even gap for adjustment and shimming. Excessive trimming weakens structural support, complicates flange alignment, and increases leak risk.
Measure twice, cut conservatively, and test-fit before final trimming.
Failing to provide adequate support under the flange
Undermining the toilet flange by leaving it unsupported often leads to rocking, seal failure, and leaks.
Without solid backing—plywood, flange spacers, or blocking—the flange can compress under weight, loosening bolts and damaging the wax ring.
Proper support guarantees even load transfer to the subfloor, maintains bolt alignment, and prevents movement that causes slow leaks, odors, and premature replacement.
Ignoring floor height differences and toilet fit problems
Failing to account for floor height differences and how a toilet mates with the flange can result in misaligned bolts, improper sealing, and an unstable fixture.
Ignoring offsets between finished subfloor and flange height causes gap issues, prevents a tight wax ring or modern gasket seating, and may require rework or trim rings.
Measure finished floor elevation and test-fit the bowl before finalizing the subfloor.
Overlooking waterproofing and slow leaks
Although it may seem minor during installation, neglecting waterproofing and slow leaks around a toilet flange can lead to hidden water damage, mold growth, and costly repairs over time.
A proper seal, moisture barrier, and regular inspections prevent seepage into subfloor joints. Ignoring slow drips or failed wax rings accelerates rot and structural compromise; early detection and waterproofing save time and expense.
Signs a professional repair is needed
When the subfloor shows structural rot or joists are extensively compromised, professional repair is recommended to guarantee safety and code compliance.
Repeated flange failures or signs of hidden sewer problems indicate systemic issues beyond basic DIY fixes.
Complex plumbing buried under concrete slabs typically requires specialized tools and expertise that a homeowner should not attempt alone.
Structural rot or extensive joist damage
Structural rot or extensive joist damage is indicated by sagging floors, soft or crumbling wood around the flange, widespread water stains, or visible decay where joists meet the subfloor.
These signs typically mean the problem goes beyond a simple flange repair and requires professional assessment and structural remediation.
A qualified contractor should evaluate load-bearing elements, propose joist replacement or sistering, and address underlying moisture sources before subfloor replacement.
Repeated flange failures or hidden sewer issues
After addressing rot or joist damage, attention should turn to repeated flange failures or signs of concealed sewer problems, which often present differently and carry different risks.
Persistent loose or cracked flanges, recurring leaks despite correct installation, foul sewer odors, gurgling drains, or slow drainage suggest deeper plumbing deterioration or misaligned soil pipes.
These signs warrant prompt professional diagnostics and repair.
Complex plumbing under concrete slabs
A homeowner’s repeated toilet problems can point to complex plumbing routed beneath a concrete slab, a situation that carries different challenges and risks than accessible joist- or subfloor-level repairs.
Persistent leaks, sewage odors, unexplained sink or drain backups, localized slab cracking, or multiple fixture failures indicate slab piping issues.
These signs warrant immediate professional inspection using video diagnostics and slab-appropriate repair methods to prevent extensive damage.
Tips for a durable, leak-free finish
For a durable, leak-free finish around a toilet flange, attention to material choice and installation detail is essential.
Recommendations include using appropriate caulks and sealants or wax-free gasket alternatives, torquing toilet bolts correctly to stabilize the bowl and seat, and sealing seams to prevent moisture intrusion.
Preventive measures—such as moisture-resistant subfloor materials, proper flange height, and routine inspections—help avoid future water damage.
Best caulks, sealants, and wax-free gasket alternatives
Select sealants and gaskets based on compatibility with subfloor materials and expected moisture exposure to guarantee a durable, leak-free connection around the toilet flange.
Preferred options include silicone or polyurethane for joints and rubber or foam wax-free gaskets for compression seals.
Choose mildew-resistant formulations and nonreactive materials to prevent corrosion and deterioration.
- Silicone sealant
- Polyurethane caulk
- Rubber/foam gasket
Torquing toilet bolts and achieving a stable toilet seat
After sealing and fitting the gasket, attention turns to torquing the closet bolts and securing the bowl to the flange to prevent leaks and wobble.
Nuts should be tightened alternately and evenly, using a torque wrench or calibrated feel, until snug—avoid overtightening to protect the flange and porcelain.
Once stable, install washers and caps; recheck for rocking and tighten incrementally if needed.
Preventive measures to avoid future water damage
A few simple habits and quality materials greatly reduce the risk of future water damage around a toilet.
Regularly inspect seals, wax ring condition, and flange tightness; replace failing wax or rubber seals promptly.
Use waterproof subfloor materials, proper flashing, and silicone caulk at base.
Confirm flange sits flush, bolts torqued correctly, and bathroom ventilation minimizes condensation to protect the assembly.
Quick reference checklists
A concise set of checklists helps guarantee consistent results when laying subfloor around a toilet flange.
The guide presents a pre-work checklist, a step-by-step execution checklist, and a post-installation inspection checklist for quick verification.
Each checklist focuses on essential items to reduce errors and confirm watertight, level installation.
Pre-work checklist
Before cutting or laying any material, confirm tools, safety gear, measurements, and parts are assembled and accessible: tape measure, circular saw or jigsaw, pry bar, drill, flange spacer or extender, wax ring or seal, toilet bolts, shims, screws, construction adhesive, safety glasses, gloves, and a shop vacuum.
A final site inspection verifies plumbing alignment, subfloor level, and debris-free workspace.
- Verify clear access.
- Confirm measurements.
- Stage materials.
Step-by-step execution checklist
When the pre-work checklist is complete, the installer follows a concise, numbered execution checklist that sequences cutting, fitting, fastening, and sealing around the toilet flange to guarantee alignment and leak prevention.
The checklist prioritizes measured cuts, secure mechanical fastening, and watertight seals to protect the flange and subfloor integrity.
- Trim subfloor to flange profile precisely.
- Fasten panels and flange flange-to-joist.
- Apply sealant and test dry fit.
Post-installation inspection checklist
If any visible gaps, fastener issues, or sealant voids remain, the inspector methodically verifies flange alignment, fastener security, and continuous waterproofing to affirm the subfloor installation meets performance and safety standards.
A concise checklist follows to document findings and required corrections.
- Confirm flange sits flush, level, and centered over drain.
- Verify all fasteners are tight and countersunk where needed.
- Ascertain sealant and membrane are continuous with no gaps.
Troubleshooting common problems after installation
After reinstalling the toilet, common issues may arise that require prompt attention.
Typical checks include tightening or shimming a wobbly bowl, inspecting and reseating the wax ring or flange bolts for persistent base leaks, and addressing uneven floor finish or visible gaps around the flange with targeted repairs.
The following section outlines diagnostic steps and practical remedies for each problem.
Toilet wobbles after reinstalling fixes
Check the flange and mounting bolts for alignment and secure seating before assuming a different cause for a toilet that wobbles after reinstalling.
If bolts are loose, tighten evenly and avoid overtightening. Confirm flange height matches finished floor; use appropriate shims or a repair ring if low.
Verify wax ring compression and tighten tank-to-bowl bolts if needed; retest stability and adjust shims until wobble stops.
Persistent leaks at base diagnostic steps
Why is water appearing at the toilet base despite a recent installation?
Inspect wax ring seating, flange height, and bolt alignment.
Check for hairline cracks in the porcelain and for wet subfloor indicating hidden leaks.
Run several flushes while observing.
Tighten bolts evenly; avoid over-torquing.
If water persists, remove the toilet, reseat or replace the wax ring, and retest.
Uneven floor finish or gaps around flange remedies
Addressing uneven floor finish or gaps around a toilet flange requires identifying whether the issue is cosmetic, structural, or due to improper flange height and then selecting the appropriate repair—surface leveling compound and trim for minor gaps, flange shims or a flange extender for height discrepancies, and replacing damaged subfloor or installing a plywood patch for structural voids.
After repair, verify flange alignment, secure fasteners, apply proper sealant, and test stability.
Estimated costs and time for DIY vs. professional installation
Estimating costs and time for installing subfloor around a toilet flange requires comparing material and labor expenses, skill level, and project scope: a DIY homeowner can expect to spend mainly on plywood, fasteners, flange adapters, and sealant—typically $50–$200 for materials—and 2–6 hours for removal, fitting, and finishing, while hiring a professional commonly adds $200–$600 in labor (totaling roughly $250–$800) and completes the job in 1–3 hours depending on access and complications.
| Option | Cost | Time |
|---|---|---|
| DIY | $50–$200 | 2–6 hr |
| Pro | $250–$800 | 1–3 hr |
| Risk | Higher | Lower |
Conclusion
Finished subfloor around a toilet flange signifies careful alignment, sealed cuts, and stable support—yet coincidence underscores how small choices converge: an accurately traced hole, an unexpected warped flange, and a dropped washer together shape the outcome. When the patch sits flush and the flange fastens without wobble, those minor moments reveal their cumulative impact. The final fit reflects both planned technique and small accidents that were anticipated, managed, and turned into a lasting, watertight result.