How to Service an Oil Furnace: Step-by-Step Maintenance Checklist for Homeowners
To service an oil furnace effectively, homeowners should follow a straightforward maintenance checklist that includes safety precautions, inspections, cleaning tasks, and combustion testing. Begin by shutting off the power and fuel supply, ensuring proper ventilation, and wearing safety gear. Clean the burners, replace nozzles and filters, vacuum any debris, and inspect the heat exchanger, flue, oil line, and tank. Conduct electrical checks and perform combustion analysis, documenting your findings to confirm a safe startup. For detailed step-by-step procedures and additional tips, continue reading.
Quick Overview of Servicing an Oil Furnace
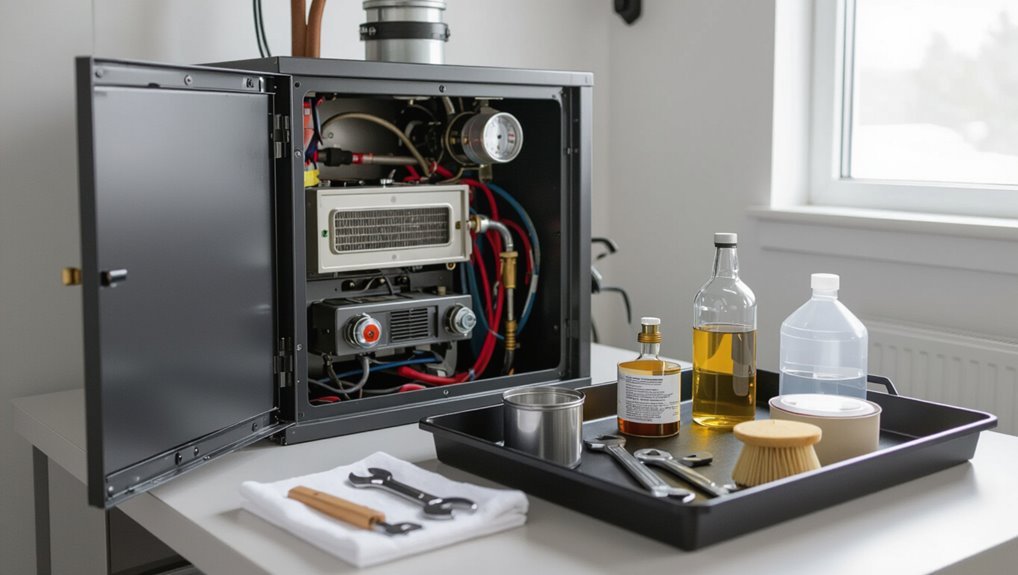
The overview summarizes routine tasks—inspection, filter and nozzle replacement, burner cleaning, and combustion checks—and explains how these actions maintain efficiency and prevent breakdowns.
It also highlights essential safety steps such as shutting off power and fuel, ensuring ventilation, and using appropriate protective gear before beginning work.
Readers are reminded that observing safety protocols and regular maintenance reduces fire risk and extends equipment life.
What routine service covers and why it matters
Routine oil furnace service inspects and cleans key components—burner, heat exchanger, fuel nozzle, filters, and flue—to guarantee safe, efficient operation and to catch wear or problems early.
Routine tasks include combustion analysis, filter replacement, nozzle and electrode checks, oil line and tank inspection, and thermostat calibration.
Regular servicing reduces fuel use, extends equipment life, prevents breakdowns, and documents proper how to service oil furnace maintenance.
Safety considerations before you start
Before beginning any work on an oil furnace, verify power and fuel supply are shut off, ventilation is adequate, and appropriate personal protective equipment—gloves, eye protection, and a respirator or mask if soot or fumes are present—is worn; these steps reduce fire, electrical, and inhalation hazards while enabling clear access to components.
Confirm no leaks, keep a fire extinguisher nearby, and follow manufacturer and local code requirements.
Tools and Materials You’ll Need
A concise list of essential tools prepares the technician for routine oil furnace service.
Basic hand tools, a multimeter, vacuum, and combustion analyzer are among the items typically required.
Common consumables and replacement parts to keep on hand include replacement nozzles, filters, gaskets, and burner oil.
Essential tools checklist
Several basic hand tools and a few specialty items are required to service an oil furnace safely and effectively.
A concise toolkit improves efficiency and safety during inspection and maintenance.
Recommended essentials include:
- Screwdrivers and nut drivers (various sizes)
- Multimeter for electrical checks
- Combustion analyzer or CO meter
- Small vacuum and soft brushes for cleaning
Consumables and replacement parts to keep on hand
With the basic toolkit prepared, attention shifts to consumables and spare parts that keep service visits efficient and prevent repeat trips.
Stocked items minimize downtime and unexpected purchases.
- Replacement oil nozzle set (various sizes)
- Combustion air filter and furnace filter pack
- Ignition electrodes and transformer
- Fuel line and gasket seals
Technician-grade oil and cleaning solvent.
Pre-Service Safety and Preparation Steps
Before beginning any maintenance, the technician guarantees the oil supply and electrical power are properly shut off to prevent ignition or shock.
The workspace is assessed for ventilation and carbon monoxide risks, with monitors or temporary ventilation added if needed.
Finally, the technician inspects the area and dons appropriate protective gear—gloves, eye protection, and respiratory protection as required—before proceeding.
Power and fuel shutdown procedures
Shut down power and isolate the oil supply to eliminate ignition and spill hazards before any service begins.
The technician switches off the furnace at the breaker and disconnects the primary power source.
Close the oil shutoff valve and, if present, close the tank’s fuel valve or use a pump to relieve pressure.
Verify isolation with a meter and visual inspection before proceeding.
Ventilation and carbon monoxide precautions
Several simple checks and controls dramatically reduce the risk of hazardous combustion gases during service.
Confirm flues and vents are unobstructed, sealed, and properly pitched to encourage draft.
Verify adequate room ventilation by opening nearby windows or using exhaust fans if needed.
Install or test carbon monoxide detectors before service.
Monitor for odors or symptoms and evacuate if CO is suspected, then seek professional help.
Inspecting the work area and protective gear
With ventilation and carbon monoxide checks complete, attention turns to the immediate work area and personal protective equipment.
The technician verifies clear, dry floor space, adequate lighting, and unobstructed access to the furnace.
Protective items—gloves, goggles, disposable coveralls, and a NIOSH-rated respirator if needed—are inspected for damage and proper fit.
Tools and a fire extinguisher are placed within reach.
Step-by-Step Oil Furnace Maintenance Checklist
The checklist begins with an external inspection and cleaning to guarantee clear vents and a debris-free cabinet.
Next, the technician inspects and cleans the burner assembly, services the nozzle and fuel system, and performs combustion testing with necessary adjustments.
Finally, electrical components and control systems are checked for secure connections and proper operation.
External inspection and cleaning
The technician begins with an external inspection, checking the cabinet for corrosion or loose panels and confirming the flue and venting are secure and unobstructed.
Attention then turns to clearing leaves, dust, and other debris from around the unit to guarantee proper airflow and safe combustion.
Any issues found are noted for repair before restarting the furnace.
Checking the cabinet, flue, and venting
Several quick external checks can reveal early signs of wear or safety hazards on an oil furnace: inspect the cabinet for corrosion, dents, or loose panels; verify the flue is securely fastened and free of gaps or rust; and confirm venting paths are unobstructed and properly pitched.
Note damaged seals, missing screws, or displaced sections; mark issues for professional repair and avoid operating the furnace until corrected.
Clearing debris and dust from around the unit
Begin by clearing away leaves, dust, and loose debris from around the furnace to reduce fire risk and guarantee proper airflow.
Next, vacuum accessible surfaces, brush vents and intake grilles, and remove cobwebs.
Keep a clear perimeter, trim vegetation, and store combustibles elsewhere.
Inspect the base for oil stains or deterioration and document findings for technician review or future reference.
Burner assembly inspection and cleaning
Attention then turns to the burner assembly, which must be removed and inspected for wear, deposits, and alignment.
The electrode, nozzle, and combustion chamber are cleaned and checked for pitting, clogs, or carbon buildup that can impair ignition and combustion.
Any damaged components are noted for repair or replacement before reassembly.
Removing and inspecting the burner
Remove the burner assembly only after the furnace is powered down and the fuel supply is securely isolated; this allows a clear inspection of the nozzle, electrodes, combustion head, and surrounding chamber for soot, corrosion, or damage.
Loosen mounting hardware, note gasket condition, and withdraw the unit carefully.
Examine fuel lines, electrical connectors, and flame sensor for wear or loosened fittings before reassembly or further service.
Cleaning the electrode, nozzle, and combustion chamber
With the burner assembly accessible and the fuel and power isolated, the technician cleans the electrode, nozzle, and combustion chamber to restore proper ignition and efficient combustion.
Using appropriate brushes and solvent, deposits and soot are removed, electrode tips are lightly dressed and gap checked, the nozzle is inspected and replaced if clogged, and chamber surfaces are wiped.
Reassembly follows manufacturer torque and alignment specs.
Nozzle and fuel system maintenance
Nozzle and fuel system maintenance guarantees reliable combustion and prevents fouling or pump damage.
The technician should replace the nozzle with the manufacturer-recommended type and size, change clogged or aged fuel filters, and verify that the fuel pump and lines are free of leaks, air, and wear.
Systematic testing of pump pressure and line integrity completes the check.
Replacing the nozzle and recommended nozzle types
Begin by identifying the correct nozzle size and spray pattern for the furnace’s make and model, since proper atomization and flow directly affect combustion efficiency and soot buildup.
Replace the nozzle when worn, clogged, or mismatched. Use manufacturer-recommended types—standard, fine orifice, or low-input nozzles—matched to burner capacity.
Tighten securely, test spray pattern, and verify stable flame and smoke-free operation.
Checking and replacing fuel filters
Although often overlooked, fuel filters are critical to maintaining reliable oil delivery and preventing burner fouling. They should be inspected and replaced regularly according to runtime and oil quality.
A technician checks primary and secondary filters for clogging, water, and debris, noting pressure drop and service history.
Replace with manufacturer‑specified elements, prime the system carefully, and dispose of used filters per local regulations.
Inspecting and testing the fuel pump and lines
Inspect the fuel pump and lines for proper pressure, leaks, and flow before moving on to nozzle work; these components deliver the oil charge and any failure or restriction will cause poor combustion, smoke, or burner lockout.
Measure pump pressure with a gauge, check for air in the lines, tighten fittings, replace cracked or corroded tubing, and verify pump operation under run conditions.
Combustion testing and adjustments
The technician begins combustion testing with a smoke test to verify proper air intake and then makes targeted adjustments to the burner’s air shutter.
A combustion analyzer is used next to measure carbon monoxide levels and combustion efficiency, ensuring safe operation and efficient fuel use.
Results guide any further tuning to balance emissions and performance.
Performing a smoke test and adjusting air intake
Begin by measuring smoke output and combustion characteristics to verify burner efficiency and safe operation. A calibrated smoke tester or visual chart identifies soot or excessive smoke.
Adjust the primary air shutter and intake gradually, observing flame quality and smoke reduction. Recheck draft and venting after adjustments.
Record settings and repeat tests until minimal smoke and stable combustion are achieved.
Using a combustion analyzer to measure CO and efficiency
After smoke output and primary air have been optimized, a combustion analyzer provides precise measurements of carbon monoxide (CO), oxygen, flue temperature, and combustion efficiency to confirm safe, efficient operation.
The technician samples flue gases at the draft hood, records CO and O2, compares efficiency to manufacturer specs, and adjusts burner settings.
Repeat testing after adjustments and document results for safety and warranty compliance.
Electrical and control system checks
The technician inspects wiring, control modules, and safety switches for secure connections, signs of wear, and proper operation.
Voltage and continuity tests are performed where appropriate to verify circuits and interlocks.
The thermostat and furnace cycle are then tested to confirm correct temperature sensing and on/off sequencing.
Inspecting wiring, controls, and safety switches
Inspecting wiring, controls, and safety switches confirms the oil furnace will operate reliably and safely between service visits.
The technician visually checks wiring insulation, tightens terminals, and verifies control module connections.
Safety switches (limit, rollout, flame sensor) are inspected for corrosion, proper alignment, and secure mounting.
Faults are documented, corrected, and retested to confirm safe operation without addressing thermostat cycling.
Testing the thermostat and cycle operation
Begin by confirming the thermostat accurately calls for heat and that the furnace responds through a complete on/off cycle; this verifies the control chain from user input to burner operation and exposes issues like weak batteries, miscalibration, or short cycling.
Check setpoint accuracy with a separate thermometer, verify differential and anticipator settings, observe cycling duration, and note irregular delays, continuous runs, or frequent starts for further troubleshooting.
Flue and draft inspection
The technician measures furnace draft and visually inspects the flue for soot, corrosion, or obstructions that could impede venting.
Accurate draft readings confirm proper combustion and safe exhaust flow.
If readings are out of range, visible damage is present, or access is limited, a qualified professional should be called to diagnose and repair flue issues.
Measuring draft and inspecting flue for blockages
Technicians measure furnace draft and inspect the flue to guarantee combustion gases vent properly and to detect soot, creosote, animal nests, or other blockages that could cause backdrafting or carbon monoxide buildup.
They use a manometer or draft gauge at the draft hood and chimney, note readings against specifications, visually examine liner and termination for obstructions, and remove minor deposits or document issues for corrective cleaning.
When to call a professional for flue issues
When should a professional be called for flue problems? A technician is required if soot, persistent odors, visible cracks, corrosion, backdrafting, or unsafe draft readings occur.
Also call when chimney liner damage, animal nests, recurring soot buildup, or suspicious carbon monoxide alarm activity appears.
Professionals assess structural damage, perform creosote removal, repair liners, and verify safe venting to prevent fire and poisoning risks.
Final cleaning, reassembly, and system restart
The technician completes a final cleaning, carefully reinstalls all panels, filters, and fasteners following manufacturer torque and alignment specifications.
A concise startup checklist is followed, confirming oil supply, thermostat settings, safety controls, and proper venting before energizing the system.
During the initial run the technician observes ignition, flame pattern, combustion sound, and steady operating pressures, ready to shut down immediately if abnormalities appear.
Proper reassembly steps
Begin by confirming that all soot and debris have been removed from combustion components and the surrounding cavity.
Reinstall cleaned burners, electrodes, and gaskets using correct torque and alignment.
Replace filters and access panels, reconnect wiring and fuel lines, and secure venting.
Verify fasteners and clearances match manufacturer specifications.
Document parts replaced and final positions for future reference.
Startup checklist and initial run observation
With reassembly complete and documentation logged, attention turns to the startup checklist and watching the furnace through its initial run.
The technician verifies fuel supply, electrical connections, and venting, then restores power and opens the oil valve.
Observe ignition sequence, flame stability, burner noise, and exhaust draft for several cycles.
Check thermostat response, monitor for leaks, and confirm safe operating temperatures before leaving.
Seasonal and Annual Maintenance Tasks
Before winter begins, a concise list of pre-season checks—filter replacement, oil tank inspection, nozzle and electrode checks, and thermostat testing—helps guarantee reliable startup.
Annual inspections and professional tune-ups confirm combustion efficiency, safety controls, and proper draft while identifying wear that DIY checks may miss.
A simple long-term maintenance schedule template with monthly, seasonal, and yearly items keeps service tasks organized and records clear.
Tasks to do before winter season start
Several straightforward seasonal and annual checks should be completed on an oil furnace before cold weather arrives to secure safety, efficiency, and reliability.
Inspect and replace the air filter, check and tighten electrical connections, test thermostat operation, verify oil tank level and lines for leaks, clean accessible vents and combustion chamber access, make certain flue and chimney are clear, and confirm proper airflow and register operation.
Annual inspections and professional tune-ups
Because an oil furnace combines combustion, electrical components, and moving parts, annual inspections and professional tune-ups are essential to maintain safety, efficiency, and longevity.
A qualified technician should inspect burners, heat exchangers, flues, controls, and safety devices; clean or replace filters and nozzle; test combustion efficiency and carbon monoxide levels; adjust settings; document findings and repairs; and advise on necessary parts or timing for future service.
Long-term maintenance schedule template
After completing annual inspections and professional tune-ups, a clear long-term maintenance schedule helps owners plan seasonal and yearly tasks to preserve performance and safety.
- Spring: inspect flue, clean burner, check filters.
- Summer: test thermostat, service tank and lines, replace filters.
- Fall: verify combustion, adjust controls, lubricate motors.
- Winter: monitor fuel level, emergency checks, log performance and call technician if anomalies appear.
Common Problems Identified During Service and How to Fix Them
During routine service, technicians commonly encounter ignition failures or weak sparks, soot buildup from poor combustion, fuel delivery problems including clogged filters, and short cycling often tied to thermostat issues.
Each fault requires specific diagnostic steps—inspection of the burner and electrodes, cleaning or adjusting combustion components, replacing filters and checking the fuel line, and testing thermostat settings and controls.
Identifying the root cause during service allows targeted repairs that restore safe, efficient operation.
No ignition or weak ignition
No ignition or a weak pilot flame prevents an oil furnace from starting and can signal several distinct issues that a service technician should methodically check.
The technician inspects fuel supply, filter, fuel pump pressure, nozzle condition, electrode alignment and gap, transformer voltage, and safety controls.
Cleaning or replacing worn components, adjusting gaps, and verifying proper electrical connections typically restore reliable ignition.
Soot buildup and poor combustion
Soot accumulation and incomplete combustion reduce furnace efficiency, increase fire risk, and indicate specific faults in the burner system.
Technicians inspect nozzle spray pattern, electrode gaps, and combustion chamber for carbon deposits.
Cleaning or replacing the nozzle, adjusting air shutter and fuel metering, and removing soot restore proper flame characteristics.
After service, combustion is tested and flue inspected to confirm clean exhaust and safe operation.
Fuel delivery issues and clogged filters
Many fuel delivery problems trace back to restricted flow caused by clogged filters, collapsed fuel lines, or failed lift pumps.
Technicians inspect and replace primary and secondary filters, check fuel line integrity, bleed air, and test pump pressure.
Cleaning or replacing the nozzle and ensuring tank venting prevents starvation.
Document findings and retest system operation to confirm steady combustion and reliable fuel flow.
Short cycling and thermostat problems
Several common causes can make an oil furnace short-cycle or exhibit thermostat-related faults, each requiring targeted diagnostics and correction.
Technicians should check thermostat calibration, wiring, and placement, then inspect the limit switch, clogged return vents, and oversize/undersize burner settings.
Repair steps include recalibrating or replacing the thermostat, adjusting cycles, clearing airflow obstructions, and correcting control or safety switch faults.
When to Call a Professional vs. DIY
The article distinguishes routine maintenance tasks that a homeowner can safely perform from situations that require a licensed technician.
Safety- or code-related issues—such as fuel leaks, combustion problems, electrical faults, or venting and flue concerns—should prompt an immediate professional call.
It also notes that complex repairs may be more cost- and time-effective when handled by a trained service provider.
Safety- or code-related situations requiring a technician
Homeowners should recognize clear boundaries between routine maintenance and issues that require a licensed technician because oil furnaces involve combustion, pressurized fuel, and electrical components that pose safety and code risks.
Call a professional for fuel leaks, persistent carbon monoxide alarms, failed safety interlocks, venting or chimney damage, electrical faults, illegal installations, or required permits and inspections.
Do not attempt major repairs alone.
Cost and time considerations for professional service
Many homeowners weigh cost and time when deciding whether to call a professional or tackle furnace tasks themselves. Routine chores like filter changes and basic cleanup can be quick and inexpensive, while diagnostics, burner adjustments, or parts replacement often demand hours of labor and specialized tools that raise costs.
Professionals offer warranties, safety compliance, and faster troubleshooting. DIY suits simple maintenance when confidence and basic tools exist.
Energy Efficiency Tips and Small Upgrades
Attention to combustion settings, burner tune-ups, and regular nozzle and filter changes can improve combustion efficiency and reduce fuel use.
Integrating smart thermostats and basic zoning can cut wasted heat and tailor temperatures to occupied spaces.
Upgrading insulation and sealing drafts further lowers demand on the furnace and maximizes the benefit of control improvements.
Improving combustion efficiency and reducing fuel use
Optimize combustion to get more heat from each gallon of fuel while cutting emissions and operating costs.
Technicians inspect and adjust nozzle, electrode gap, and air shutter settings, clean burners and heat exchanger, and verify draft and flue conditions.
Regular oil filter replacement and proper fuel quality prevent incomplete combustion.
These targeted actions reduce soot, improve efficiency, and lower annual fuel consumption.
Smart thermostats, zoning, and insulation impacts
After combustion systems and fuel delivery are tuned for cleaner, more efficient burning, addressing how heat is controlled and retained in the home yields further savings.
Installing a smart thermostat optimizes schedules and reduces wasted runtime.
Implementing zoning directs heat only where needed.
Upgrading insulation and sealing air leaks lowers demand, prolongs cycles, and multiplies efficiency gains from the furnace service.
Maintenance Recordkeeping and Compliance
A concise log of each service visit should list date, technician, work performed, parts replaced, settings adjusted, and any measurements or test results.
Records also help verify warranty coverage and document compliance with local codes or inspection requirements.
The homeowner or technician should retain copies and note any code-related actions or permit references for future reference.
What to record during each service visit
During each service visit, technicians should document a concise, standardized set of information to guarantee maintenance continuity and regulatory compliance.
Records should be clear, dated, and signed, enabling trend tracking and accountability.
- Inspection findings and corrective actions
- Measurements: pressure, temperature, combustion readings
- Parts replaced, lubricant types, quantities
- Technician name, license number, and next service recommendation
Warranty and local code considerations
Because warranties and local codes directly affect acceptable service practices and recordkeeping, technicians must align maintenance logs with both manufacturer requirements and municipal regulations.
Records should note parts, dates, serial numbers, and technician credentials to preserve warranty eligibility.
Compliance includes following disposal, venting, and combustion-air rules; retaining receipts and signed checklists; and providing homeowners with copies for future claims or inspections.
Troubleshooting Quick Reference
Begin by checking the furnace’s basic indicators—thermostat setting, power supply, and pilot or ignition status—to quickly rule out simple causes of failure. Then consult this quick reference for common faults, likely causes, and immediate actions.
| Symptom | Likely Fix |
|---|---|
| No heat | Power/thermostat/pilot |
| Short cycling | Overheat/airflow |
| Smell of fuel | Shut off/ventilate |
| Noisy burner | Clean/adjust |
Conclusion
Like a well-tended garden that blooms reliably each spring, routine oil-furnace care rewards steady attention. One homeowner who kept a simple log found soot and a clogged nozzle months earlier than neighbors, cutting emergency repairs by 60%. Regular checks—filters, combustion, seals—cultivate safety, efficiency, and longevity. When tasks exceed skill or diagnostics show danger signs, a qualified technician protects investment and household well-being. Consistent maintenance keeps warmth predictable and costs down.