
How to Replace the Floor Under a Toilet in a Mobile Home: Step-by-Step Repair Guide
To replace the floor under a toilet in a mobile home, start by shutting off the water supply and removing the toilet. Inspect for any rot, mold, or damage to the joists. Cut out any damaged subfloor, reinforce or sister the joists as necessary, and then install moisture-resistant plywood or engineered panels using adhesive and corrosion-resistant fasteners. Replace the flange and seal, reinstall the toilet, and test for leaks. Following these steps ensures a safe and durable repair, preventing future problems. More detailed instructions are provided below.
Overview of Replacing Mobile Home Toilet Flooring
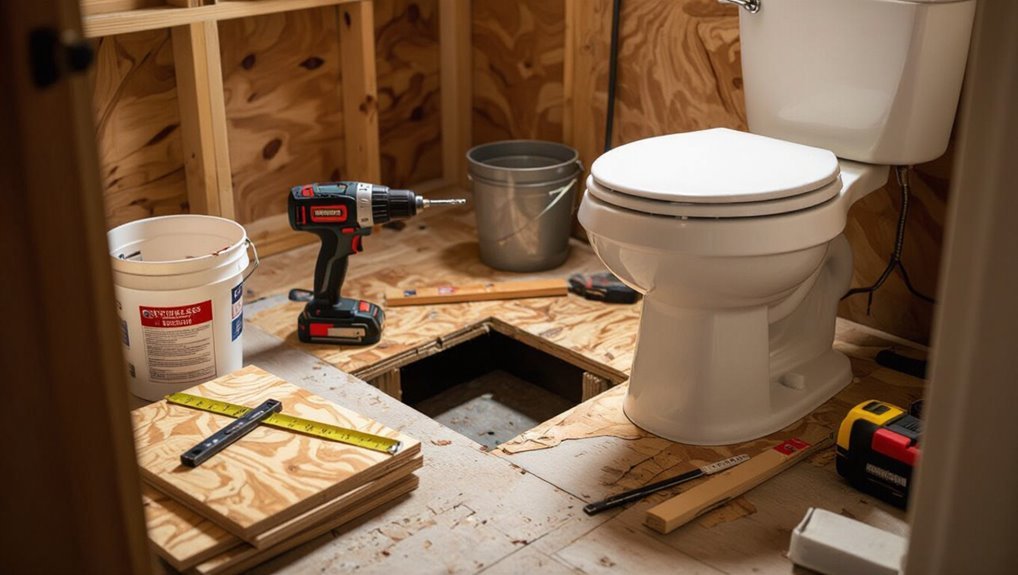
Mobile home toilet flooring should be replaced when rot, soft spots, persistent leaks, or odor indicate compromised subflooring that threatens structural integrity and sanitary conditions.
The process typically involves removing the toilet and surrounding flooring, evaluating and repairing any damaged joists or subfloor, and installing a new moisture-resistant subfloor and finish. A straightforward job can take a day or two, while extensive repairs may require more time.
Costs and difficulty vary with damage extent and access — expect relatively low expense and moderate DIY difficulty for minor work, and higher cost with professional help for major structural repairs.
When and why to replace the floor under a toilet in a mobile home
Durability often determines whether the flooring under a toilet in a mobile home must be replaced: prolonged moisture, slow leaks, or structural sagging compromise the subfloor and create health and safety hazards.
Replacement is warranted when rot, soft spots, persistent odors, or shifting toilet fixtures appear.
Homeowners researching how to replace floor under toilet in mobile home should prioritize safety, mold remediation, and restoring proper flange alignment.
Summary of the process and expected time, cost, and difficulty
Begin by removing the toilet and evaluating the damage.
Then proceed through demolition of the compromised subfloor, mold remediation if needed, installation of a new substrate and flange, and finally re-seating the toilet and testing for leaks.
The job typically takes one to two days, costs $150–$800 depending on materials and labor, and rates moderate difficulty for DIYers with basic carpentry and plumbing skills.
Safety, Tools, and Materials Needed
Before beginning work, the author recommends evaluating mobile-home-specific safety risks, including floor support, nearby plumbing, and electrical lines.
Essential tools such as a pry bar, circular saw, drill, level, and plumbing wrenches should be gathered.
Required materials include appropriate plywood or subfloor panels, flooring finishes, fasteners, and sealants, with alternatives chosen for moisture resistance and load capacity.
Safety precautions specific to mobile homes (support, plumbing, electrical)
Work cautiously around mobile-home toilets, as floors, framing, and utility runs differ from site-built homes and require extra attention to structural support, plumbing connections, and electrical wiring.
Inspect underfloor supports and shore weak areas before removing flooring. Shut off water and power, cap lines, and identify vent and drain paths.
Avoid cutting near electrical runs; consult mobile-home schematics or a licensed pro for complex issues.
Tools required
A concise, organized set of safety gear, hand tools, and materials saves time and prevents mistakes when replacing the floor beneath a toilet.
Essential items include protective gear, cutting and fastening tools, and plumbing supports.
Recommended list:
- PPE: gloves, eye protection, dust mask, knee pads.
- Tools: reciprocating saw, drill, pry bar, tape measure.
- Support: flange wrench, jack or temporary shoring.
Materials and replacements options (plywood, subfloor panels, flooring finishes, fasteners, sealants)
With safety gear, cutting tools, and supports in place, attention turns to selecting replacement materials that match the subfloor’s structural needs and the finished floor’s durability and appearance.
Suitable options include exterior-grade plywood or tongue-and-groove subfloor panels, moisture-resistant underlayment, and compatible flooring finishes (vinyl, tile, laminate).
Use corrosion-resistant screws, construction adhesive, waterproof sealant, and plumber-grade wax or gasket for the flange.
Inspecting the Damage and Preparing a Repair Plan
A careful inspection determines how far rot and structural compromise extend by probing the floor, checking for soft spots, and looking for water stains or mold.
The inspector distinguishes damage limited to the subfloor from problems that reach the joists, measures and marks the repair area, and notes joist spacing and condition.
Based on these findings the appropriate approach is chosen: a localized patch, full subfloor replacement, or joist reinforcement.
How to assess rot extent and structural compromise
Inspection begins by removing the toilet and any immediate coverings to reveal the full extent of visible rot and any hidden moisture indicators.
The technician probes surrounding wood with a screwdriver to map soft areas, stains, and mold. Measurements document affected zones; photos record conditions.
Load-bearing elements are noted for compromised integrity. Findings produce a prioritized repair plan with material and time estimates.
Identifying subfloor vs joist damage
Once the extent of rot and compromised framing is documented, the technician must distinguish damage limited to the subfloor from damage that reaches the joists.
Probing with a screwdriver, inspecting underside access, and looking for sagging, split, or blackened joist faces reveal deeper failure.
If joists are affected, plan for sistering or replacement; if only the subfloor, localized panel replacement suffices.
Measuring and marking the repair area
Measure and mark the repair area methodically to guarantee cuts remove all compromised material while preserving as much sound subfloor and framing as possible.
Inspect from toilet flange outward, probing for soft spots and staining.
Outline a rectangular or polygonal cut that extends to solid wood, marking joist locations and fastener lines.
Record dimensions and note any obstructing plumbing or vapor barriers before cutting.
Deciding between partial patch, replace subfloor, or reinforcing joists
How badly is the structure compromised, and what scope of work will reliably restore function and safety? Inspectors assess rot extent, joist decay, and subfloor stiffness.
Localized soft spots suit partial patching; widespread damage requires full subfloor replacement. If joists are sagging or split, reinforce or sister joists.
Choose the least invasive repair that meets load requirements and prevents future moisture intrusion.
Shutting Off, Removing, and Protecting Plumbing Fixtures
Before cutting into the subfloor, the water supply must be shut off and the toilet flushed and drained to prevent spills and water damage.
The fixture should be unbolted and lifted straight up, taking care not to damage the flange or attached plumbing.
Adjacent finishes and nearby fixtures should be covered and protected to keep debris and moisture from causing additional harm.
How to shut off water and drain the toilet
Shut off the toilet’s water supply and fully drain the bowl and tank to prevent spills and simplify removal.
Close the angle stop clockwise until tight; if none exists, shut off the main water to the unit.
Flush to empty the tank and use a sponge or wet/dry vacuum to remove residual water from bowl and tank.
Cap or plug the supply line to prevent leaks.
Removing the toilet safely without damaging flange or plumbing
Carefully lift the toilet clear of the floor once the water is off and the bowl and tank are emptied, keeping movements slow and steady to avoid cracking the porcelain or stressing the closet flange.
Support the bowl at the base, straighten bolts, and wiggle gently to break the seal.
Set the toilet on a protective surface, cap the waste outlet, and inspect the flange and trap for damage.
Protecting adjacent areas and finishes
While plumbing is offline and fixtures are removed, adjacent flooring, cabinetry, and finishes should be protected with durable coverings and barriers to prevent water, dust, and impact damage.
Apply waterproof tape to seams, use rigid sheets over counters, and drop cloths on floors.
Protect trim and painted surfaces with cardboard or foam.
Secure coverings to avoid shifting and check periodically during work.
Removing Damaged Flooring and Exposing Structure
The damaged floor is cut out with appropriate tools—oscillating multi-tool, circular saw set to the subfloor depth, or pry bar for localized removals—to expose joists and underlying layers.
Insulation is pulled back and inspected while the cavity is checked for hidden mold, moisture stains, or pests that require remediation.
In mobile homes, temporary supports or shoring are installed before removing load-bearing sections to maintain structural alignment.
Methods for cutting and removing old flooring and subfloor
Begin by removing fixtures and surface materials to expose the damaged area, taking care to shut off water and disconnect the toilet before work begins.
Use appropriate cutting tools and techniques to avoid structural damage.
- Score and remove finish flooring with a utility knife and pry bar.
- Cut subfloor into manageable sections with a circular saw set to depth.
- Pry up and inspect joist edges for rot or fastener corrosion.
Removing insulation and checking for hidden mold or pests
Remove insulation carefully to reveal the cavity beneath the subfloor, taking care to wear appropriate PPE and to contain debris to prevent spreading dust or spores.
Inspect exposed joists, vapor barriers, and plumbing for discoloration, soft rot, mold colonies, droppings, or insect activity.
Photograph damage, collect samples if needed, and remove contaminated insulation in sealed bags.
Ventilate area and document findings for repair planning.
Temporary supports and shoring in mobile homes
Lift and brace the toilet and surrounding floor before cutting into damaged areas to prevent sagging or collapse of the mobile home’s lightweight structure.
Install adjustable jacks or temporary posts under chassis beams, place cribbing under floor joists, and use plywood spreaders to distribute loads.
Verify stability, monitor for movement, and only remove compromised decking once shoring securely supports the area.
Repairing or Reinforcing Joists and Framing
The condition of existing joists determines whether replacement or sistering is appropriate, with sistering preferred for localized rot or sag and full replacement for widespread damage.
For mobile home floors, a step-by-step sistering approach — measure, cut matching lumber, shim for level, and clamp before fastening — will be outlined.
Proper fastening, strategic blocking, and confirming a level, plumb structure are essential for long-term stability.
When to sister joists vs replace joists
Deciding whether to sister joists or replace them hinges on evaluating the extent and nature of the damage: localized rot, splits, or slight sagging often call for sistering, while widespread decay, severe twisting, or compromised bearing ends typically necessitate full replacement.
Inspect span, load, fastener capacity, and moisture source; if structural integrity or continuous bearing is lost, replace. Sistering suits repairable sections.
Step’by’step to sister a joist in a mobile home floor
Begin by confirming the joist’s dimensions, orientation, and the extent of damage to determine if sistering will restore required strength and bearing.
Cut a replacement board matching size and length, dry-fit alongside the damaged joist, then apply construction adhesive to faces.
Clamp the sisters tightly, temporarily support loads, and prepare to fasten per specified pattern once alignment and bearing are verified.
Fastening, blocking, and ensuring level structure
Securely fasten sistered joists with a combination of mechanical fasteners and adhesive. Add blocking to distribute loads and prevent rotation, and check for level and plumb before finishing.
Use through-bolts or structural screws staggered along the splice, glue with construction adhesive, and install solid blocking at supports and under fixtures.
Shim as needed, recheck alignment, then fasten subfloor to new framing to lock geometry.
Installing New Subfloor Under the Toilet
For mobile homes, selecting a subfloor material that resists moisture and flex—such as exterior-grade plywood or tongue-and-groove engineered panels—is essential.
Panels must be cut to fit accurately around the toilet flange and secured firmly to joists with appropriate fasteners. Then seams sealed and taped to create a continuous surface.
The installer should also provide ventilation and a proper moisture barrier beneath the subfloor to prevent rot and mold.
Choosing the right subfloor material for mobile homes
Selecting the appropriate subfloor material for a mobile home requires balancing moisture resistance, weight limits, and compatibility with existing framing and plumbing.
Materials like exterior-grade plywood, moisture-resistant OSB, and specialized composite panels each offer trade-offs in durability, cost, and ease of installation.
Choice depends on local climate, expected humidity, load distribution around the toilet flange, and long-term maintenance expectations.
Cutting and fitting replacement subfloor panels
With the subfloor material chosen, attention shifts to accurately cutting and fitting replacement panels around the toilet opening and surrounding framing.
Measurements are taken twice; templates replicate flange and pipe locations. Cuts are made with appropriate saws, edges smoothed, and panels test-fit to guarantee flush alignment and even gaps for movement.
Pieces are trimmed for joist clearances and reinstall-ready positioning.
Securing subfloor to joists and sealing seams
Begin fastening the new subfloor by aligning panels over joists and using the specified screws or ring-shank nails at manufacturer-recommended spacing to guarantee a solid, squeak-free connection.
Stagger panel joints, countersink fasteners, and drill pilot holes near edges.
Apply construction adhesive beneath panels for extra bond.
Seal seams with exterior-grade sealant or waterproof tape to prevent water infiltration and maintain structural integrity.
Ensuring proper ventilation and moisture barrier
After fastening and sealing the new subfloor, attention shifts to controlling moisture and ensuring adequate air exchange beneath and around the toilet area.
Install a continuous vapor barrier over exposed framing, extend it up wall bases, and seal penetrations.
Provide passive ventilation—air gaps, vented access panels, or small through-joist vents—to prevent trapped humidity and prolong subfloor and fixture longevity.
Reinstalling or Replacing the Toilet Flange and Plumbing Connections
Next, the condition of the toilet flange should be assessed and replaced if cracked, corroded, or improperly seated to guarantee a secure connection to the drain.
A new wax ring or a modern rubber or foam seal should be installed to create a reliable seal between the flange and the toilet base.
Finally, the water supply line must be reattached and the assembly tested carefully for leaks before completing the job.
Inspecting and replacing the toilet flange
Inspecting the toilet flange requires checking for cracks, corrosion, warping, and proper alignment with the drain pipe so any compromised flange that can’t form a secure seal is identified early.
If damaged, remove old flange and evaluate pipe condition. Choose a replacement flange compatible with pipe material and height.
Secure new flange to subfloor and guarantee bolt positions align with toilet base before reinstalling.
Installing new wax ring or modern seal alternatives
Begin by selecting the appropriate toilet-to-flange seal—either a traditional wax ring, a wax-free rubber gasket, or an elastomeric spacer—based on flange height, pipe type, and homeowner preference.
Center the seal on the flange, press firmly for full contact, and align closet bolts.
When reinstalling the bowl, lower evenly to compress the seal without rocking.
Torque bolts alternately to manufacturer specs.
Reconnecting supply lines and testing for leaks
Reconnect the water supply and verify all connections for leaks before completing the installation.
The supply line is attached to the shutoff valve and toilet fill valve; tighten fittings hand-tight plus a quarter turn with a wrench.
Open the valve slowly, observe joints and flange area for drips, and flush multiple times.
Replace any leaking fittings or use thread sealant; guarantee stable, leak-free operation.
Installing Finish Flooring and Sealing Around Toilet Base
The installer selects a finish material suited to the mobile home — typically vinyl, tile, or water-resistant laminate — and plans cuts to clear the flange and match the toilet footprint.
Precise cutting around the flange and any bolt locations guarantees a snug fit and proper toilet seating.
Finally, the installer applies appropriate sealants and caulking around the base and flange area to prevent moisture infiltration and future damage.
Flooring options compatible with mobile homes (vinyl, tile, laminate)
Three common finish-floor choices for mobile homes—sheet vinyl, ceramic or porcelain tile, and laminate—each offer different trade-offs in moisture resistance, weight, and ease of installation.
- Sheet vinyl: lightweight, water-resistant, seamless options ideal for slight subfloor movement.
- Tile: durable, water-tight with proper underlayment but adds significant weight.
- Laminate: attractive and affordable, requires moisture barrier and stable subfloor for longevity.
Cutting flooring to fit flange and toilet footprint
Begin by measuring the toilet flange location and the outer perimeter of the toilet base to establish precise cutting lines for the finish floor.
Transfer measurements, mark cutouts for the flange bolt slots and the toilet footprint.
Use appropriate blades for material, cut carefully, and test-fit.
Trim as needed for a snug, even fit around the flange and base before reinstalling the toilet.
Sealing and caulking methods to prevent future moisture damage
After trimming the finish flooring to fit snugly around the flange and toilet footprint, attention turns to sealing and caulking methods that will block water intrusion and protect the subfloor.
Apply a bead of plumber’s putty or silicone around the flange, then install the toilet.
Finish by caulking the base with mildew-resistant silicone, smoothing joints, and wiping excess to guarantee a continuous waterproof seal.
Reinstalling the Toilet and Final Testing
The toilet is set back in place, bolts are torqued to the manufacturer’s specification, and the bowl is checked for level to prevent stress on the flange.
Multiple test flushes are performed while inspecting for wobble and any signs of leaks at the base and supply connection.
Once watertight and stable, trim is completed and final touch-ups are applied to seal and match surrounding finishes.
Proper torquing and leveling of the toilet
Seat the toilet carefully onto the new flange and guide the bolts through the base, ensuring the wax ring compresses evenly.
Tighten nuts alternately and incrementally to avoid cracking the porcelain. Use a torque-limiting wrench or stop when snug and secure, typically 15–20 ft·lb for most bolts.
Check with a level across bowl front-to-back and side-to-side; shim if necessary before final torque.
Testing flush, checking for wobble and leaks
With the bowl torqued and leveled, attention turns to function and stability: operate the flush and inspect for any wobble or leaks before finishing.
Flush multiple times, watching water flow, refill speed, and tank seals.
Place hands around base and tank while an assistant flushes to detect movement.
Check supply line, shutoff valve, and wax ring area for dampness; tighten connections as needed.
Final trimming and aesthetic touch’ups
Carefully trim any excess flooring and caulk joints before lowering the toilet back into place, ensuring the flange ring, bolts, and new wax or foam seal align precisely.
Tighten bolts evenly, reinstall tank and seat, then test for leaks.
Apply matching trim or quarter-round, touch up paint, and seal perimeter.
Inspect for level, secure fastenings, and confirm clean, finished appearance.
Common Problems, How to Troubleshoot, and When to Hire a Pro
Common problems after replacing the floor under a toilet include flange misalignment, persistent leaks, and sagging subfloor.
The article outlines brief troubleshooting steps for each issue and simple tests to confirm the source of a problem.
It also identifies clear indicators—extensive water damage, unstable joists, or repeated leaks—that warrant calling a plumber or contractor.
Troubleshooting common issues (flange misalignment, persistent leaks, sagging)
Troubleshooting the floor beneath a toilet begins by identifying three frequent issues—flange misalignment, persistent leaks, and sagging—and evaluating their root causes and severity.
Inspect flange position relative to finished floor; adjust or replace if offset.
Trace leaks to wax ring, flange bolts, or supply line and repair accordingly.
Assess joists and subfloor for rot or deflection; reinforce or replace damaged members.
Signs the job is beyond DIY and when to call a plumber or contractor
After examining flange alignment, leak sources, and joist integrity, determine whether the remaining work matches the homeowner’s skills and available tools.
Some problems—extensive rot, active sewer-gas leaks, corroded cast-iron waste lines, or structural joist replacement—are best handled by a licensed plumber or contractor.
Call a pro for complex rerouting, hidden mold, compromised support beams, permit-required alterations, or uncertain diagnostic findings that risk safety or code violations.
Preventive Maintenance to Avoid Future Floor Damage
A concise preventive maintenance plan helps prevent repeat damage after replacing a toilet floor.
It should include a brief inspection checklist tailored to mobile homes, specific moisture-control and ventilation measures, and a shortlist of recommended products or upgrades such as waxless seals, corrosion-resistant flange bolts, and humidity-sensing exhaust fans.
Following these steps reduces the likelihood of future leaks and structural decay.
Regular inspection checklist for toilets in mobile homes
Regular inspections of toilet assemblies in mobile homes help detect early signs of leaks, movement, or seal failure that can lead to costly floor deterioration.
A concise checklist guarantees consistent assessment of the wax or rubber flange seal, closet bolts, tank-to-bowl connections, floor around the base for soft spots or discoloration, and visible plumbing joints for drips.
- Verify flange seal integrity and closet bolts.
- Check tank-to-bowl fittings and water supply connections.
- Inspect floor base for softness, stains, or odors.
Moisture control strategies and ventilation tips
Implementing effective moisture control and proper ventilation is essential to prevent future floor damage around toilets in mobile homes.
Inspect and seal plumbing joints, keep caulking intact, and repair leaks promptly.
Guarantee exhaust fans vent outdoors, maintain airflow under cabinets, and use humidity sensors or timers.
Promote routine drying after spills and monitor indoor humidity to limit mold and rot risks.
Recommended products and upgrades to reduce recurrence
Consider upgrading components and materials that directly address common failure points around toilets to reduce the chance of recurrent floor damage.
Recommended items include a corrosion-resistant flange, flexible wax-free seal or reinforced wax ring, stainless or brass bolts, and a moisture-resistant subfloor (marine-grade plywood or cement board).
Add silicone sealant, a water-sensing alarm, and upgraded shutoff valve to detect and stop leaks early.
Estimated Costs, Timeline, and Permits
An overview of expected costs, including a materials breakdown and common labor rates, helps homeowners budget for toilet-floor replacement.
Timelines vary from a single-day partial repair to multiple days for full subfloor and joist work.
Permit requirements—especially unique rules for mobile homes—should be checked with local authorities before work begins.
Cost breakdown for materials and typical labor rates
When budgeting for replacing the floor under a toilet, homeowners should itemize materials (subfloor, underlayment, flooring, fasteners, sealants, flange/closet bolts) and separate them from labor and permit fees to get an accurate total.
Typical material costs range $75–$350 depending on materials and quantity.
Labor in mobile homes commonly runs $50–$100 per hour; permit fees vary regionally, often $25–$150.
Typical timeline for partial vs full replacement
How long the job takes depends on whether only the damaged section beneath the toilet is addressed or the entire bathroom floor is replaced.
Partial repairs often require 4–8 hours, including removal, subfloor patching, drying, and reinstallation.
Full replacements typically span 1–3 days for demolition, new subfloor and underlayment, tile or vinyl installation, and curing time before reinstalling fixtures.
Permit considerations and mobile home regulations
Because local building codes and park rules can affect scope and cost, homeowners should verify permit requirements and mobile home regulations before beginning floor work under a toilet. Inspectors, park managers, and lenders may impose standards; fees and lead times vary. Confirm documentation, disposal rules, and licensed-contractor mandates to avoid fines or rework.
| Authority | Common requirement |
|---|---|
| City/plumbing inspector | Permit, inspection |
| Mobile home park | Approval, trash rules |
| State agency | Installer licensing |
| Lender/insurer | Documentation, compliance |
Conclusion
Replacing the floor under a mobile home toilet transforms a tricky chore into a manageable project when approached methodically. With careful inspection, proper tools, and attention to plumbing and structural details, the repair restores safety and value. Like peeling back wallpaper to reveal the truth beneath, each step uncovers what must be fixed and why. Homeowners who follow the guide can save time and money, yet should call a pro for complex structural or plumbing issues.
