How to Unfreeze Well Water Pipes Fast: Step-by-Step Fixes to Prevent Damage
To quickly unfreeze well water pipes and prevent damage, follow these essential steps: cut power to the pump and main, ensure proper ventilation, and wear protective gear. Then, apply gentle heat using a hair dryer, heat lamp, warm towels, or a portable heater, starting from the warmer sections and moving toward the colder areas. Keep an eye out for leaks, and slowly open faucets to release trapped air. Only restart the pump once you’ve confirmed that the lines are clear. After thawing, you may need to make temporary repairs and sanitize the system. For detailed guidance and prevention tips, further instructions are available.
Fast Overview: Can Frozen Well Water Pipes Be Thawed Quickly and Safely?
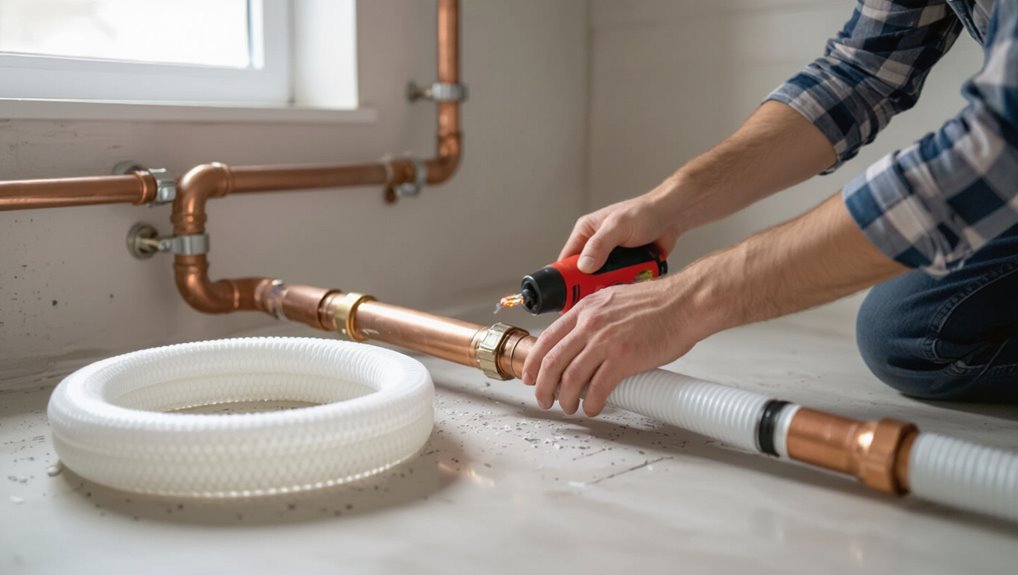
Frozen well water pipes can pose immediate risks such as burst pipes, loss of water supply, and potential contamination from compromised seals.
Quick thawing may restore service, but improper methods can worsen damage or cause scalding and electrical hazards.
Professional help is recommended when pipes are inaccessible, already leaking, or when the homeowner is unsure of safe thawing techniques.
Immediate risks of frozen well water pipes
Evaluating the situation quickly is essential because a frozen well water pipe can halt supply and lead to dangerous outcomes: pipe bursts from ice expansion, loss of water for heating or sanitation, and contamination risks if pressure changes draw surface water into the system.
Immediate risks include structural failure, mold from leaks, and compromised water quality; knowing how to unfreeze well water pipes reduces further damage.
When to call a professional vs. DIY
After recognizing the immediate hazards of a frozen well water pipe—bursting, contamination, and loss of service—homeowners must decide whether to attempt a quick thaw themselves or summon a professional.
DIY is suitable for accessible, short frozen sections using safe heat methods and basic plumbing skills.
Call a licensed plumber when pipes are hidden, frozen near pressure systems, show cracks, involve electrical heaters, or if uncertain to avoid costly damage and contamination.
Quick-Start Checklist: What to Do in the First 30 to 60 Minutes
First actions focus on safety: guarantee proper ventilation, wear protective gear, and keep heat sources away from combustible materials.
Next, assemble essential tools and materials such as a hair dryer or heat gun, towels, pipe insulation, and a wrench.
Finally, locate and shut off the well pump and main water supply, and cut power to affected circuits if electrical heating or frozen pumps are involved.
Safety precautions before attempting to thaw pipes
Within the first 30 to 60 minutes, a homeowner should focus on immediate safety steps before attempting to thaw well water pipes.
Verify power is off to affected circuits, shut main water supply if possible, ventilate confined areas, and clear combustible materials.
Check for gas odors; evacuate and call professionals if detected.
Use caution around electrical sources and structural instability.
Tools and materials to gather immediately
While ensuring safety measures are in place, assemble a compact kit of tools and materials to speed thawing and limit damage:
- Hair dryer or heat gun (low setting) and extension cord
- Space heater or electric infrared lamp with stable placement
- Towels, rags, bucket for draining water
- Pipe insulation, heat tape, and duct tape for temporary wrapping
Keep clear, work calmly, monitor heat.
How to shut off water supply and electricity if necessary
Locate and shut off the water supply and, if heating devices or exposed wiring are present, cut power to the affected area before applying heat.
Identify the main water valve (well pump switch or pressure tank shutoff) and turn clockwise.
For electricity, switch off the circuit breaker feeding the pump, basement outlets, or space heaters.
Verify no power with a noncontact tester before proceeding.
Step-by-Step Methods to Thaw Frozen Well Water Pipes Fast
The following section presents concise, step-by-step techniques for thawing frozen well water pipes using common tools and heaters.
It covers safe procedures for space heaters, heat lamps, hair dryers or heat guns, hot towels and electric heating pads, and portable propane or infrared heaters, with key safety notes.
Guidance is provided for targeting individual pipes and distinguishing indoor from outdoor lines.
Thawing with a space heater or heat lamp step-by-step
Position a space heater or heat lamp to direct warm air at the frozen section of pipe, keeping the unit at a safe distance to prevent overheating or fire hazards.
Turn the unit on low, monitor temperature, and guarantee ventilation.
Remove insulation gradually as the pipe thaws.
Check for leaks continuously.
Maintain presence until water flows freely, then restore insulation and normal water use.
Using a hair dryer or heat gun safely step-by-step
Aim the hair dryer or heat gun at the frozen section of pipe, keeping the nozzle several inches away and moving it steadily to heat evenly; use the lowest effective setting and avoid direct contact with insulation, fittings, or plastic piping to prevent damage.
Operate with dry hands, keep cords away from water, work outward from the faucet toward the blockage, and monitor pipe temperature until flow resumes.
Applying hot towels and electric heating pads step-by-step
Wrap a series of hot towels or secure an electric heating pad around the frozen section of pipe to deliver steady, localized warmth without overheating nearby materials.
Alternate towels as they cool, monitoring for moisture. Use an electric pad with thermostat and GFCI protection, avoiding prolonged contact with insulation.
Check adjoining fittings for thaw progression; stop when full flow resumes and dry surrounding areas to prevent refreezing.
Using a portable propane heater or infrared heater step-by-step and safety notes
Use a portable propane or infrared heater to deliver focused, high-output heat to the frozen section while maintaining safe distances and ventilation.
Position heater downwind, keep clear space, and direct heat at exposed pipe runs.
Monitor temperature and progress constantly, avoiding open flames near insulation or combustibles.
Have a CO detector, fire extinguisher, and an evacuation plan; shut off propane when finished.
Pipe-by-pipe targeted thawing for indoor vs. outdoor lines
Differentiate indoor and outdoor runs before beginning targeted thawing, since access, heat retention, and risk factors vary by location.
Assess each frozen section: indoor pipes in basements, crawlspaces, or walls allow controlled heating and monitoring; outdoor or exposed lines require insulated blankets, safe space heaters, or tracing tape.
Thaw one pipe at a time, move heat progressively toward the faucet, check joints for leaks, and restore flow gradually.
Techniques Specific to Well Systems
Well systems present unique challenges beyond household plumbing, requiring attention to the well pump, pressure tank, pressure lines, and the drop pipe.
Techniques include safely thawing pump and tank components, addressing frozen pressure lines and the vertical drop pipe, and following proper procedures to restart the pump once lines are clear.
The following guidance prioritizes safety and equipment protection while restoring water flow.
Thawing the well pump and pressure tank components
Begin by isolating electrical power to the pump and depressurizing the system to prevent damage or injury; frozen components must be thawed without energizing the motor.
Use directed, gentle heat—heated blankets, warm towels, or a portable heater—around the pump head, control box, and exposed fittings.
Inspect valves, gauges, and wiring for ice damage, slowly restore pressure, then test pump operation once fully thawed.
Dealing with frozen pressure lines and the drop pipe
Address frozen pressure lines and the drop pipe methodically, concentrating on sections most prone to ice blockage—near the frost line, at surface joints, and where the pipe runs through unheated spaces.
Inspect exposed runs and accessible joints for ice, apply gentle heat (heat tape, warm air), insulate thawed areas, clear vents, and protect buried segments.
Avoid sudden pressure changes; monitor for leaks during thawing.
Restarting the well pump after thawing
After confirming all frozen sections and fittings are fully thawed and insulated, the operator should follow a systematic restart procedure to prevent pump damage and release trapped air.
Slowly open hydrants or faucets to vent air, guarantee pressure tank valves are set correctly, inspect for leaks, reset pump controls, and restart power.
Monitor pressure cycling and flow; stop immediately if unusual noise, vibration, or no recovery occurs.
How to Locate the Freeze Point Quickly
The guide outlines quick methods for pinpointing where a well water pipe has frozen, starting with visual inspection and known trouble spots such as bends, exposed runs, and near fittings.
It then describes using thermal imaging or handheld temperature probes to trace cold spots more precisely.
Finally, it summarizes signs that a pipe may have already burst—wet insulation, pooling water, or sudden pressure loss—so responders can prioritize repairs.
Visual inspection and common freeze locations
A quick visual inspection narrows the search for a frozen section by focusing on visible signs: frost or ice on exposed pipework, bulging fittings, condensation patterns, and discoloration on surrounding insulation or siding.
Check unheated areas: crawlspaces, basements, exterior walls, meter boxes, and near foundation penetrations.
Pay attention to long, straight runs and poorly insulated joints where ice commonly forms.
Using thermal imaging or temperature testing
Having narrowed likely freeze sites through visual cues, the next step is to pinpoint the exact frozen section quickly using thermal imaging or simple temperature testing.
A handheld thermal camera reveals cold spots instantly; an infrared thermometer or probe can confirm temperatures along the run.
Work from warm toward cold, mark the coldest point, and plan targeted thawing while monitoring temperature changes to avoid overheating.
Signs the pipe has already burst
Silvery water stains, unexplained puddles, or sudden drops in system pressure often indicate a pipe has ruptured from freezing; locating the break quickly focuses subsequent thawing and repair efforts.
Other signs include constant water running at fixtures, damp insulation, and visible bulging or frost on the pipe.
Immediate shutoff, containment, and call to a licensed plumber minimize water damage and contamination risks.
Preventing Damage While Thawing
When thawing well water pipes, care must be taken to warm them gradually to prevent rupture from rapid temperature change.
The person performing the thaw should continuously inspect joints and exposed sections for signs of leaking so that any failures are caught early.
If small hairline cracks or pinholes appear, temporary measures such as pipe repair tape, epoxy putty, or a clamp can limit loss until a proper repair is made.
Avoiding rapid temperature changes that cause pipe rupture
Because metal and plastic pipes expand unevenly under sudden heat, thawing must proceed gradually to prevent stress fractures and burst joints.
Apply gentle, consistent warmth—space heaters, heated blankets, or hair dryers—maintaining even temperature along the affected length. Avoid open flames and extreme heat spikes.
Increase temperature slowly, monitor pipe surfaces visually, and stop if seams bulge or fittings show strain to reduce rupture risk.
How to monitor for leaks during thawing
Inspect the thawing pipe regularly for signs of leakage, focusing on joints, connections, and low points where water can collect.
Observe for drips, damp insulation, pooling, or discoloration. Listen for hissing or running water.
Keep a dry towel or container nearby to catch minor seepage and to confirm source.
Record locations of any leaks and isolate affected sections if pressure allows.
Temporary fixes for hairline cracks and pinhole leaks
Address small hairline cracks and pinhole leaks immediately with compact, temporary measures that limit water loss and prevent further damage during thawing.
- Apply rubber patch and hose clamp to isolate leak.
- Wrap self-fusing silicone tape tightly around pinhole.
- Use epoxy putty for a quick, hard seal on small cracks.
- Reduce system pressure and monitor until permanent repair is possible.
Tools, Materials, and Estimated Time for Each Method
Several practical methods exist for unfreezing well water pipes, each requiring specific tools, materials, and time estimates; the following sections outline what homeowners or technicians will need and how long each approach typically takes.
| Method | Tools/Materials & Time |
|---|---|
| Heat tape | Tape, outlet; 1–3 hours |
| Hair dryer | Dryer, extension; 30–90 minutes |
| Propane torch (caution) | Torch, wrench; 10–30 minutes |
| Hot water circulation | Hose, kettle; 20–60 minutes |
| Pipe insulation | Insulation, tape; 1–2 hours |
Common Mistakes That Make Frozen Pipes Worse
A number of common errors can turn a manageable frozen-pipe situation into a major repair, including using open flames, pouring boiling water directly on pipes, or forcing water through with excessive pressure.
Improper thawing techniques increase the risk of pipe ruptures and can introduce water hammer or overload the well pump, causing mechanical failure.
Clear guidance on safe thawing methods helps prevent these avoidable and costly consequences.
What NOT to do (open flames, boiling water, excessive pressure)
Attempting to thaw frozen well water pipes with open flames, pouring boiling water, or forcing water through with excessive pressure can quickly escalate a minor freeze into a costly rupture.
Such actions risk melting pipe insulation, warping fittings, or creating pressure spikes. Instead, avoid direct flame, scalding liquids, and high-pressure attempts; opt for gentle, controlled warming and professional guidance when unsure.
How improper thawing leads to burst pipes and pump damage
Improper thawing methods often turn a manageable freeze into a destructive failure: localized heating, sudden pressure changes, or uneven warming can crack pipe walls, dislodge joints, and overload the well pump.
Rapid restarting or forcing flow before full thawing creates pressure spikes that burst weakened sections. Inadequate monitoring allows leaks to expand; damaged pumps suffer cavitation, overheating, and premature failure, increasing repair costs.
Aftercare: Steps to Take Once Water Flow Returns
Once water flow returns, a careful inspection for leaks and pressure irregularities should be performed to catch any damage early.
The system may need flushing and sanitizing to remove contaminants introduced during the freeze and thaw.
Continued monitoring for signs of re-freeze and use of temporary mitigation measures can prevent repeat incidents.
Inspecting for leaks and pressure irregularities
Begin a systematic inspection of the plumbing after flow returns to identify leaks and pressure issues promptly.
Check visible joints, fittings, valves, and exposed pipe runs for drips, moisture, or corrosion.
Monitor pressure at faucets and the pressure tank for fluctuations or slow recovery.
Note any unusual sounds or steady drops.
Isolate and mark suspect areas for repair or professional assessment.
Flushing the system and sanitizing if needed
Flush faucets and fixtures thoroughly to clear dislodged sediment and stagnant water from the lines.
Then sanitize the system if contamination is suspected or the well was compromised during freezing.
After flushing, disinfect according to well guidelines—typically chlorination—running treated water through all outlets until chlorine is evident.
Then flush until odor dissipates.
Test water quality before regular use and document actions taken.
Monitoring for re-freeze and temporary mitigation
Several simple checks should be performed regularly after water flow resumes to detect signs of re-freeze and to apply temporary mitigations as needed.
Inspect exposed pipes for frost, listen for reduced flow or air pockets, and verify faucets for steady output.
Maintain a slow trickle during extreme cold, add insulation or heat tape where practical, and monitor pressure for sudden drops indicating hidden refreezing.
Long-Term Prevention Strategies for Well Water Systems
Long-term prevention centers on reliable insulation, correct heat tape application, and strategic pipe routing to reduce freeze risk.
Recommendations include burying supply lines to appropriate frost depth, using automatic or thermostatically controlled heating elements with backup power, and selecting routes that minimize exposure.
A seasonal maintenance checklist guarantees insulation integrity, heat tape functionality, and timely repairs before cold weather.
Insulation and heat tape installation best practices
Install insulation and heat tape with attention to pipe material, exposure, and local climate to guarantee reliable freeze protection.
Select closed-cell foam or mineral wool for exposed runs, matching insulation thickness to expected temperatures.
Use UL-listed self-regulating heat tape on metal or plastic, follow manufacturer overlap and fastening instructions, seal joints with waterproof tape, and test system periodically for wear and correct operation.
Buried depth recommendations and pipe routing tips
When planning buried water lines, depth and routing should be chosen to keep pipes below the frost line and away from surface stresses. Local frost depth governs minimum burial depth, but attention to soil type, groundwater, and future landscaping can require deeper placement.
Route lines along protected corridors, avoid heavy traffic zones, maintain access points at junctions, minimize bends, and separate potable lines from septic or drainage to reduce risk.
Automatic heat solutions, backup power, and thermostatic controls
Preventive systems that combine automatic pipe heating, reliable backup power, and thermostatic controls form the most effective defense against freeze-related disruptions in well water systems.
Self-regulating heat tape, insulated trace cables, and controlled heating panels activate based on temperature sensors.
Pairing these with battery or generator backups preserves operation during outages, while programmable thermostats maintain setpoints, minimizing energy use and preventing repeated freeze-thaw cycles.
Seasonal maintenance checklist
A concise seasonal maintenance checklist helps guarantee long-term reliability of well water systems by scheduling targeted inspections and adjustments before cold weather arrives.
- Inspect and insulate exposed pipes and pressure tanks.
- Service and test backup generators and heaters.
- Check well cap seals, vent screens, and frost protection.
- Flush lines, test water pressure, and verify thermostatic controls.
Cost Considerations and When Professional Help Is Worth It
Typical repair and thawing services for well water pipes often range from a modest diagnostic fee and hourly labor to several hundred dollars for more intensive repairs or emergency calls.
Signs such as no water pressure after thawing, visible pipe bursts, or loss of pump function indicate situations where immediate professional intervention is warranted.
Homeowners should weigh the cost of services against the risk of worsening damage and higher downstream expenses.
Typical repair and thawing service costs
Cost is a central factor when deciding between a DIY thaw and hiring a professional: emergency thawing services for frozen well water pipes commonly range from $150 to $500 for simple cases, while complex repairs or weekend/holiday call-outs can push totals to $800–$1,500 or more.
Typical charges include labor ($75–$150/hour), travel fees, materials (replacement pipe, fittings), and diagnostics; permits and pump work increase costs.
Red flags that mean call an emergency plumber or well contractor
Recognize when a frozen well system exceeds DIY limits and demands immediate professional attention.
Call an emergency plumber or well contractor if there is visible pipe bursting, rapid pressure loss, no recovery after safe thaw attempts, contaminated or foul-smelling water, electrical faults at the pump, or inaccessible buried components.
Rapid response minimizes structural, contamination, and costly replacement risks.
Real-World Scenarios and Quick Solutions
Scenarios such as remote properties without power require tailored thawing approaches that rely on portable heat sources and conserving residual warmth.
Prolonged cold snaps call for multi-day strategies that prioritize insulation, gradual warming, and monitoring to prevent re-freezing.
Simple emergency DIY fixes—like applying space heaters where safe, using warm towels, or circulating warm water—can restore flow temporarily until professional help arrives.
Thawing pipes in remote properties without power
Many remote property owners face frozen well pipes when power outages or off-grid living prevent standard electric thawing methods, requiring practical, low-tech approaches that prioritize safety and preservation of the system.
Use hot water bottles, heated towels, and propane space heaters placed safely outside frost-prone zones.
Insulate exposed lines, open faucets to relieve pressure, monitor thaw progress, and call a professional if leaks or pressure loss occur.
Cold snaps and multi-day freeze strategies
When a prolonged cold snap lasts several days, well owners must shift from quick fixes to a sustained strategy that prevents pipe rupture and maintains water access.
This includes staged heating, prioritized insulation, and routine system checks.
Implement gradual temperature increases, prioritize vulnerable lines and pump housings, monitor pressure and flow, rotate heat sources to conserve fuel, and schedule inspections to catch ice formation before catastrophic failure.
Emergency DIY fixes until a pro arrives
After exhausting staged heating and routine checks, a homeowner facing frozen well lines may need fast, temporary measures to preserve the system until a professional arrives.
Immediate, cautious steps reduce damage risk:
- Apply gentle heat with a hairdryer or heat lamp, avoiding open flame.
- Insulate exposed pipes with towels or foam.
- Open faucets slightly to relieve pressure.
- Shut off pump power if water flow is absent.
Conclusion
Nearly 25% of rural homes rely on private wells, and when pipes freeze that community faces disproportionate disruption. Prompt, informed action can often restore flow and prevent costly damage, yet many homeowners delay until pipes burst. By combining quick detection, safe thawing techniques, and targeted aftercare, property owners can minimize loss and stress. Investing in prevention reduces emergency repairs and preserves water access—critical for daily life and peace of mind.