
How to Fix Low Water Pressure in Toilet: Easy DIY Steps to Restore a Strong Flush
If you’re experiencing low water pressure in your toilet, it’s often due to clogged rim jets, a low tank water level, a faulty fill valve, or a restricted supply line. To quickly restore strong flushing performance, try these simple DIY steps: raise the float, clean the rim and siphon jets with vinegar, ensure the shutoff valve is fully open, and replace any worn flappers or fill valves. If the issue persists, there may be more extensive supply or pipe problems that require further investigation.
What Causes Low Water Pressure in a Toilet
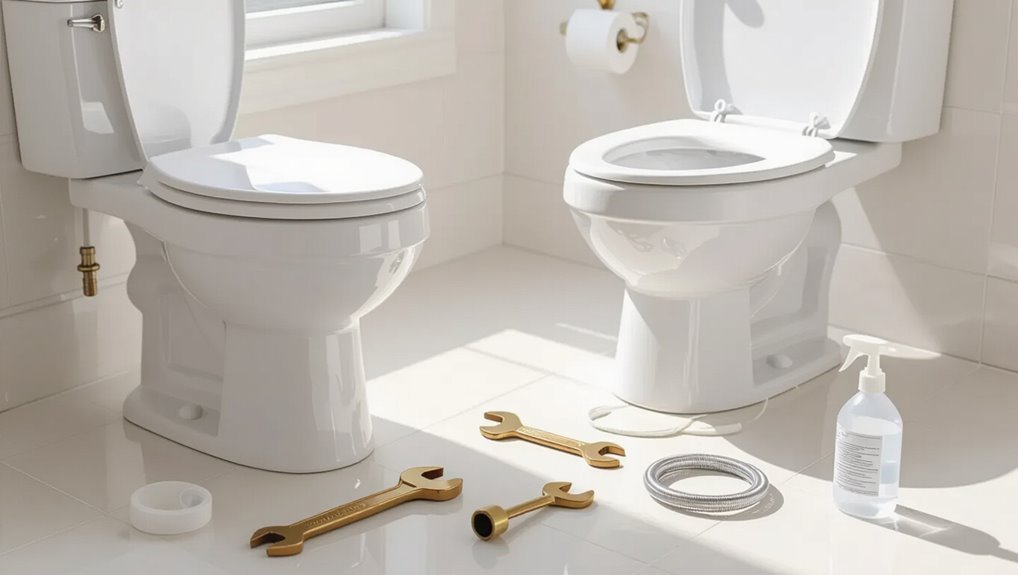
Low toilet pressure can stem from internal components like worn flappers, clogged rim jets, or a partially closed fill valve that reduce flush force.
External plumbing issues—such as kinked supply lines, corroded pipes, or a malfunctioning shutoff—also constrain water flow to the bowl.
Broader supply problems from municipal systems or private wells, including low mains pressure or sediment in the source, further affect toilet performance.
Common internal toilet issues that reduce flush power
Several internal problems within a toilet can sap flush power, often originating in the tank or bowl components.
Common causes include worn flappers, faulty fill valves, clogged rim jets, partially blocked siphon passages, and incorrect water levels.
Inspecting and replacing seals, cleaning jets, adjusting the float, and following how to fix low water pressure in toilet guides restores effective flush performance.
External plumbing and supply problems affecting toilet pressure
When problems originate outside the tank, household supply and municipal systems can substantially reduce toilet flush pressure.
External causes include partially closed shutoff valves, kinked or corroded supply lines, clogged inlet screens, pressure-reducing valves set too low, and shared-supply conflicts during peak demand.
Identifying and correcting these—valve adjustment, line replacement, screen cleaning, or PRV recalibration—restores proper flow.
How municipal or well water issues can impact toilet performance
Municipal and well water systems can directly affect toilet performance because variations in source pressure, treatment equipment, and distribution infrastructure determine how much water reaches the tank.
Low municipal pressure, main breaks, or peak demand reduce flow; treatment backwash or pressure-reducing valves limit supply.
Well pumps, pressure tanks, faulty switches, or clogged intake lines similarly cause weak fills, requiring utility contact or pump service.
Quick way to test and confirm low toilet water pressure
A quick assessment begins at the toilet: observe flush strength, note slow tank refill, and listen for weak flow or sputtering.
Next, inspect the supply line and shutoff valve for full opening and feel for pressure at the connection; a pressure gauge can confirm numerical values.
If pressure appears low at the toilet, test nearby faucets to determine whether the issue is isolated or affects multiple fixtures.
Simple at-toilet checks to measure flush strength
If toilet performance seems weak, a few quick at-the-bowl checks can confirm whether water flow is the issue.
Observe flush speed and bowl refill volume, note partial flushes or lingering waste, and listen for weak gurgling.
Drop a few drops of food coloring into the tank to time intake into the bowl.
Check for consistent jet action around the rim and siphon jet.
How to check supply line pressure and valve operation
After confirming weak flush characteristics at the bowl, the next step is to verify whether the problem originates upstream by checking the toilet’s supply line pressure and the shutoff valve operation.
Close the valve, open the tank fill valve, then briefly open the supply to feel flow and hear water.
Use a pressure gauge or attach a hose to measure PSI; guarantee the shutoff fully opens and replace if restricted.
When to test other fixtures to isolate the problem
When diagnosing whether low toilet water pressure is confined to the fixture or affects the whole home, test nearby and distant faucets and showerheads for flow and pressure while noting differences in strength and duration.
Consistent weakness at multiple points indicates a broader supply issue, whereas normal flow elsewhere isolates the problem to the toilet’s supply components or internal tank parts.
Then run fixtures one at a time and during simultaneous use to reveal pressure drops.
Immediate fixes to restore a stronger flush
Immediate fixes focus on simple adjustments and cleaning that restore tank fill and flush volume.
Suggestions include adjusting the fill valve and cup assembly or raising the float to increase the tank water level, and tweaking or replacing the flapper to improve flow.
Clearing rim holes and the siphon jet, and cleaning or replacing a clogged fill valve, are recommended next steps.
How to adjust the toilet fill valve and cup assembly
Adjusting the fill valve and cup assembly can quickly restore proper flush force by ensuring the tank refills to the correct level and the flapper seats reliably.
Inspect for mineral buildup, clean or replace the refill tube and valve seat, and confirm the cup moves freely on its shaft.
Tighten mounting nuts, test several flushes, and replace worn parts to regain consistent refill performance.
How to raise the float to increase tank fill level
Raise the float to increase the tank’s water level and restore stronger flush power by allowing more water into the bowl.
A float adjustment raises the shutoff point: bend the float arm slightly upward or move the float clip on a rod-style valve; for cylinder floats, turn the adjustment screw clockwise.
Confirm the new fill level is below the overflow tube to prevent flooding.
How to adjust or replace the flapper for better flush volume
Inspect the flapper to determine whether a simple adjustment or a replacement is needed to restore full flush volume.
Check chain slack—shorten if the flapper won’t seat, lengthen if it won’t seal.
Clean the flapper and valve seat.
If warped, hardened, or leaking, remove old flapper and install a compatible replacement, ensuring proper alignment and chain tension for a complete, powerful flush.
How to clear debris from the rim holes and siphon jet
After confirming the flapper and chain are functioning, attention should turn to the rim holes and siphon jet, common locations where mineral deposits and debris restrict water flow and reduce flush power.
Insert a wire or thin brush to dislodge buildup; flush to test.
For stubborn scale, apply vinegar, soak briefly, scrub, then rinse.
Repeat until jets flow freely.
How to clean or replace a clogged fill valve
Check the fill valve next, since a partially clogged or failing valve can slow tank refill and weaken the subsequent flush.
Inspect for sediment, mineral buildup, or damage. Shut off water, drain the tank, then remove and rinse the valve components or soak in vinegar.
Replace the valve if cleaning fails or parts are cracked.
Reassemble, restore water, and test refill speed and flush strength.
Step-by-step troubleshooting for persistent low pressure
For persistent low toilet pressure, the next step-by-step troubleshooting focuses on the water supply and the bowl itself.
The process includes inspecting and cleaning the supply line and shutoff valve, testing and replacing a faulty braided hose, and checking the angle stop for corrosion or partial closure.
It also covers examining the toilet bowl and trap for mineral buildup or blockages that can restrict flow.
Inspecting and cleaning the water supply line and shutoff valve
Turn the shutoff valve off and then back on to confirm it operates smoothly and to isolate the supply line before proceeding.
Visually inspect the valve and exposed line for corrosion, leaks, kinks or mineral buildup.
Detach the supply line at the valve, flush debris into a bucket, and clean fittings with a brush.
Reassemble, check seals, restore water, and test pressure.
Testing and replacing a faulty supply line or braided hose
If low pressure persists after clearing the shutoff valve and inlet fittings, attention should shift to the flexible supply line or braided hose. Internal collapse, clogging from mineral deposits, or hidden kinks commonly restrict flow. Diagnosing this requires isolating the line, measuring flow and visual condition, then replacing it if tests indicate reduced or inconsistent output.
Disconnect, inspect, run a bucket test, then install a new certified hose, ensuring proper fittings and no twists.
Checking and replacing a corroded or partially closed angle stop
After inspecting and, if necessary, replacing the flexible supply line, the angle stop (angle valve) at the wall should be checked next because internal corrosion or a partially closed spindle often restricts flow despite an open supply hose.
Turn water off at main, remove handle, inspect spindle and seat for corrosion, flush debris, replace valve if stiff or damaged, then restore supply and test pressure.
How to inspect toilet bowl and trap for mineral buildup and blockages
Begin by visually inspecting the bowl and trap for visible mineral deposits, foreign objects, or slow-draining water that indicate a partial blockage.
Note scale buildup around the rim jets, siphon jet, and waterline since these restrict flow into and through the trap.
Use a flashlight and toilet brush, remove debris with a coat hanger or auger, flush repeatedly, and apply vinegar or CLR to dissolve scale if needed.
When to address external plumbing and municipal issues
If in-home checks—such as measuring household water pressure and inspecting the pressure-reducing valve—do not reveal the problem, attention should shift outward.
Indicators that the municipal supply or a private well is at fault include low pressure across multiple fixtures or sudden changes tied to utility schedules.
In those cases, contact the water utility or a qualified well technician to verify supply pressure, confirm outages or system work, and coordinate any required repairs.
How to check home water pressure and pressure-reducing valves
Several simple tests can determine whether low toilet pressure originates inside the home or from the supply line: measure static and running pressure at an outdoor hose bib or near the main shutoff with a pressure gauge, note changes when appliances run, and inspect the pressure-reducing valve (PRV) for obvious leaks or corrosion.
Record readings, adjust PRV slowly if present, and retest to confirm stability.
Signs that the municipal supply or well system is the cause
When household checks show normal pressure at the meter or main but toilets and other fixtures still run weakly, the problem often lies with the municipal supply or the well system rather than internal plumbing.
Additional signs include simultaneous low pressure across multiple homes, scheduled utility maintenance, air in lines, fluctuating pressure throughout the day, reduced flow after heavy usage, or well pump cycling and low tank pressure.
How to work with your water utility or well technician
After confirming that the meter and household plumbing are functioning normally but low pressure persists, contact with the water utility or a qualified well technician becomes the next step.
Provide meter readings, timing, and affected fixtures. Ask about mains maintenance, pressure zone issues, or hydrant flushing.
For wells, request pump performance tests, pressure tank inspection, and electrical checks.
Document responses and schedule repairs if needed.
Parts to replace and recommended materials
The section outlines key parts commonly replaced to restore toilet performance and which materials work best.
It compares fill valve types and compatibility, flapper and flush valve sizing and features, and options for supply hoses and shutoff valves that improve flow.
Recommended materials and fittings for reliable installation are highlighted to guide appropriate selections.
Fill valve options and compatibility guide
Several common fill valve types—float-cup, ballcock, diaphragm, and pressure-assisted—cover most residential toilets and determine which parts must be replaced.
Choose valves matching tank height, inlet size, and refill tube orientation.
Plastic adjustable valves fit modern tanks; brass or stainless options suit older systems.
Verify compatible shank diameter, anti-siphon features, and refill flow control to restore reliable fill and pressure.
Flapper and flush valve replacements: sizing and features
A properly sized flapper and matching flush valve are central to a toilet’s ability to seal and deliver the correct flush volume; selecting replacements requires measuring the valve seat diameter, confirming tank-to-bowl compatibility, and choosing materials that resist corrosion and mineral buildup.
Choose durable elastomer flappers or adjustable models, and opt for brass or high-grade plastic valves with smooth seats to minimize leaks and scale adherence.
Supply hose and shutoff valve upgrades for better flow
Upgrade the supply hose and shutoff valve to restore full inlet flow and reduce pressure loss during flushing.
Replace old braided plastic hoses with 3/8-inch stainless steel braided supply lines and install a full-bore quarter-turn ball shutoff valve.
Choose corrosion-resistant brass or stainless fittings, PTFE tape for threads, and guarantee proper compression or threaded adapters.
Verify compatibility with toilet inlet size and local codes.
Tools and supplies needed for DIY repairs
A brief inventory of tools and supplies helps guarantee efficient DIY repairs for low toilet water pressure.
Typical essentials include basic plumbing tools and common replacement parts, plus cleaning materials to clear buildup.
Useful items to have on hand:
- Adjustable wrench, pliers, and screwdriver set
- Replacement flapper, fill valve, and washers
- Vinegar, brush, and a small cup for flushing and descaling
Essential tools for toilet pressure troubleshooting
Start by gathering a compact kit of essential tools and supplies to diagnose and repair toilet pressure issues: an adjustable wrench, channel-lock pliers, flat- and Phillips-head screwdrivers, a plunger, toilet auger, bucket, sponge, rubber gloves, replacement flapper and fill valve, plumber’s tape, and a small flashlight.
These items enable inspecting valves, tightening fittings, clearing clogs, and replacing worn parts safely and efficiently.
Parts and cleaning materials to keep on hand
Beyond basic tools, keeping a small stock of commonly replaced parts and cleaning supplies streamlines most DIY toilet repairs.
Spare flapper, fill valve, flush valve seal, and replacement bolts handle mechanical failures.
Include a small supply of plumbers’ tape, silicone grease, nylon brush, vinegar, mild descaler, and a sponge.
Store items in an organized caddy for quick access during troubleshooting.
Safety tips and when to call a plumber
Before attempting repairs, basic safety steps such as shutting off the water supply, wearing gloves and eye protection, and using the right tools should be observed.
Persistent leaks, sewage odors, or suspected sewer-line issues are warning signs that warrant professional service. Homeowners should weigh typical plumber fees against the lower cost of DIY parts and their own skill level before proceeding.
Safety precautions before repairing toilet plumbing
While small adjustments can be made safely by a homeowner, addressing toilet plumbing requires attention to personal safety, sanitary risks, and potential property damage; appropriate precautions include turning off the water supply, wearing gloves and eye protection, and placing towels or a bucket to catch residual water.
Guarantee good ventilation, use proper tools, isolate electrical nearby, and read component instructions.
Call a plumber if uncertain.
Warning signs that require professional service
Recognizing when a toilet problem exceeds DIY skill prevents minor issues from becoming major damage.
Persistent leaks, repeated clogs despite proper tools, sewage odors, continuous running after adjustments, unusual noises in supply lines, or visible water damage/mold indicate professional assessment.
Also call a plumber for low city pressure affecting multiple fixtures or suspected hidden leaks; timely service avoids structural harm and health risks.
Estimated costs for professional repair vs. DIY
Estimating costs for fixing low toilet water pressure helps homeowners choose between DIY repairs and hiring a plumber.
DIY expenses typically range $10–$75 for parts like fill valves, flappers, or supply lines.
Professional service usually costs $100–$300 for diagnostics and minor repairs, more for complex issues.
If unsure, or if leaks and structural concerns exist, contacting a licensed plumber is advised.
Preventative maintenance to keep toilet pressure strong
Preventative maintenance preserves strong toilet pressure through simple, scheduled tasks.
Regularly cleaning jets and valves, considering water treatment to limit mineral buildup, and performing seasonal checks help avoid gradual loss of flow.
Planning for long-term part replacement guarantees reliable performance and reduces emergency repairs.
Regular cleaning schedule for jets and valves
Establish a regular cleaning schedule for jets and valves to prevent mineral buildup and maintain consistent flush performance.
Inspect jets, rim holes, flapper, and fill-valve monthly; remove visible deposits with a brush and mild vinegar solution, rinse thoroughly, and reassemble.
Replace worn seals or corroded components annually.
Record dates and observations to track trends and address issues before they impair flush strength.
Water treatment options to prevent mineral buildup
Several treatment options can reduce mineral buildup in toilet plumbing and preserve flush strength.
Installing a whole-house or under-sink water softener reduces hardness minerals before they reach the toilet.
In-line calcite or magnetic descalers target deposits.
Periodic use of phosphate-based or citric acid conditioners prevents scale adherence.
Regularly monitoring water hardness guarantees treatments remain effective without overuse.
Seasonal checks and long-term replacement planning
Schedule seasonal inspections and plan for component replacement to maintain consistent toilet flush performance over the long term.
Inspect flapper, fill valve, and supply line quarterly for wear, leaks, and mineral buildup.
Test flush strength and tank refill time after winter and summer.
Document dates and parts replaced.
Budget for replacing aging valves, seals, or fill mechanisms every 5–10 years to prevent declines.
Comparison of common fixes and expected outcomes
A concise comparison of common fixes helps readers weigh speed, cost, difficulty, and effectiveness before starting repairs. The table below summarizes typical options and realistic outcomes to guide decision-making. Each fix is presented objectively to set expectations for time, expense, and results.
| Fix | Key takeaway |
|---|---|
| Adjust fill valve | Quick, low-cost, easy; often effective for minor pressure issues |
| Clean/replace rim jets | Moderate time, low cost, moderate difficulty; restores flow if clogged |
| Replace flush valve or flapper | Moderate cost, moderate difficulty; improves seal and refill timing |
| Check/replace supply line or shutoff | Moderate time, moderate cost; fixes line restrictions or leaks |
| Call a plumber | Slowest, highest cost, professional difficulty; best for persistent or complex problems |
Speed, cost, difficulty, and effectiveness of each solution
Compare common fixes for low toilet water pressure by rating them on speed, cost, difficulty, and effectiveness so readers can choose the best option for their situation.
Quick actions:
– check shutoff valve and clean rim holes—fast, free, easy, highly effective.
Replace fill valve—moderate speed, low cost, moderate difficulty, very effective.
Clear supply line or call plumber—slow, higher cost, difficult, most reliable for complex issues.
Real scenarios and quick resolutions
Several common low-pressure situations are presented with concise corrective steps and next actions.
- Scenario: Slow weak flush after winter shutoff — step-by-step fix.
- Scenario: Strong tank fill but poor bowl flush — targeted solutions.
- Scenario: Whole-house low pressure with toilet affected — next steps.
Each case is framed for quick troubleshooting and practical resolution.
Scenario: Slow weak flush after winter shutoff step-by-step fix
Begin by checking the shutoff valve and supply line for partial closure or trapped air, since winter shutoff can leave the valve slightly closed or introduce air that weakens the flush.
Open the valve fully, cycle the toilet to purge air.
Inspect the fill valve and refill tube for proper position.
Clear any jet or rim obstructions with a wire or vinegar soak.
Test flush and adjust as needed.
Scenario: Strong tank fill but poor bowl flush targeted solutions
If the tank refills quickly but the bowl still flushes weakly, the problem lies downstream of the fill cycle and requires targeted checks of the trap, rim and jet openings, and the flush valve seating.
Inspect and clear rim and siphon jets with a wire or vinegar soak, verify the trap isn’t partially clogged, confirm the flapper/valve seals and lifts fully, and adjust or replace components as needed.
Scenario: Whole-house low pressure with toilet affected next steps
What steps should be taken when low water pressure affects the entire house and the toilet is only one symptom? Inspect main shutoff and supply, check municipal outages or hydrant work, and confirm pressure regulator settings. Test multiple fixtures, note cold versus hot differences. Flush sediment-prone appliances and clean inlet screens. If problem persists, contact the water utility or a licensed plumber for pressure testing and repairs.
Conclusion
A bathroom that once sighed into silence now demands attention; juxtaposed with the simple click of a repaired fill valve, the problem’s roots—mineral build-up, a worn flapper, or a municipal dip in pressure—reveal themselves as candid, fixable causes. Practical DIY steps contrast with the rare need for professional help, and routine maintenance stands against sudden failures. When clear tests and targeted fixes fail, calling a plumber is the patient, rational next act.
