
How to Stop Condensation on PVC Pipes: Simple Fixes That Work
To effectively stop condensation on PVC pipes, insulate them using closed-cell foam or self-sealing tape, raise the room temperature, and utilize dehumidifiers or fans for better airflow. Additionally, seal gaps around fittings and add drip pans as needed. For a long-term solution, measure the runs accurately, install proper insulation with vapor barriers, and maintain consistent humidity control. These steps will help prevent moisture buildup on your pipes.
Why PVC Pipes Sweat and Why It Matters
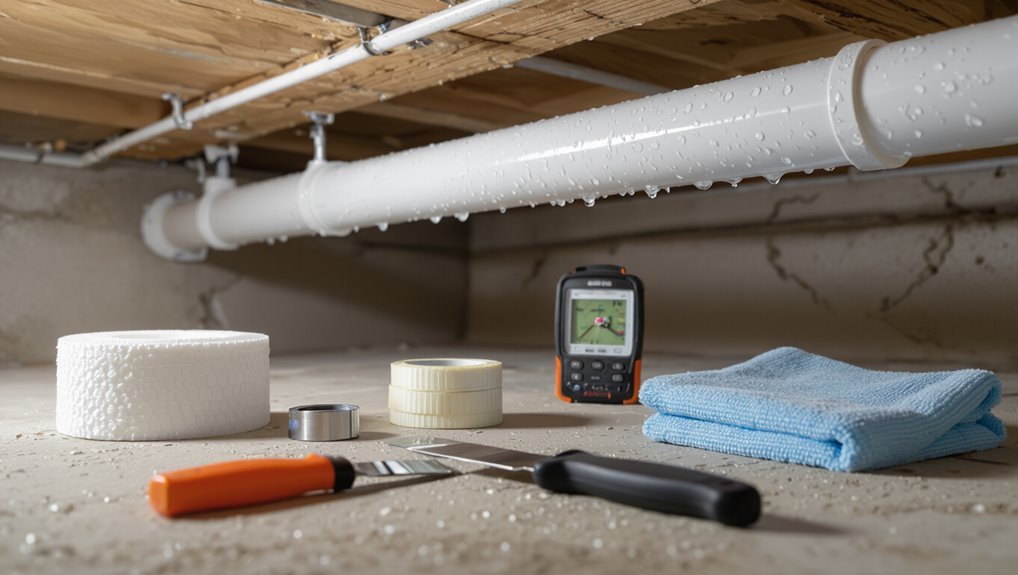
Condensation forms on cold PVC when warm, humid air contacts the pipe surface and moisture drops out of the air.
This sweating can lead to mold growth, deterioration of nearby materials, and water damage if left unchecked.
Persistent or heavy condensation may signal inadequate ventilation, missing or damaged insulation, or an underlying leak that requires repair.
How condensation forms on cold PVC pipes
When warm, humid air contacts cold PVC pipes, water vapor releases its latent heat and shifts to liquid on the pipe surface. This process is driven by the air reaching its dew point near that cooler material.
Condensation forms where pipe temperature stays below surrounding air, influenced by humidity, airflow, and pipe insulation.
Understanding this physics guides practical how to stop condensation on PVC pipes measures.
Common problems caused by pipe condensation (mold, corrosion of nearby materials, water damage)
Many household and commercial systems experience sweating PVC pipes, and the resulting moisture can trigger mold growth, accelerate corrosion of nearby metal fixtures, and cause water damage to building materials.
Persistent dampness fosters mildew, stains, and structural weakening of drywall, wood, and insulation. Corroded fasteners and electrical components can fail, while recurring water exposure increases repair costs and health risks from airborne spores.
When condensation indicates a larger issue (ventilation, insulation, pipe leaks)
Occasional sweating on PVC pipes can be a harmless response to temperature differences, but persistent or heavy condensation often signals a deeper problem such as inadequate ventilation, missing or damaged insulation, or an undetected leak.
In such cases, moisture may promote mold, rot, or structural damage.
Investigation should target airflow, insulation integrity, and joint leaks; professional assessment is advised when sources are unclear or damage appears extensive.
Quick, Immediate Fixes to Stop PVC Pipe Condensation
To address PVC pipe condensation immediately, the first steps focus on reducing temperature differences by slightly raising ambient air temperature or lowering the water temperature.
Quick temporary fixes include applying foam pipe wrap or self-sealing insulation tape to the cold surfaces.
Where dripping persists, placing drip pans or simple catchment beneath trouble spots prevents water damage until a permanent solution is installed.
Turn down surface temperature differences (reduce cold water temp or raise ambient temp)
Lowering the temperature gap between the pipe surface and surrounding air quickly reduces condensation by decreasing the tendency of ambient moisture to reach its dew point on the PVC.
Practical steps include modestly raising room heat, improving airflow with fans or vents, and slightly increasing chilled-water setpoints where feasible.
These measures reduce moisture buildup without altering pipe coverings or applying temporary insulation.
Temporary insulation options for a fast fix (foam wrap, self-sealing tape)
Several quick temporary insulation options can stop PVC pipe condensation immediately, with the most common being foam pipe wrap and self-sealing insulation tape.
Foam wrap slides over pipes, sealing joints with adhesive strips; it’s inexpensive and easy to cut.
Self-sealing tape conforms to irregular shapes, bonds without adhesive, and resists moisture.
Both are short-term fixes until permanent insulation or system changes are applied.
Using drip pans and catchment for problem areas
In many localized condensation hotspots, a simple drip pan or catchment system provides an immediate, low-cost way to collect moisture before it damages surfaces.
Install a shallow pan beneath the pipe, slope toward a drain or reservoir, and seal seams to prevent leaks.
Empty or plumb the pan regularly, and combine with insulation or dehumidification for a longer-term solution to recurring condensation.
Step-by-Step Permanent Solutions
A systematic approach begins with measuring and evaluating each PVC run to determine insulation requirements.
Next comes selecting an appropriate material—closed-cell foam, rubber, or fiberglass—and properly installing foam insulation with the right tools and techniques.
Finally, joints, fittings, and seams are sealed and, in humid areas, a protective vapor barrier or jacket is applied to eliminate air gaps and prevent future condensation.
Measure and assess pipes for insulation needs
Measure each exposed PVC run and note pipe diameters, lengths, elbow and T-joint locations, and proximity to cold surfaces or humid air sources.
Record surface temperature readings and areas of visible sweating.
Identify access points and obstacles for straightforward insulation installation.
Calculate total material length and extra allowances for fittings.
Prioritize sections with highest condensation risk for timely intervention.
Selecting the right insulation material (closed-cell foam, rubber, fiberglass)
Several common insulation types—closed-cell foam, rubber, and fiberglass—offer distinct trade-offs in moisture resistance, thermal performance, flexibility, and installation complexity.
- Closed-cell foam: excellent vapor barrier, lightweight, easy to fit.
- Rubber: superior flexibility for curves, good thermal properties, higher cost.
- Fiberglass: high R-value, requires vapor jacket and careful sealing to prevent condensation.
Properly installing foam pipe insulation: tools and techniques
Having chosen closed-cell foam for its vapor resistance, the next step is a practical guide to installing foam pipe insulation correctly to prevent future condensation.
Measure pipe length and diameter, cut foam sleeves to fit, and use a utility knife for clean edges.
Slide insulation over pipes, align seams, and secure with appropriate tape or straps.
Inspect for uniform contact and coverage.
Sealing joints, fittings, and seams to prevent air gaps
Begin by identifying every joint, elbow, tee, and coupling along insulated PVC runs where gaps or misaligned seams could admit humid air.
Clean surfaces, remove loose insulation, then apply closed-cell foam tape into seams.
Seal with an appropriate acrylic-latex or silicone-rated sealant and finish with foil or PVC-compatible self-sealing tape.
Verify continuity of seals and recheck after temperature or pressure changes.
Adding protective vapor barrier or jacket for humid environments
After sealing joints and ensuring continuous seals, attention turns to adding a protective vapor barrier or jacket to insulated PVC runs in humid environments.
A vapor-impermeable jacket—foil-faced polyethylene or closed-cell foam wrap—prevents moisture ingress and wicking.
Secure seams with compatible tape, overlap edges, and seal terminations at fittings.
Regular inspection and prompt repair preserve barrier integrity and prevent condensation recurrence.
Improving Room Conditions to Reduce Condensation
Improving room conditions can greatly reduce condensation on PVC pipes by addressing the surrounding air.
Increasing ventilation and air circulation with exhaust fans or vents, controlling indoor humidity through dehumidifiers or HVAC adjustments, and positioning pipes away from moisture sources all help keep pipe surfaces above the dew point.
Consider combining these measures for the most effective and consistent results.
Increasing ventilation and air circulation (exhaust fans, vents)
Increase airflow through a space to reduce humidity levels around PVC pipes, since moving moist air away prevents the temperature of pipe surfaces from reaching the dew point.
Install or upgrade exhaust fans in bathrooms, kitchens, and laundry areas, guarantee vents are unobstructed, add passive vents where practical, and use ceiling or portable fans to promote cross-ventilation.
Maintain regular fan operation during high-moisture activities.
Controlling indoor humidity (dehumidifiers, HVAC settings)
Reducing indoor humidity complements airflow improvements by lowering the overall moisture that can condense on PVC surfaces.
Employing dehumidifiers in basements or crawlspaces and setting HVAC systems to maintain relative humidity between 40–50% reduces condensation risk.
Regular HVAC maintenance and proper drainage from condensate pans guarantee consistent performance.
Monitor humidity with hygrometers and adjust equipment or settings as needed for stable, drier indoor air.
Positioning pipes away from moist air sources
A building’s layout and the placement of PVC lines relative to moisture sources largely determine where condensation forms; routing pipes away from damp areas—such as laundry rooms, unvented crawlspaces, or poorly drained exterior walls—reduces their exposure to humid air.
Strategic rerouting, isolating wet zones, sealing gaps, and using shorter, interior runs where possible minimize humid airflow contact and lower condensation risk on exposed piping.
Products and Materials Comparison
The discussion compares common insulation options for PVC pipes by focusing on thermal performance and R-value differences.
It also evaluates cost, expected lifespan, and resistance to moisture or crushing.
Ease of installation and required tools or fasteners are noted to guide practical selection.
Insulation material performance and R-value
Understanding thermal performance is essential when selecting insulation for PVC pipes, because material type and R-value directly determine how effectively condensation is prevented. Different materials offer varying R-values per inch; higher R reduces surface dew point risk. Comparison aids selection:
| Material | Typical R/in | Notes |
|---|---|---|
| Foam | 4.0 | Common, water-resistant |
| Fiberglass | 3.2 | Requires vapor barrier |
| Elastomeric | 4.5 | Flexible, closed-cell |
| Cotton | 2.5 | Less common |
Cost, durability, and ease-of-installation comparison
Cost, durability, and installation effort vary considerably across pipe insulation options, affecting both upfront expense and long-term performance. Choices balance cost, longevity, and ease: foam sleeves are cheap and simple but less durable; elastomeric is pricier with strong longevity and easy fit; fiberglass offers high durability but requires careful sealing and skill.
| Option | Key trade-off |
|---|---|
| Foam sleeves | Low cost, low durability |
| Elastomeric | Higher cost, long-lasting |
| Fiberglass | Durable, requires skill |
| Tape/paint | Cheap, temporary solution |
Common Mistakes and What to Avoid
Common mistakes include choosing the wrong insulation type or leaving gaps that undermine performance.
Painting or covering insulation with non-breathable materials can trap moisture and defeat its purpose.
Ignoring nearby condensation-prone surfaces can allow problems to recur despite properly insulated pipes.
Using the wrong insulation type or leaving gaps
Choose insulation carefully and install it without gaps, because the wrong material or poor fit defeats the purpose and allows condensation to form.
Closed-cell foam, proper thickness, and vapor-impermeable liners are often recommended. Leaving seams open, using undersized or degraded types, or compressing insulation reduces effectiveness.
Properly sealed joints and continuous coverage prevent cold surfaces and control moisture accumulation on PVC pipes.
Painting or covering insulation with non-breathable materials
After selecting the proper insulation and ensuring tight, continuous coverage, attention must shift to how that insulation is finished.
Coating or wrapping with non-breathable paints, tapes, or sealants traps moisture inside, promoting mold, degradation, and loss of R-value.
Use vapor-permeable finishes or manufacturer-recommended weatherproof jacketing to allow drying and prevent hidden condensation that undermines pipe protection and longevity.
Ignoring nearby condensation-prone surfaces
When adjacent surfaces—cold walls, uninsulated ductwork, or concrete slabs—are overlooked, they can create microclimates that defeat pipe insulation by drawing moisture toward the pipe surface.
Ignoring these sources leaves insulation ineffective: condensation migrates from cold masses, pooled humidity persists, and localized cooling undermines vapor barriers.
Inspect and mitigate nearby cold surfaces, add insulation or thermal breaks, and control room humidity to prevent recurrence.
Maintenance and Long-Term Monitoring
A concise routine inspection checklist should list visible damage, secure fittings, vapor barrier integrity, and signs of moisture at regular intervals.
Guidance on when to replace insulation or call a professional hinges on failing barriers, recurring wet spots, or insulation compression.
Returning condensation is indicated by new dripping, persistent surface dampness, or unexplained increases in humidity near the pipes.
Routine inspection checklist for PVC pipe condensation
Routine inspections provide a systematic way to detect and address PVC pipe condensation before it causes damage.
Inspect visually for dampness, beads, or frost; check insulation integrity, seams, and adhesive; measure ambient humidity and pipe surface temperature; verify ventilation and airflow; look for corrosion or mold on nearby surfaces; document findings, corrective actions, and recheck intervals to guarantee persistent control.
When to replace insulation or call a professional
Findings from regular inspections guide decisions about insulation replacement and professional intervention:
visible breakdowns such as crushed, saturated, moldy, or missing insulation, persistent condensation despite intact insulation, repeated adhesive or seam failures, and surface temperatures that remain below dew point despite corrective measures indicate replacement is warranted.
Additionally, extensive damage, recurring leaks, complex piping runs, or uncertainty about thermal calculations justify hiring a qualified contractor.
Signs that condensation problems are returning
Monitor for early, recurring signs that condensation is returning: small wet spots or beading along pipe seams, damp insulation or clumps of moisture appearing between insulation layers, fresh discoloration or mold colonies on adjacent surfaces, and a rise in the frequency of surface sweating during similar environmental conditions.
Document occurrences, note temperature/humidity when spotted, inspect fasteners and joints, and schedule corrective actions before damage escalates.
Real-World Examples and Typical Scenarios
Common situations illustrate how condensation on PVC pipes varies by location and exposure.
Basements and crawlspaces often require tailored humidity control and insulation, while outdoor exposed PVC benefits from weatherproofing and UV-resistant coverings.
In utility rooms and kitchens, targeted pipe insulation and ventilation usually resolve routine condensation issues.
Condensation in basements and crawlspaces: tailored solutions
When basements and crawlspaces exhibit persistent pipe condensation, solutions must be matched to specific conditions—ambient humidity, temperature differentials, and space ventilation—to be effective.
Assess moisture sources, improve drainage and perimeter grading, install dehumidification or mechanical ventilation as needed, insulate cold water lines with closed‑cell foam, seal foundation cracks, and elevate or reroute pipes away from damp zones to prevent recurrent sweating.
Condensation on outdoor exposed PVC: weather-proofing tips
Outdoor-exposed PVC faces different drivers of condensation than pipes inside basements or crawlspaces, chiefly rapid changes in air temperature, direct radiative cooling at night, and localized humidity pockets under overhangs.
Typical scenarios include irrigation lines, pool plumbing, and exposed vent runs.
Recommended weather‑proofing: insulate with UV‑rated foam, apply reflective coatings, provide airflow, slope to avoid water pooling, and install simple shields to reduce nighttime radiative cooling.
Condensation on plumbing in utility rooms and kitchens
Why does plumbing in utility rooms and kitchens often sweat even when the house seems dry? Moist, warm indoor air contacts cooler PVC, triggering condensation.
Common scenarios: cold-water supply near water heaters, refrigerator lines, basement laundry hookups, and vented crawlspaces.
Typical signs include dripping joints, pooled water, and mold growth.
Solutions prioritize insulation, improved ventilation, and relocating warm sources or pipes when feasible.
Materials, Tools, and Estimated Costs
A concise list of essential tools and supplies—insulation wrap, adhesive tape, pipe sleeves, a utility knife, and cleaning solvent—prepares a homeowner for most DIY condensation fixes.
Estimated material costs for small projects typically range from $15 to $60, while more extensive DIY work may reach $100–$150.
Hiring a professional commonly increases total cost to $150–$400 depending on labor and scope.
Essential tools and supplies for DIY fixes
Several basic items are required to tackle pipe condensation effectively: insulation sleeves or foam wrap sized to the pipe diameter, waterproof tape or adhesive specifically rated for HVAC/plumbing use, a utility knife, measuring tape, gloves, and a pipe-cleaning solvent.
Additional recommended supplies and brief uses:
- Pipe insulation cement or adhesive.
- Moisture barrier tape.
- Caulk and caulking gun.
Budget estimates for DIY vs. professional service
Many homeowners can reduce condensation on PVC pipes for considerably less by handling materials and basic labor themselves, but comparing DIY costs to professional services requires listing items, tools, and realistic time estimates.
DIY: foam pipe insulation, anti-sweat tape, caulk, adhesive, utility knife, ~1–3 hours; $20–80.
Pro service: labor, inspection, better materials, 1–3 hours; $150–400+.
Cost varies by pipe length, access, and local rates.
Closing Summary of Best Practices to Prevent PVC Pipe Condensation
A concise, prioritized checklist guides immediate and long-term fixes to stop PVC pipe condensation.
It emphasizes quick actions—insulation, sealing leaks, and improving ventilation—followed by durable measures like rerouting pipes or installing vapor barriers.
Each item is ordered by impact and ease of implementation to aid fast decision-making.
Prioritized action checklist for immediate and long-term fixes
Prioritize corrective steps by addressing the most effective, least invasive measures first to stop PVC pipe condensation: implement immediate insulation and sealing, reduce surrounding humidity, and correct any temperature differentials.
Schedule progressive upgrades such as improved ventilation, permanent pipe jackets, and system audits to prevent recurrence.
Then verify results, document interventions, assign maintenance responsibility, and set periodic inspections to guarantee sustained performance.
Conclusion
A homeowner once wrapped chilled PVC under a sink and watched beads fall like morning mist; within days, the towel grew mold. This cautionary anecdote illustrates that small fixes can hide bigger risks. With studies showing insulation can cut pipe sweating by over 80%, the guide’s recommended rapid and permanent steps act like a raincoat—simple, preventive barriers that keep moisture—and problems—outside where they belong.

