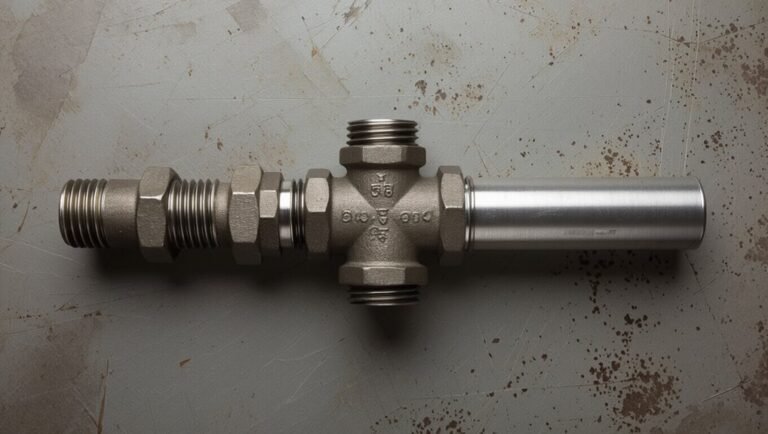
How to Get a Rubber Hose to Fit Securely on a Fitting: Step-by-Step Methods and Tips
To securely fit a rubber hose onto a fitting, start by ensuring the hose’s inner diameter (ID) matches the fitting’s outer diameter (OD) and check both for any damage or debris. Cut the hose squarely, deburr the edge, and dry-fit to confirm a snug fit. Use an appropriate clamp—such as worm-drive, spring, T-bolt, or ferrule—tightened to specifications. For particularly stubborn fits, consider using heat or adhesive-lined shrink sleeves. Finally, test the connection under low pressure for leaks and adhere to routing and torque guidelines. For further methods and troubleshooting tips, continue reading.
How to Secure a Rubber Hose to a Fitting Quickly and Reliably
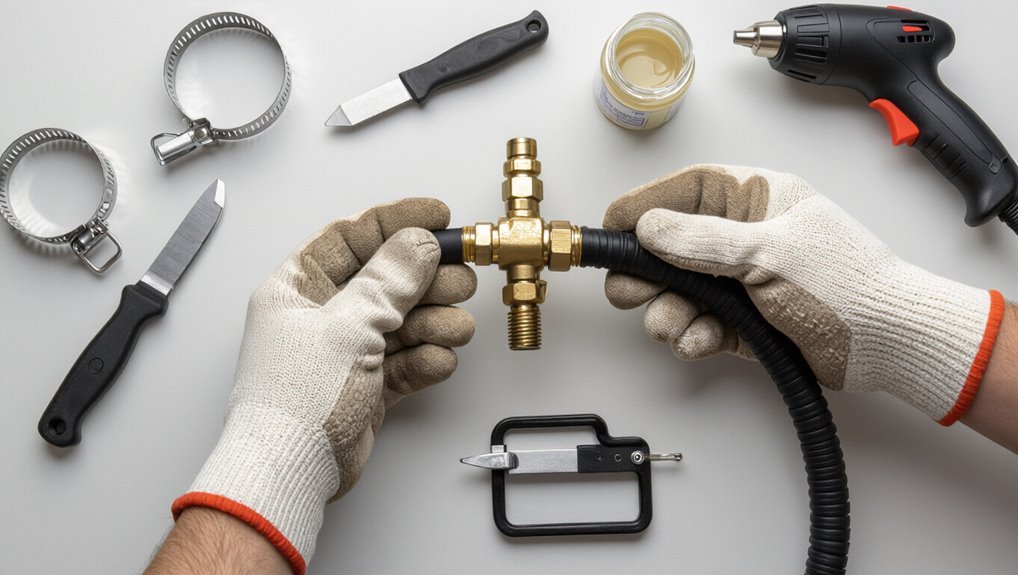
When a hose slips off a fitting, a temporary fix can restore function until a permanent repair is made.
A clamp, a length of wire twisted tight, or a hose pinch tool can secure the sleeve quickly and resist leaks.
These quick solutions are designed only as short-term measures before proper replacement or a durable clamp is installed.
Immediate solution for a loose hose (quick fix)
Act swiftly to stop leaks and restore function: a loose rubber hose can be secured quickly with a few common tools and simple techniques that provide a reliable temporary hold until a permanent repair is possible.
For an immediate fix, slide the hose fully onto the fitting, wrap with self-fusing silicone tape or hose clamp, or use cable ties.
This addresses how to get rubber hose on fitting fast.
Why Hose Fitment Matters: Performance and Safety Impacts
Poorly fitted hoses can leak, abrade, or detach, leading to equipment failure and safety hazards.
Material compatibility and system pressure determine how securely a hose grips a fitting and how it responds under load.
Understanding these factors helps prevent common failures and guarantees reliable, safe operation.
Common problems caused by poorly fitted hoses
Even a small misfit between hose and connector can lead to leaks, reduced flow, and premature failure, compromising system performance and creating safety hazards.
Poor fitment causes fluid loss, contamination ingress, pressure fluctuations, and heat buildup. Vibration and movement accelerate wear, clamps can loosen, and emergency shutdowns may occur.
Unaddressed issues increase downtime, repair costs, and risk of injury.
Materials and pressure factors that affect fit
The compatibility of hose materials with conveyed media and the system’s operating pressure are primary determinants of fit quality: elastomers, thermoplastics, and reinforced composites each have distinct flexibility, memory, and surface characteristics that affect sealing against barbed or flanged fittings.
Meanwhile, working pressure, surge pressure, and vacuum conditions dictate required wall thickness, reinforcement layers, and clamp selection to prevent deformation, blow-off, or extrusion.
Proper selection minimizes leakage, wear.
Tools and Materials Needed
To fit a rubber hose securely, the technician gathers essential tools such as pliers, screwdrivers, a heat source, and a selection of clamps.
Consideration is given to different clamp types and fittings—worm-drive, spring, and T-bolt among them—matched to hose size and application.
Optional supplies like lubricants, a heat gun, hose adapters, and sealants can simplify installation and improve sealing.
Essential tools (pliers, screwdrivers, heat source, clamps)
Several basic tools are required to fit a rubber hose securely: pliers for gripping and positioning, screwdrivers for tightening clamps, a controlled heat source for softening stiff hose ends, and an assortment of hose clamps sized to the application.
Additionally, protective gloves, a clean rag, measuring tape, and a deburring tool help guarantee correct length, clean edges, safe handling, and reliable sealing during installation.
Types of hose clamps and fittings to consider
Consider a range of clamps and fittings to match hose material, diameter, pressure, and environment. Choices influence seal reliability, corrosion resistance, and installation ease.
Select based on application specifics and compatibility with rubber compounds. Common options include:
- Worm-drive screw clamps for general use
- T-bolt clamps for high-pressure
- Spring or constant-tension clamps for thermal cycling
- Ear clamps for permanent, tamper-resistant joints
Optional supplies (lubricants, heat gun, hose adapters, sealants)
Gathering a few optional supplies can simplify installation and improve long-term performance: a silicone- or water-based lubricant eases hose assembly without damaging rubber, a heat gun helps soften stiff hose ends for a snug fit, hose adapters or reducers bridge mismatched diameters, and compatible sealants or thread tape prevent leaks on fittings.
Use correct size adapters, apply minimal lubricant, heat cautiously, and test for leaks.
Preparing the Hose and Fitting
Before assembly, the hose and fitting are inspected for cuts, cracks, corrosion, or debris that could compromise the seal.
The installer measures the hose inner diameter and the fitting outer diameter to confirm a proper interference or slip fit.
Finally, the hose end is trimmed square and deburred so it seats cleanly against the fitting.
Inspecting hose and fitting for damage or debris
Inspect the hose and fitting closely for cuts, cracks, bulges, corrosion, or embedded debris that could compromise the seal or flow.
Note seam irregularities, soft spots, or hardening in the rubber and metal pitting, burrs, or flaking on the fitting.
Remove loose particles with a brush and solvent.
Discard components showing structural damage or contamination that cannot be fully cleaned.
Measuring inner diameter and fitting outer diameter for correct sizing
Accurate measurement of the hose inner diameter (ID) and the fitting outer diameter (OD) guarantees a proper, leak-free connection.
Using calipers, measure hose ID at several points to detect ovality; record the largest reading. Measure fitting OD at the barb or bead where contact occurs.
Compare values, allowing appropriate clearance or interference per material and application specifications before selecting or modifying components.
Trimming and deburring hose end for a clean seat
Cut the hose squarely with a sharp blade or hose cutter, then remove any burrs and crushed fibers so the end forms a clean, even seat against the fitting.
Inspect the cut for fraying; trim again if uneven. Deburr with a file or fine sandpaper, wiping away residue.
A true, smooth end prevents leaks, guarantees full clamp contact and simplifies insertion onto barbs or ferrules.
Step-by-Step Methods to Get a Secure Fit
The following section outlines five practical methods for achieving a secure hose connection: a worm-drive (screw) clamp, a spring or constant-tension clamp, heat-shrink hose with adhesive lining, push-on or barbed fittings used with clamps, and hose splice or ferrule crimping for permanent joins.
Each method will be presented with step-by-step procedures, required tools, and common pitfalls to avoid. Readers can compare the approaches to select the most suitable option for their application.
Method 1 Using a worm-drive (screw) clamp
The worm-drive clamp is appropriate for low- to medium-pressure hose connections where a tight, adjustable seal is required.
A clear step-by-step application covers positioning the clamp, evenly tightening while checking alignment, and trimming excess hose as needed.
Recommended torque ranges and tightening technique are discussed to prevent over-compression or slippage.
When to use it
Several situations call for a worm-drive clamp: when a hose connects to a smooth metal fitting, when working with moderate internal pressures, or when a durable, adjustable seal is required.
It suits automotive coolant lines, fuel vents, and garden hoses; installations needing periodic adjustment or inspection; and repairs where a reliable, corrosion-resistant clamp is preferable to spring or ear types.
Step-by-step application
Begin by gathering the hose, fitting, appropriately sized worm-drive clamp, screwdriver or nut driver, and any necessary lubrication or sealant.
Slide the clamp onto the hose, apply light lubricant to the fitting if needed, seat the hose fully over the barb or lip, position the clamp just behind the hose bead, and tighten incrementally until the hose is held firmly and layered evenly against the fitting.
Torque and tightening guidance
After the hose is seated and the clamp positioned just behind the bead, attention shifts to proper torque and tightening technique for a worm-drive clamp.
The operator tightens gradually, applying even turns while avoiding over-torquing that can cut the hose. Use a torque-limited driver if available, matching manufacturer specifications;
verify seal integrity and recheck torque after initial operation and cooling cycles.
Method 2 Using a spring clamp or constant-tension clamp
Spring clamps or constant-tension clamps are recommended when hoses experience temperature changes or vibration that cause diameter variation.
The procedure covers selecting the correct size, positioning the clamp over the hose bead, and compressing or crimping to secure without over-tightening.
Advantages include automatic tension compensation and quick installation, while limitations involve lower maximum sealing force and suitability for specific hose materials and diameters.
When to use it
When is a spring clamp or constant‑tension clamp the appropriate choice?
It suits applications requiring consistent compressive force despite temperature or hose aging, such as coolant lines, fuel hoses, and vibration-prone connections.
Use when access is limited, rapid installation or removal is needed, and when uniform clamping prevents leaks.
Avoid for very large diameters or where precise torque control is essential.
Step-by-step application
Having determined that a spring or constant‑tension clamp suits the job, the following step‑by‑step method outlines how to fit it correctly:
Slide the clamp onto the hose before positioning the hose over the fitting.
Verify the hose end seats fully against the fitting shoulder.
Compress the clamp with appropriate pliers, move it into place over the sealing area, then release to engage tension evenly.
Advantages and limitations
Although compact and simple to operate, spring and constant‑tension clamps offer a distinct balance of benefits and trade‑offs: they provide consistent pressure, tolerate thermal cycling, and install quickly without tools, reducing leaks.
Limitations include limited clamping range, potential for insufficient bite on hardened hoses, difficulty adjusting exact tension, and susceptibility to corrosion; selection must match hose material, diameter, and service conditions.
Method 3 Heat-shrink hose and adhesive-lined heat shrink
This method requires specific materials—heat-shrink tubing or adhesive-lined heat-shrink, a proper heat source, and protective equipment—and each item should be confirmed before starting.
The procedure covers precise positioning, controlled heating to activate shrinkage and adhesive, and verification of a consistent seal.
Safety precautions include using heat-resistant gloves, eye protection, adequate ventilation, and avoiding excessive heat that could damage the hose or fittings.
Materials required
For Method 3, prepare heat-shrink hose sized to the hose outer diameter and adhesive-lined heat-shrink sleeves rated for the operating temperature.
Additional materials: appropriate-sized hose clamp(s), isopropyl alcohol or solvent wipe, lint-free cloth, a calibrated heat gun with nozzle, temperature labels or thermometer, protective gloves and eye protection, and a small utility knife or scissors for trimming.
Step-by-step heating and shrinking process
Begin by verifying the hose and fittings are clean, dry, and positioned exactly as they will be when shrunk.
Slide adhesive-lined heat-shrink tubing over the joint.
Apply even heat with a heat gun, moving continuously to avoid scorching.
Watch adhesive flow and tubing contract until snug.
Allow assembly to cool undisturbed so adhesive cures and the hose retains the tightened seal.
Safety precautions
When applying heat-shrink tubing and adhesive to a hose assembly, operators must prioritize controlled heating, ventilation, and protective equipment to prevent burns, inhalation of fumes, and damage to surrounding components.
Use temperature-regulated heat guns, maintain distance, ventilate or extract fumes, wear heat-resistant gloves and eye protection, and avoid open flames.
Inspect tooling and materials for defects and follow manufacturer’s cure profiles and safety data sheets.
Method 4 Using push-on fittings and barbed fittings with clamps
The fourth method explains how push-on and barbed fittings, used with clamps, achieve a secure hose connection.
It emphasizes selecting a barb that matches the hose inner diameter and following proper installation steps—cleaning the hose end, fully seating the fitting, and tightening the clamp to specification.
Practical notes cover verifying fit by visual inspection and pressure testing before regular use.
Matching barb size to hose ID
Although small differences can seem negligible, ensuring the barb diameter matches the hose’s inner diameter is essential for a leak-free push-on connection.
Properly sized barbs create interference that grips rubber without overstretching. Measure hose ID accurately, select a barb slightly larger for compression, and avoid mismatches that cause slipping or splitting.
Correct sizing reduces reliance on excessive clamp tension and extends hose life.
Proper installation steps
Begin by sliding the hose over the barbed fitting until it seats firmly against the shoulder.
Then position a clamp just behind the last barb to capture the area of greatest interference.
Make certain the hose is clean, cut square, and warmed if needed for flexibility.
Tighten the clamp evenly to recommended torque, avoiding overtightening.
Verify no leaks by pressurizing and inspecting the joint.
Method 5 Using hose splice or ferrule crimping for permanent connections
When a permanent, high-pressure seal is required, a hose splice or ferrule crimp provides a durable solution.
The process involves selecting the correct ferrule and tooling, properly positioning the hose and fitting, then operating a crimper to compress the ferrule to specification.
Attention to equipment calibration and inspection of the finished crimp guarantees a reliable connection.
When a crimped connection is appropriate
If a hose must form a permanent, high-pressure seal that resists vibration, twisting, or fluid seepage, a crimped ferrule or splice provides the necessary mechanical and hydraulic integrity.
It is appropriate for hydraulic lines, fuel systems, and critical fluid transfer where loosening would be hazardous.
Use crimping when reusable clamps are insufficient, connections must be tamper-resistant, or industry standards mandate permanent fittings.
Crimping steps and equipment
After deciding that a permanent, high-pressure hose connection is required, attention turns to the specific steps and tools for crimping a ferrule or splice.
The technician selects the correct ferrule size, prepares hose and fitting, inserts the barb fully, positions the ferrule, and uses a calibrated hydraulic or mechanical crimper.
Finished crimp dimensions and leak testing confirm a secure, specification-compliant connection.
Method 6 Using thread sealant or liquid gasket for threaded fittings
Method 6 covers the use of thread sealants and liquid gaskets to guarantee leak-free threaded hose fittings.
It emphasizes choosing a sealant chemically compatible with the hose material and the fluid being conveyed, plus selecting appropriate cure time and temperature ratings.
Clear application steps and recommended curing times are outlined to achieve a reliable bond without damaging the hose.
Selecting compatible sealants
When joining threaded hose fittings, choosing a compatible thread sealant or liquid gasket guarantees a reliable, leak-free connection without damaging materials.
Select sealants based on thread type, pressure, temperature, and fluid compatibility. Confirm chemical resistance to hose and fitting materials, and prefer products rated for flexible assemblies.
Avoid hardening adhesives on rubber; opt for removable or elastomeric formulations specified by manufacturers.
Application and curing guidance
One clear set of steps guarantees proper application and curing of thread sealant or liquid gasket on threaded hose fittings:
Clean threads thoroughly, remove oil and debris, and dry.
Apply an even, recommended amount of sealant; avoid excess.
Assemble per torque specifications.
Allow initial tack time, then full cure per manufacturer temperature and time guidelines before pressurizing.
Inspect for leaks after curing.
Choosing the Right Clamp or Fitting
Selection of clamp or fitting begins with material compatibility—stainless steel, brass, or plastic—matched to the hose’s fluid, temperature, and corrosion environment.
The clamp type must suit the application’s pressure, temperature range, and vibration exposure to prevent leaks or failures.
Consult sizing charts and quick-reference guides to guarantee proper diameter range and torque specifications for a secure installation.
Material choices: stainless steel, brass, plastic
Material choice for clamps and fittings directly affects corrosion resistance, strength, compatibility with hose materials, and longevity under pressure.
Stainless steel offers high corrosion resistance and strength.
Brass provides good corrosion resistance and machinability but is softer.
Plastic is lightweight, noncorrosive, and chemically resistant but less strong.
- Stainless steel
- Brass
- Plastic
- Selection factors
Matching clamp type to application (pressure, temperature, vibration)
Although the hose clamp must secure a joint, its design should be chosen based on the system’s pressure, temperature, and vibration characteristics to guarantee reliable performance.
High-pressure systems favor heavy-duty T-bolt or constant-tension clamps. Elevated temperatures require heat-resistant materials like stainless steel.
Applications with significant vibration benefit from worm-drive or spring clamps that maintain tension. Corrosion and compatibility must also guide selection.
Sizing charts and quick reference
After determining the appropriate clamp type for the system’s pressure, temperature, and vibration demands, sizing charts and quick-reference guides provide the measurable data needed to choose the correct clamp or fitting. They list hose OD, clamp range, and torque. Technicians consult them to prevent leaks, failures, and downtime. Clear tables speed decisions and build confidence.
| Hose OD | Clamp Range | Torque |
|---|---|---|
| 12 mm | 10–14 mm | 3 Nm |
| 20 mm | 18–22 mm | 4 Nm |
Testing the Connection
The connection should be verified with a controlled leak test at a safe pressure appropriate to the hose and system rating, using soapy water, pressure gauges, or a pressure decay method.
After an initial run-in period, the clamp torque and hose position must be rechecked for slippage and retightened to spec if necessary.
A regular inspection schedule—documenting pressure checks, visual inspections, and torque verification intervals—ensures long-term integrity.
Leak testing under pressure (methods and safe pressures)
Begin leak testing by applying controlled pressure to the assembled hose and fitting while monitoring for drops or audible signs of escape.
Suitable methods include hydrostatic testing with water, low-pressure air tests using a regulated source and soapy solution for bubble detection, and ultrasonic leak detectors for fine leaks.
Limit test pressures to manufacturer recommendations or typically 1.5× working pressure for short-duration verification, using gauges and safety reliefs.
Checking for slippage and re-torque after initial run-in
Inspect connections for any movement once the hose assembly has seen its initial run-in under operating conditions.
Technicians should mark positions, observe clamps and ferrules for slippage, and feel for loosening. If movement is detected, stop operation, depressurize, then re-torque to manufacturer torque specs.
After corrective action, repeat the brief pressure test and visual check before returning to normal service.
Long-term inspection schedule
How often should connections be checked to guarantee lasting integrity?
Inspection intervals depend on application risk, pressure, and environment: weekly for critical systems, monthly for moderate-risk, quarterly for low-risk.
Each check verifies clamp tension, hose condition, leaks, and misalignment.
Record findings, replace aging hoses per manufacturer life limits, and escalate frequency after repairs, abnormal readings, or harsh operating conditions.
Troubleshooting Common Problems
When fittings fail to hold, the likely causes and simple fixes are outlined, including improper hose diameter, contaminated barb surfaces, and incompatible materials.
If clamps cut into the hose, preventive measures and corrective steps—such as using protective sleeves, wider bands, or different clamp types—are described.
For slow leaks at the fitting, a concise diagnostic sequence—inspect for cracks, verify torque and alignment, and pressure-test after adjustments—is recommended.
Hose still slips off: causes and fixes
A slipping hose usually signals one or more underlying issues—wrong-size hose, worn or damaged fittings, insufficient clamp tension, or an oily/dirty mating surface—that prevent a secure seal; identifying which problem applies narrows the appropriate fix.
Inspect dimensions and fittings, clean mating surfaces, replace degraded hose or barbs, use proper clamp type and torque, and consider a slightly larger barb or hose with tighter inner diameter for a firmer interference fit.
Clamp cutting into hose: prevention and remedies
If a hose continues to grip the barb yet shows damage at the clamp line, the problem often shifts from poor fit to improper clamping that concentrates load and slices the material.
Use wider, smooth-edged clamps, add a protective sleeve or thin metal washer under the band, avoid overtightening, and replace sliced hose sections.
Inspect clamps for burrs and choose appropriate clamp type and torque for hose material.
Slow leaks at the fitting: diagnostic steps
Several simple checks quickly narrow the cause of a slow leak at a hose fitting: visually inspect the clamp and hose for cracks or cuts, feel for seepage around the barb and under the clamp, and listen for a faint hiss while the system is pressurized.
Verify clamp torque, correct clamp placement, and barb condition.
Replace deformed clamps, trim frayed hose ends, and test under operating pressure to confirm repair.
Preventive Measures to Ensure Long-Lasting Hose Connections
Selecting a hose whose material is compatible with the fluid, temperature, and pressure of the application prevents early degradation and leaks.
Proper installation—correct hose length, secure fittings, and avoidance of sharp bends or abrasion—reduces stress that causes premature failure.
Regular inspection criteria and clear replacement thresholds should guide when a hose or fitting must be replaced rather than repaired.
Proper hose selection for application (material compatibility)
When matching a rubber hose to an application, compatibility of the hose material with the conveyed fluid, temperature range, pressure, and environmental exposure determines longevity and safety.
Select compounds resistant to chemicals, ozone, oils, solvents, or fuels encountered.
Verify temperature and pressure ratings, consider abrasion and UV resistance, and consult manufacturer compatibility charts and industry standards to prevent degradation and leaks.
Installation best practices to avoid premature failure
Begin installation with careful planning to guarantee hose routes minimize bending, twisting, and contact with sharp edges that can accelerate wear.
Install clamps correctly, use proper bend radii, and secure hoses to prevent chafing. Inspect fittings and ends for proper seating and corrosion. Follow torque specs and pressure ratings.
- Use strain reliefs
- Protect with sleeves
- Maintain clearances
- Schedule inspections
When to replace hose or fitting instead of repairing
Any hose or fitting showing visible cracking, bulging, severe abrasion, or recurrent leaks should be replaced rather than repaired, because such damage indicates compromised integrity that repairs cannot reliably restore.
Replace when age, chemical exposure, or hardening reduce flexibility, when fittings are corroded or deformed, or when contamination risks exist.
Regular inspection schedules and prompt replacement minimize failure and downtime.
Safety Considerations and Environmental Concerns
The section addresses required personal protective equipment and safe heating practices to prevent burns and inhalation risks during hose fitting.
It also covers proper disposal and recycling options for old hoses and clamps to minimize environmental impact.
Practical tips and local regulations are highlighted to guarantee compliance and safety.
Personal protective equipment and safe heating practices
Safety depends on proper personal protective equipment and careful heating methods when fitting rubber hose assemblies.
Workers should wear heat-resistant gloves, eye protection, and long sleeves.
Use controlled heat sources (heat guns with adjustable settings), avoid open flames, and maintain ventilation to disperse fumes.
Inspect tools and hoses for damage before heating.
Follow manufacturer temperature limits and allow cooling before handling or securing clamps.
Disposal and recycling of old hoses and clamps
Several straightforward steps help guarantee environmentally responsible disposal and recycling of old hoses and clamps while minimizing safety risks.
Inspect components for contamination; drain fluids into approved containers and label them.
Separate metal clamps for scrap recycling and rubber hoses for designated rubber recycling or energy recovery where accepted.
Follow local hazardous-waste regulations and use licensed disposal services for chemically contaminated items to prevent pollution and harm.
Additional Resources and Product Recommendations
The article lists reputable clamp brands and crimping tools suited for different hose sizes and pressure ratings to help readers choose durable hardware.
It also points to clear, step‑by‑step guides and short demonstration videos for those who prefer visual instruction.
Links and brief notes on selection criteria are provided for quick comparison.
Recommended clamp brands and crimping tools
Consults reputable clamp brands and matched crimping tools to confirm durable, leak-free hose connections. Recommended choices prioritize material, size range, and consistent torque.
Selection depends on hose type and pressure rating; stainless steel worm-drive, T-bolt, ear/crimp, and Oetiker-style options suit varied needs.
Proper crimping tools guarantee uniform compression and prevent damage, extending service life and safety.
- Stainless-steel worm-drive
- T-bolt clamps
- Ear/crimp clamps
- Oetiker-style crimps
Guides and videos for visual learners
When visual demonstration is preferred, concise step-by-step videos and illustrated guides accelerate correct hose-fitting techniques by showing clamp placement, torque methods, and common pitfalls.
Recommended resources include manufacturer how-tos, professional trade channels, and high-quality DIY tutorials that pair close-up footage with measured specs.
Visual learners benefit from clear captions, tool lists, and calibration tips.
- Manufacturer how-to videos
- Trade professional channels
- Close-up DIY tutorials
- Inspection and torque demos
Conclusion
A final check finds that a secure hose fitting is like a well-tied rowboat knot: one marina mechanic once wrapped, clamped, and tested a fuel line under a thunderstorm, and the dry engine afterward proved the method. With proper prep, correct clamps, and periodic inspection, leaks drop dramatically — industry reports cite up to 90% fewer failures when fittings are installed per guidelines. Consistent technique preserves performance, safety, and longevity.