
How to Cut Conduit Cleanly: Step-by-Step Guide for EMT, PVC, and Rigid Conduit
To cut conduit cleanly, you need the appropriate tools and techniques for different types: use a tubing cutter or hacksaw for EMT, a ratcheting cutter or fine-tooth saw for PVC, and an abrasive or power saw for rigid metal. Start by securely holding the conduit and marking square lines. Cut with steady pressure, then deburr and chamfer the edges. Finally, inspect for any burrs, apply a rust inhibitor to metal conduits, and ensure fittings fit smoothly. Follow these detailed steps for a clean and professional cut every time.
How to Cut Conduit Cleanly: Quick Overview
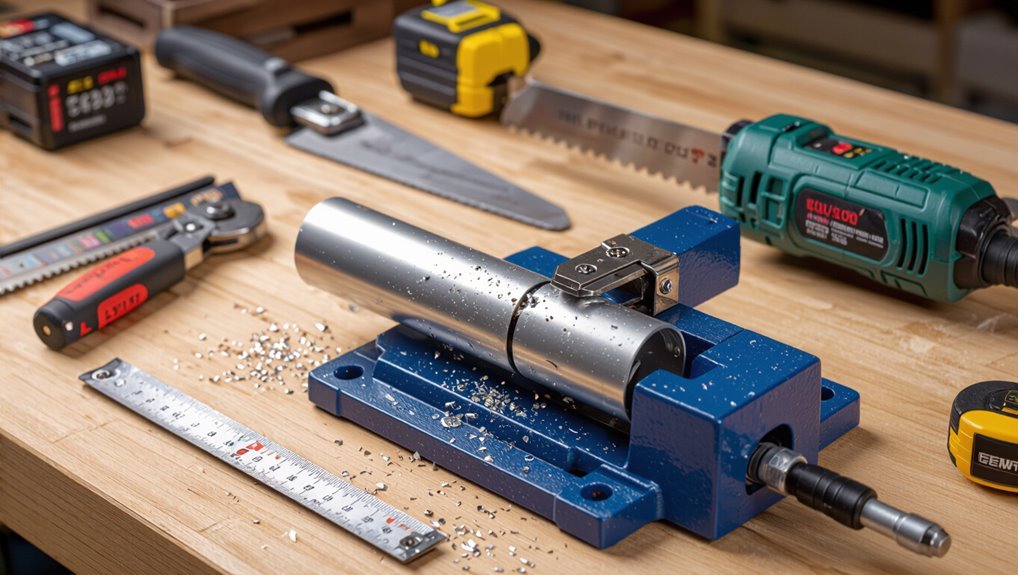
A concise definition of a clean cut for EMT, PVC, and rigid conduit explains smooth edges, square ends, and the absence of burrs or cracks.
A quick checklist of tools—tube cutter or hacksaw, deburring tool or file, measuring and marking tools, and appropriate PPE—prepares the user for the task.
A reminder of safety essentials such as eye protection, gloves, secure clamping, and power-tool precautions frames the procedure.
What cut cleanly means for EMT, PVC, and rigid conduit
Clean cuts on EMT, PVC, and rigid conduit mean smooth, square edges free of burrs, chips, or deformations that could impede fitting, compromise insulation, or create safety hazards.
Consistent beveling and true 90-degree faces guarantee reliable joints, simplify threading or couplings, and reduce strain on conductors.
Clear criteria guide decisions about rework or replacement when learning how to cut conduit properly.
Tools you’ll need at a glance
Several essential tools make clean conduit cuts efficient and repeatable: a hacksaw or conduit cutter for EMT, a PVC pipe cutter or fine-tooth saw for plastic, a portable tubing cutter or abrasive wheel for rigid metal, plus measuring, deburring, and marking aids.
Tools listed clarify purpose and selection.
- Hacksaw or tubing/conduit cutter
- PVC cutter or fine-tooth saw
- Abrasive wheel or portable cutter
- Deburring tool
- Measuring and marking kit
Safety essentials before you start
With tools laid out, safety checks come next to prevent injury and protect the workpiece.
The operator inspects PPE, secures the conduit, and confirms workspace clearance. Proper lighting, ventilation, and tool condition reduce risks.
Follow manufacturer and code guidance before cutting.
- Wear eye, hand, and hearing protection
- Clamp conduit firmly
- Check blade/knife sharpness
- Clear nearby hazards
- Guarantee adequate lighting
Choosing the Right Tool for Each Conduit Type
Selecting the proper cutting tool depends on conduit material and the desired speed and finish.
For EMT, choices range from tube cutters to hacksaws and reciprocating saws; PVC is best handled with PVC cutters, miter saws, or handsaws; rigid metal often requires reciprocating saws, abrasive cutoffs, or specialty conduit cutters.
A brief comparison of pros and cons for each tool clarifies trade-offs in accuracy, speed, and burr control.
Best tools for EMT (tube cutter, hacksaw, reciprocating saw)
Different conduit materials and job conditions demand specific cutting tools: a tube cutter for smooth, square cuts on EMT, a hacksaw for flexible placement and low cost, and a reciprocating saw for speed on thicker or obstructed runs.
Tube cutters give burr-free edges and controlled rotation; hacksaws are portable and inexpensive; reciprocating saws handle tight spaces and heavy gauge EMT but require deburring after cutting.
Best tools for PVC conduit (PVC cutter, miter saw, handsaw)
For PVC conduit, the most appropriate cutting tool depends on length, accuracy, and site constraints.
Short runs and small diameters suit a ratcheting PVC cutter for clean, burr-free cuts.
Longer sections benefit from a miter saw with a fine-tooth blade for speed and square edges.
A fine-tooth handsaw serves tight spaces or quick field adjustments, though it requires deburring afterward.
Best tools for rigid metal conduit (reciprocating saw, abrasive cutoff, conduit cutter)
Cutting rigid metal conduit requires tools that balance speed, control, and a clean edge: common choices are the reciprocating saw for rough cuts and tight spaces, abrasive cutoff wheels for fast, straight cuts on-site, and dedicated conduit cutters for the cleanest, burr-free finish on smaller diameters.
Selection depends on diameter, access, and finish needs; portable power tools suit field work while manual cutters excel for neat trim and safety.
Tool pros and cons comparison
Having surveyed common cutting tools for rigid metal conduit, the next step compares their strengths and weaknesses across conduit types—EMT, IMC, and RMC. Tool choice balances speed, finish, and safety: rotary cutters excel on EMT/PVC; abrasive saws cut IMC/RMC fast but need deburring; reciprocating saws adapt to tight spaces with rougher edges.
| Tool | Strength | Weakness |
|---|---|---|
| Rotary cutter | Clean finish | Limited to thin walls |
| Abrasive saw | Fast, versatile | Sparks, heat buildup |
Preparing the Workpiece and Workspace
Before cutting, the workpiece should be measured and marked with clear, accurate cut lines and any common measurement mistakes noted.
The conduit must be clamped and supported securely while nearby surfaces and wiring are protected from sparks, metal shavings, and tool contact.
These preparatory steps reduce errors, improve safety, and guarantee clean, precise cuts.
Measuring and marking accurate cut lines
Measure twice and mark once: accurate layout is the foundation of a clean conduit cut.
The installer measures from fixed reference points, accounting for fittings and insertion depth. Measurements are transferred with a fine-tip marker or scribe; a square guarantees perpendicular lines.
For curved runs, scribe offset marks. Double-check totals and note orientation marks for repeatable alignment before cutting.
Clamping, supporting, and securing conduit
Secure the conduit firmly in a stable setup to prevent movement and guarantee a square, burr-free cut.
Use a vise with protective jaws or pipe clamps padded to avoid marring. Support long runs with additional stands or saw horses every few feet.
Clamp near the cut but clear of the blade path. Check alignment and re-tighten before cutting.
Protecting nearby surfaces and wiring
Protect surrounding surfaces and existing wiring by isolating the work area and creating physical barriers between the conduit and anything that could be damaged.
Use drop cloths, cardboard, or plywood to shield floors and walls. Cover nearby cables with cable protectors or foam padding.
Remove or retract delicate items. Mark exclusion zones and keep tools, sparks, and metal shavings contained for safe, damage-free cutting.
Common measurement mistakes to avoid
Because small errors compound quickly, common measurement mistakes when preparing conduit often stem from rushed setups, incorrect reference points, or failure to account for fittings and bend allowances.
Practitioners should double‑check marks, use proper tools, and verify clearances before cutting to prevent rework and unsafe runs.
- Using tape without tension
- Measuring to outside diameter
- Ignoring coupling depths
- Skipping test fits
- Misreading bend tables
Step-by-Step Cutting Process for EMT
The section outlines the practical steps for preparing EMT, selecting the appropriate cutting method, and finishing the cut for a safe, fit installation.
It covers preparing and measuring the tube, using an EMT tubing cutter, and alternately cutting with a hacksaw or reciprocating saw, each with clear step-by-step actions.
It concludes with deburring and reaming techniques to guarantee smooth, code-compliant ends.
Preparing EMT for cutting
Measure and mark the EMT accurately before any tool touches it, using a tape measure and a fine-tip marker to note cut lines and any bending points.
Clamp the conduit in a vise or secure with a C-clamp to prevent rotation.
Deburrer, file, or coarse cloth should be on hand to remove sharp edges after cutting.
Clear the work area and wear gloves and eye protection.
Using an EMT tubing cutter: step-by-step
Several simple motions and checks produce a clean EMT cut when using a tubing cutter: position the cutter squarely on the mark, tighten the knob until the wheel contacts the tube, rotate the cutter around the conduit while gradually tightening after each full revolution.
Continue until the tube separates. Deburr the inside edge with a reamer or file and inspect the cut for squareness before installing.
Cutting EMT with a hacksaw or reciprocating saw: step-by-step
Begin by securing the EMT conduit in a vise or with clamps to prevent movement.
Then mark the cut line clearly and wear eye protection before proceeding.
Position a fine-tooth hacksaw or a reciprocating saw with a metal-cutting blade at the mark.
Cut steadily with even pressure, following the line.
Pause to check alignment; adjust angle if necessary to maintain a straight, square cut.
Deburring and reaming EMT ends
After cutting, the exposed edge of EMT must be smoothed to remove burrs and sharp metal shards that can damage wire insulation or cause injury.
Use a round file, deburring tool, or reamer to chamfer the inner edge and smooth the outer lip.
Rotate the tool evenly, inspect visually and by touch, and remove metal filings before installing fittings or running conductors.
Step-by-Step Cutting Process for PVC Conduit
The section outlines preparing PVC conduit for cutting, selecting the appropriate cutting tool, and the step-by-step techniques for each method.
It compares using a ratcheting PVC/conduit cutter with cuts made by a miter saw or handsaw, noting setup, blade choice, and cutting motions.
It then covers finishing procedures—smoothing, chamfering, and removing burrs—to guarantee clean, deburred ends ready for fitting.
Preparing PVC conduit for cutting
Before cutting, the PVC conduit should be measured, marked, and secured to guarantee a straight, safe cut.
The writer recommends using a tape measure, square, and pencil for accurate marks.
Clamp the conduit in a bench vise or pipe clamp with padding to avoid crushing.
Deburr and clean the marked area, removing dirt, grease, and imperfections that could affect fit or bonding after cutting.
Using a PVC/conduit cutter: step-by-step
With the conduit measured, marked, and firmly clamped, attention turns to the cutter and the cutting sequence.
The operator aligns the cutter blade on the mark, applies steady pressure, and rotates the cutter around the pipe if ratcheting.
Maintain firm, even strokes until the blade breaches.
Inspect the cut, remove burrs with a deburring tool or utility knife, and verify length before installation.
Cutting PVC with a miter saw or handsaw: step-by-step
Start by securely supporting the PVC conduit on a stable work surface and marking the cut line clearly. A miter saw or fine-toothed handsaw then makes straight, controlled cuts with minimal chatter.
With PPE on, clamp the conduit without deforming it, align blade to mark, and cut at steady feed. For handsawing, use even strokes; for a miter saw, use low speed and steady pressure.
Smoothing, chamfering, and removing burrs from PVC
After cutting, the PVC conduit requires deburring, smoothing, and a light chamfer to guarantee clean joints and safe handling.
Using a deburring tool or round file, remove inner and outer burrs.
Sand lightly with fine-grit sandpaper to smooth edges.
Create a shallow 15–30° chamfer on the outer edge for easy insertion.
Wipe clean before joining or solvent welding.
Step-by-Step Cutting Process for Rigid Metal Conduit (RMC)
The procedure for cutting rigid metal conduit (RMC) begins with proper preparation, including measuring, marking, and securely clamping the conduit.
It then covers step-by-step methods for using power saws and abrasive cutoff wheels or grinders to make accurate cuts.
Finally, the process addresses filing, reaming, and treating cut edges to remove burrs and corrosion for a safe, code-compliant finish.
Preparing RMC for cutting
Before cutting RMC, the workpiece should be measured, marked, and secured to guarantee accurate, square cuts and safe handling.
Inspect for burrs, corrosion, and obstructions.
Choose appropriate PPE: gloves, eye protection, and hearing protection.
Clamp the conduit in a vise or on a stable workbench with protective jaws.
Mark cut lines with a permanent marker and transfer layout marks for fittings before proceeding.
Cutting RMC with power saws: step-by-step
Begin by confirming the saw, blade, and personal protective equipment are appropriate for cutting rigid metal conduit (RMC):
Secure the conduit in a vise or clamp, mark the cut, and align the blade.
Start the saw, feed steadily without forcing, and maintain control until through.
Deburr the edge with a file, inspect the cut for squareness and remove metal shavings before installation.
Using abrasive cutoff wheels and grinders: step-by-step
Use a grinder fitted with an appropriate abrasive cutoff wheel to slice rigid metal conduit (RMC) quickly and accurately, ensuring the operator follows approved safety and tool-selection practices.
Secure conduit in a vise, mark cut, start wheel before contact, and make steady, controlled passes.
Pause to clear sparks, avoid overheating, and complete the cut with minimal wandering.
Inspect cut for alignment.
Filing, reaming, and treating cut edges on RMC
After cutting RMC with an abrasive wheel, attention turns to refining the raw edge so fittings slide on smoothly and conductors are protected.
A file removes burrs; a round reamer or deburring tool cleans the inner lip.
Inspect for sharp edges, apply corrosion inhibitor or rust-resistant primer if bare metal shows, then wipe clean.
Confirm fittings seat without resistance before installation.
Ensuring Accurate Lengths and Square Ends
Accurate lengths and square ends are essential for secure joints and neat installations.
The text will outline techniques for squaring cuts across conduit types, procedures for verifying true length after deburring, and the use of jigs and guides to produce repeatable cuts.
Practical tips and simple checks will help guarantee consistency on the job.
Techniques for squaring the cut across conduit types
Measure twice and mark clearly at the planned end before cutting, because achieving a square, flush conduit face depends on precise layout and consistent technique.
Use appropriate guides: a miter box or pipe vise for EMT, a PVC guide or wheel cutter, and a rigid-conduit clamp with file guide.
Rotate the conduit evenly, advance cutting tool slowly, and finish with a flat file to true the face.
Checking for true length after deburring
Confirm the final length and squareness by seating the deburred conduit against a known-flat reference—such as a square-faced stop, machinist’s square, or a precision-cut template—and visually and tactilely verify full contact around the circumference.
Measure from the reference to the end with calipers or a tape, checking multiple points to detect chamfer drift. Mark and trim any high spots; re-deburr and recheck before installation.
Using jigs and guides for repeatable cuts
After verifying true length and squareness against a flat reference, the technician can employ jigs and guides to reproduce that result consistently.
Fixtures clamp conduit, stop blocks set repeatable lengths, adjustable miter guides guarantee square cuts, V-blocks stabilize round stock, and scale-marked fences speed setup.
Consistent clamping and blade alignment minimize burrs and rework.
- Fixture clamping
- Stop block placement
- Adjustable miter guide
- V-block stabilization
- Scale-marked fence
Finishing and Protecting Cut Ends
After cutting, the ends are smoothed and prepared with appropriate deburring tools—files or reamers for metal, and a utility knife or deburring tool for PVC.
Metal conduit should receive rust-inhibiting treatments or protective coatings to prevent corrosion at exposed edges.
PVC joints benefit from proper application of primer and adhesive or a weatherproof sealant to guarantee a secure, lasting connection.
Deburring tools and methods for metal and PVC
Deburr the cut ends promptly to remove sharp edges and prevent damage to wiring and fittings.
Use a hand deburring tool or round file on metal conduit, rotating to remove burs and smooth the ID and OD.
For PVC, employ a utility knife, chamfering tool, or fine-file to remove plastic flash.
Finish with a brief wire brush or vacuum to clear debris.
Corrosion prevention for metal conduit
Several simple treatments greatly reduce corrosion risk at freshly cut metal conduit ends.
After deburring, apply a light coat of rust-inhibiting primer or zinc-rich spray to exposed steel.
For galvanized conduit, use cold-galvanizing compound or touch-up galvanizer.
Seal threads and joints with corrosion-resistant tape or compound.
Store finished pieces dry and off concrete to minimize moisture contact and galvanic action.
Applying adhesive, primer, or sealant for PVC joints
Prepare PVC conduit ends for bonding by ensuring cuts are square, clean, and free of burrs, dust, and grease so primers and adhesives can form a full, consistent bond.
Apply PVC primer to mating surfaces, allow brief dwell time, then coat with solvent cement.
Assemble immediately with proper alignment and twist for even distribution.
Wipe excess, allow recommended cure before handling or burying.
Common Problems and How to Fix Them
Common cutting problems are identified and corrected to guarantee safe, functional conduit runs.
Crooked or uneven cuts, burrs and sharp edges, and pieces cut to the wrong length each have specific causes and straightforward remedies.
The following section explains why these issues occur and offers practical prevention and repair techniques.
Crooked or uneven cuts: causes and fixes
Crooked or uneven conduit cuts often result from misaligned tools, unstable material, or improper cutting technique; identifying the root cause is the first step toward consistent, square cuts.
Confirm tool alignment, secure the conduit in a proper vise or clamp, and use guide marks.
Replace dull blades, correct cutting angle, and progress slowly with steady pressure.
Re-measure and trim minimally to correct minor deviations.
Preventing and repairing burrs and sharp edges
Even when cuts are square, rough edges and burrs can create safety hazards and interfere with fittings; addressing those issues requires both prevention during cutting and focused post-cut cleanup.
Use sharp blades, steady clamps, proper cutting speed, and support to minimize burrs.
Deburr metal with a round file, deburring tool, or rotary bit; chamfer PVC edges with a utility knife or sanding drum for smooth, safe connections.
What to do if conduit is too short or overcut
When conduit ends up too short or an overcut removes too much length, the job can still be salvaged with a few standard fixes: use couplings or extenders to add length, employ compression or set-screw fittings to bridge small gaps, or replace the faulty section if alignment or structural integrity is compromised.
- Use threaded or slip couplings
- Fit extension pieces
- Apply compression fittings
- Replace compromised sections
- Re-measure before final assembly
Time-Saving Tips and Best Practices
The author outlines practical time-saving techniques that include batch cutting and efficient layout strategies to reduce setup and measurement time.
Recommendations on selecting blades and cutters that maintain sharpness longer help minimize downtime and replacement costs.
Routine maintenance practices for both hand and power tools are presented to sustain performance and prevent delays.
Batch cutting and layout strategies
Group jobs by conduit type, length, and fittings so that multiple identical cuts can be made in one setup, reducing tool changes and measurement time.
Arrange pieces on a marked layout board or sawhorse, label counts, and clamp jigs for repeatable stops.
Sequence work from longest to shortest, bundle finished pieces, and plan transport to minimize handling and on-site re-measurement.
Choosing blades and cutters for longer life
Select blades and cutters based on conduit material, wall thickness, and anticipated cutting volume to maximize tool life and minimize downtime.
Use carbide-tipped blades for rigid and frequent cuts, bi-metal for steel EMT, and fine-toothed blades or abrasive wheels for PVC to prevent melting.
Match cutter geometry to section profile, prefer replaceable-edge systems, and keep spare consumables on hand for uninterrupted workflow.
Maintenance tips for hand and power tools
Keep tools clean, sharp, and properly adjusted to prevent wasted time and poor cuts; routine inspections for dull blades, loose guards, frayed cords, and clogged vents quickly identify issues before they cause downtime.
Proper lubrication, correct storage, timely replacement parts, and calibrated guides extend life and guarantee accuracy.
- Clean after each use
- Lubricate moving parts
- Replace worn blades promptly
- Store dry and organized
- Test safety features regularly
Safety Checklist and PPE for Cutting Conduit
The section outlines the essential safety checklist and PPE for cutting different conduit materials, specifying eye, hand, respiratory, and hearing protection as required per metal or PVC.
It also addresses controls for sparks, dust, and fumes, including ventilation and spark guards.
Procedures for collecting and disposing of metal shavings and PVC offcuts are provided to prevent injury and contamination.
Required personal protective equipment by material
When cutting different conduit materials, specific personal protective equipment (PPE) must be matched to the hazards each material presents:
For EMT and rigid steel, wear cut-resistant gloves, eye protection, hearing protection, and a face shield for grinding.
For PVC, use safety glasses, a dust mask or respirator rated for particulates, and gloves.
For all, wear long sleeves and sturdy footwear to prevent injury.
Handling sparks, dust, and fumes safely
After outlining the required PPE by material, attention shifts to controlling sparks, dust, and fumes produced during cutting.
Work in ventilated areas or use local exhaust. Employ spark shields and noncombustible barriers; keep combustibles away.
Use respirators rated for metal or PVC particulates and fumes. Wet cutting or vacuum attachments minimize airborne debris.
Monitor air and evacuate on strong odors or visible smoke.
Safe disposal of metal shavings and PVC offcuts
Collect and segregate metal shavings and PVC offcuts immediately to prevent hazards and simplify disposal.
Personnel should wear gloves and eye protection, sweep with a stiff brush into labeled containers, and avoid dust dispersal.
Follow local recycling and landfill rules; hazardous-contaminated pieces require special handling and documentation.
- Wear gloves and eye protection
- Use labeled containers
- Sweep, don’t blow
- Recycle metals
- Document hazardous waste
Tools and Materials Shopping Guide
The shopping guide compares recommended tool models for DIY users and professionals to match performance and budget.
It also lists consumables and accessories to keep stocked, such as blades, lubricants, and clamps.
Guidance on when to rent versus buy specialty cutters is provided based on frequency of use and cost-effectiveness.
Recommended models for DIY and professional users
Begin by grouping recommended conduit-cutting tools into two clear categories—budget-friendly options for DIYers and heavy-duty models for professionals—so readers can match features to expected use.
DIY picks emphasize affordability, ease, and portability; pro models prioritize durability, capacity, and speed.
- Ratcheting PVC cutter (compact, cheap)
- Tubing cutter for EMT (manual, precise)
- Hacksaw with guide (versatile)
- Portable abrasive saw (pro, high RPM)
- Electric conduit cutter (stationary or hand-held)
Consumables and accessories to keep stocked
A small selection of consumables and a few reliable accessories keep conduit-cutting work efficient and safe: blades and discs matched to the cutter, replacement cutting wheels for tubing cutters, fresh abrasive belts or wheels for portable saws, and lubricant or cutting oil for metal cuts.
- Spare cutoff wheels
- Assorted blades (metal/PVC)
- Cutting oil and degreaser
- Deburring tools and files
- Safety gear (glasses, gloves)
When to rent vs. buy specialty cutters
Weigh cost, frequency, and job complexity before deciding whether to rent or buy specialty cutters; occasional or one-off projects favor rental, while frequent use justifies purchase.
Consider cutter quality, maintenance, storage, and warranty.
Rent to access high-end tools for specific tasks without ownership burden.
Buy when amortized cost, availability, and consistent performance outweigh rental fees and scheduling constraints.
Visual Reference and Quick How-To Recap
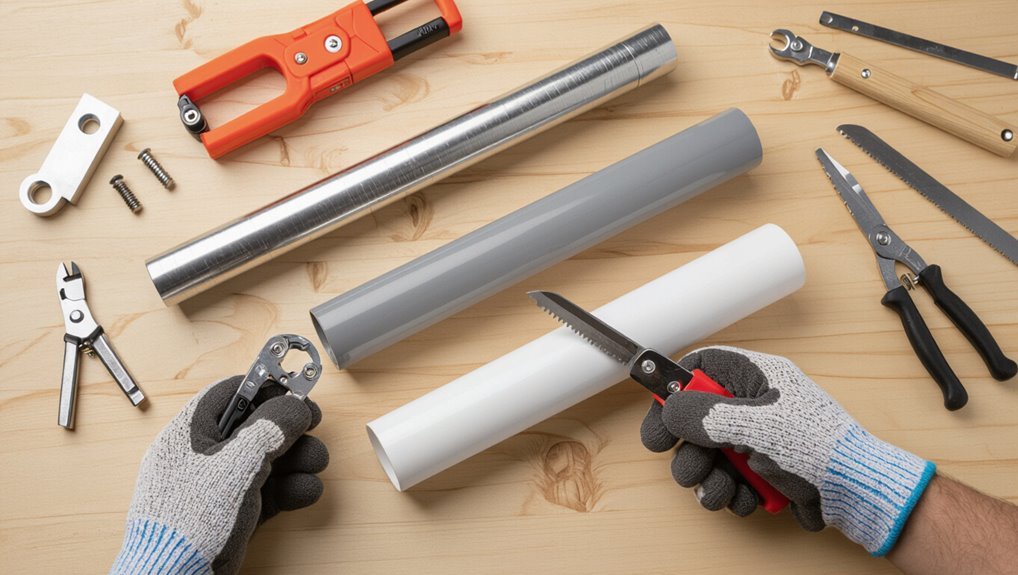
The article provides a one-page quick steps sheet covering EMT, PVC, and RMC cutting techniques for fast reference.
A compact troubleshooting flowchart highlights common cutting issues and corrective actions.
Readers are invited to consult these visuals before beginning a cut to reduce errors and save time.
One-page quick steps for EMT, PVC, and RMC
Start with a clear visual checklist and concise step sequence for EMT, PVC, and RMC so users can cut each conduit type quickly and accurately.
A one-page quick steps sheet summarizes tools, measurements, marking, cutting, and deburring for fast reference.
It highlights safety, blade choice, clamp technique, and final fit checks for repeatable, clean results.
- Tools and PPE
- Measure and mark
- Secure and cut
- Deburr and inspect
- Fit and adjust
Troubleshooting flowchart for common cutting issues
After following the one-page quick steps, a compact troubleshooting flowchart helps diagnose and fix common cutting problems quickly.
It guides users through prompts:
- uneven cuts → check blade type and secure conduit;
- burrs → deburr tool or file;
- binding → lubricate and reposition clamp;
- crushed edges → use proper support or saw guide;
- noisy vibration → inspect blade tension and feed rate.
Follow corrective action steps.
Conclusion
A clean conduit cut combines proper tool choice, setup, and technique to guarantee fit, safety, and professional results. For example, on a municipal job replacing aged EMT runs, a crew used a tubing cutter for straight cuts and a file for deburring; this reduced rework and sped installation by two hours. Consistent preparation—secure clamping, correct blade, and PPE—prevents damage and injury, making each cut predictable and repeatable across EMT, PVC, and rigid conduit.
