How to Make Pipe Dope at Home: Step-by-Step Guide for Reliable Thread Sealing
To make homemade pipe dope for reliable thread sealing, combine petroleum jelly or vegetable-oil grease with beeswax and an inert filler like powdered clay or fine sawdust. This simple mixture creates a tacky paste suitable for low-pressure, non-potable threaded joints.
Start by mixing the solids, then gradually add the lubricant until smooth. Store the finished product in an airtight container. When applying, use a thin clockwise bead on the male threads, tighten evenly, and allow it to cure for 1 to 24 hours before pressure testing. For full instructions, safety notes, and application tips, refer to the detailed guide.
What Homemade Pipe Dope Is and When to Use It
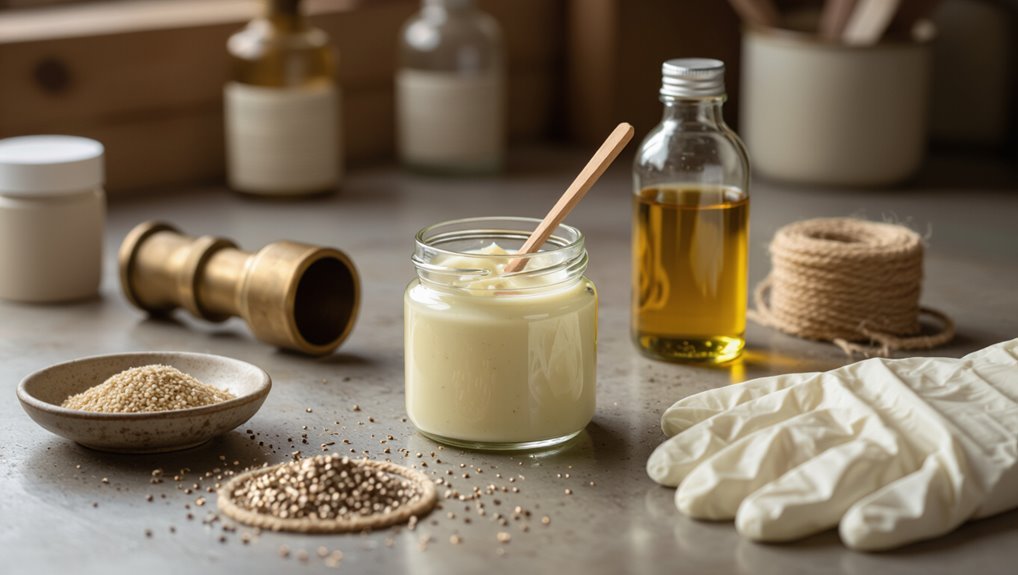
Homemade pipe dope is described as a lubricant and sealant applied to threaded connections to improve fit, prevent leaks, and resist corrosion.
It is commonly used on metal fittings and compatible plastics when formulated from appropriate base oils, fillers, and binders chosen for the specific materials and media.
Users must consider safety, local plumbing codes, and legal liability before applying DIY thread sealants, since some systems require certified commercial products.
Definition and functions of pipe dope
Pipe dope is a sealing compound applied to threaded pipe joints to prevent leaks, lubricate threads for proper torque, and protect against corrosion.
It fills gaps between threads, maintains pressure integrity, and eases assembly.
In a how to make a pipe dope context, homemade formulations mimic these functions, offering temporary sealing, improved tightening, and corrosion inhibition when commercial products aren’t available.
Common applications and materials compatible with homemade formulations
Sealants made from common household materials serve well for low-pressure, non-potable, and temporary plumbing repairs where commercial thread compounds are unavailable.
Typical uses include garden hoses, outdoor spigots, radiator drain valves, and temporary joins during testing.
Compatible materials: petroleum jelly, plumber’s tape, beeswax, vegetable oil-based greases, and inert fillers like powdered clay; avoid applications requiring potable water or high-pressure systems.
Safety, legal, and code considerations for DIY thread sealants
Several common DIY thread compounds are suitable only for low-risk, non-potable, or temporary uses and must be evaluated against safety, legal, and code requirements before application.
Users should verify potable-water approval, pressure and temperature ratings, flammability, and chemical compatibility.
Local building codes and inspectors may prohibit homemade sealants for permanent or concealed plumbing.
When unsure, opt for certified commercial products and professional advice.
Quick Recommendation: Best Homemade Recipe for Thread Sealing
A simple mixture of non-hardening pipe thread compound—made from powdered graphite, fine clay, and a light mineral oil—provides reliable sealing for common metal fittings.
This recipe is recommended because it balances malleability, temperature tolerance, and ease of application while avoiding corrosive or hardening ingredients.
It is also favored for its readily available components and minimal risk of damaging threads compared with solvent-based or epoxy alternatives.
One-sentence summary of the recommended DIY pipe dope
Mix equal parts white plumber’s pipe thread sealant (Teflon-based paste) and fine powdered graphite to create a tacky, heat-resistant putty that fills threads, resists water and oil, and cures within 24 hours for reliable DIY thread sealing.
This blend offers easy application, good lubrication during tightening, stable sealing across temperature ranges, and straightforward preparation from common materials for pragmatic home repairs.
Reasons to choose this recipe over alternatives
Practicality and performance make this recipe stand out: combining a Teflon-based plumber’s paste with fine graphite yields a sealant that balances tackiness for easy application, lubrication for smoother tightening, and heat and chemical resistance for longevity—advantages often missing from plain tape, raw grease, or single-component compounds.
It offers controlled application, reduced galling, improved sealing under pressure, and longevity without specialized tools or hazardous solvents.
Ingredients and Tools Needed
A concise inventory outlines the core ingredients—such as base oils, fillers, and thickeners—and explains each component’s role in sealing and lubrication.
It then notes optional additives and common substitutes for tailoring properties like temperature resistance or curing time.
Finally, required tools and containers are listed to guarantee safe mixing, storage, and application.
List of core ingredients with roles
Successful homemade pipe dope relies on a small set of core ingredients and a few basic tools, each contributing a specific function: a base lubricant to fill gaps and reduce friction, a tackifier to help the compound adhere to threads, a filler to provide body and prevent leakage, and a corrosion inhibitor to protect metal surfaces.
- Base lubricant — guarantees smooth threading and gap filling.
- Tackifier — promotes adhesion.
- Filler — builds consistency and seals.
- Corrosion inhibitor — protects metal.
Optional additives and substitutes
Several optional additives and substitutes can tailor homemade pipe dope to specific metals, pressures, or environmental conditions.
Graphite improves high-temperature resistance; PTFE powder increases lubricity and chemical inertness.
Zinc or aluminum flakes enhance conductivity for grounding where needed.
Specialty thickeners (e.g., fumed silica) adjust consistency.
Corrosion inhibitors protect dissimilar metals.
Use mild, compatible alternatives and test small batches before application.
Required tools and containers
Basic hand tools and a few clean, inert containers are necessary before mixing homemade pipe dope. Required items include a stainless steel or glass mixing bowl, measuring spoons, a calibrated scale for accuracy, a disposable stir stick or silicone spatula, and airtight glass jars for storage.
Safety gear—nitrile gloves and eye protection—should be on hand to prevent contamination and exposure.
Step-by-Step Instructions to Make Pipe Dope at Home
The process begins with preparing a well-ventilated workspace and donning appropriate protective gear.
Next, precise measurements of ingredients are combined and mixed to the target consistency using recommended techniques and periodic checks.
Finally, the finished compound is transferred to labeled containers, noting storage conditions and expected shelf life.
Preparing the workspace and safety precautions
Before beginning, the work area should be cleared, well-lit, and ventilated to minimize dust and fumes while providing unobstructed access to tools and materials.
Wear chemical-resistant gloves, eye protection, and a respirator if mixing powders or solvents.
Keep a fire extinguisher nearby, store flammables safely, label containers, and maintain a tidy bench to prevent cross-contamination and accidental spills.
Measuring and combining ingredients
One clear set of measurements and an organized layout help guarantee consistent results when combining ingredients for homemade pipe dope.
Measure components by weight using a digital scale for accuracy; record ratios. Pre-weigh containers, label each, and assemble tools nearby.
Add solids before liquids as recipes specify. Verify quantities twice before proceeding to the mixing stage to prevent formulation errors.
Mixing technique and consistency checks
Begin by placing the weighed ingredients on a clean, level surface and donning appropriate gloves; this sets a controlled workspace for mixing.
Use a flat spatula to fold components, scraping sides and bottom until homogeneous. Target a smooth, tacky paste that holds shape but spreads under light pressure.
Test small amount between fingers for uniform texture and absence of gritty particles.
Storage, shelf life, and labeling
When stored properly in airtight, chemically resistant containers and kept away from heat and direct sunlight, homemade pipe dope can retain its properties for several months.
Label containers with formulation, date mixed, and any hazards.
Keep batches small, inspect before use for separation, odor, or mold.
Dispose expired material per local regulations.
Store away from children, pets, and incompatible chemicals.
How to Apply Homemade Pipe Dope Correctly
Before applying homemade pipe dope, the installer inspects and cleans threads and mating surfaces to remove debris, oil, and old sealant.
The discussion then compares application techniques for metal, PVC, and galvanized fittings, specifies how much compound to use and the correct thread orientation, and outlines proper torque plus recommended curing time.
Finally, guidance is given on pressure-testing only after the compound has set for the stated interval to guarantee a reliable seal.
Surface preparation and thread cleaning
Prepare the mating surfaces by removing old sealant, grime, and corrosion so threads seat cleanly and evenly.
Use a wire brush, pipe cleaner, or solvent-soaked rag to remove debris.
Inspect threads for nicks or deformation; file burrs lightly if needed.
Dry thoroughly and degrease with isopropyl alcohol.
Confirm no particulates remain before applying homemade pipe dope to avoid leaks and improper sealing.
Application method for different pipe materials (metal, PVC, galvanized)
With clean, dry threads confirmed, attention shifts to choosing and applying the homemade pipe dope according to pipe material.
For metal threads, thinly coat male threads and lightly smear female threads to guarantee even coverage.
For galvanized fittings, use a corrosion-compatible formula and avoid abrasive scrubbing.
For PVC, select a solvent-safe, non-reactive paste and apply sparingly on threads only, avoiding solvent-weld areas.
Amount to apply and orientation tips
A thin, even bead of homemade pipe dope—about the thickness of a nickel on the first two threads for standard 1/2–1″ fittings—provides a reliable seal without excess squeeze-out; apply clockwise onto male threads, leaving the leading thread lightly coated to prevent intrusion.
Orient joints so excess faces away from sensitive areas. Wipe stray material immediately; avoid overapplication that can impede thread engagement.
Torqueing and curing time before pressure testing
Before and during final tightening, torque should be applied gradually and evenly so that threads compress the homemade compound without stripping or binding; recommended torque values follow pipe size and material charts, not guesswork.
After assembly, allow the compound to cure per ingredient guidance—typically 1–24 hours—before pressure testing.
Shorter cures suit low pressure; full cure guarantees reliable seals under rated system pressures.
Performance Comparison: Homemade vs. Commercial Thread Sealants
A concise comparison highlights how homemade and commercial thread sealants differ in sealing effectiveness, pressure ratings, and resistance to temperature and chemicals. Considerations of cost, availability, and environmental impact further influence which option suits a given project. The table below summarizes key aspects for quick reference.
| Criterion | Homemade Sealant | Commercial Sealant |
|---|---|---|
| Sealing effectiveness / Pressure ratings | Variable; often untested | Specified and certified |
| Temperature & chemical resistance | Limited, depends on ingredients | Engineered for ranges and exposures |
| Cost, availability & environmental impact | Low cost, readily made, variable eco-profile | Higher cost, widely available, regulated formulations |
Sealing effectiveness and pressure ratings
Many homemade thread sealants can provide a temporary leak-free joint under low-pressure, non-critical conditions.
However, they rarely match the consistent sealing effectiveness or rated pressure limits of commercial formulations.
Commercial sealants undergo standardized testing and specify maximum working pressures; homemade mixes lack certification and variable composition can cause unpredictable failure under high pressure.
For safety-critical or high-pressure systems, certified products are recommended.
Temperature and chemical resistance
When exposed to extreme temperatures or aggressive chemicals, homemade thread sealants typically offer far less predictable resistance than commercial products.
Commercial formulations are engineered and tested for thermal stability and chemical compatibility, while DIY mixtures rely on constituent oils, greases, or tapes that degrade, harden, or wash out under stress.
Consequently, commercial sealants maintain seals across wider temperature ranges and resist solvents, acids, and fuels more reliably.
Cost, availability, and environmental considerations
Although homemade thread sealants can appear economical at first glance, their true cost profile often includes hidden expenses—time for preparation, higher failure risk, and potential damage from leaks—that can outweigh the lower upfront material price.
Commercially produced sealants, while pricier per tube, are widely available, packaged for specific uses, and often formulated to minimize waste and rework.
Environmental impacts differ: DIY mixes may lack regulatory testing, complicating disposal; commercial products often include safety data, recycling guidance, and lower volatile emissions.
Common Problems and How to Fix Them
The section outlines common issues users encounter with homemade pipe dope, starting with methods for detecting leaks and pinpointing their causes.
It then explains safe techniques for removing aged DIY compound from threads without damaging fittings.
Finally, it sets clear criteria for when a commercial thread sealant should replace a homemade formulation.
Detecting leaks and diagnosing causes
Start by inspecting joints, fittings, and accessible pipe runs for visible signs of leakage—wetness, mineral deposits, corrosion, or staining.
Then listen for hissing or dripping sounds and feel for moisture with a dry tissue or paper towel to pinpoint active leaks.
Determine cause by noting thread damage, loose connections, incorrect sealant application, overtightening, or degraded fittings; document location and severity for targeted repair.
How to remove old homemade pipe dope
After documenting leak locations and causes, attention turns to removing old homemade pipe dope so repairs can proceed cleanly.
The technician loosens fittings, wipes excess with a cloth, and scrapes hardened residue with a plastic or brass scraper.
Solvents like mineral spirits soften stubborn deposits; guarantee ventilation and gloves.
Finish by cleaning threads with a wire brush and drying thoroughly before reassembly.
When to replace DIY dope with a commercial product
When recurring leaks, thread degradation, or chemical breakdown appear despite proper application and curing time, switching from homemade pipe dope to a tested commercial sealant becomes prudent.
Commercial products offer formulated viscosities, additives, and certifications that address temperature extremes, potable water safety, and chemical compatibility better than many DIY mixtures.
Replace DIY dope when repairs repeat, certifications are required, or exposures exceed the homemade formula’s proven limits.
Safety, Health, and Environmental Concerns
The section addresses toxicity and safe handling of common pipe dope ingredients, emphasizing use of gloves, ventilation, and storage precautions.
It outlines proper disposal methods and steps for containing and cleaning spills to minimize environmental harm.
Guidance is provided on situations—extensive leaks, contaminated water, or uncertain materials—when a professional plumber should be consulted.
Toxicity and safe handling of ingredients
Working with homemade pipe dope requires careful attention to the toxicity and safe handling of constituent ingredients, since common components like solvents, petroleum-derived greases, and anti-corrosion additives can pose inhalation, skin-contact, and environmental hazards.
Users should wear gloves, eye protection, and respirators as appropriate; guarantee ventilation; store chemicals labeled and sealed; and consult safety data sheets to assess acute and chronic risks before use.
Proper disposal and spill cleanup
Contain and neutralize spills immediately to minimize environmental release and personal exposure: absorb with inert material (cat litter, vermiculite), collect into labeled, sealed containers, and avoid washing residues into drains.
Dispose of contaminated absorbent and unused compound per local hazardous-waste rules.
Decontaminate surfaces and tools with appropriate cleaners and PPE.
Document incidents and report significant releases to local authorities following regulations.
When to consult a professional plumber
After addressing spills and waste according to regulations, recognition of situations that exceed typical DIY scope helps protect health, property, and the environment.
A professional plumber should be consulted for pressurized mains, gas lines, unknown pipe materials, persistent leaks despite repairs, mold or contamination risk, structural impacts, or required permits.
Professionals offer certified repairs, safe disposal, and liability protection.
Tips, Variations, and Advanced Techniques
The section outlines how formulations can be adjusted for high-pressure or hot-water systems, including heat-resistant thickeners and sealants.
It also covers additives to impart antiseize or thread-locking functions and how those affect curing and removability.
Finally, it addresses best practices for storing small batches and scaling recipes while maintaining consistent performance.
Adjusting recipes for high-pressure or hot-water systems
When service conditions involve high pressure or sustained hot water, recipe adjustments focus on increased temperature stability and enhanced sealing under stress; this typically means substituting higher-melting-point thickeners, adding heat-resistant fillers, and raising the proportion of lubricious oils that resist breakdown at elevated temperatures.
Proportions should be tested incrementally, verifying viscosity, thermal stability, and compatibility with pipe materials and system fluids before deployment.
Adding antiseize or thread-locking properties
Several practical modifications can impart antiseize or thread-locking properties to homemade pipe dope by introducing specific additives—metallic particulates or graphite for anti-galling and fine anaerobic or tackifying agents for retention.
Measure and disperse additives uniformly into base grease or paste, test compatibility with metals and sealants, adjust concentrations for torque and cure behavior, and document formulations.
Prioritize safety, ventilation, and small trial batches.
Storing small batches and scaling for larger projects
Following the discussion on additives for antiseize and thread-locking, guidance turns to practical handling: small-batch storage and methods for scaling recipes without degrading performance.
Store airtight in cool, dark containers; label with date and composition.
Scale by weight, not volume; test torque on sample joints; adjust lubricant ratios incrementally and record results.
- Airtight storage
- Weight-based scaling
- Sample testing
- Record keeping
Troubleshooting Checklist Before Finalizing a Joint
Before final tightening, the installer should perform pre-pressurization checks for correct material seating, cleaned threads, and appropriate compound coverage.
A clear post-installation inspection timeline is recommended to monitor for seepage during the first 24–72 hours and again after temperature cycles.
Any visible weeping, rapid pressure loss, or odors must be treated as signs that the joint needs immediate attention.
Pre-pressurization checks
Inspect the assembly visually and by hand to confirm thread compound coverage, proper thread engagement, and that mating surfaces are clean and undamaged.
Verify alignment, torque to specification, and absence of cross-threading. Guarantee no foreign debris or excess compound will enter the system.
Confirm valves are positioned for controlled pressurization and nearby drains or isolation points are available for safe testing before applying pressure.
Post-installation inspection timeline
Completion of the joint requires a structured post-installation inspection timeline to catch leaks, misalignments, or compound failures before the system is commissioned.
Inspect immediately after curing, at initial pressurization, and again after 24 and 72 hours.
Record observations, torque, and compound condition. Use soap solution or electronic leak detection.
Flag anomalies for rework, retest after repairs, and document clearance before final sign-off.
Signs that a joint needs immediate attention
After documenting post-installation checks and any corrective actions, attention turns to obvious and subtle signs that a joint requires immediate intervention.
Visible leaks, persistent drips, wet staining, or corrosion indicate failure.
Audible hissing, pressure loss on gauges, chemical odor, or moisture accumulation at fittings also demand action.
Loose fittings, thread exposure, or softening of sealant require immediate disassembly and resealing.
Conclusion
In closing, the homemade sealing paste offers a friendly alternative to store-bought solutions, quietly doing the heavy lifting where joints meet. When fashioned and applied with care, it gently keeps leaks at bay and saves a few coins without drama. Practitioners are advised to mind safety whispers, respect material limits, and patch up any missteps promptly. Treated with common sense, this modest concoction performs its small but useful duty admirably.