How to Vent a Basement Toilet Properly: Step-by-Step Guide for Reliable Drainage
To properly vent a basement toilet, ensure you prevent sewer gas, maintain trap seals, and enable efficient drainage. This involves installing a vertical vent or connecting to an existing stack at the correct elevations. Alternatively, you may use an air admittance valve where permitted by local codes. Make sure to confirm the proper slope, secure all fittings, firestop any penetrations, and pressure-test the system. Always obtain necessary permits and adhere to local regulations. This guide will provide you with step-by-step installation instructions, alternatives, and troubleshooting tips.
How to Vent a Basement Toilet Properly: Quick Overview and Key Outcomes
Proper venting for a basement toilet guarantees traps remain sealed, prevents sewer gas entry, and promotes efficient drain flow.
Common signs of inadequate venting include gurgling noises, slow draining, and persistent sewer odors.
Recognizing these outcomes helps prioritize inspections and corrective venting measures.
What proper venting accomplishes for a basement toilet
Making certain a basement toilet is correctly vented prevents sewer gases from entering the living space, maintains water seals in traps, and allows waste to flow smoothly by balancing air pressure in the drain system.
Proper venting makes certain of consistent flush performance, reduces clog risk, minimizes odor intrusion, and preserves fixture longevity.
Clear guidance on how to vent basement toilet supports code compliance and reliable operation.
Typical symptoms of improper venting to watch for
After outlining what correct venting accomplishes, attention turns to the warning signs that indicate a basement toilet is not vented properly.
Common symptoms include slow drainage, gurgling noises, frequent siphoning or loss of trap seal, persistent sewer odors, and toilet backups.
Intermittent bubbling in nearby drains and backsplash during flushing also point to blocked or insufficient venting requiring prompt inspection and repair.
Essential Basics of Plumbing Venting for Basements
A brief explanation of how plumbing vents maintain trap seals and equalize pressure frames why basement fixtures require special routing or air admittance solutions due to below‑grade positioning.
Applicable building codes and common permit requirements should be reviewed early to guarantee any venting method meets local standards.
Before beginning, a concise list of necessary tools and materials—pipe, fittings, sealants, fasteners and safety gear—helps prevent delays.
How plumbing vents work and why basement fixtures need special consideration
Plumbing vents maintain neutral air pressure in drain lines by allowing sewer gases to escape and fresh air to flow into the system, preventing siphoning of traps and ensuring reliable fixture drainage.
Basement fixtures often sit below main soil lines, requiring individualized venting or looped solutions to prevent long horizontal runs from creating siphon, backflow, or slow drainage issues unique to below-grade installations.
Code requirements and common local permit considerations
Local building codes dictate how basement vents must be sized, routed, and terminated to protect health and maintain system performance.
These regulations often differ from those for fixtures on upper floors because of below-grade risks and unique venting arrangements.
- Permit requirements for alterations or new vent runs
- Minimum pipe sizes and slopes
- Approved vent termination locations
- Inspection checkpoints and documentation
- Licensed installer or homeowner allowances
Tools and materials you’ll need before starting
Before beginning work, the installer should assemble a concise kit of tools and materials tailored to basement venting so the job proceeds efficiently and to code.
Essential items include durable pipe, fittings, and sealant; proper vent caps and flashing; cutting and joining tools; testing equipment; and safety gear.
- PVC/ABS vent pipe and fittings
- Primer, cement, gaskets
- Hole saw, pipe cutter, wrenches
- Smoke or pressure tester
- Gloves, goggles, respirator
Assessing Your Current Basement Drainage and Vent System
A careful inspection begins with the toilet drain and trap and follows any visible vent routes to identify obstructions or improper connections.
The assessor then decides whether to tie into an existing vent stack or run a new vent based on location, capacity, and code compliance.
Finally, pipes are measured and mapped for slopes, distances, and vent heights to guarantee proper flow and meet venting requirements.
Inspecting the toilet drain, trap, and existing vent routes
Begin by tracing the toilet’s waste path from the bowl through the trap to the drain line, noting pipe sizes, materials, slope, and any visible fittings or junctions.
Examine trap condition, seal integrity, and clearance to cleanouts.
Map existing vent routes externally and internally, locating tees, stacks, or branch vents.
Identify corrosion, offsets, backpitch, and accessible inspection points for later testing.
Determining whether to tie into an existing vent stack or install a new vent
Having mapped the drain, trap, and vent routes, the next step is to decide whether to connect the basement toilet to an existing vent stack or provide a dedicated vent.
Evaluate distance, available fittings, existing vent capacity, and code allowances. If the run is short and stack capacity adequate, tie in; if conflicts, long runs, or code restrictions exist, install a dedicated vent to guarantee proper airflow and compliance.
Measuring and mapping pipe slopes, distances, and vent heights
Measure and map the exact slopes, distances, and vent heights before cutting any pipe to guarantee the basement toilet ties into a functioning system.
Inspect existing traps, soil stacks, and cleanouts.
Use a level, tape, and inclinometer to record fall per foot, run lengths, and vertical vent termination relative to roof and flood-level rim.
Produce a simple sketch with measurements and notes for installer verification.
Step-by-Step Guide to Installing a Proper Vent for a Basement Toilet
The following section outlines a concise, step-by-step procedure for installing a proper vent for a basement toilet, covering planning, preparation, and compliance choices.
It begins with selecting the vent path and type—vertical stack, individual vent, or air admittance valve—and preparing the flange and trap for access.
Subsequent steps address connecting to an existing vent stack or installing a new vertical stack through floor and roof, and the selection, placement, and code considerations for using an AAV.
Step 1 Planning the vent path and choosing vent type (vertical stack, individual vent, or AAV)
Begin by mapping the shortest, most direct route from the basement toilet to the roof or nearest suitable vent connection. Then decide whether a vertical stack, individual vent, or air admittance valve (AAV) best fits that route and local code.
Consider slope, obstructions, fittings, vent size, and access for maintenance.
- Roof penetration complexity
- Local code restrictions
- Distance to stack
- Basement ceiling access
- Future renovations
Step 2 Preparing the toilet flange and trap to access the drain line
After the vent route is chosen and obstructions identified, attention turns to preparing the toilet flange and trap so the drain line can be accessed safely.
The toilet is removed, flange bolts and wax ring cleared, and the trap arm exposed.
Protective caps, a drain plug, and temporary supports prevent sewer gas and debris.
Photographs and measurements document orientation before cutting or dismantling.
Step 3 Connecting to an existing vent stack: locating tie-in point and wet vent considerations
Several key factors determine where a basement toilet can tie into an existing vent stack: proximity to the stack, elevation of the tie-in relative to the trap arm, and local code limits on horizontal wet venting.
The installer identifies an accessible clean-out or appropriate stack section, guarantees the tie-in is above the trap arm invert, sizes fittings to code, and avoids trapping or low spots that impede airflow.
Step 4 Installing a new vertical vent stack through the floor and roof (cutting, through-penetration, flashing)
Cut a continuous vertical path from the basement fixture up through the floor framing and roof, ensuring the vent pipe remains plumb and unobstructed at every penetration.
Drill and cut holes centered within joist bays, install appropriate fire‑stopping and insulation around the pipe, run pipe through attic to roof, flash roof penetration with a compatible boot, and secure pipe with straps to prevent movement and leaks.
Step 5 Using an air admittance valve (AAV): selection, placement, and code compliance
If running a continuous vent stack through the floor and roof is impractical, an air admittance valve (AAV) offers a compact alternative for a basement toilet.
Select a listed AAV sized for the fixture unit demand, install vertically above the trap arm in accessible space, and follow local code restrictions—many jurisdictions limit AAV use or require backup venting and manufacturer installation instructions to be observed.
Step 6 Sealing and testing joints, pipe slopes, and water-tightness
Begin by verifying that all fittings are fully seated and solvent-cemented or mechanically joined. Then proceed to seal and test each connection, slope, and fixture for proper drainage and watertightness.
Inspect slopes with a level (1/4″ per foot typical). Apply appropriate sealants or gaskets. Pressure-test drains and vents per code. Remedy leaks and recheck alignments until no seepage or improper pitch remains.
Step 7 Final tests: trap seal integrity, vent airflow, and flushing performance
With all joints sealed and slopes confirmed, attention turns to final operational checks: verifying trap seal integrity, confirming vent airflow, and evaluating flushing performance.
Inspect trap seal for correct water depth and absence of siphonage during simulated flushes.
Use smoke or airflow meter at vent terminations to guarantee unobstructed flow.
Record flushing tests, listen for gurgles, and correct deficiencies before finishing.
Special Situations and Alternative Solutions
The article next examines special situations and alternative solutions that affect basement toilet venting, including when an air admittance valve is appropriate versus tying into a traditional vent stack.
It addresses constraints such as slab-on-grade floors or finished ceilings, options for wet venting multiple fixtures or sharing vent lines, and the steps required to bring old cast-iron or clay systems up to current venting standards.
Practical considerations and code implications for each scenario are highlighted to guide selection of the best approach.
When to use an AAV vs. a traditional vent stack
When should an air admittance valve (AAV) be chosen over a traditional vent stack depends on site constraints, code allowances, and long-term maintenance considerations.
An AAV suits retrofit installs where routing a vent is impractical, subject to local code approval and regular inspection.
A traditional vent stack is preferred for full compliance, passive reliability, and situations requiring future system expansion or minimal mechanical components.
Handling slab-on-grade or finished ceiling basements
Addressing slab-on-grade or finished-ceiling basements requires tailored venting strategies because conventional vertical stacks may be impractical or destructive to existing finishes and foundation slabs.
Options include using approved mechanical air admittance valves, routing vents horizontally to exterior walls with proper slope and insulation, or creating chaseways to conceal piping.
Local code compliance and professional evaluation determine acceptable, durable solutions for minimal disruption.
Multi-fixture wet venting and shared-vent configurations
Consideration of multi-fixture wet venting and shared-vent configurations is essential when a basement bathroom must minimize penetrations or plumbing runs. A wet vent can serve multiple fixtures if slopes, trap arms and stack sizes comply with code; shared vents reduce roof penetrations but require careful fixture placement, sizing and wet-dry separation to prevent siphoning and backflow.
| Fixture | Role |
|---|---|
| Toilet | Primary drain |
| Sink | Wet vent |
| Shower | Secondary tie-in |
| Stack | Vertical vent |
| Roof | Termination |
Converting an old cast-iron or clay system to meet modern venting standards
After outlining multi-fixture wet venting and shared-vent approaches, attention turns to upgrading legacy cast-iron or clay systems to meet modern venting standards.
Assessment identifies corrosion, joint integrity, and slope issues.
Recommended actions include lining or partial replacement with PVC, installing accessible vent connections, adding mechanical or AAV vents where code permits, pressure testing, and documenting changes for inspections to guarantee reliable basement toilet venting.
Common Problems, Diagnoses, and How to Fix Them
Common issues with basement toilet venting—such as gurgling, slow drains, and sewer gas odors—often trace to blocked vents, improper pipe sizing, or incorrect slopes.
Diagnostic steps include smoke or water tests, slope checks, and inspections for backflow or ice-related blockages.
Solutions range from clearing or rerouting vents and correcting pitch to installing larger vents, backflow preventers, or insulation/heating to prevent freezing and condensation.
Gurgling, slow drains, and sewer gas odors: root causes and fixes
Gurgling, slow drains, and sewer gas odors often signal venting or blockage issues in a basement plumbing system; diagnosing them requires checking vent integrity, trap seals, and drain line obstructions.
Common fixes include clearing vents, snaking drains, and restoring trap water.
Signs and steps:
- Inspect roof or air admittance vent for blockage
- Check trap for evaporation or leaks
- Snake main drain for clogs
- Test for sewer gas with smell/source tracing
- Replace damaged vent pipe fittings
Sizing errors, incorrect slopes, and backflow issues
Several frequent problems—undersized piping, incorrect slope, and improper backflow prevention—create slow drainage, frequent clogs, and sewer backups in basement toilets.
Diagnoses include measuring pipe diameters, testing flow rates, and inspecting trap and vent alignment.
Remedies involve upsizing drains to code, regrading runs to 1/4″–1/8″ per foot, installing proper backflow valves or check assemblies, and retesting for free flow.
Preventing frozen vents and condensation in cold climates
When vents run through cold attics or terminate above unheated roofs, they are prone to freezing and to internal condensation that restricts airflow and accelerates ice buildup.
Diagnosing these issues requires inspecting exposed vent pipes for frost, measuring airflow at fixtures, and checking attic insulation and roof flashings.
Remedies include insulating vent runs, adding heat trace or ventilation, extending terminations above wind-wash zones, and improving attic sealing to prevent cold air intrusion.
Safety, Code Compliance, and When to Call a Professional
Safety precautions for cutting floors or making roof penetrations are essential to prevent structural damage, electrical hazards, and water leaks.
Typical permits, inspections, and code checkpoints—vent height, slope, material, and clearances—should be confirmed with local building authorities before work begins.
If structural framing, complicated vent routing, or gas/sewer smell and backup issues are present, a licensed plumber or structural tradesperson should be engaged.
Safety precautions for cutting floors and roof penetrations
Because cutting through floors or creating roof penetrations can expose hidden wiring, plumbing, and structural elements, strict precautions are required before work begins.
Verify utilities with a locator, shut off power and water as needed, and brace or support surrounding framing.
Use appropriate PPE, dust control, and fall protection.
Confirm material ratings for firestopping and flashing.
Stop and consult a professional if unknown conditions arise.
Typical permits, inspections, and code checkpoints to expect
Permits and inspections are typically required for venting a basement toilet because the work affects drainage, venting, and potentially structural or fire-rated assemblies.
Contractors or homeowners should verify local plumbing and building codes before cutting, routing, or penetrating floors and roofs.
Expect permit application, plan review, rough-in and final inspections, and code checks for vent sizing, slope, cleanouts, pipe material, roof penetration flashing, and firestop reinstatement.
Signs this job requires a licensed plumber or structural trades
After outlining typical permit and inspection requirements, attention turns to the indicators that a licensed plumber or structural tradesperson should handle the job.
Call a professional if main-stack alterations, load-bearing wall penetrations, complex roof or sewer connections, repeated backups, illegal or improvised venting, or code enforcement involvement are present.
Also hire one when unfamiliarity with local codes or gas and structural risks exists.
Maintenance Checklist and Long-Term Care for Basement Toilet Vents
Routine maintenance preserves vent performance and prevents odors or drainage issues in basement toilets. Homeowners should schedule seasonal inspections and run simple diagnostics to confirm air admittance valves (AAVs), seals, and vent piping remain functional.
Clear criteria for replacement—persistent odor, visible damage, or failed operation—should guide timely repairs or component swaps.
- Inspect AAVs monthly for proper opening/closing and replace if sticky or noisy
- Check seals and gaskets annually for cracks or compression and swap when brittle
- Flush vents with water/air after heavy use or construction to clear blockages
- Replace vent piping if corrosion, root intrusion, or repeated leaks are observed
- Keep a maintenance log with dates, findings, and parts replaced for trend tracking
Seasonal checks and simple diagnostics to keep vents functioning
Inspecting basement toilet vents seasonally prevents small issues from becoming costly failures.
Technicians or homeowners should clear visible debris, verify unobstructed air movement at roof terminals, listen for gurgles during flushing, and check for slow drainage indicating partial blockage.
Use a flashlight and flexible camera for accessible sections. Record findings, tighten loose fittings, and repeat checks biannually to maintain reliable vent performance.
When to replace AAVs, seals, or vent piping
When wear, odor, persistent gurgling, or repeated blockages appear despite regular cleaning, it is time to evaluate air admittance valves (AAVs), seals, and vent piping for replacement.
AAVs that fail to open or close reliably, brittle or cracked rubber seals, and corroded, crushed, or sagging vent pipes should be replaced to restore proper airflow and prevent sewer gas ingress.
Inspect annually; replace faulty parts promptly.
Cost Estimates and Timeframes
Estimated DIY costs for venting a basement toilet typically range from basic materials under $100 to $300 for more complex fittings, while professional installations usually fall between $500 and $2,000 depending on scope and local labor rates.
Simple solutions like adding an inline vent or rerouting a short vent stack can often be completed in a few hours, whereas cutting through floors, running long vent stacks, or installing an upflush system may require a full day or multiple days.
Presenting these ranges helps readers weigh budget against complexity before choosing a course of action.
Typical DIY costs vs. professional installation price ranges
Because venting a basement toilet can range from a simple DIY project to a complex job requiring a plumber, costs vary accordingly: DIY materials often cost $50–$300; professional work typically runs $400–$2,500 depending on access, pipe routing, and permits. Estimated ranges help budgeting; choose pro for complex routing or code compliance.
| Option | Typical DIY Cost | Professional Range |
|---|---|---|
| Basic kit | $50–$150 | $400–$800 |
| Intermediate | $150–$300 | $800–$1,500 |
| Complex | $300+ | $1,500–$2,500 |
Expected time to complete common venting approaches
Having reviewed cost differences between DIY and professional venting, attention turns to how long common venting methods typically take.
Simple reventing or adding an air admittance valve can be completed in 2–6 hours by a competent DIYer; running new vent piping to roof usually requires a professional and 4–12 hours depending on roof access and complexity.
Permitting adds variable extra time.
Visual Resources and Diagrams to Guide Installation
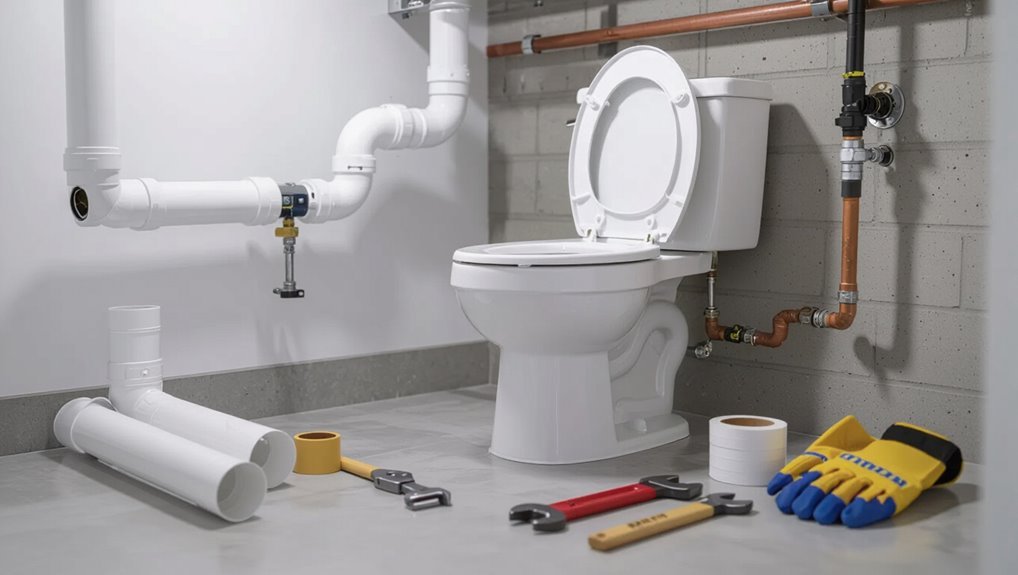
Clear, annotated diagrams and step-by-step visuals are essential for accurately locating vents, routing pipes, and ensuring proper slope and connections when venting a basement toilet.
Include exploded views of fittings, elevation drawings showing pitch, and plan views of joists and obstructions.
Label materials, dimensions, and vent terminations.
Provide printable templates and QR-linked video walkthroughs for on-site reference and verification.
Conclusion
In summary, careful venting guarantees a basement toilet functions reliably and prevents sewer gas intrusion; as the adage warns, “an ounce of prevention is worth a pound of cure.” Proper assessment, adherence to code, and timely maintenance yield long-term peace of mind and avoid costly repairs. Where complexities arise, consulting a licensed plumber secures safety and compliance. With methodical installation and routine checks, drainage performance and household health are preserved.