How to Remove Jets From a Whirlpool Tub: Step-By-Step DIY Guide
To remove jets from a whirlpool tub, follow these steps: first, identify the type of jets, then shut off the power and water supply. Drain the tub and gather necessary tools such as screwdrivers, pliers, gloves, and a flashlight. For threaded jets, simply unscrew them; for snap-in jets, carefully pry them outward. If the jets are glued or sealed, use heat or solvent to soften the seals before gentle removal. After removing the jets, inspect and clean the plumbing, replace any gaskets or jets as needed, or cap the openings if you wish to convert the tub to a soaking model. Further steps may include troubleshooting or seeking professional help if needed.
What Removing Whirlpool Tub Jets Involves and When to Do It
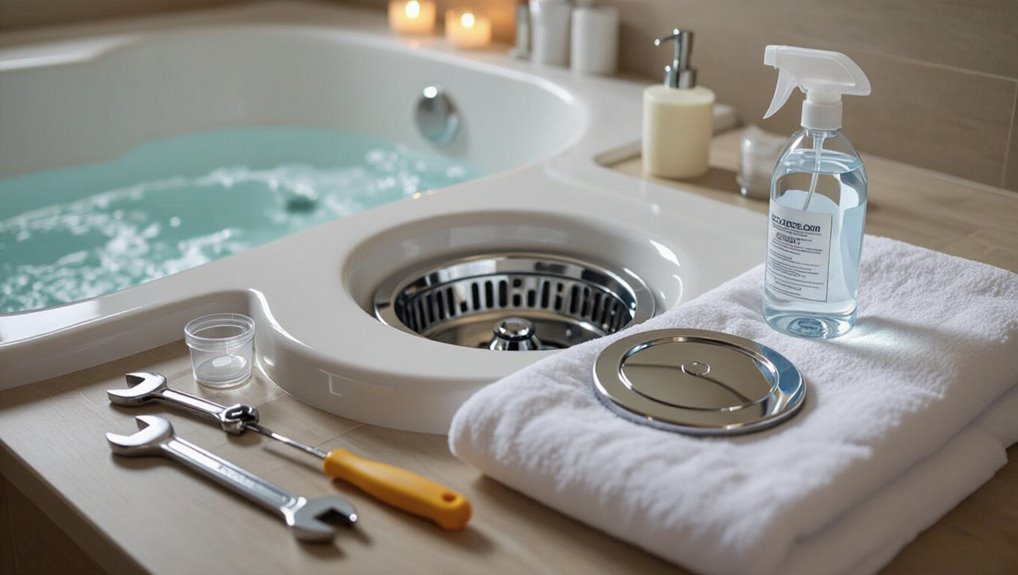
Removing jets is typically prompted by repair needs, part replacement, deep cleaning, or converting the tub into a plain soaking unit.
The task generally involves accessing and unscrewing or prying out the jet fittings, disconnecting plumbing as needed, and can take from 30 minutes for a single accessible jet to several hours for multiple or hard-to-reach fittings.
Before beginning, one must consider electrical and plumbing safety, local codes, and manufacturer warranty terms that may restrict or affect the procedure.
Reasons to remove jets (repair, replacement, cleaning, conversion to soaking tub)
Owners consider removing jets from a whirlpool tub for several practical reasons: to access and repair malfunctioning components, to replace worn or cracked fittings, to deep-clean internal plumbing that harbors biofilm and debris, or to convert the fixture into a low-maintenance soaking tub.
Motivations include restoring circulation, eliminating odors, upgrading parts, or simplifying maintenance; instructions for how to remove jets from whirlpool tub follow.
Quick overview of the removal process and time estimate
Begin by shutting off power and water to the tub and gathering basic tools—screwdriver, pliers, towels, and a flashlight—then confirm jet type (snap-in, threaded, or glued) to determine the technique.
Removal typically involves unsnapping or unscrewing the nozzle, disconnecting internal fittings, and cleaning or sealing the opening.
Expect 30–90 minutes per jet depending on access and adhesion.
Safety and legal considerations (electrical, plumbing, manufacturer warranty)
Before undertaking jet removal, one should verify power is isolated, water lines are shut, and local codes and warranty terms are reviewed to avoid safety hazards or voiding coverage.
Qualified electricians and plumbers should handle complex work; permits may be required. Documentation of changes preserves warranty claims.
Improper disassembly risks electrocution, leaks, mold, or structural damage; professional consultation mitigates liability and guarantees code compliance.
Tools, Materials, and Preparation
A concise list of necessary and optional tools and materials sets expectations for the job, from basic wrenches and screwdrivers to penetrating oil and extraction tools for corroded jets.
The workspace should be prepared by draining the tub, switching off power, and ensuring adequate ventilation.
Photos and simple markings are recommended to document the existing jet configuration before removal.
Necessary tools and materials
Gather the correct tools and materials to guarantee the jet removal goes smoothly and safely.
Essential items include protective gloves, eye protection, a set of screwdrivers, and a wrench.
Also required: towels, bucket, flashlight, cleaning brush, mild cleaner, and replacement seals.
Check tub access panels and shut off power/water before work.
- Gloves
- Screwdrivers
- Wrench
- Flashlight
Optional tools for difficult or corroded jets
If basic tools fail to free a stuck whirlpool jet, additional specialty implements can make removal safer and quicker.
Consider corrosion-specific options and nonmarring devices to avoid damage. Useful choices include:
- Penetrating oil and soak applicator
- Strap or rubber jaw puller
- Heat gun with temperature control
- Extraction kit for broken or recessed jets
Use cautiously and follow manufacturer guidance.
Preparing the workspace (drain, power off, ventilation)
Before beginning jet removal, the workspace should be fully prepared: the tub must be drained, electrical power to the whirlpool system turned off at the breaker, and the bathroom ventilated to disperse fumes from cleaners or penetrating oils.
Protective gloves and eye protection should be worn. Lay down towels or a drop cloth to protect surfaces. Keep a flashlight and a small bucket nearby for drained water and loose parts.
How to document existing configuration (photos, markings)
Photographs and simple markings provide a clear record of the whirlpool tub’s current configuration before any parts are removed.
The technician photographs jets, trim, and surrounding plumbing from multiple angles, labels each jet with painter’s tape and a number, and notes screw types and orientations.
Images and markings are stored with a brief written checklist to guarantee accurate reassembly and parts ordering.
Identifying Jet Types and Attachment Methods
The section outlines common jet styles—directional units, directional jets with separate faceplates, eyeball fittings, and suction inlets—to help identify what is installed.
It explains how to recognize threaded, snap-in, or glued/sealed attachments by inspecting edges, test-turning with gentle force, and checking for adhesive residue.
It also notes where to find hidden fasteners, access panels, and nearby valve connections that affect removal.
Common jet styles (directional, directional with faceplate, eyeball, suction)
Jets on whirlpool tubs come in several common styles—directional, directional with faceplate, eyeball, and suction—each defined by how the nozzle is adjusted and how the assembly attaches to the housing; identifying the type quickly narrows the possible removal methods and tools needed.
Directional jets pivot inside a ring. Faceplate variants add a trim ring. Eyeball jets rotate more freely, and suction fittings are simpler, flush units.
How to tell if jets are threaded, snap-in, or glued/sealed
How can one quickly determine whether a whirlpool tub jet is threaded, snap-in, or glued/sealed?
Inspect the visible rim: threads or screw-like grooves indicate threaded jets.
A smooth bezel with small retention clips or spring tension suggests snap-in.
Excess adhesive, uneven edges, or lack of movement implies glued/sealed jets.
Gently testing rotation, inward push, and visual gaps confirms attachment type without forcing removal.
Locating hidden fasteners, access panels, and valve connections
A concise inspection around the tub perimeter often reveals access points and hidden fasteners that secure jets and plumbing.
Panels may be recessed behind removable trim, fasteners can be concealed under screw caps or behind service doors, and valve connections frequently terminate in accessible cavities beneath or beside the tub.
Systematically check corners, underside skirting, and behind panels for clips, screws, unions, and flexible hoses to map attachment methods.
Step-by-Step Jet Removal Procedure
The procedure begins with basic safety measures: power and water are shut off and the tub is drained to expose the pump and plumbing.
Removable faceplates and eyeballs are taken off first, followed by unscrewing or prying out threaded and snap-in jets.
For sealed or glued jets, softening seals with heat or solvent is addressed before attempting removal.
Step 1 Shut off power and water supply
Before beginning any work on a whirlpool tub, confirm both electrical power and the water supply are completely disconnected.
Verify the circuit breaker is off and lock or tag it if possible.
Shut the tub’s shutoff valves or the main water line.
Test with a noncontact voltage tester and open a nearby faucet to guarantee no water pressure remains before proceeding.
Step 2 Drain the tub and access the pump/plumbing
With power and water confirmed off, the next step is to empty the tub and gain access to the pump and plumbing so the jets can be removed safely.
Drain fully using the built-in drain or a pump; remove the access panel.
Inspect hoses, clamps, and fittings for corrosion or residue.
Have towels and a bucket ready to catch residual water before disconnecting components.
Step 3 Remove removable faceplates and eyeballs
Begin by identifying each jet assembly and confirming which faceplates and eyeballs are removable; most Whirlpool tubs have push-in or threaded retainers that indicate the removal method.
Use appropriate tools—trim ring pliers, a flat screwdriver with tape, or adjustable grips—apply steady, even pressure, and rotate if threaded.
Protect trim and surrounding acrylic, label parts as removed, and set components aside for cleaning or replacement.
Step 4 Unscrew or pry out threaded and snap-in jets
Proceed to remove each jet by first identifying whether it is threaded or a snap-in type; threaded jets are turned counterclockwise to unscrew, while snap-in jets require prying outward at the retention tabs.
Use an appropriate-sized wrench or pliers with padding to avoid scratching. For snap-ins, insert a flat tool behind a tab and lever gently.
Collect removed jets and inspect for damage before cleaning.
Step 5 Dealing with sealed or glued jets (softening seals, heat, solvent)
When jets resist removal because their seals have been glued or deteriorated into an adhesive-like bond, softened material and controlled heat or a compatible solvent can break the bond without damaging the tub.
Apply a hairdryer or heat gun briefly to soften sealant, or use a manufacturer-safe solvent sparingly.
Test solvent on an inconspicuous area, protect surrounding finishes, and pry gently once softened.
Step 6 Removing internal retaining rings or housings through access panel
Access the pump room or service panel and lay out tools and a flashlight to inspect the jet housings from behind; removing the decorative face ring is only half the job—many jets are held in place by internal retaining rings or a clipped housing that must be released from the plumbing side.
Identify clip types, depress or pry retaining tabs, unthread rings with appropriate wrench, and gently pull housings free to avoid damaging plumbing.
Step 7 Inspecting and cleaning the opening and plumbing pathways
Begin by visually and manually inspecting each jet opening and the adjacent plumbing passages for debris, mineral buildup, or damaged seals.
Use a flashlight and small mirror to view recesses. Remove scale with vinegar-soaked cloths or a plastic scraper.
Flush passages with clean water, then run a soft brush through accessible piping.
Note any cracks, excessive corrosion, or loose fittings for repair.
Step 8 Temporarily capping or sealing openings if not replacing jets
After cleaning and inspecting the openings and plumbing pathways, the technician prepares to temporarily cap or seal any jets that will not be replaced.
They select compatible slip-on caps or threaded plugs, apply plumber’s tape or silicone where needed, and guarantee a snug, leak-proof fit.
Finally, the technician tests for leaks and labels sealed openings for future reference or permanent replacement.
Reinstallation, Repairs, and Converting to a Soaking Tub
Next steps cover reinstalling or replacing jets with attention to alignment, gaskets, and correct torque to guarantee a watertight fit.
The section also reviews proper sealing methods and compatible sealants, options for converting to a non-jet soaking tub using blanking plates or permanent caps and finishing, and how to reconnect and test the pump, suction, and air systems.
Practical tips focus on leak prevention and confirming system function before regular use.
Installing replacement jets (alignment, gaskets, torque)
Installing replacement jets requires careful alignment, proper gaskets, and controlled torque to guarantee a watertight seal and reliable operation.
The technician aligns each jet squarely, seats a new gasket without twists, then tightens fasteners incrementally to manufacturer torque specs. Excessive force risks cracking the housing; under-torquing invites leaks.
After installation, checks include functional testing and visual inspection for gaps or misalignment.
Proper sealing methods and compatible sealants
Proper sealing guarantees long-term watertight integrity whether reinstalling jets, repairing an existing system, or converting the unit to a soaking tub.
Technicians should select compatible gaskets and sealants, apply them in thin, continuous beads, and follow manufacturer cure times and torque recommendations to prevent leaks or chemical damage.
- Use tub-safe silicone or polyurethane
- Verify chemical compatibility
- Apply consistent bead size
- Respect cure and test times
Converting to a non-jet soaking tub (blanking plates, permanent caps, and finishing)
After ensuring all gaskets and sealants are compatible and fully cured, the process of converting a jet tub to a non-jet soaking tub begins with isolating and sealing the plumbing openings.
Install blanking plates or permanent caps rated for the system, secure with appropriate fasteners and sealant, trim excess, and smooth finishes.
Restore access panels and label sealed lines for future reference.
Reconnecting and testing pump, suction, and air systems
When all seals and blanking plates are secure, attention turns to reconnecting and testing the pump, suction, and air systems to confirm safe operation and identify any leaks or faults.
Reattach wiring and hoses per schematic, restore power briefly for dry-run checks, then fill tub and run full cycles.
Inspect joints, listen for unusual noise, verify suction strength and air injection before finalizing covers.
Troubleshooting Common Problems During Removal
During jet removal, common obstacles include stripped threads, corroded or seized fittings, and jets that will not budge.
Attention must also be paid to damaged acrylic or fiberglass around the jet opening and the risk of leaks after reinstallation or resealing.
Accessing jets can reveal electrical or pump issues that require separate diagnosis before the tub is put back into service.
Stripped threads, corroded fittings, and stuck jets
Encountering stripped threads, corroded fittings, or stubborn jets is common and requires methodical troubleshooting to avoid further damage.
Inspect threads and fittings; apply penetrating oil, let sit, then attempt gentle turning with proper tools. Use strap or rubber jaw pliers to reduce slippage.
For stripped threads, install a thread repair insert or replace the fitting. Clean corrosion before reinstalling components.
Damaged acrylic or fiberglass around the jet opening
A cracked or delaminated area of acrylic or fiberglass around a jet opening compromises the tub’s structural integrity and requires careful assessment before attempting removal.
The technician should inspect the extent of damage, document cracks, and avoid forcing the jet.
Small surface damage may be reinforced with backing and epoxy; extensive delamination warrants professional repair or panel replacement to prevent further cracking or warping.
Leaks after reinstallation or sealing
If leaks appear following reinstallation or sealing, the technician should first isolate the source before assuming the repair failed.
Inspect fittings, O-rings, and sealant joints for gaps or misalignment.
Tighten connections to specified torque, replace compressed or damaged gaskets, and remove excess sealant obstructing seating.
Pressure-test the system and recheck after several uses to confirm leak resolution.
Electrical/pump issues discovered during access
After ruling out sealant and gasket faults, attention should shift to electrical and pump components exposed during jet removal.
Access often reveals worn wiring, corroded connectors, clogged impellers, or failing motors.
Inspect wiring for insulation damage, test continuity and grounding, check connectors for corrosion, clear impeller debris, and bench-test the motor.
Replace faulty parts or consult a licensed electrician for safe repairs.
When to Call a Professional
If removal attempts reveal persistent leaks, damaged plumbing, or inaccessible components, a qualified plumber or spa technician should be engaged.
Professionals typically assess the system, perform repairs or replacements, and may charge a diagnostic fee plus labor and parts—costs vary by region and issue severity.
Homeowners should vet contractors by checking licenses, insurance, references, and asking about experience with whirlpool tubs, warranties, and written estimates.
Signs a plumber or technician is required
Several clear indicators show when a plumber or technician is required to remove or repair whirlpool tub jets.
Persistent leaks, water damage, electrical faults, or motor failure demand professional assessment.
If jets are fused by mineral buildup beyond manual removal, hidden structural damage exists, or access requires paneling and rewiring, a licensed technician guarantees safe, code-compliant repair and prevents further harm.
Typical costs and what professionals will do
Estimate costs typically range from modest service fees for simple jet removal to several hundred dollars for extensive repairs or replacements; exact pricing depends on labor rates, parts, and access difficulty.
A professional will diagnose system issues, remove and replace jets, repair plumbing or pump connections, clean internal passages, and test operation.
Emergency calls or hard-to-reach tubs increase time and cost.
How to hire and what questions to ask a contractor
After outlining typical costs and contractor services, homeowners should know how to hire and what to ask to guarantee competent work and fair pricing.
Verify licenses, insurance, references, written estimates, timelines, and warranty terms.
Ask about experience with whirlpool tubs, parts sourcing, disposal, and unforeseen damage.
Compare at least three bids and insist on a clear contract.
- License
- Estimate
- Warranty
- References
Maintenance After Jet Removal or Replacement
After jets are removed or replaced, regular cleaning and sanitizing with manufacturer-approved solutions helps prevent buildup and bacterial growth.
Routine inspections of impellers, filters, and seals can catch early signs of clogging or wear before they cause damage.
Strong solvents, abrasive cleaners, and oil-based products should be avoided near jets and seals to preserve materials and maintain proper function.
Recommended cleaning and sanitizing procedures
Begin by flushing and disinfecting the jet plumbing to remove residual debris and microbial buildup that can accumulate during removal or replacement.
Use a manufacturer-approved cleaner or a mild bleach solution, circulate for the recommended time, then drain and rinse thoroughly.
Manually clean accessible jet faces and housings with a soft brush.
Dry components before reassembly and ventilate the area to prevent odors.
Routine checks to prevent future clogging or damage
Although routine inspections seem minor, a consistent schedule of checks will greatly reduce the risk of future clogs and mechanical damage to the tub’s jet system.
Technicians should inspect intake screens, jet fittings, and visible plumbing for buildup or corrosion. Verify pump operation and listen for unusual noises.
Tighten loose connections, replace worn gaskets, and document findings to inform timely maintenance.
Materials and products to avoid around jets and seals
Careful selection of materials and cleaners is essential to protect jets and seals following removal or replacement.
Harsh chemicals, abrasive tools, and incompatible lubricants degrade seals and plastic components.
Avoid:
- Bleach-based cleaners
- Acetone or strong solvents
- Metal scrapers or steel wool
- Petroleum-based oils
Use mild, nonabrasive cleaners and silicone-safe lubricants to preserve integrity.
Comparison of Options: Replace Jets vs. Convert Tub
Weighing the choice between replacing malfunctioning jets and converting a whirlpool tub to a non-jetted soak requires comparing cost, effort, long-term maintenance, and performance outcomes. The homeowner considers upfront expense, DIY complexity, future repairs, resale impact, and personal preference for hydrotherapy versus simplicity.
| Factor | Replace Jets |
|---|---|
| Cost | Moderate |
| Effort | Moderate |
| Maintenance | Ongoing |
| Outcome | Restored function |
Safety Checklist Before Finishing the Job
After deciding whether to replace the jets or remove them altogether, the homeowner must follow a concise safety checklist before finishing the job.
Verify electrical power is off and locked out. Confirm plumbing drains and seals are secure. Clean debris from fittings. Inspect surrounding structure for water damage.
- Turn off power
- Cap lines
- Test seals
- Document condition
Conclusion
In the hush after the mechanical chorus, discreet removal of whirlpool jets becomes a gentle simplification—an intentional downshift toward quieter waters. Homeowners proceed with mild prudence, armed with modest tools and clearer intent, choosing either precise replacements or a graceful conversion to uncomplicated soaking. When complexities murmur beyond confidence, a skilled professional steps in. Ultimately, the bath is gently liberated, offering a calmer, less engineered sanctuary for rest and reflection.