How to Secure a Free-Standing Tub: Step-by-Step Guide to Stable, Leak-Free Installation
To secure a free-standing tub effectively, begin with thorough site planning, joist assessment, and load calculations to ensure the subfloor can support the tub, water, and occupants. Proceed by dry-fitting the tub, leveling it, and aligning it to the drain. For heavy models, reinforce the structure with sistered joists, blocking, or a framed cradle. Use mechanical anchors, corrosion-resistant bolts, and construction adhesive for a stable installation, while proper gaskets and caulking will prevent leaks. Finally, conduct pressure and weight tests to validate the installation. Detailed guidance is available for each step to ensure a stable, leak-free setup.
Why Properly Securing a Free-Standing Tub Matters
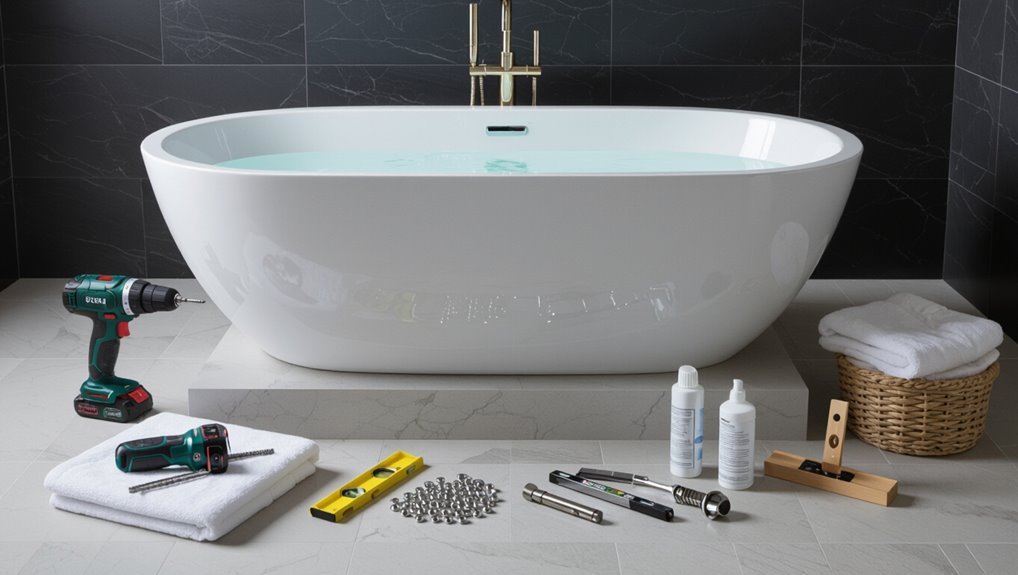
An improperly installed free-standing tub can shift, crack, or leak, creating safety hazards and costly water damage.
Proper securing prevents movement, guarantees stable weight distribution, and minimizes the risk of plumbing failures.
A stable, leak-free installation preserves the bathroom’s structural integrity and reduces long-term repair and maintenance needs.
Risks of an Improperly Installed Tub
Failing to properly secure a free-standing tub can lead to structural damage, safety hazards, and costly repairs.
An improperly anchored tub shifts, stresses subflooring, and may leak at connections. Occupant injury risk rises from tipping or sudden movement.
Contractors and homeowners seeking guidance on how to secure free standing tub must follow manufacturer instructions, use proper fasteners, and verify level and seal integrity.
Benefits of a Stable, Leak-Free Installation
Stability and a reliable seal transform a free-standing tub from a decorative fixture into a safe, long-lasting installation.
Proper anchoring prevents shifting and reduces stress on plumbing connections. A watertight seal averts leaks, protecting subfloor and finishes.
Together they minimize maintenance, lower repair costs, preserve warranty coverage, and enhance user safety and confidence in daily use.
Types of Free-Standing Tubs and Their Mounting Considerations
Different materials and styles of free-standing tubs require distinct mounting approaches, from lightweight acrylic and fiberglass to heavy cast iron and stone.
Soaking, clawfoot, and slipper designs each present unique weight distribution and anchor needs.
A clear floor and subfloor compatibility checklist helps determine appropriate mounting hardware and reinforcement.
Acrylic and Fiberglass Tubs
Acrylic and fiberglass tubs are lightweight, cost-effective options commonly used for free-standing installations. However, their hollow shells and flexible construction require specific mounting considerations to guarantee long-term support and prevent flexing or cracking.
Reinforcement via factory ribs or added blocking, full-bed mortar or foam support, vibration-damping pads, and careful anchoring at designated mounting points minimize movement, distribute loads, and protect acrylic finishes from stress fractures.
Cast Iron and Stone Tubs
Cast iron and natural stone tubs demand a different mounting approach than lightweight shells: their high mass and rigidity provide inherent stability but also impose significant point and distributed loads on subfloors and anchors.
Installers must verify floor load capacity, add engineered blocking or a reinforced platform, use corrosion-resistant anchor systems, and plan drainage and vibration isolation.
Professional assessment is recommended for structural upgrades.
Soaking, Clawfoot, and Slipper Styles
Soaking, clawfoot, and slipper tubs each present distinct mounting needs based on shape, weight distribution, and user access:
Soaking tubs require broad support points and secure drain anchoring;
clawfoot models need adjustable feet, pad dampening, and perimeter restraint to prevent shifting;
slipper tubs demand front-to-back stabilization and reinforced mount zones where the elevated rim concentrates loads, ensuring user safety and long-term stability.
Floor and Subfloor Compatibility Checklist
Having reviewed how different tub shapes distribute loads and require specific anchor points, attention must turn to whether the existing floor and subfloor can accept those demands.
Inspect joist span, species, and condition; confirm subfloor thickness and attachment; verify finish-floor load rating.
Remediate weak framing, sister joists, or plywood replacement before installation.
- Fear of collapse
- Relief from certainty
- Confidence in safety
Tools, Materials, and Preparatory Supplies
Before beginning installation, the necessary tools, mounting hardware, and preparatory supplies should be assembled to guarantee a smooth, secure fit.
This includes wrenches and drills, brackets and anchor kits, appropriate sealants and adhesives, waterproofing products, plumbing fittings and drain kits, plus safety gear and accurate measuring instruments.
Confirming compatibility and quality of each item reduces delays and prevents common installation errors.
Essential Tools
A compact kit of tools and materials is essential for securely installing a free-standing tub; it should include a torque-rated wrench or socket set, adjustable pliers, a level, drill with appropriate bits, corrosion-resistant fasteners, silicone sealant, plumber’s putty, and shims.
Additional items: tape measure, masking tape, utility knife, safety glasses, work gloves, bucket, rags, and a small vacuum for site cleanup and precise preparation.
Mounting Hardware and Brackets
Mounting hardware and brackets form the mechanical interface between the free-standing tub and the floor or wall, so selecting corrosion-resistant, load-rated components is critical.
Required items include adjustable mounting brackets, stainless steel or brass anchors, threaded rods, vibration-isolating pads, and heavy-duty screws or bolts.
Confirm load ratings, compatible fastener types for subfloor material, and spare washers and locknuts for secure, adjustable connections.
Sealants, Adhesives, and Waterproofing Products
Following selection of corrosion-resistant brackets and anchors, attention turns to sealants, adhesives, and waterproofing products that protect the tub interface and surrounding finishes.
Use high-quality silicone or urethane sealants rated for continuous water exposure, marine-grade adhesives for tack and gap-filling, and membrane systems or waterproofing primers on adjacent floors and walls.
Verify compatibility with tub material and cure times before final placement.
Plumbing Supplies and Drain Kits
Plumbing supplies and drain kits assure reliable water management and proper function for a free-standing tub, so selecting the right tools and materials is essential.
Components include a compatible pop-up or grid drain, overflow assembly, flexible supply lines, P-trap, brass or stainless fittings, and corrosion-resistant mounting hardware.
Quality gaskets, PTFE tape, and appropriate pipe sealant assure leak-free joints and long-term performance.
Safety Gear and Measurement Tools
Several essential items protect installers and confirm accurate measurements when fitting a free-standing tub.
Personal protective equipment—gloves, safety glasses, knee pads, and steel-toe shoes—reduces injury risk.
Measurement tools include a tape measure, laser level, carpenter’s square, and adjustable wrench for fitting hardware.
A stud finder and marking pencil guarantee secure anchor placement.
A utility knife and shop vacuum aid final cleanup.
Measuring and Planning the Installation Site
Before any anchoring begins, the installer measures and maps the chosen site to locate floor joists and determine if reinforcement is required.
They verify floor level and load capacity, align the tub with plumbing access and the planned drain location, and confirm clearances for faucets and accessories.
These checks establish whether structural or layout adjustments are needed prior to final placement.
Locating Floor Joists and Reinforcement Needs
Measure the installation area carefully to determine joist spacing, orientation, and the floor’s load capacity.
Inspect joist locations with a stud finder, probe, or access hatch. Note header and bearing walls for load paths.
Identify areas needing reinforcement beneath the tub footprint; plan sistering, blocking, or a plywood patch to distribute loads.
Mark reinforcement zones for contractor or DIY work.
Checking Floor Level and Load Capacity
After locating joists and marking reinforcement zones, attention shifts to verifying floor level and calculating load capacity for the tub footprint. A straightedge and level reveal high or low spots; shim or plane as needed.
Determine total static load (tub, water, occupants) and compare with joist capacity. If insufficient, specify sistering, blocking, or subfloor reinforcement before proceeding.
Positioning for Plumbing Access and Drain Location
Several critical measurements establish where the tub and its drain will sit within the room: the tub’s footprint, clearances to walls and fixtures, and the exact location of joists and subfloor access for plumbing.
The installer maps drain centerline, measures trap and waste routing, confirms subfloor cut access, locates structural supports for piping mounts, and verifies slope for gravity drainage before final placement.
Allowing Clearance for Faucets and Accessories
Allowing adequate clearance for faucets and accessories requires planning the tub’s perimeter work zone so fixtures can be installed, operated, and serviced without obstruction.
Measure reach, service access, and swing of controls; confirm clearances for spouts, handshowers, and mounting hardware.
Account for maintenance panels and wall finishes to prevent future disruption.
- Relief: effortless access so repairs won’t feel overwhelming
- Confidence: fixtures usable without strain
- Pride: finished installation feels intentional
Reinforcing the Subfloor and Framing
If the existing subfloor cannot support the tub’s concentrated load, reinforcement of joists and the addition of blocking beneath the fixture become necessary.
Techniques include sistering joists, installing cross-blocking, and fitting a plywood underlayment or dedicated support base to spread weight.
After reinforcement, a visual inspection and a load test validate stiffness and stability before final installation.
When Subfloor Reinforcement Is Required
When is subfloor reinforcement necessary for a free-standing tub?
Reinforcement is required when existing joists or subfloor are undersized, damaged, spaced too far apart, or when the tub plus water and occupants exceed typical load capacity.
It’s also necessary over modified layouts, second-floor installations, or when inspections reveal deflection, soft spots, or compromised structural connections that threaten long-term stability and waterproofing.
Methods to Reinforce Joists and Add Blocking
Having identified weak or undersized joists, the next step is to strengthen the framing and add blocking to distribute loads and prevent deflection.
Methods include sistering new joists alongside existing ones with structural screws and adhesive, installing solid blocking between joists at midspan and bearing points, and adding cross-bracing or plywood strips to reduce twisting.
Fastening must follow load-rated practices and local codes.
Installing a Support Base or Plywood Underlayment
Several contractors recommend adding a dedicated support base or continuous plywood underlayment beneath a free-standing tub to create a rigid, level platform that spreads load across joists and reduces local deflection.
Install 3/4″ exterior-grade plywood or equivalent, fasten to joists with screws, stagger seams over blocking, seal joints against moisture, and guarantee the finished surface aligns with flooring height for stable, long-lasting support.
Inspection and Load-Test Steps
Start by visually and physically inspecting the subfloor and surrounding framing to identify deflection, rot, or loose connections that could compromise a free‑standing tub installation.
Measure joist spacing and span; probe suspicious areas for soft spots.
Reinforce with blocking, sistered joists, or plywood as needed.
Perform a static load test simulating filled tub weight, observe movement, and rectify any identified settlement or failure before final installation.
Dry-Fitting the Tub and Mock Plumbing
The tub is set in place and the drain aligned to confirm fit and access before final connections are made.
The installer checks level and adjusts feet or adds shims as needed, then routes supply lines to verify clearance around valves and fittings.
Common alignment issues—offset drains, uneven feet, and obstructed supply runs—are noted for correction prior to permanent fastening.
Placing the Tub and Aligning the Drain
Before any permanent connections are made, the tub should be set in its planned position and the drain alignment verified using mock plumbing so that measurements and adjustments can be made without committing to final fixtures.
The installer connects a temporary tailpiece and trap assembly, checks centerline and slope, confirms clearance to floor access and wall penetrations, then marks precise drain locations for final plumbing.
Checking Level and Adjusting Feet or Shims
Set the tub on its feet and check level in both directions, using a torpedo or longer spirit level across the rim and diagonally to detect any twist.
If uneven, adjust adjustable feet or insert thin plastic or composite shims under high points until level.
Recheck after each tweak.
Confirm consistent contact with the floor and that the drain alignment remains unchanged before final anchoring.
Routing Water Supply Lines and Verifying Clearance
Once the tub sits level and secure, attention turns to routing the water supply and mock-fitting the plumbing to confirm clearances and alignment.
Plumbers position supply lines, test shutoffs, and mount temporary hoses to check reach without final connections.
Verify spacing for escutcheons, access panels, and floor drains.
Adjust stub-out locations as needed, documenting measurements before committing to permanent soldering or fittings.
Common Alignment Problems to Watch For
Although careful measuring reduces surprises, several recurring alignment issues appear during dry-fitting and mock plumbing that can compromise fit and finish.
The tub may sit off-center, drain flange misaligns, supply stub-outs sit too high or low, and floor irregularities tilt the shell.
Verify level, adjust shims, confirm drain and supply offsets, and recheck clearances before final anchoring.
Permanent Mounting Methods
Permanent mounting methods range from manufacturer-supplied brackets to adhesive bonding and mechanical anchors, each chosen for tub design and subfloor conditions.
Construction adhesive can secure tubs to finished floors while floor bolts or anchors provide more positive mechanical restraint.
For heavy or oversized tubs, installing a support frame or cradle beneath the tub guarantees long-term stability and load distribution.
Using Manufacturer-Supplied Mounting Brackets
Begin by locating the manufacturer-supplied mounting brackets and reading the included instructions, since these components are designed specifically for the tub model and provide the most reliable anchoring method.
Position brackets per template, mark anchor points, and install anchors into subfloor or framing.
Secure brackets to tub base, verify level and alignment, then tighten hardware to manufacturer torque specs for a permanent, manufacturer-approved installation.
Adhesive-Based Bonding to Floor with Construction Adhesive
When manufacturer brackets are unavailable or the installation calls for a low-profile, continuous bond, construction adhesive offers a reliable permanent method for securing a freestanding tub to the subfloor.
Surfaces must be clean, dry, and structurally sound. Apply a continuous bead where the tub base contacts the floor, press into place, and clamp or weight until cure.
Use marine- or PVC-compatible adhesive and follow cure times.
Mechanical Anchors and Floor Bolts
Secure a freestanding tub to the subfloor using mechanical anchors and floor bolts for a durable, load-bearing connection that resists shifting and tipping.
Install threaded floor bolts or flange anchors into joists or concrete, align tub mounting points, and tighten with washers and lock nuts.
Use appropriate anchor types, corrosion-resistant hardware, and verify level and secure engagement without stressing the tub shell or plumbing.
Installing Support Frames or Cradles for Heavy Tubs
Install a dedicated support frame or cradle beneath a heavy freestanding tub to distribute weight evenly to the subfloor and prevent stress on the tub shell or plumbing.
Select corrosion-resistant materials, level and anchor the frame to joists or a reinforced subfloor, and include adjustable pads for final alignment.
Verify clearances for drains and access panels, then secure the tub to the frame per manufacturer specifications.
Sealing the Drain and Preventing Leaks
Attention to the drain assembly and sealants is essential to prevent water damage around a free-standing tub.
Properly installed gaskets, plumber’s putty or silicone, and thread sealant create reliable joints, while waterproofing at the drain and tub base protects surrounding substrates.
Before final sealing, the system should be filled and inspected for leaks to confirm all connections are watertight.
Correct Installation of the Drain Assembly
When fitted correctly, the drain assembly is the single most important barrier against water damage in a free‑standing tub; proper sealing and tight connections prevent leaks that can compromise floors and framing.
The installer aligns tailpiece, flange, and waste to avoid stress. Fasteners are torqued evenly, testing for drainage and leaks. Any misalignment is corrected before final trim and floor sealing.
Applying Gaskets, Plumber’s Putty, and Thread Sealant
Begin by selecting the correct gasket, plumber’s putty, and thread sealant compatible with the tub’s drain materials and local plumbing codes; each component plays a distinct role in forming a watertight seal—gaskets compress to fill gaps, putty seals smooth flanges, and sealant prevents threaded leaks.
Clean mating surfaces, apply putty sparingly under the flange, seat gaskets, hand-tighten then torque fittings, wipe excess.
Waterproofing Around the Drain and Tub Base
Because even a small gap at the drain or base can cause significant water damage over time, proper waterproofing focuses on continuous seals, correct materials, and verified installation.
The technician installs a neoprene or silicone flange gasket, applies flexible marine-grade sealant around the drain and tub perimeter, guarantees full contact with substrate, and protects joints with waterproof membrane.
All fittings are tightened to manufacturer torque.
Testing for Leaks Before Final Sealing
After waterproofing the drain flange and tub base, the next step is to verify that seals hold under realistic conditions before final capping.
Fill the tub to typical depth, inspect drain and surrounding floor for seepage, monitor for 15–30 minutes, and check the access panel and ceiling below.
Address any slow leaks, tighten fittings, replace gaskets, then dry surfaces thoroughly before applying final sealant.
Connecting Water Supply and Faucet Installation
The installer must decide between floor-mounted and wall-mounted faucets based on tub placement, floor structure, and aesthetic preference.
Proper connection requires flexible supply lines, accessible shutoff valves, and a thorough pressure test to confirm leak-free joints.
Any concealment of plumbing should preserve service access and follow local codes.
Choosing Between Floor-Mounted and Wall-Mounted Faucets
When deciding between floor-mounted and wall-mounted faucets, homeowners should weigh plumbing layout, aesthetic impact, and installation complexity.
Floor-mounted units require robust in-floor supply lines and anchoring, while wall-mounted faucets demand reliable in-wall water access and careful alignment with tub lip height.
Choice also hinges on maintenance access, style coherence with fixtures, and structural constraints influencing installer access and long-term stability.
Installing Flexible Supply Lines and Shutoff Valves
Begin by locating shutoff valves and routing flexible supply lines to minimize bends and potential stress points; precise placement guarantees serviceability and leak-free connections.
Use braided stainless lines sized to fixture fittings, securing with accessible shutoffs. Hand-tighten then snug with wrench, avoiding overtightening.
Support lines to prevent strain, trim excess length, and confirm alignment with faucet inlets before final coupling and trim installation.
Pressure Testing Water Connections
Pressurize the new connections and inspect for leaks before completing the faucet installation.
After closing the tub drain, open supply shutoffs and apply house pressure; observe fittings, joints, and hose ends for seepage.
Use a dry tissue or paper towel to detect micro-leaks.
Maintain pressure for several minutes, record any drops, tighten or reseal suspect joints, then retest until stable and leak-free.
Concealing Plumbing While Maintaining Access
Although the exposed plumbing of a free-standing tub can undermine a clean aesthetic, the supply lines and shutoffs should be routed and hidden in a way that preserves full service access.
Use removable chase panels, recessed access plates, or built-in cabinets to conceal valves and flexible lines.
Label shutoffs, keep clearances for tools, and test connections after concealment to guarantee leak-free, maintainable installation.
Final Sealing, Caulking, and Finishing Touches
Attention to final sealing and trim guarantees a watertight installation and a polished appearance.
The discussion will cover choosing bathroom-rated caulk and sealant, creating a continuous waterproof bead at the tub base, and options for trim, access panels, and skirting.
It will also address proper cleaning and manufacturer-recommended curing times to guarantee long-term performance.
Selecting the Right Caulk and Sealant for Bathrooms
Selecting the correct caulk and sealant is essential for durable, watertight finishes around a free-standing tub. Choices should be based on joint movement, substrate compatibility, and exposure to water and cleaners.
Silicone is preferred for non-porous surfaces and high moisture; polyurethane bonds well to varied materials and tolerates movement.
Use mildew-resistant formulations, match softness to joint movement, and verify paintability and curing time.
Applying a Continuous, Waterproof Seal at the Tub Base
Begin by thoroughly cleaning and drying the gap between the tub base and floor to guarantee adhesion and a uniform bead.
Remove old sealant, dust, soap residue, and oils with a suitable solvent and allow full evaporation.
Mask edges with painter’s tape, apply a continuous bead of selected silicone or hybrid sealant, tool the joint smooth, remove tape, and cure per manufacturer instructions for a watertight finish.
Finishing Trim, Access Panels, and Skirting Options
With the sealed joint established at the tub base, attention shifts to the visible finishing elements that complete both function and appearance: trim, access panels, and skirting.
Final caulking lines are neat and continuous; access panels align for service; skirting conceals anchors while matching décor. Choices balance durability and style, ensuring discreet access and a polished install.
- Relief: confidence in longevity
- Pride: cohesive aesthetics
- Calm: accessible maintenance
Cleaning and Curing Times for Sealants
Allow adequate time for sealants to cure before exposing the tub to water or heavy use, as manufacturers’ specifications for tack-free, full cure, and paint-over windows can differ considerably; follow label directions for temperature and humidity limits.
Note that higher humidity often accelerates cure while low temperatures slow it, and plan cleaning and final caulking touch-ups only after the recommended tack-free period to avoid disturbing joints.
After cure, inspect seams, remove masking, clean residue with recommended solvent, and apply any trim sealant sparingly.
Post-Installation Inspection and Maintenance
After installation, a thorough stability and leak test should be performed to confirm the tub is secure and plumbing connections are watertight.
A concise routine maintenance checklist — inspecting caulk, checking fasteners, and monitoring drainage — helps prevent future problems.
Observable signs such as shifting, persistent moisture, or cracked sealant indicate the need for re-sealing or re-reinforcement.
How to Perform a Full Stability and Leak Test
Begin the post-installation inspection by visually and physically evaluating the tub and surrounding connections to confirm structural stability and the absence of leaks.
Next, apply weight at multiple points, check for movement or creaks, and inspect the floor beneath for moisture.
Run water to fill and overflow tests, observe all fittings, and monitor for slow seepage over a 24-hour period.
Routine Maintenance Checklist to Prevent Future Issues
With the stability and leak checks complete, a concise routine maintenance checklist helps preserve the tub’s condition and prevents future problems.
The homeowner performs simple inspections, documents findings, and schedules minor upkeep to maintain safety and serenity.
- Inspect mounting points and finishes for early wear to avoid anxiety.
- Check for dampness and odors to protect comfort.
- Clean drains and seals to retain confidence.
Signs You Need Re-Sealing or Re-Reinforcement
When visible gaps, persistent moisture, or shifting movement appear around a free-standing tub, they indicate the need for re-sealing or re-reinforcement.
These signs—cracked caulk, softened flooring, squeaks, or loose mounting hardware—signal breaches in the barrier or support that can lead to water damage and structural failure if not addressed promptly.
Immediate inspection, targeted caulk replacement, subfloor repair, and tightening or replacing anchors restore integrity and prevent escalation.
Troubleshooting Common Problems
When problems arise, the guide outlines practical steps for fixing a wobbly tub without major demolition, including shimming and tightening anchor points.
It also covers methods for repairing slow or leaky drains, from clearing clogs to replacing seals and trap components.
Finally, it explains how to assess and address floor damage or sagging beneath the tub to restore proper support.
Fixing a Wobbly Tub Without Major Demolition
Addressing a wobbly free-standing tub usually begins with a focused inspection to identify loose feet, uneven flooring, or mounting hardware that’s shifted out of place.
Stabilization often requires tightening or replacing adjustable feet, adding discreet shims beneath the base, securing the tub flange to wall anchors, and using vibration-damping pads.
Tests for level and firmness confirm repairs before sealing and finishing.
Repairing Slow or Leaky Drains
Stabilizing a tub’s structure is only part of maintaining its function; drain problems are another common source of frustration that often present after the tub is secure.
Inspect for clogs, remove debris with a drain snake, and test water flow.
For persistent leaks, tighten or replace slip-joint fittings and seals, reseal the flange with plumber’s putty or new gasket, and verify tight connections.
Addressing Floor Damage or Sagging Under the Tub
Any visible sagging, soft spots, or unevenness beneath a free-standing tub indicates compromised subflooring that must be evaluated before further use.
The installer should remove the tub, inspect joists and subfloor, and identify rot or water damage.
Replace or sister joists, install new plywood or blocking, guarantee level support, and reseal finishes.
Confirm structural integrity prior to reinstalling the tub.
Cost Estimates, Permits, and When to Hire a Professional
Estimated costs vary considerably depending on tub material and mounting method, with simple floor-mounted installs typically costing less than custom recessed or reinforced setups.
Local permits and building code requirements should be checked before work begins, especially when structural changes, drain relocations, or electrical work are involved.
Professional plumbers or contractors are recommended for complex installations, permit-managed jobs, or when structural reinforcement and waterproofing exceed basic DIY skills.
Estimated Costs by Mounting Method and Tub Type
Costs for securing a free-standing tub vary widely depending on the mounting method and tub type, with simpler floor-mounted solutions often costing far less than reinforced subfloor or custom anchoring for heavy stone or cast-iron tubs. Typical ranges:
| Method | Estimated Cost |
|---|---|
| Floor-mounted, acrylic | $50–$300 |
| Reinforced subfloor, stone/cast | $400–$2,000 |
Permits and Code Considerations to Check
When must permits be obtained for securing a free-standing tub depends on the scope of work and local codes: minor anchoring or aesthetic adjustments often fall below permitting thresholds, while structural reinforcement, altering floor framing, relocating drains, or changing plumbing and electrical systems typically require formal permits and inspections.
Verify local building and plumbing codes, confirm load-bearing and waterproofing standards, and obtain required permits before beginning work.
When to Call a Plumber or Contractor vs. DIY
How much professional involvement is needed depends on the complexity of the tub work and local regulations: simple anchoring or cosmetic adjustments can often be handled by a competent DIYer with basic tools, while tasks that affect plumbing, floor framing, waterproofing, or electrical systems usually merit a licensed plumber or contractor.
Obtain quotes, verify licenses and insurance, confirm permit requirements, and hire pros for structural, waterproofing, or concealed plumbing work.
Tips to Prolong Tub Life and Maintain Waterproofing
Maintaining a free-standing tub requires regular, gentle cleaning with products that preserve seals and finishes to prevent premature wear.
Periodic inspections—seasonal checks for grout, caulking, and mounting integrity plus annual reviews of the subfloor and waterproofing—catch issues before they cause leaks.
Thoughtful upgrades, such as reinforced anchors, improved drain assemblies, and accessible grab bars, enhance stability and extend the tub’s usable life.
Best Cleaning Practices That Preserve Seals
Regularly cleaning a free-standing tub while respecting seal materials is key to preventing water intrusion and prolonging fixture life.
Use pH-neutral cleaners, soft cloths, and nonabrasive sponges to avoid degrading caulk or rubber gaskets. Rinse thoroughly after cleaning and dry seams to prevent mold.
Avoid solvents, bleach, or acidic cleaners that can break down seals or corrode fittings.
Seasonal and Long-Term Inspection Tips
After following gentle cleaning routines to protect caulking and gaskets, seasonal and long-term inspections help catch wear before it becomes a leak.
Inspect seams, drain connections, and floor protection quarterly; check for soft spots, discoloration, or mold.
Tighten loose fittings, reseal failing caulk, and monitor anchoring hardware annually.
Document findings and address defects promptly to maintain waterproofing and prolong tub lifespan.
Upgrades That Improve Stability and Accessibility
When homeowners choose targeted upgrades—such as reinforced mounting brackets, a structural support platform, slip-resistant treads, and ADA-compliant grab bars—they enhance both stability and accessibility while reducing stress on seals and surrounding flooring.
These improvements help prevent shifting, concentrated wear, and moisture intrusion that can compromise waterproofing over time.
- Relief in knowing the tub won’t shift underfoot
- Comfort from safer, easier access daily
- Pride in a durable, well-preserved bathroom
Conclusion
Properly securing a free-standing tub guarantees safety, longevity, and a leak-free bathroom sanctum. The installer’s attention to subfloor reinforcement, precise plumbing alignments, and thorough waterproofing prevents disastrous floods and costly repairs. Regular inspections and gentle maintenance keep seals intact and surfaces pristine. When complexity exceeds DIY skills, a licensed professional should intervene. With careful planning and execution, a free-standing tub becomes a durable, elegant focal point—an absolute marvel of bathroom engineering.