How to Get Rit Dye Out of Bathtub: Fast, Safe Methods That Actually Work
To effectively remove Rit dye from your bathtub, start by blotting any excess dye and rinsing with cool water. Then, create a paste using baking soda and dish soap for gentle abrasion. For tougher stains on grout or porcelain, you can use hydrogen peroxide or a diluted bleach solution—just be sure to test these first. For fiberglass and acrylic tubs, mild detergents and non-abrasive pads work best. If stains persist, repeat treatments or use poultices to enhance removal. More detailed tips for specific materials are provided below.
How to Remove Rit Dye from a Bathtub Quickly and Safely
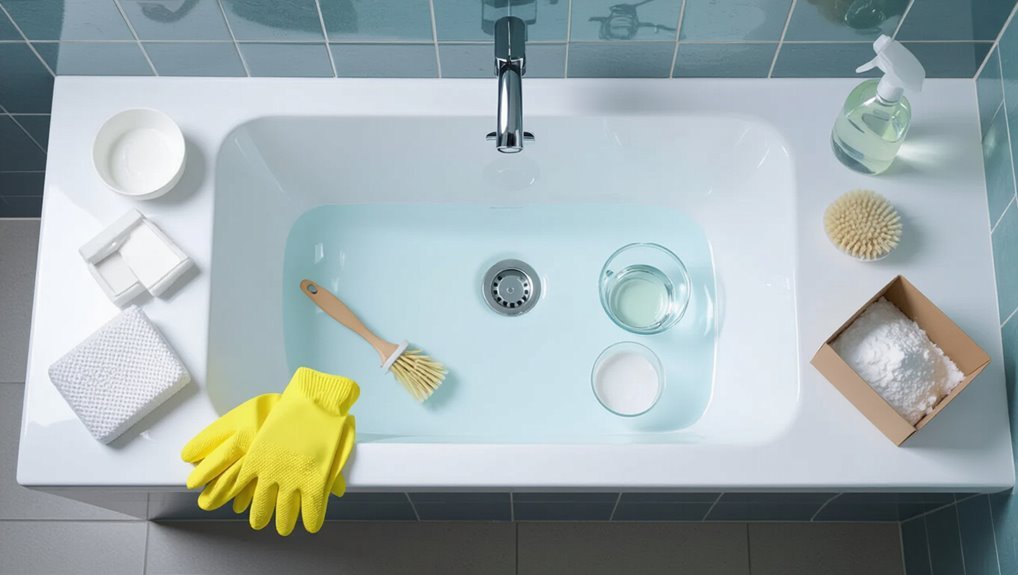
When Rit dye spills in a bathtub, prompt action—blotting excess and rinsing with cool water—reduces staining.
The approach then depends on whether the dye is fresh or already set, with fresh stains responding to mild detergents and set stains often requiring stronger treatments.
Before any cleaning, the person should put on gloves, guarantee good ventilation, and test cleaners on an inconspicuous area to protect skin and surfaces.
Immediate actions to take after dye spills
Act quickly: blot any pooled Rit dye with paper towels or a clean white cloth to prevent it from spreading, taking care not to rub and further embed pigment into the tub surface.
Rinse the area with cool water, contain runoff, and remove stained items.
For guidance on how to get rit dye out of bathtub proceed to targeted cleaning steps, avoiding abrasive scrubbing that may damage finishes.
Assessing the stain: fresh vs set-in dye
If the dye is still damp or sits on the surface as a vivid patch, it should be treated as a fresh stain and is far easier to remove; if the color has faded into the surface and appears uniform with no raised residue, it is likely set-in and will require stronger cleaners or professional refinishing.
Examine texture, sheen, and edges: defined, wet edges indicate fresh; blurred, penetrated color signals set-in.
Safety precautions before cleaning
Having determined whether the dye is fresh or set-in, the next step is to observe safety measures before attempting removal.
Wear chemical-resistant gloves and eye protection, guarantee ventilation by opening windows or using a fan, and protect surrounding surfaces with towels.
Test cleaners on a small inconspicuous area first.
Keep children and pets away, read product labels, and follow manufacturer instructions precisely.
Materials and Tools You’ll Need
The next section lists the materials and tools needed to tackle Rit dye stains in a bathtub.
It covers common household cleaners and supplies, commercial stain removers and bleach products, and necessary protective gear along with ventilation tips.
Clear guidance on selecting and using these items will follow.
Common household cleaners and supplies
A few readily available household cleaners and basic tools can remove Rit dye from a bathtub without specialist products.
Essential items include mild dish soap, white vinegar, baking soda and basic tools for scrubbing and rinsing.
Useful supplies:
- Dish soap, white vinegar
- Baking soda, paper towels
- Soft scrub brush, microfiber cloth, rubber gloves
Commercial stain removers and bleach products
Consider commercial stain removers and bleach products when household items fail; these offer stronger, purpose-formulated chemistries for removing Rit dye from tubs.
Choose products labeled for dye or grout stains and follow directions. Test a hidden area first.
Typical useful items:
- Oxygen bleach powder or liquid for color-safe lifting.
- Chlorine bleach for white porcelain or heavy stains.
- Specialized dye-removal sprays or gels.
Protective gear and ventilation tips
After using stronger stain removers or bleach, attention shifts to personal protection and airflow to prevent inhalation or skin exposure.
Protective gear and ventilation minimize risk while treating dye stains.
- Wear chemical-resistant gloves, eye protection, and a mask rated for fumes.
- Open windows, run an exhaust fan, and create cross-ventilation.
- Remove bystanders and keep pets away until fumes dissipate.
Step-by-Step Methods to Remove Rit Dye
The article outlines five practical approaches for removing Rit dye from a bathtub, ordered by immediacy and aggressiveness.
First, rinsing and blotting is the fastest immediate action, followed by a gentle dish soap and baking soda paste.
Then hydrogen peroxide for grout-safe tubs.
Stronger options include a bleach solution (for compatible porcelain or enamel) and commercial color-removing or oxygen bleach products.
Method 1 Rinse and blot immediately (fastest)
Act quickly: run cool water over the stained area and blot with a clean, white cloth or paper towel to lift fresh Rit dye before it sets.
Continue rinsing, alternating blotting and flushing until color diminishes. Avoid scrubbing, which spreads dye. Dispose of contaminated cloths safely.
If residue remains, repeat immediately; prompt action yields the best chance of removing fresh dye from bathtub surfaces.
Method 2 Dish soap and baking soda paste (gentle)
If rinsing and blotting did not fully lift the dye, a mild, nonabrasive paste of dish soap and baking soda can often remove remaining stains without harming most bathtub finishes.
Mix equal parts baking soda and liquid dish soap to form a spreadable paste.
Apply to stained areas, let sit 10–15 minutes, gently scrub with a soft cloth or sponge, then rinse thoroughly and repeat if necessary.
Method 3 Hydrogen peroxide treatment for grout-safe tubs
Apply hydrogen peroxide cautiously for tubs with grout and finishes rated safe for mild oxidizers; it can break down Rit dye molecules without harsh scrubbing.
Saturate stained areas with 3% hydrogen peroxide, let sit 10–20 minutes, then blot gently. Rinse thoroughly and repeat if needed.
Test an inconspicuous spot first. Ventilate the room and wear gloves to protect skin.
Method 4 Bleach solution for porcelain and enamel (when safe)
Although chlorine bleach is effective at breaking down many dye stains, it should be used only on tubs with intact porcelain or enamel finishes and good ventilation.
Wear gloves and eye protection.
Dilute 1 cup bleach in 1 gallon water, apply with sponge, let sit 5–10 minutes, then scrub gently with nonabrasive pad.
Rinse thoroughly; repeat once if needed.
Method 5 Commercial color-removing products and oxygen bleach
Consider commercial color removers and oxygen-based cleaners when household options fall short.
The article recommends selecting a product labeled for bathtubs and following manufacturer instructions: test a small area, apply, allow dwell time, then rinse.
Oxygen bleach (sodium percarbonate) lifts dye without chlorine’s harshness; mix as directed, soak a cloth or apply paste, then repeat if stains persist until removed.
Method 6 Abrasive scrubbing pads and when to use them
Scrub carefully: abrasive pads can remove stubborn Rit dye stains that resist chemical treatments, but they should be used only on durable surfaces and with controlled pressure to avoid scratching.
Select nonmetallic scouring pads, test in an inconspicuous spot, wet the area, apply gentle circular motions, and rinse frequently.
Stop if surface dulls or scratches appear; switch to gentler methods if needed.
Choosing the Right Method for Your Bathtub Material
Choosing a removal method depends on the bathtub material and its finish.
Porcelain enamel, fiberglass, acrylic, cast iron, and enamel-coated surfaces each respond differently to cleaners and abrasives, so recommended approaches and warnings vary.
The following guidance outlines safe options for each type and notes durability considerations for tougher treatments.
Porcelain enamel tubs: recommended approaches
Porcelain-enamel tubs require a gentle, nonabrasive approach because the thin glazed surface chips and dulls easily; using mild cleaners and stain-specific treatments preserves the finish while removing Rit dye. Recommended steps: test cleaners, blot dye, apply oxygen bleach, rinse thoroughly.
| Step | Cleaner | Note |
|---|---|---|
| 1 | Mild dish soap | Test first |
| 2 | Oxygen bleach | Gentle soak |
| 3 | Soft cloth | No scrubbing |
Fiberglass and acrylic tubs: safe options and warnings
After treating porcelain-enamel tubs with gentle, nonabrasive methods, attention shifts to fiberglass and acrylic surfaces, which tolerate different cleaners and carry their own risks. Use mild detergent, baking soda paste, or diluted bleach sparingly; avoid abrasive pads and strong acids. Test first in a hidden spot and rinse thoroughly.
| Cleaner | Safe? | Notes |
|---|---|---|
| Baking soda paste | Yes | Gentle abrasion |
| Mild detergent | Yes | First choice |
| Bleach (diluted) | Caution | Spot test required |
Cast iron and enamel-coated tubs: durability considerations
Cast iron and enamel-coated tubs are highly durable but require care to avoid chipping or dulling the finish when removing set-in stains like Rit dye.
Use nonabrasive cleaners and soft pads; avoid metal scrapers and harsh acids.
Test solvents on an inconspicuous spot.
For persistent stains, consult a professional refinisher to prevent permanent damage and preserve the enamel’s protective glaze.
How to Treat Stubborn or Set-In Rit Dye Stains
For persistent Rit dye marks, professionals recommend repeated treatment schedules and prolonged soaking to gradually lift color without damaging the surface.
Deep-set stains may require a poultice—an absorbent paste left in place to draw dye from porous finishes.
If multiple remedies fail or the finish is compromised, a professional refinisher should be consulted.
Repeated treatment schedules and soaking techniques
Stubborn or set-in Rit dye often requires a planned sequence of treatments and periodic soaks rather than a single attempt; beginning with milder methods and escalating only if needed preserves tub finishes.
A schedule might alternate enzyme or mild detergent soaks with brief bleach or oxygen bleach applications, each followed by rinsing and inspection.
Repeat cycles every 24–48 hours until staining fades, avoiding prolonged high‑strength exposure.
Using a poultice for deep stains
Apply a poultice when surface methods and repeated soaks have failed to lift deep, set-in Rit dye: a poultice draws pigment out by holding a cleaning agent against the stain while absorbing dissolved color.
Mix powdered absorbent (diatomaceous earth, talc, or powdered clay) with an appropriate cleaner (oxygen bleach or mild solvent) to paste consistency, apply, cover, wait 24–48 hours, then lift and rinse.
When to call a professional refinisher
If a poultice and repeated treatments fail to remove deeply set Rit dye, it may be time to consult a professional refinisher.
A refinisher assesses surface damage, determines whether reglazing or replacement is necessary, and offers durable color-matched repairs.
Call a licensed specialist when stains persist after safe DIY attempts, when porous or chipped surfaces exist, or when chemical exposure risks personal safety.
Preventing Damage While Removing Dye
When removing Rit dye, practitioners should avoid abrasive scrubbing and harsh chemicals that can etch or discolor the tub surface.
They should always test any cleaner or method on an inconspicuous area first to confirm compatibility.
If the finish is damaged despite precautions, professional refinishing or DIY repair kits can restore appearance and should be considered.
Avoiding common cleaning mistakes that cause etching or discoloration
Begin cleaning with caution: many household remedies that seem effective can actually etch or discolor bathtub surfaces if used improperly.
A detached approach prevents damage by avoiding harsh abrasives, undiluted acids, and scrubbing pads on delicate finishes.
- Avoid abrasive powders and steel wool.
- Do not pour concentrated acids or bleach directly.
- Skip aggressive scrubbing on acrylic or enamel.
Testing cleaners on an inconspicuous area
Always test any cleaner on an inconspicuous spot before applying it to visible areas of the tub; this quick check reveals whether a product will discolor, etch, or otherwise damage the finish.
Apply a small amount, wait the manufacturer’s recommended dwell time, then rinse and inspect under good light.
If no change occurs, proceed cautiously; if staining or dulling appears, choose a milder product.
Repair options if the finish is damaged
If a cleaner causes discoloration, etching, or dulling despite prior spot-testing, several repair paths exist depending on the finish and extent of damage.
For minor dulling, polishing compounds or fine abrasive pads can restore shine.
Deeper etches or stains may require professional reglazing, refinishing kits, or replacing the tub surface.
Always match material and follow manufacturer guidance.
Natural and Non-Toxic Alternatives
The article next examines natural, low-toxicity options such as white vinegar, lemon juice, and baking soda for treating Rit dye stains in a bathtub.
It summarizes typical application methods and expected results for these mild remedies.
It then compares their effectiveness and safety trade-offs with stronger chemical treatments.
Vinegar, lemon juice, and other mild options
Reach for gentle acids like distilled white vinegar or fresh lemon juice as first-line, natural stain removers for Rit dye on nonporous bathtub surfaces.
Apply, let sit briefly, then scrub with a soft cloth. Test inconspicuous area first.
- Vinegar: soak, scrub, rinse.
- Lemon: apply juice, wait, scrub.
- Baking soda paste: mild abrasion, rinse.
Pros and cons compared with chemical treatments
Balance is key when comparing natural, non-toxic options like vinegar, lemon, and baking soda to harsher chemical treatments for removing Rit dye from bathtubs.
Natural methods are safer for surfaces, occupants, and the environment but may require more effort, time, and multiple applications.
Chemical agents often work faster and tackle stubborn stains yet risk surface damage, fumes, and the need for protective gear.
Cleaning Aftercare and Maintenance
After stain removal, one should thoroughly rinse and neutralize any cleaning chemicals to prevent surface damage and residue buildup.
Regular maintenance, including prompt rinsing and periodic gentle scrubbing, helps prevent future dye stains from setting.
Storing dyes securely and following laundry precautions—such as using a laundry sink or sealed container—reduces the risk of bathtub spills.
Rinsing and neutralizing cleaning chemicals
Flush the surface thoroughly with clean, cool water to remove residual dye and loosened cleaning agents before they can react further.
After rinsing, apply a mild neutralizer—such as diluted white vinegar or a baking soda paste—depending on prior cleaners used.
Rinse again until pH is near neutral, dry with a soft cloth, and ventilate the area to dissipate fumes and prevent lingering chemical reactions.
Regular maintenance to prevent future staining
Establishing a consistent maintenance routine particularly reduces the chance of future Rit dye stains by removing dye particles and chemical residues before they set.
- Weekly rinse and mild cleanser: remove pigment residues promptly.
- Monthly non-abrasive scrub: target grout, corners, and drain areas.
- Immediate spot-checks after projects: blot spills, rinse with water, and apply a gentle cleaner to prevent fixation.
Storing dyes and laundry tips to avoid bathtub spills
Maintaining a regular cleaning schedule naturally leads to attention on how dyes and laundry practices are handled to prevent spills in the first place.
Store dye packets and liquids in sealed, labeled containers on high, stable shelves. Use dedicated, leakproof tubs for soaking, and transport laundry in plastic bins with lids.
Wear gloves and apron; keep stain pretreaters accessible to minimize accidents.
Troubleshooting Common Scenarios
The troubleshooting section distinguishes between dye transfers from clothing and direct dye spills, as each requires different removal steps.
It also addresses colored bathwater residue after exposure and provides methods for neutralizing lingering tint.
Finally, it covers targeted fixes for stains near grout lines and caulk, noting when professional repair may be necessary.
Dye transferred from clothes vs direct dye spills
Accidents fall into two main categories: dye that rubs off from dyed clothing during a bath or wash, and dye that is poured or splashed directly onto the tub surface.
Transferred dye often appears as faint streaks and usually responds to milder cleaners and prompt action.
Direct spills can saturate grout or porous finishes and may require stronger treatments, repeated applications, or professional refinishing.
Colored bathwater residue after dye exposure
Many instances of colored bathwater leave a faint film or tinted residue on tub surfaces and fixtures after draining.
This residue often wipes away with a non-abrasive cleaner or diluted vinegar; allow a few minutes contact time, then rinse.
For persistent tinting, a paste of baking soda and water applied with a soft cloth lifts dye without damaging finish.
Repeat as needed.
Stains near grout lines and caulk: targeted fixes
After wiping off surface residue, attention often shifts to narrow areas where dye concentrates: grout lines and caulk seams.
For grout, apply a paste of baking soda and hydrogen peroxide, scrub with a stiff brush, then rinse.
For caulk stains, test a bleach solution on a hidden spot; if persistent, replace discolored caulk.
Always ventilate and wear gloves during treatment.
Quick Reference Cheat Sheet
A concise cheat sheet lists the best quick-fix method by tub material — porcelain, acrylic, fiberglass, or enamel — so readers can match treatment to surface.
It also notes when to use gentler options like baking soda or vinegar versus stronger chemicals such as bleach or commercial color removers.
The guidance emphasizes minimizing surface damage while prioritizing effective stain removal.
Best quick-fix method by tub material
Consult the quick-reference cheat sheet below to match each tub material with the fastest, safest stain-removal method; it summarizes which common household products work best, which to avoid, and any surface-specific precautions so a reader can act promptly without damaging the finish.
| Tub Material | Quick Fix | Avoid |
|---|---|---|
| Porcelain | Baking soda paste | Abrasive pads |
| Acrylic | Mild dish soap + soak | Harsh bleach |
| Fiberglass | Vinegar solution | Strong abrasives |
| Enamel | Hydrogen peroxide | Metal scrubbing tools |
When to choose gentler methods vs stronger chemicals
Although gentler methods should be tried first for most dye stains to protect finishes and avoid fumes, escalate to stronger chemicals only when milder treatments fail or when the tub material and stain age warrant it.
Gentle approaches suit fresh stains and porous surfaces; stronger agents fit stubborn, set-in dye on durable finishes.
- Assess stain age and tub material.
- Start mild, test small area.
- Escalate if ineffective.
Conclusion
To sum up, the guide wraps up like a tidy toolbox: practical, varied methods give homeowners the power to lift Rit dye from tubs without panic. By matching cleaning approaches to bathtub materials, starting with gentle, non-toxic options, and escalating to stronger treatments only when needed, most stains respond. Consistent aftercare and quick action prevent recurrence. For stubborn, set-in dye, targeted stain removers or professional help deliver the necessary final touch.