How to Reduce Pressure in Hot Water Tank: 7 Safe Fixes and When to Call a Pro
How to Reduce Pressure in a Hot Water Tank:
If you’re dealing with high pressure in your hot water tank, it’s essential to address it promptly to prevent leaks or scalding. Begin by turning off the power and water supply, and ensure the tank has cooled. You can reduce pressure by following these steps:
- Lower the thermostat setting.
- Drain a few gallons of water from the tank.
- Test or replace the temperature and pressure (T&P) valve.
- Check and recharge or replace the expansion tank.
- Verify the inlet pressure regulator and check valves.
If issues persist, or if you notice leaks or bulging surfaces, it’s best to call a professional. Follow these guidelines for a safe and effective solution.
What High Pressure in a Hot Water Tank Means and Why It’s Dangerous
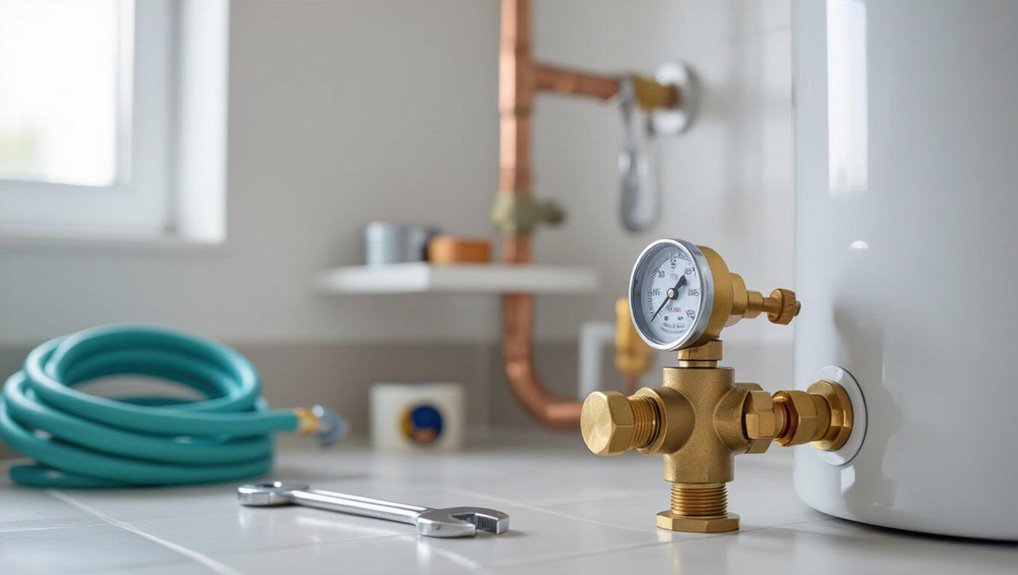
Pressure in a hot water tank is measured in pounds per square inch (PSI) using a pressure gauge mounted on the tank or plumbing, which indicates whether readings are within the safe range.
Elevated pressure commonly results from thermal expansion, a failed pressure-relief valve, a malfunctioning expansion tank, or excessive incoming mains pressure.
Ignoring high pressure can lead to ruptured fittings or tank failure, scalding from overheated water, leaks that cause property damage, and violations of plumbing codes.
How tank pressure is measured (PSI, gauge basics)
A gauge attached to the tank reads pressure in pounds per square inch (PSI), the standard unit technicians use to quantify the force exerted by the water and steam within the closed system.
Readings above recommended PSI indicate risk. The gauge shows static and operating pressures; technicians interpret needle position, verify against temperature, and advise on how to reduce pressure in hot water tank or call a professional for relief.
Common causes of high pressure in residential hot water tanks
Several common faults can cause dangerously high readings in residential hot water tanks, each increasing the risk of leaks, ruptures, or scalding.
Typical causes include a failed temperature‑pressure relief valve, a malfunctioning expansion tank or closed system without proper backflow/expansion controls, thermal expansion from overheating, clogged pressure relief discharge, or excessive inlet supply pressure.
Regular inspection and prompt repairs limit recurrence.
Risks of ignoring high tank pressure (rupture, scalding, leaks, code violations)
Ignoring rising pressure in a hot water tank invites a cascade of hazards that can endanger property and people.
Excess pressure may rupture the tank, causing flooding and structural damage. Scalding risks increase when relief valves fail. Persistent overpressure accelerates corrosion and leaks.
Noncompliance with plumbing codes can void warranties and result in fines.
Prompt diagnosis and repair prevent injury and costly remediation.
Quick Safety Checklist Before You Begin Any Troubleshooting
Before attempting any troubleshooting, a clear safety checklist should be reviewed: shut off power and water, don appropriate PPE, and take steps to prevent scalding.
Required tools and equipment—adjustable wrench, pressure gauge, bucket and hose—should be gathered and inspected.
If there is visible damage, leaking steam, or inability to control pressure, occupants should evacuate and contact emergency services immediately.
Personal safety precautions (shutoff, PPE, scald prevention)
A brief safety checklist helps protect anyone working on a hot water tank by outlining critical steps: shut off power and water supply, wear appropriate personal protective equipment (gloves, eye protection, and heat-resistant clothing if needed), and take measures to prevent scalding—such as cooling the tank and testing water temperature—before any troubleshooting begins.
Confirm isolation, relieve residual pressure slowly, avoid direct skin contact, and keep bystanders clear.
Tools and equipment you’ll need
Checklist items and basic tools should be gathered and inspected before any troubleshooting on a hot water tank begins to guarantee a safe, efficient process.
Essential items include adjustable wrench, pipe wrench, slip-joint pliers, screwdriver set, replacement T&P valve, garden hose, pressure gauge, bucket, tape, and work gloves.
A flashlight, safety glasses, and a non-contact thermometer complete the quick inspection kit.
When to evacuate or call emergency services
When should occupants leave immediately or summon emergency services: any visible rupture, loud popping from the tank, persistent hissing from the pressure-relief valve, strong smell of gas, or rapidly rising water leaking near electrical components warrants immediate evacuation and a call to emergency responders.
If unsure, err on the side of caution.
Notify others, keep clear of the area, and wait for professionals to assess and secure the site.
7 Safe Methods to Reduce Pressure in a Hot Water Tank
The following methods outline practical steps to identify and lower excessive pressure in a hot water tank while minimizing risk.
Each method targets a common cause—from incorrect settings to failed safety components—and can be performed in sequence or by a qualified technician.
Readers should follow safety checks first and stop if unsure or if pressure remains elevated.
- Check and adjust the temperature-pressure settings
- Drain a small amount of water to lower pressure
- Test and replace the temperature and pressure (T&P) relief valve
- Inspect and replace a faulty expansion tank
Method 1 Check and Adjust the Temperature-Pressure Settings
The temperature control and pressure relationship should be checked first by reading the thermostat setting on the tank and noting its current value.
If the thermostat reads higher than recommended, it can be safely lowered following the manufacturer’s instructions or by switching power off before adjusting.
Setting the tank to a recommended range—typically 120°F (49°C) or slightly lower—helps reduce internal pressure while still providing adequate hot water.
How to read and safely lower the thermostat
Refer to the boiler’s owner’s manual and the manufacturer label on the tank to locate the thermostat and pressure settings before attempting any adjustments.
Identify the thermostat dial or digital panel, note current readouts, and turn power or gas off if required.
Make small incremental reductions, wait for system stabilization, and verify pressure gauge response.
Restore power and monitor for leaks or faults; call a professional if uncertain.
Recommended temperature range to reduce pressure
Lowering the tank thermostat into an appropriate range is an effective way to reduce internal pressure without compromising comfort.
A recommended setting is 120°F (49°C); lowering from 140°F can significantly reduce pressure and scald risk.
For households requiring hotter water, 130°F (54°C) balances safety and demand.
Always adjust gradually and monitor pressure gauge and relief valve performance.
Method 2 Drain a Small Amount of Water to Lower Pressure
A controlled drain of a small volume of water can quickly reduce excessive pressure in a hot water tank when done correctly.
The procedure typically involves isolating the tank, opening the drain valve briefly, then refilling from the cold-water supply to restore normal levels.
Guidance should specify how much to drain (usually a few liters or a brief 10–20 second drain) and recommend frequency based on pressure readings or manufacturer advice.
Step-by-step drain procedure (isolate, drain valve, cold water refill)
Begin by shutting off the cold-water supply to the tank and closing the isolation valve on the hot-water outlet.
Then attach a hose to the drain valve and run it to a safe drainage point; this prevents new water from entering while providing a controlled path for discharge.
Open a hot faucet to relieve vacuum, carefully open the drain valve until pressure drops, close valve, remove hose, then reopen cold supply slowly.
How much to drain and how often
One to two gallons is typically sufficient to reduce pressure safely without considerably affecting hot-water availability.
Draining this small volume from the tank every few months—or sooner if the pressure relief valve shows signs of frequent activation—keeps system pressure within acceptable limits while minimizing thermal shock and energy loss.
Adjust frequency based on household usage, water hardness, and observed pressure trends; document each drain for maintenance records.
Method 3 Test and Replace the Temperature and Pressure (T&P) Relief Valve
The next method explains how to safely test a T&P relief valve by lifting the test lever and observing proper discharge and reseating.
It also lists warning signs—leaks, corrosion, failure to reseat, or frequent tripping—that indicate replacement is needed.
Guidance distinguishes simple DIY replacements for competent homeowners from situations that require a licensed plumber.
How to perform a safe T&P valve test
To verify that a water heater’s temperature-and-pressure (T&P) relief valve is functioning and not contributing to dangerous tank overpressure, a brief, controlled manual test should be performed by lifting the valve’s lever to allow water and steam to discharge momentarily.
If no flow or continuous leaking occurs afterward, the valve needs replacement.
Wear gloves and eye protection, place a bucket under the discharge pipe, lift and release once, then observe for proper reseating.
Signs the valve needs replacement and DIY vs pro replacement tips
When should a homeowner consider replacing a faulty T&P relief valve?
Persistent drips, corrosion, failure to reseat after testing, visible mineral buildup, or leaking at the connections indicate replacement.
DIY replacement suits competent homeowners with basic plumbing tools and shutoff knowledge; always depressurize and drain.
Call a licensed plumber if unsure, if gas or complex fittings are present, or if local codes require certified work.
Method 4 Check and Repair the Water Supply Pressure Regulator
The homeowner should measure incoming water pressure with a gauge attached to an outdoor faucet or hose bib to determine if the supply exceeds recommended levels.
If readings are high, the pressure regulator on the main line can be adjusted per manufacturer instructions or replaced if faulty.
Proper testing and repair of the regulator guarantee the hot water tank is not subjected to excessive inlet pressure.
How to test home incoming water pressure
How can incoming household water pressure be measured accurately and safely before adjusting or replacing a pressure regulator?
A pressure gauge attaches to an exterior hose bib or washing machine valve; open the valve fully and read steady-state PSI.
Repeat at multiple outlets to confirm consistency.
If readings exceed 60–80 PSI or fluctuate widely, document values and consult a qualified plumber for diagnosis and repair.
Adjusting or replacing the pressure regulator
After confirming incoming pressure readings that are consistently high or erratic, attention should turn to the home’s pressure regulator, the device that controls mains pressure into the plumbing system.
A qualified technician can adjust the screw or spring to lower setpoint; if malfunctioning, replacement restores safe pressure.
Post-adjustment, recheck readings and inspect for leaks; document settings for future reference.
Method 5 Inspect and Replace a Faulty Expansion Tank
An expansion tank absorbs thermal expansion from a closed hot water system and prevents pressure spikes that can stress the tank and plumbing.
To assess it, the air charge is checked with a tire gauge at the Schrader valve and compared to the system’s static pressure; a low or waterlogged tank indicates loss of separation.
If the diaphragm is ruptured or the tank remains water-filled after repressurizing, replacement is recommended.
Role of expansion tanks in pressure control
Many systems rely on a small expansion tank to absorb the extra volume produced when water heats and expands, preventing pressure spikes that can stress the hot water tank and plumbing.
Properly sized and functioning tanks isolate thermal expansion from the potable system, reducing relief valve cycling and prolonging equipment life. They act as a pressure buffer, stabilizing system dynamics during heating cycles.
How to check expansion tank air charge and when to replace
Inspecting an expansion tank’s air charge is a straightforward diagnostic that determines whether the tank can absorb thermal expansion or has lost its cushioning capacity.
Measure pressure at the Schrader valve with a tire gauge when the system is cold; it should match system fill pressure (typically 12–15 psi residential).
If the bladder is waterlogged, irreparably corroded, or air cannot be recharged, replace the tank.
Method 6 Fix Closed-System Issues and Check Check Valves/Backflow Preventers
Closed hot water systems trap heated water, causing thermal expansion that raises tank and system pressure.
Technicians should consider whether a faulty check valve or backflow preventer is restricting pressure relief and contributing to pressure build-up.
Simple diagnostic checks—such as monitoring pressure changes when isolating the inlet or temporarily relieving downstream pressure—help identify valve failures.
How closed-system thermal expansion increases pressure
When a domestic water system is fitted with a check valve or backflow preventer that blocks mains pressure from escaping, thermal expansion in the hot water tank has nowhere to relieve itself and raises the system pressure as water heats and expands.
The trapped increased volume elevates static pressure, stressing pipes, fittings and the tank’s relief valve; repeated cycles can accelerate wear and cause leaks or valve activation.
Diagnosing backflow preventer or check valve problems
A simple check of the inlet-side backflow preventer or check valve can reveal whether a one-way device is trapping thermal expansion and driving up system pressure.
Inspect for corrosion, debris, or a stuck disc; listen for unusual noises during heating cycles.
Temporarily isolating and testing with a pressure gauge upstream and downstream confirms operation.
Replace or service any faulty valve per manufacturer guidance.
Method 7 Address Leaks, Corrosion, and Sediment Buildup
Sediment accumulation can reduce tank capacity and obstruct valves, causing internal pressure fluctuations and impaired heating efficiency.
Flushing the tank periodically removes deposits and helps restore normal pressure behavior.
Corrosion should be assessed during inspection, since rusted components or breach points can alter pressure dynamics and require repair or replacement.
How sediment affects pressure and tank function
Loose mineral particles accumulate at the bottom of a hot water tank, reducing effective volume and interfering with heat transfer, which raises internal temperatures and can increase pressure cycling.
Sediment also abrades components, clogs valves and dip tubes, and creates localized boiling pockets that shock the tank.
Over time this stresses fittings, accelerates corrosion, and compromises pressure-relief function, increasing leak and failure risk.
Flushing the tank and assessing corrosion-related pressure problems
Begin by draining and flushing the tank to remove accumulated solids. Then inspect internal and external surfaces for corrosion that could compromise pressure integrity.
After flushing, check anode condition, tank lining, and seams for pitting or rust. Replace a failing anode, repair visible leaks, or consider tank replacement if corrosion is advanced.
Refill and test pressure relief and system stability.
Step-by-Step Troubleshooting Sequence to Follow (Prioritized)
A concise, prioritized troubleshooting sequence helps distinguish immediate fixes from issues needing professional attention.
First, quick checks that take under 15 minutes—such as inspecting the pressure relief valve, thermostat settings, and visible leaks—should be performed.
Next, schedule same-day diagnostics for less obvious faults, and reserve complex or safety-critical repairs for a licensed plumber.
Fast checks to perform in under 15 minutes
Start with a quick visual and audible inspection of the tank area: scan for external leaks, corrosion, or wetness, listen for unusual hissing or dripping, and check that pressure and temperature gauges (if present) show within normal ranges.
Confirm cold-water supply valve is fully open, verify T&P relief valve discharge is unobstructed, and briefly operate the drain/relief lever to observe flow.
Deeper diagnostics to schedule the same day
Schedule a same-day inspection that follows a prioritized, step-by-step diagnostic sequence to identify causes of high tank pressure and determine corrective actions.
The inspector checks cold-water inlet pressure, expansion tank condition and precharge, T&P valve operation, and pressure-reducing valve function.
They inspect thermal bypass devices, thermostat settings, and evidence of sediment or corrosion.
Document findings, immediate mitigations, and recommended repairs.
Tasks that should wait for a licensed plumber
Following same-day diagnostics, certain repairs should be deferred to a licensed plumber due to safety, code, or warranty implications.
Complex tasks include replacing pressure relief valves, repairing internal tank leaks, modifying gas burner or thermostat assemblies, and altering relief valve discharge piping.
These require permits, proper tools, pressure testing, and certified installation to guarantee compliance, prevent hazards, and preserve manufacturer warranties.
When to Call a Professional Plumber or HVAC Technician
If symptoms such as persistent high pressure, leaking T&P valve, discolored water, or hissing from the tank appear, immediate professional attention is warranted.
Licensed plumbers or HVAC technicians should be called for tasks like replacing a temperature-and-pressure relief valve, installing or sizing an expansion tank, or adjusting/replacing a pressure regulator.
The service visit typically includes diagnosis, repairs or part replacement, and a safety check, with common costs ranging from modest diagnostic fees to several hundred dollars depending on parts and labor.
Red flags that require immediate professional help
Occasionally, signs around a hot water tank indicate a serious problem that requires immediate attention from a professional plumber or HVAC technician.
Visible leaks, bulging or rusted tank surfaces, persistent hissing or knocking, sudden loss of hot water, or repeated automatic pressure relief discharge are red flags.
Any smell of gas or electrical burning demands evacuation and urgent service.
Do not attempt DIY fixes.
Tasks typically requiring licensed technicians (T&P valve replacement, expansion tank install, regulator work)
Call a licensed plumber or HVAC technician for any work that affects a hot water tank’s safety systems or pressure controls, such as replacing a temperature-and-pressure (T&P) relief valve, installing or sizing an expansion tank, or adjusting a pressure-reducing regulator.
These tasks involve code compliance, correct sizing, pressure testing, and safe depressurization.
Improper work risks leaks, scalding, tank failure, or voided warranties.
What to expect from a professional service call and typical cost ranges
When a homeowner schedules a professional service call for high pressure issues on a hot water tank, the technician typically begins with a visual inspection and pressure measurements to identify the source—whether it’s a faulty T&P valve, a waterlogged expansion tank, a pressure-reducing valve problem, or thermal expansion from closed-system conditions. The visit often includes diagnostics, minor repairs or part replacement, and a written estimate; costs range $150–$600.
| Action | Typical outcome |
|---|---|
| Inspection | Diagnosis |
| Repair/Replace | Fixed issue |
| Estimate | Cost range |
Preventive Maintenance to Keep Tank Pressure Stable
Regular inspections on a set schedule and seasonal checks help identify pressure issues before they escalate.
Attention to the temperature-and-pressure (T&P) valve, expansion tank, and drain valve—including testing, flushing, and replacing worn parts—keeps system components functioning.
Managing water quality with softening or a sediment filter reduces buildup that can raise tank pressure.
Regular inspection schedule and seasonal checks
Establishing a consistent inspection schedule and performing targeted seasonal checks helps identify pressure-related issues in a hot water tank before they escalate.
Monthly visual inspections for leaks, corrosion, and pressure gauge readings combined with quarterly testing of system performance detect gradual changes.
Seasonal checks before winter and summer address temperature-related stress and heating load variations, prompting timely adjustments or professional assessment if anomalies persist.
How to maintain the T&P valve, expansion tank, and drain valve
Detecting abnormal pressure trends during scheduled inspections should prompt focused care of the tank’s safety and pressure-control components: the temperature-and-pressure (T&P) relief valve, the expansion tank, and the drain valve.
Test the T&P valve annually, replace if it sticks or leaks.
Check expansion tank precharge and isolation; repressurize or replace diaphragmed tanks when soft.
Operate drain valve periodically to flush minor debris.
Water quality management and using a sediment filter
Monitor water quality and control sediment to prevent pressure-related problems in a hot water tank.
Regular testing for hardness, pH, and particulates identifies corrosion and scale risks.
Installing a sediment filter and softener reduces buildup, improving heat transfer and preventing pressure spikes.
Flush the tank periodically and replace filters per manufacturer guidelines.
Consistent monitoring extends component life and stabilizes internal pressure.
Common Mistakes to Avoid When Reducing Tank Pressure
Homeowners should be cautious when attempting pressure reduction, since dangerous DIY actions and faulty gauges can produce inaccurate readings and unsafe conditions.
Excessive draining or incorrect thermostat adjustments can damage the tank or create scalding risks.
Failing to follow local codes or voiding warranties by improper procedures can lead to liability and expensive repairs.
Dangerous DIY actions and inaccurate pressure readings
Attempting improvised fixes or bypassing safety components on a hot water tank can create immediate hazards and obscure true pressure readings.
DIY tampering—removing relief valves, blocking gauges, or using uncalibrated tools—may cause leaks, scalding, or false low/high readings.
Misinterpreting inaccurate gauges delays proper diagnosis.
Always use correct instruments and consult a qualified technician when uncertainty or abnormal readings persist.
Over-draining or improper thermostat settings
Draining too much water or missetting the thermostat are common mistakes that can worsen pressure issues rather than solve them.
Over-draining may introduce air, cause tank stress, or trigger safety valves.
Excessively low or high thermostat settings can mask underlying problems or create thermal expansion.
Properly follow manufacturer guidance: adjust temperature modestly and drain only per instructions, or consult a technician.
Ignoring code and warranty implications
Adjusting temperature settings or draining a tank without regard for local codes and warranty terms can create legal and financial problems as well as safety risks.
Homeowners who bypass permit requirements, ignore manufacturer instructions, or alter safety devices may void warranties and face fines or costly repairs.
Compliance guarantees safe operation, preserves warranty coverage, and avoids liability; consult professionals or inspect documentation before modifying systems.
Quick Reference: Tools, Parts, and When to Replace Them
A concise toolkit and a clear parts checklist help determine when intervention is needed and what to replace. The key replaceable items and criteria for selecting correct replacements are summarized below for quick decision-making. This reference aims to reduce guesswork and keep repairs within safe specifications.
- Basic tools: adjustable wrench, channel locks, screwdriver set, and pressure gauge.
- Replaceable parts checklist: temperature & pressure (T&P) valve, expansion tank, pressure regulator, inlet/outlet fittings.
- How to choose replacements: match size, pressure/temperature ratings, and plumbing connections.
- Certifications to look for: ASME, ANSI, and relevant local plumbing codes.
Essential tools for safe pressure reduction
Several basic tools and a few replaceable parts are essential for safely relieving excess pressure in a hot water tank: an adjustable wrench, hose rated for hot water, a pressure-relief valve wrench or pliers, Teflon tape, and a pressure gauge; homeowners should also know the signs that valves, hoses, and the tank’s pressure-relief device need replacement to prevent failure.
Additional useful items include gloves, bucket, flashlight.
Replaceable parts checklist (T&P valve, expansion tank, pressure regulator)
Essential components for maintaining safe water heater pressure include the temperature-and-pressure (T&P) relief valve, thermal expansion tank, and incoming pressure regulator; each part has distinct wear patterns and replacement triggers that owners should recognize.
Inspect T&P for leakage or corrosion, expansion tank for loss of air charge or waterlogging, and regulator for fluctuating inlet pressure.
Replace when malfunction, visible damage, or failed testing occur.
How to choose replacement parts (size, rating, certifications)
Select replacement parts by matching size, pressure/temperature ratings, and required certifications to the existing system and local codes; correct sizing and verified ratings guarantee safe, compatible operation while certified products meet regulatory and warranty standards.
Confirm pipe and fitting dimensions, T&P valve set pressure, expansion tank volume, and regulator range.
Choose parts with ANSI/ASME/UL listings, durable materials, and manufacturer documentation for installation and replacement intervals.
Troubleshooting Scenarios and Solutions
The guide presents three common pressure problems and their likely causes: a sudden spike after the heater cycles, a slow rise over months, and repeated T&P valve discharge.
Each scenario is paired with targeted diagnostic steps and corrective actions, emphasizing safety and when to call a professional.
Readers are encouraged to compare symptoms to identify the appropriate solution path.
Scenario A Sudden pressure spike after heater cycling
A sudden pressure spike immediately after a water heater cycles indicates a rapid thermal expansion event or a failing pressure-relief mechanism.
Diagnosing it requires observing pressure behavior during and between heating cycles, checking the temperature-pressure relief valve for proper operation, and confirming the presence and condition of an expansion tank or backflow prevention device.
If the TPR valve sticks, replace it; if the expansion tank is waterlogged, drain or replace it.
Call a professional for persistent spikes.
Scenario B Gradual pressure increase over months
Recognize that a gradual pressure increase over months typically points to slow, accumulative causes—such as a failing thermal expansion tank, intermittent backflow through a check valve or pressure-reducing valve (PRV), mineral buildup restricting valves, or creeping temperature overset—rather than an immediate mechanical failure.
Inspect expansion tank charge, test PRV/check valve operation, check thermostat accuracy, descale accessible valves, and monitor pressure trend.
Call a pro if diagnosis or repairs are uncertain.
Scenario C Frequent T&P valve discharge
When pressure slowly rises over months, intermittent relief through the T&P valve can indicate a separate, more acute issue requiring its own checks.
Frequent T&P discharge often signals excessive temperature, stuck thermostat, failing pressure regulator, thermal expansion without a functioning expansion tank, or a faulty valve.
Recommend immediate isolation, temperature verification, valve replacement if leaking, and calling a licensed plumber for persistent or unsafe conditions.
Summary Action Plan: Reduce Pressure Now and Prevent Future Recurrence
The author outlines immediate actions to lower tank pressure safely, such as shutting off the water supply and releasing excess pressure via the relief valve.
They contrast quick temporary fixes with permanent repairs like replacing faulty valves or addressing thermal expansion.
A clear maintenance schedule—periodic valve tests, annual inspections, and timely component replacement—is recommended to prevent recurrence.
Immediate actions to take right away
Act quickly to relieve excessive pressure in a hot water tank by isolating the water supply and opening a nearby hot faucet to reduce internal pressure safely.
Then check the temperature-pressure relief (T&P) valve for proper operation and, if leaking or stuck, replace it immediately to prevent further buildup.
Drain a few gallons via the drain valve, inspect expansion tank charge, and shut power or gas if overheating persists.
Short-term fixes vs permanent solutions
If immediate steps have eased tank pressure, distinguish short-term fixes—temporary measures to relieve pressure now—from permanent solutions that address root causes and prevent recurrence; prioritize safety while planning repairs.
Short-term fixes include draining some hot water or briefly adjusting the thermostat.
Permanent solutions involve replacing faulty relief valves, correcting thermal expansion issues, or installing expansion tanks.
Engage a qualified technician for diagnosis and durable repairs.
Maintenance schedule to prevent recurrence
Regularly scheduled inspections and simple preventive tasks form the backbone of a maintenance plan to keep hot water tank pressure within safe limits.
Monthly visual checks for leaks, annual pressure-relief valve testing, and flushing sediment every 6–12 months reduce stress.
Record readings and service dates.
Replace aging components per manufacturer guidance and schedule professional inspections every 3–5 years to prevent recurrence and guarantee safety.
Conclusion
In closing, one might say the tank is simply feeling a bit overenthusiastic—an easily remedied condition with calm measures and sensible checks. Gentle venting, a quick valve review, and timely part replacement usually restore balance before tension grows. If steps fail, inviting a qualified hand prevents small grievances from becoming louder complaints. With regular attention and modest adjustments, the system will again behave itself, offering warm service without unnecessary drama.