How to Install a Water Pressure Gauge: Step-by-Step Guide for Homeowners
To install a water pressure gauge in your home, start by gathering the necessary tools: a wrench, Teflon tape, a compatible gauge, and personal protective equipment (PPE). First, turn off the main water supply and depressurize the line. Locate a threaded port near your service line or pressure tank. Wrap the threads with Teflon tape, hand-start the gauge, and tighten it securely with a wrench. Restore the water supply and check for leaks. The ideal pressure range is between 40 and 60 psi. For ongoing safety, follow local codes and perform routine checks. Additional sections will cover gauge placement, troubleshooting, and maintenance tips.
What a Water Pressure Gauge Does and Why It Matters
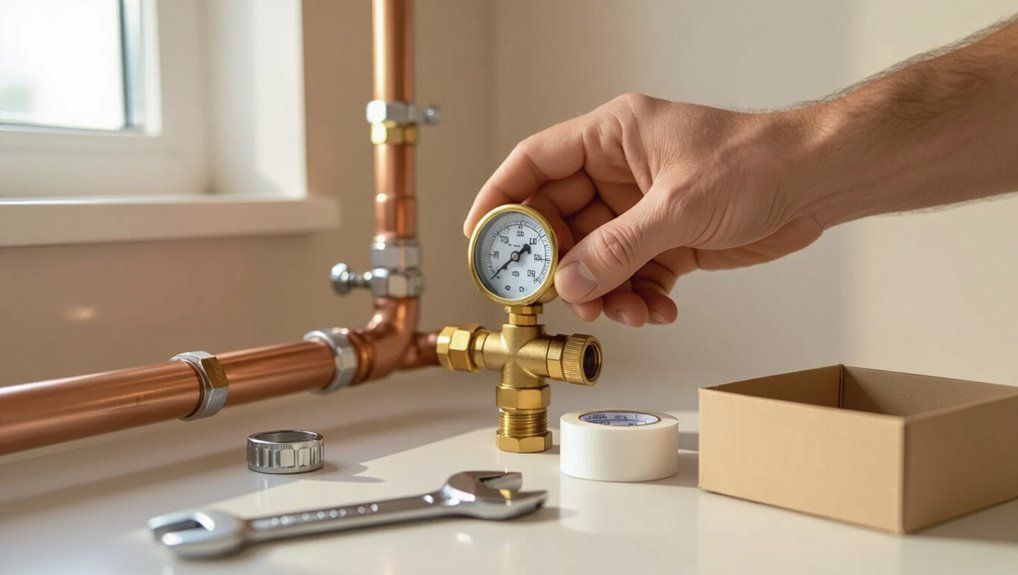
A water pressure gauge measures the force of water in a residential plumbing system by sensing line pressure and displaying it in pounds per square inch (psi).
Typical household pressures fall between about 40–60 psi, with lower or higher readings signaling issues such as supply problems or overpressure that can stress fixtures.
Installing a gauge helps protect appliances, catch leaks early, and demonstrate compliance with local plumbing standards.
How a pressure gauge works in a residential plumbing system
Installers and homeowners rely on a water pressure gauge to measure the force pushing water through pipes, converting that force into a readable dial or digital value.
The gauge senses pressure via a Bourdon tube or diaphragm, translating mechanical movement into needle position or electronic signal.
Understanding this mechanism aids troubleshooting, informs installation choices like placement and fittings, and complements guidance on how to install a water pressure gauge.
Typical pressure ranges and what they indicate
Knowing how a gauge senses pressure helps interpret the numbers it displays.
Typical residential readings: 40–60 psi is ideal for balance between performance and plumbing longevity. Below 40 psi may cause weak flow; below 20 psi can impair appliances.
Above 80 psi stresses pipes, joints, and fixtures; sustained over 100 psi risks failure.
Occasional spikes suggest transient events or pump activity.
Benefits of installing a pressure gauge (appliance protection, leak detection, code compliance)
Measure water pressure to protect appliances, detect leaks early, and guarantee compliance with plumbing codes.
A pressure gauge helps prevent damage to water heaters, dishwashers, and washing machines by signaling excessive pressure. It enables prompt leak identification through unexplained pressure drops and documents safe operating ranges for inspectors.
Consistent monitoring reduces repair costs, extends appliance lifespan, and supports regulatory adherence.
Tools, Materials, and Safety Precautions
Before starting, gather the required tools and any replacement parts such as pipe thread tape, adapters, and a properly sized pressure gauge.
The correct gauge type and size for the home main should match the pipe fittings and the expected pressure range to guarantee accurate readings and a secure fit.
Follow safety steps first: shut off the main, depressurize the line, and wear appropriate PPE.
Required tools and replacement parts
A concise list of tools, materials, and safety items guarantees the installation proceeds efficiently and without unnecessary interruptions.
Essential items include specific replacement parts and basic plumbing tools.
- Adjustable wrench, pipe cutter, Teflon tape
- Pressure gauge (appropriate thread type)
- Brass or stainless fitting adapters
- Replacement valve or union; gloves and safety glasses
Choosing the right gauge type and size for home mains
Select a gauge calibrated for the typical residential range (0–100 psi or 0–160 psi) and compatible with the main’s thread and connection type.
Choose brass or stainless steel bourdon tube gauges for durability; liquid-filled models reduce vibration for accurate readings.
Match pressure port size (1/4″ NPT common) and mounting style (panel, direct, or inline).
Verify accuracy class and temperature rating for potable water.
Safety steps before you start (shutoff, depressurize, PPE)
After confirming the gauge type and fittings match the home mains, the installer must take specific safety steps to prevent injury and equipment damage.
Isolate water at the main shutoff, open a downstream faucet to fully depressurize, and drain residual water.
Wear gloves and eye protection.
Verify no electrical hazards nearby.
Use appropriate tools; keep work area clear and communicate with household members.
Where to Install a Water Pressure Gauge
Placement choices concentrate on the main supply line near the meter and at points serving appliances to provide representative pressure readings.
Outdoor hose bibs, pressure tanks, and regulators are common mounting locations for routine checks and troubleshooting.
Installers must also follow local code and guarantee gauges remain accessible for reading and maintenance.
Best locations on the main supply line and near appliances
Where on the plumbing should a pressure gauge go to provide the most useful readings? A gauge mounted on the main supply just after the shutoff captures incoming municipal or well pressure before household influence.
Additional gauges near high-demand appliances—water heater, dishwasher, laundry—reveal localized drops.
Place fittings accessible for reading and maintenance, avoiding dead-ends and softened-water bypasses to guarantee representative measurements.
Installing at outdoor hose bibs, pressure tanks, and regulators
Alongside main-line and appliance locations, outdoor hose bibs, pressure tanks, and pressure-reducing regulators offer practical spots for a gauge because they reflect system behavior under different conditions.
Installing at hose bibs reveals outdoor pressure and leak indications.
Mounting on pressure tank fittings shows pump cut-in/cut-out performance.
Placing at regulators verifies setpoint accuracy and detects malfunctions without disturbing interior plumbing.
Local code considerations and accessibility requirements
Because local plumbing codes and utility regulations dictate acceptable connection points, materials, and access for pressure-measuring devices, installers must verify jurisdictional requirements before choosing a gauge location.
Requirements often cover permitted tap locations, backflow prevention, freeze protection, mounting height, and clear access for reading and maintenance.
Compliance prevents violations, guarantees accurate readings, and facilitates safe, serviceable installations consistent with inspector expectations.
Step-by-Step Installation Guide
The following steps guide the installer through site preparation—shutting off supply, draining the line, and cleaning threads—before fitting the gauge.
Procedures cover threaded connections with plumber’s tape, use of brass adapters or unions, and mounting to a tee for permanent monitoring.
Options for temporary testing using a petcock or test port are also explained.
Prepare the installation site (shut off, drain, clean threads)
Begin by shutting off the main water supply and opening nearby faucets to drain pressure from the line; this prevents water spray and allows a clear, dry work area.
Confirm pressure is zero using a test port or gauge.
Wipe fittings dry, remove debris and old sealant with a wire brush or rag, and inspect threads for damage.
Replace corroded fittings before proceeding.
Installing a gauge on a threaded fitting (male/female) with plumber’s tape
Install the gauge onto the prepared threaded fitting using plumber’s (PTFE) tape to guarantee a leak-free seal; this procedure applies whether mating a male gauge stem to a female pipe fitting or a female gauge to a male adapter.
Wrap tape clockwise three to five times, press tape into threads, hand-start the connection, then tighten snugly with a wrench—avoid over-tightening.
Check for leaks after repressurizing.
Using a gauge with a brass adapter or union fitting
Attach the gauge assembly to the system using a brass adapter or union fitting that matches the gauge thread size and pipe connection.
Confirm mating surfaces are clean, apply thread sealant where required, and hand-tighten before final wrench adjustment.
Align the gauge for readable orientation, avoid over-torquing to prevent damage, and verify connections under pressure for leaks, tightening incrementally if necessary.
Installing with a tee fitting for permanent monitoring
To add a gauge for continuous system monitoring, the technician selects a tee fitting sized to match the pipe and gauge threads.
Next, the technician shuts off the supply and relieves downstream pressure before cutting or preparing the pipe where the tee will be inserted.
The tee is installed, sealed with thread tape or compound, tightened to specification, and the gauge attached.
After restoring supply, connections are checked for leaks and proper reading.
Installing a gauge with a petcock or test port
Beginning by isolating the section of pipe to be tested, the technician locates and prepares an existing petcock or test port—or installs a suitable adapter—ensuring the valve is fully closed and downstream pressure has been relieved.
The gauge is threaded into the port, using appropriate tape or sealant; the petcock’s stem is opened briefly to confirm proper seating, then closed before system re-pressurization.
Re-pressurize system and check for leaks
Once the gauge and fittings are secured, the technician slowly re-pressurizes the section by opening the upstream isolation valve in small increments while monitoring the gauge for stable rise and avoiding pressure spikes.
The installer inspects all joints, fittings and the gauge connection for drips, using a dry cloth or leak detection solution. Any leaks are tightened or re-seated, then rechecked until dry.
Calibrating and reading the gauge for the first time
The technician confirms the system is stable and isolates any downstream loads before calibrating; this guarantees readings reflect true supply pressure rather than transient fluctuations.
They attach a calibrated reference gauge or use a handheld calibrator, compare readings at multiple points, and adjust the installed gauge if adjustable.
Once matched, record baseline pressure, note ambient conditions, and verify repeatability by cycling valves and retesting.
Troubleshooting Common Installation Problems
Common installation problems include leaks at the connection, a gauge that reads zero or fluctuates, and visible corrosion or a stuck needle.
The article will outline simple fixes for loose or sealed fittings, step-by-step diagnosis for erratic or zero readings, and how to assess corrosion or replace a faulty gauge.
Clear, practical checks and remedies follow to restore accurate pressure measurement.
Leaks at the connection and how to fix them
Identify and stop leaks at the gauge thread promptly to prevent water loss and inaccurate readings.
Inspect connections, tighten fittings with an appropriate wrench, and avoid overtightening. If leaks persist, shut off water, remove the gauge, clean threads, apply fresh PTFE tape or pipe sealant, then reinstall.
Replace damaged washers or adapters. Test under pressure and recheck for any remaining seepage.
Gauge reads zero or fluctuates’ diagnosis steps
Several quick checks can narrow down why a pressure gauge reads zero or fluctuates.
Verify shutoff valves are fully open and inlet strainers are clear.
Confirm the gauge is mounted at a low point without trapped air and that plumbing vibrations or water hammer aren’t causing spikes.
Inspect fittings for partial blockages and guarantee proper gauge range for the system pressure.
Corrosion, stuck needle, and replacing a faulty gauge
After checking valves, strainers, and mounting, attention should turn to problems within the gauge itself: corrosion, a stuck needle, or total failure.
Corrosion appears as rust or mineral buildup; clean contacts gently or replace the unit if internal components are compromised.
A stuck needle may free with light tapping or flushing. For persistent faults, install a new calibrated gauge and verify system pressure.
Maintenance, Testing Frequency, and Record-Keeping
Routine testing intervals, including seasonal checks, help guarantee accurate pressure readings and early detection of issues.
Guidance on cleaning, proper storage, and timely replacement of gauges preserves calibration and extends service life.
Keeping concise records of pressure readings enables trend spotting and informed maintenance decisions.
Routine testing intervals and seasonal checks
Because water pressure can drift gradually and seasonal conditions affect readings, a regular testing schedule guarantees the gauge provides reliable data for system maintenance.
Recommended intervals and checks include:
- Test monthly during heavy-use months (summer/winter extremes).
- Perform full checks quarterly; record results.
- Verify after plumbing work or storms.
- Compare readings year-over-year to spot trends and trigger inspections.
How to clean, store, and replace a gauge
Maintenance of a water pressure gauge hinges on three simple practices: regular cleaning to guarantee accurate readings, proper storage to prevent damage when not in use, and timely replacement when calibration or wear indicates failure.
Clean with mild detergent and soft cloth; avoid solvents.
Store in a dry, padded case at moderate temperature.
Replace if readings drift, glass cracks, or mechanical parts stick.
Documenting pressure readings and spotting trends
When pressure readings are recorded consistently and systematically, patterns of fluctuation become visible and allow for early identification of leaks, pump wear, or system blockages.
A simple log—date, time, static/working pressure, weather, and recent repairs—supports trend analysis. Monthly entries suffice for stable systems; increase frequency after repairs or irregularities.
Review quarterly to detect gradual decline or cyclical spikes and act promptly.
Upgrades, Alternatives, and Cost Considerations
The section outlines upgrade paths such as digital gauges and remote monitoring systems that offer more precise readings and alerts.
It also covers how a gauge can be integrated with pressure regulators, expansion tanks, and shutoff valves to improve system stability and safety.
Typical costs for parts and for professional installation are summarized to help readers weigh DIY versus hiring a plumber.
Digital gauges and remote monitoring options
Consider digital pressure gauges and remote monitoring as upgrades that add precision and convenience to a water pressure system.
They offer real-time readings, alerts, and data logging for trends and troubleshooting.
- Wi‑Fi or Bluetooth gauges for mobile access
- Battery or wired power options
- Alert thresholds and push notifications
- Cloud storage and exportable logs
Integrating with pressure regulators, expansion tanks, and shutoff valves
Integrating a pressure gauge with regulators, expansion tanks, and shutoff valves guarantees accurate readings and safer system operation by placing the gauge where it reflects actual working pressure and can be isolated for maintenance.
Positioning near the regulator output, adjacent to the expansion tank connection, and using a nearby isolation valve enables diagnostics, prevents false spikes from thermal expansion, and allows quick servicing without system drainage.
Typical costs for parts and professional installation
One can expect basic parts for a household water pressure gauge—gauge, brass adapter, short nipple and isolation valve—to cost roughly $20–$60.
Higher-accuracy or stainless-steel gauges and specialized fittings raise parts costs to $75–$200.
DIY installation typically adds minimal tool expense; professional service ranges $75–$250 labor depending on access and complexity, with troubleshooting or regulator work increasing total charges.
Common Mistakes to Avoid
Common installation errors can compromise readings or cause leaks, so attention to correct placement and gauge size is essential.
Improper sealing or overtightening often leads to damaged fittings or thread failure.
Failure to follow local codes or to isolate the line before work creates safety and compliance risks.
Wrong placement or gauge size
Several installers mistakenly position the pressure gauge where readings are skewed or choose a gauge with an incompatible range, causing inaccurate or unreadable measurements.
Mounting too close to pumps, valves, or turbulent fittings yields fluctuating values.
Selecting a gauge rated far above or below typical system pressure reduces resolution or risks damage.
Proper placement and matching range guarantee reliable, interpretable pressure readings.
Improper sealing and overtightening
Misplaced gauges and improper range selection often lead installers to focus on location while overlooking sealing and torque, which directly affect accuracy and longevity.
Inadequate thread sealant, wrong tape direction, or crushed washers cause leaks and measurement errors. Conversely, overtightening distorts fittings, damages gauge threads, or warps diaphragms.
Proper sealing technique and hand-plus-quarter-turn torque preserve accuracy and prevent premature failure.
Ignoring local code or failing to isolate before work
Although installers may prioritize convenience or speed, disregarding local plumbing codes and failing to isolate the water supply before installing a pressure gauge creates safety, legal, and performance risks.
Noncompliance can void warranties, incur fines, or require costly rework. Not isolating risks flooding, injury, or contaminated systems.
Always review local regulations, shut off and depressurize supply, and use approved fittings to guarantee safe, compliant installation.
Quick Reference: Installation Checklist and Safety Steps
A concise checklist and clear safety steps help guarantee a safe, efficient water pressure gauge installation; before beginning, the installer should gather tools (pressure gauge, wrench, T‑seal tape, shutoff key), verify compatible gauge type and scale, isolate and depressurize the system, and wear appropriate PPE. Follow lockout, confirm zero pressure, test after install.
| Task | Safety | Verify |
|---|---|---|
| Gather tools | PPE on | Gauge type |
| Isolate system | Lockout | Leak test |
Conclusion
Practical precision protects plumbing: homeowners harnessing a water pressure gauge gain greater control, conserving components and curbing costly complications. Careful calibration and consistent checks cultivate confidence, cutting surprises and conserving cash. Selecting suitable sensors, securing safe seals, and scheduling simple seasonal scrutiny sustains system strength. Mindful measures mitigate mistakes, make maintenance manageable, and maximize metric mastery—promoting predictable performance and preserving pipes for prolonged, practical, peaceful plumbing provision.