How to Use a Sprayer Bidet: Step-by-Step Guide for Clean, Comfortable Results
A sprayer bidet is a handheld device designed for effective and comfortable cleansing. To use it, first turn off the water supply and test the pressure. Position the nozzle for either front or rear rinsing, aiming gently. Adjust the water pressure and temperature to your comfort level. Sweep the stream for thorough cleaning, then either pat dry or air-dry. After use, wipe the nozzle and periodically check connections to ensure proper hygiene and prevent leaks. The following sections will cover installation, maintenance, and troubleshooting tips.
What a Sprayer Bidet Is and Why It’s Useful
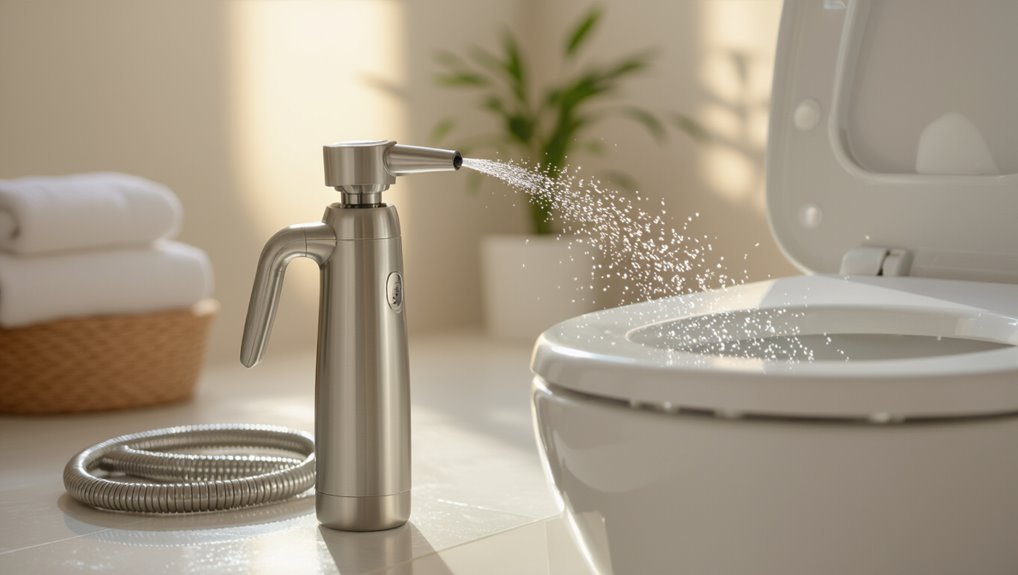
A sprayer bidet, also called a handheld bidet, shattaf, or toilet sprayer, is a nozzle attached to a hose for targeted cleansing with a water stream.
It is often preferred to toilet paper for improved hygiene, reduced irritation, and lower waste, and it can be more affordable and versatile than built‑in bidet fixtures.
Common varieties include trigger‑spray handhelds and wall‑mounted units, typically composed of a nozzle, hose, control valve, and mounting bracket.
Definition and common names (handheld bidet, shattaf, sprayer)
Often called a handheld bidet, shattaf, or sprayer, a sprayer bidet is a small, nozzle-equipped hose attached to the toilet’s water supply that delivers a directed stream for cleansing the genital and anal areas.
Users seeking how to use sprayer bidet find it intuitive: aim, control pressure via trigger or valve, and rinse, then pat dry.
Compact, simple, and adaptable.
Benefits compared to toilet paper and built-in bidets
Moving from basic description to practical advantages, the sprayer bidet offers clearer hygiene, reduced skin irritation, and lower long-term cost compared with toilet paper, while providing many of the same benefits as built-in bidets at a fraction of the price and space requirement.
It conserves resources, minimizes plumbing alteration, suits varied bathrooms, and supports post-surgery or mobility needs with targeted, gentle cleansing.
Types of sprayer bidets and typical components
Sprayer bidets come in several forms—handheld, attachable nozzle, and integrated hose systems—each built from a few common components that control water flow and direction.
Components include valves, hoses, nozzles, and mounting hardware; materials and pressure controls vary. Typical features balance spray angle, pressure, and shutoff reliability for hygiene, comfort, and installation simplicity.
- Valves
- Hoses
- Nozzles
- Mounts
Preparing Your Bathroom and Equipment
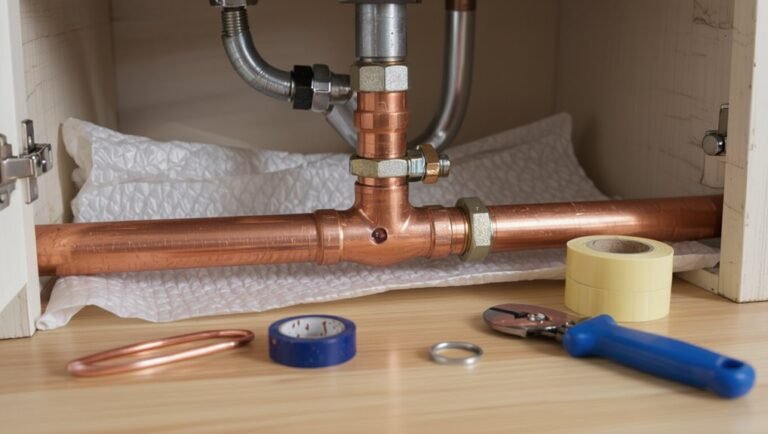
Before installation, the reader should gather essential tools and materials such as an adjustable wrench, plumber’s tape, and the bidet sprayer kit.
They should inspect the toilet’s supply line, shut-off valve, and available fittings to guarantee compatibility.
Basic safety and hygiene steps—turning off water, draining the tank, and wearing gloves—should be followed prior to work.
Necessary tools and materials for installation
A concise list of tools and materials guarantees a smooth installation: adjustable wrench, plumber’s tape (Teflon tape), a saddle or T-valve compatible with the toilet’s supply line, flexible supply hose if not included, mounting bracket or hook, screwdriver, and a small bucket or towel to catch water.
- Verify compatibility
- Gather quality parts
- Prepare workspace
- Keep safety supplies nearby
Assessing your toilet plumbing and shut-off valve
Inspect the toilet’s supply line, shut-off valve, and nearby fittings to confirm they can accommodate a bidet sprayer installation.
Verify valve type (angle or straight), thread size, and clearance for a T-adapter.
Check for corrosion, leaks, and flexible hose compatibility.
Ascertain water pressure is adequate and that the shut-off fully stops flow.
Note any parts needing replacement before installation.
Safety and hygiene precautions before use
With plumbing integrity confirmed, attention turns to preparing the bathroom and equipment to prevent contamination and accidental discharge.
The area should be cleaned and clear of personal items. Inspect hoses, connections, and spray head for damage; replace faulty parts.
Turn the shut-off valve off during installation checks.
Sanitize hands and tools, and test low-pressure flow before first full use to verify proper operation.
Step-by-Step Installation Guide
The installation begins with shutting off the water supply and draining the toilet tank to prevent spills.
Next steps cover attaching the T-valve to the fill valve, connecting the sprayer hose and mounting bracket, and testing for leaks while adjusting water pressure.
If preferred or if complications arise, hiring a professional installer is an optional consideration.
Turning off water supply and draining the tank
Shut off the toilet’s water supply by turning the shutoff valve clockwise until it stops, then flush the toilet to empty the tank.
After flushing, hold the handle to remove residual water, then use a sponge or towel to soak remaining water from the tank bottom.
Inspect for leaks at supply connections and guarantee the bowl stays empty before proceeding to install bidet components.
Attaching the T-valve to the fill valve
Begin by positioning the T-valve directly onto the toilet’s fill valve outlet, ensuring the rubber washer sits between metal surfaces to prevent leaks.
Hand-tighten the T-valve clockwise, then finish with an adjustable wrench—avoid overtightening.
Confirm the vertical orientation of the secondary outlet.
Reattach the supply line to the T-valve inlet, tighten securely, and wipe connections clean before restoring water to check for leaks.
Connecting the sprayer hose and mounting bracket
With the T-valve secured and the supply line reattached, attention turns to connecting the sprayer hose and mounting bracket.
The hose threads onto the T-valve outlet using hand pressure, then a quarter-turn with an adjustable wrench if needed.
Route the hose neatly to avoid kinks.
Install the bracket on the toilet bowl or tank edge using the supplied screw or adhesive, securing the sprayer holster.
Testing for leaks and adjusting water pressure
Once the hose and bracket are in place, the installer checks for leaks and sets the spray pressure by slowly turning the water supply back on and observing all connections for drips.
The sprayer is activated several times to confirm steady flow. If leaks appear, fittings are tightened or seals replaced.
Pressure is adjusted at the shutoff valve until spray feels comfortable and consistent.
Optional professional installation considerations
Consider hiring a licensed plumber when the installation involves complex plumbing, old pipework, wall-mounted fixtures, or limited access to shutoff valves. A professional can assess compatibility, obtain any necessary permits, and guarantee connections meet local codes.
Professionals also advise on ideal hose routing, pressure regulators, and backflow prevention. They provide reliable leak testing, documentation, and warranty-backed workmanship, reducing long-term risk and liability.
How to Use a Sprayer Bidet: Step-by-Step
The user is guided to position themselves for effective cleansing, adjust water pressure and temperature where available, and aim the nozzle for appropriate front or rear cleaning.
Practical tips cover drying options—toilet paper, a dedicated towel, or air drying—and techniques tailored for feminine hygiene, postpartum care, or limited mobility.
Clear, concise steps help guarantee comfort, cleanliness, and safety for varied needs.
Positioning yourself for optimal cleaning
Positioning for ideal cleaning requires centering the body over the toilet so the spray can reach the targeted area without excessive movement; small adjustments forward, backward, or side-to-side fine-tune the angle and distance for effective coverage.
Feet remain flat for stability, hips relaxed to allow access. Leaning slightly and turning the torso or pelvis refines aim, reducing splatter and ensuring thorough, comfortable rinsing.
Adjusting water pressure and temperature (if applicable)
Once the user has settled their stance, attention shifts to setting water pressure and temperature (if the unit supplies warm water).
The person tests pressure at low, increasing gradually to a comfortable level to avoid splashback. If warm water is available, they adjust to a lukewarm, non-scalding temperature.
They pause after adjustments to confirm comfort before proceeding to cleanse.
Proper spray angles and techniques for front and rear cleansing
Several small adjustments to angle and distance confirm effective, comfortable cleansing: for rear use, the sprayer is aimed slightly downward toward the center of the perineal area from about 4–6 inches away, using a gentle sweeping motion to cover the entire area;
for front (feminine) cleansing, the nozzle is directed forward and slightly upward, kept closer—around 3–4 inches—and moved carefully to avoid direct strong streams on sensitive tissue.
Gentle, controlled bursts and slight repositioning confirm thoroughness without discomfort.
Drying methods after spraying (toilet paper, towel, air)
After cleansing, attention turns to drying to prevent lingering moisture and guarantee comfort.
Users may pat dry with toilet paper for quick absorbency, use a dedicated clean towel for gentle reuse, or air-dry briefly to minimize contact.
Choice depends on personal preference, skin sensitivity, and hygiene practices.
Towels should be laundered regularly; toilet paper should be used sparingly to reduce waste.
Using the sprayer for feminine hygiene, postpartum care, and mobility needs
Addressing specific needs—feminine hygiene, postpartum care, and mobility limitations—requires gentle, controlled use of the sprayer to guarantee cleanliness without irritation.
Users should adjust pressure, temperature, and angle for comfort; rinse front-to-back for infection prevention.
For postpartum care, use low pressure and warm water; for limited mobility, consider seated or handheld positioning, support devices, and caregiver assistance to maintain safety and dignity.
Maintenance and Cleaning
Routine maintenance keeps a sprayer bidet reliable and hygienic, beginning with simple daily wipes and weekly deeper cleans.
Periodic descaling prevents mineral buildup, while hoses, washers, and valves should be inspected and replaced as wear appears.
Addressing leaks, low pressure, or nozzle problems promptly avoids larger failures and maintains performance.
Daily and weekly cleaning routines
A few simple tasks performed daily and weekly keep a sprayer bidet hygienic and functioning.
A daily quick wipe of the nozzle and handle with mild soap and a soft cloth prevents residue.
Weekly, inspect connections, clean the spray head exterior, sanitize the hose area, and test spray pressure.
Follow manufacturer cleaning recommendations to avoid damage.
- Daily wipe
- Weekly inspect
- Weekly sanitize
- Test operation
Descaling and mineral buildup prevention
Prevent mineral buildup by regularly descaling the sprayer bidet and using preventive measures suited to local water hardness.
Soak removable nozzles and spray heads in vinegar or a commercial descaler per manufacturer instructions; flush lines afterward.
Install a water softener or inline filter where necessary.
Inspect spray patterns monthly for residue and repeat descaling when flow narrows or misting occurs to maintain performance.
Replacing hoses, washers, and valves
Replace worn components promptly to avoid leaks and loss of pressure.
Periodically inspect hoses, washers, and shutoff valves for cracking, fraying, or deformation.
Use compatible replacement parts, matching thread sizes and rubber hardness.
Turn off water, relieve pressure, then swap components, applying plumber’s tape where metal threads join.
Recheck seals and tighten connections to manufacturer torque recommendations before restoring service.
Troubleshooting common problems (leaks, low pressure, nozzle issues)
Diagnose issues methodically by checking supply, fittings, and the nozzle in sequence: confirm the shutoff valve is fully open, inspect hoses and connections for visible leaks or loose fittings, and test water pressure at the source to distinguish fixture problems from house-wide supply issues.
- Tighten loose fittings.
- Replace worn washers.
- Clean or descale nozzle.
- Check for kinks or clogged hoses.
Safety, Etiquette, and Practical Tips
This section addresses key safety, etiquette, and practical tips for sprayer bidet users.
Topics include controlling water temperature to prevent scalding, preventing cross-contamination through proper hygiene and storage, and child-proofing or securing the sprayer.
It also covers simple ways to conserve water and use the fixture more eco-responsibly.
Water temperature and scald prevention
How warm should the water be for comfortable and safe use?
Temperatures should be lukewarm—comfortably between about 90–105°F (32–40°C)—to avoid discomfort or burns.
Test before use, adjust gradually, and limit exposure time.
Install thermostatic mixing valves or anti-scald devices where possible.
Educate household members, especially children and seniors, about cautious adjustment and checking water first.
Avoiding cross-contamination and best hygiene practices
After confirming a safe water temperature, attention shifts to preventing cross-contamination and maintaining hygiene when using a sprayer bidet.
Users should aim the nozzle away from surfaces, cleanse from front to back, and avoid splashing.
Regularly clean and disinfect the nozzle and surrounding area, wash hands after use, and use designated towels.
Replace or sanitize components showing wear or biofilm.
Storage and child-proofing the sprayer
Proper storage and child-proofing of a sprayer bidet reduce accidental discharge, prevent tampering, and prolong the device’s lifespan.
Store the sprayer on its holder or a secure mount, keep hoses coiled without kinks, and fasten valves.
Install child-resistant locks or covers on controls and educate household members about boundaries.
Regularly inspect fittings for leaks and guarantee unreachable placement for young children.
Tips for conserving water and eco-friendly use
Why conserve water with a sprayer bidet? Conserving reduces utility costs and environmental impact while maintaining hygiene.
Practical, eco-friendly habits extend appliance life and lower waste.
- Use short, targeted sprays.
- Adjust pressure to minimize runoff.
- Repair leaks promptly.
- Choose low-flow attachments and biodegradable cleansers.
Comparing Sprayer Bidets with Other Options
A concise comparison of handheld sprayers, seat-mounted bidets, and built-in bidet toilets helps readers weigh practical trade-offs.
Considerations include purchase price, installation complexity, and how intuitive each option is for users.
This framework guides choices based on budget, plumbing skill level, and preferred ease of use.
Handheld sprayer vs. seat-mounted bidet vs. built-in bidet toilet
When comparing handheld sprayers, seat-mounted bidets, and built-in bidet toilets, the primary distinctions lie in installation complexity, control precision, and user experience. A handheld sprayer offers direct aim and flexibility; seat-mounted units add integrated controls and comfort; built-in toilets provide seamless design and advanced features. Choose based on space, desired features, and maintenance preferences.
| Type | Key trait |
|---|---|
| Handheld | Flexibility |
| Seat-mounted | Integrated controls |
| Built-in | Seamless design |
Cost, installation complexity, and user-friendliness comparison
Following the comparison of types, cost, installation complexity, and user-friendliness become the next practical considerations for choosing a bidet solution.
Handheld sprayers are low-cost, minimal-installation, and intuitive.
Seat-mounted attachments cost more, require moderate installation, and offer integrated controls.
Built-in bidet toilets are costly, demand professional installation, and provide the most automated, user-friendly experience.
Budget and skill dictate the best choice.
Common Mistakes and How to Avoid Them
Users should be aware that excessive water pressure can cause discomfort or damage. Improper installation can lead to leaks, and poor hygiene habits can reduce the bidet’s effectiveness.
Each of these issues is preventable with correct pressure settings, proper fitting and seal checks, and consistent cleaning routines. The following section outlines practical steps to avoid these common mistakes.
Overly high water pressure and damage risks
Excessively high water pressure from a sprayer bidet can cause discomfort, tissue irritation, and, over time, damage to seals, mounts, and fragile plumbing connections.
Users should begin at the lowest setting, increase gradually, and test on the hand before use.
Installing a pressure regulator or flow limiter and checking manufacturer recommendations prevents harm to fixtures and guarantees gentle, effective cleansing without unnecessary wear.
Incorrect installation leading to leaks
High water pressure is not the only installation-related hazard; improper assembly or poor connections commonly lead to leaks that damage floors, cabinetry, and fixtures.
Incorrectly tightened fittings, omitted washers, or misaligned hoses cause slow seepage or sudden bursts. To avoid leaks, follow manufacturer torque specs, use supplied seals, test under pressure before finalizing, and inspect connections periodically for wear or corrosion.
Hygiene habits that reduce effectiveness
Although a sprayer bidet can greatly improve cleanliness, certain hygiene habits unintentionally reduce its effectiveness. Rinsing superficially, using water at incorrect angles, and moving prematurely prevent thorough cleaning.
Overreliance on toilet paper without follow-up rinses leaves residue. Infrequent nozzle cleaning causes buildup and bacterial transfer.
Adopting deliberate, steady rinses, correct angle, and routine nozzle maintenance maximizes performance and hygiene.
When to Call a Professional
If leaks, low water pressure, persistent clogs, or visible corrosion appear after installing a sprayer bidet, professional assessment is recommended as these often signal plumbing problems beyond typical DIY fixes.
Homeowners should seek licensed plumbers or experienced bathroom fixture installers who provide references and warranty-backed work.
Expect costs to vary by region and complexity, typically ranging from a service call fee up to several hundred dollars for parts and labor.
Signs of plumbing issues beyond DIY repair
When leaks persist despite tightening connections or replacing seals, or when water pressure fluctuates unpredictably, these are clear indicators that the problem may be systemic rather than a simple DIY fix.
Additional signs include foul odors from drains, persistent clogs, visible corrosion, mold growth, or water stains on walls and ceilings.
These warrant prompt professional assessment to prevent damage.
Finding qualified installers and expected costs
Because proper installation affects performance and longevity, homeowners should seek qualified installers for sprayer bidet systems rather than rely solely on general plumbers or DIY attempts.
Licensed installers offer warranty alignment, leak prevention, and code compliance.
Expected costs vary by region and complexity:
- Basic hookup: $75–$150
- Valve upgrades: $100–$250
- Wall-mount or concealed work: $200–$500
- Emergency callouts: premium fees
Conclusion
A sprayer bidet offers an efficient, hygienic alternative to toilet paper, enhancing personal cleanliness and comfort. After proper preparation, installation, and routine maintenance, users can enjoy reliable, water-saving performance with minimal fuss. What small change could make daily routines noticeably cleaner and greener? By following safety guidelines, avoiding common mistakes, and consulting a professional when needed, homeowners guarantee long-term functionality and peace of mind from this practical bathroom upgrade.