How to Fix a Faucet That Sprays: Simple Steps to Stop the Splash and Leak
To fix a faucet that sprays, start by identifying the cause, which may include a clogged aerator, worn cartridge or seals, high water pressure, or debris in the supply lines. Follow these steps:
- Shut off the water supply.
- Unscrew the aerator, clean it, or replace it if necessary.
- Test the water flow.
- If splashing continues, inspect and replace cartridges, O-rings, or valve seats.
- Check the supply valves and pressure regulators.
- Reassemble the faucet, turn the water back on, and check for leaks.
For detailed repairs, tools needed, timing, and prevention tips, continue reading.
What Causes a Faucet to Spray or Splash
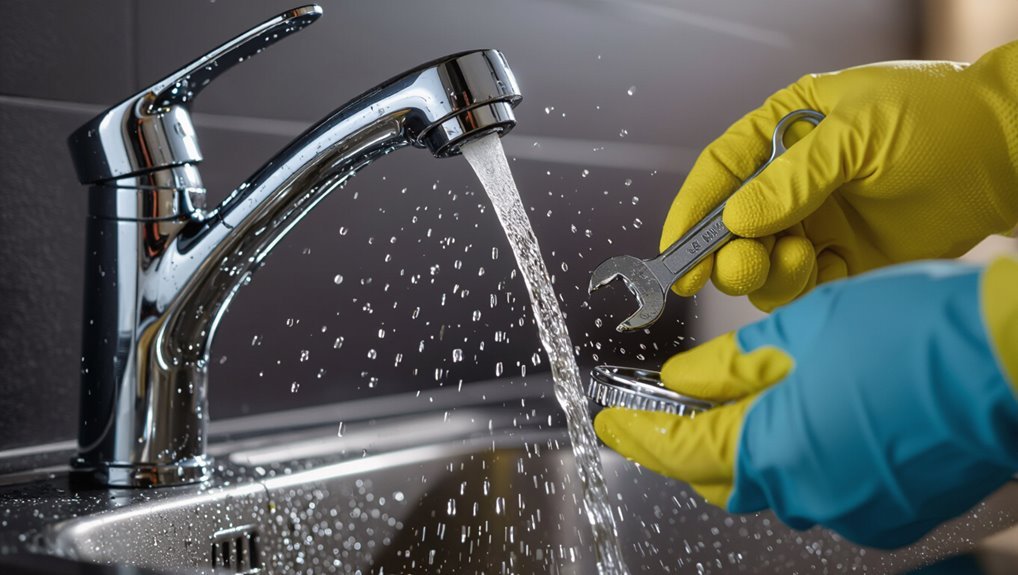
A faucet that sprays or splashes typically results from mechanical faults such as a clogged aerator, worn cartridge, or damaged valve seat.
High water pressure, supply line problems, mineral deposits and debris, and degraded seals or O-rings can each contribute to irregular flow.
Identifying the specific cause directs the appropriate cleaning, adjustment, or part replacement.
Common mechanical reasons (aerator, cartridge, valve seat)
Inspecting key faucet components often reveals why water sprays or splashes: a clogged or damaged aerator distorts flow, a worn cartridge causes uneven pressure and erratic streams, and a pitted valve seat prevents a proper seal, allowing turbulent water passages.
Addressing each—cleaning or replacing the aerator, rebuilding or swapping the cartridge, and resurfacing or replacing the valve seat—explains how to fix a faucet that sprays.
Water pressure and supply line issues
Many instances of spraying or splashing trace back to water pressure and supply line problems: high pressure, pressure fluctuations, partially closed shutoff valves, kinked or oversized supply lines, and air or debris in the plumbing all disrupt smooth flow.
Diagnosis includes checking household pressure, inspecting shutoff valve positions, feeling for kinks, and observing flow for pulsation.
Remedies involve pressure regulators, valve adjustment, or replacing faulty supply tubing.
Mineral buildup and debris
Pressure and supply problems aside, mineral deposits and trapped debris are common causes of erratic spray or splashing from a faucet.
Hard water minerals can clog aerators and narrow passages, diverting flow and creating uneven streams.
Sediment, small particles, or corrosion flakes lodge in screens and valves, disturbing spray patterns.
Regular cleaning or replacing clogged components restores smooth, consistent flow.
Damaged or worn seals and O-rings
Damaged or hardened seals and O-rings compromise the faucet’s ability to maintain a smooth, controlled stream, allowing water to escape past designated channels and produce spray or splashing.
Age, chemical exposure, and friction cause cracking, flattening, or shrinkage. Replacement restores proper sealing, often resolving intermittent spraying.
Inspecting for wear, selecting compatible parts, and lubricating with plumber’s grease prevent recurrence and guarantee reliable operation.
Quick Fix Stop the Spray Right Now
To stop a faucet from spraying immediately, one can shut off the fixture, lower the water pressure at the supply valves, or briefly reorient the spout to change the flow angle.
These stopgap measures reduce splashing while a more permanent fix is planned.
If water continues to spray forcefully, leaks appear at connections, or internal damage is suspected, a professional plumber should be contacted right away.
How to temporarily reduce splashing (shutoff, lower pressure, reorient spout)
Shut off the water or reduce its flow to stop an immediate spray and prevent further splashing while a longer repair is planned.
Partially reopen valves to lower pressure, or adjust the faucet handle for a gentler stream.
Angle the spout toward the sink basin, use a temporary aerator or tape to diffuse flow, and test briefly to confirm reduced splash before leaving the area.
When to call a plumber immediately
When should a professional be summoned immediately?
A plumber is required if water flows uncontrollably after shutting valves, if pipes leak behind walls or ceilings, if corrosion, cracking, or noisy hammering indicates failure, or if water damage, electrical risk, or mold appear.
Immediate service is also warranted when DIY attempts fail, tools are unavailable, or local codes and warranties demand certified repair.
Tools and Materials You’ll Need
A basic toolkit—screwdrivers, an adjustable wrench, and pliers—is essential for most faucet repairs.
It is also wise to have common replacement parts on hand, such as an aerator, cartridge, O-rings, and washers.
Cleaning supplies and personal protective equipment should be available to protect surfaces and the person performing the work.
Basic toolkit (screwdrivers, adjustable wrench, pliers)
Gather a compact set of hand tools to tackle most faucet repairs: flathead and Phillips screwdrivers, an adjustable wrench, and slip-joint pliers.
These enable removal of handles, aerators, and retaining nuts. Choose wrenches with smooth jaws or use cloth to protect finishes.
Pliers with adjustable jaws and a solid grip simplify stubborn fittings. Keep tools organized and within reach during the repair.
Replacement parts to have on hand (aerator, cartridge, O-rings, washers)
Alongside the basic hand tools, keeping a small assortment of common faucet replacement parts speeds repairs and prevents repeat trips to the store.
Stock an aerator for flow issues, a range of cartridge types for single- and double-handle faucets, various O-rings sized for stems and spindles, and flat washers for compression valves.
Label sizes and store in a small organizer.
Cleaning supplies and PPE
Several basic cleaning supplies and personal protective equipment make faucet work safer and cleaner.
A household degreaser or white vinegar, soft brushes, microfiber cloths, and rags remove deposits without scratching.
Disposable gloves protect skin from chemicals and grime; safety glasses prevent splashes.
A bucket catches debris and water.
Optional respirator protects against strong fumes when using concentrated cleaners in poorly ventilated spaces.
Step-by-Step Repair for Common Faucet Types
The guide now moves to practical, step-by-step repairs for the most common faucet types.
It outlines how to diagnose and replace a single-handle cartridge, service two-handle valves and seats, restore spray function and reattach hoses on pull-down/pull-out faucets, and address ball, seal, and cam problems.
Following clear procedures reduces trial-and-error and limits water damage.
- Single-handle faucets: diagnosing and replacing the cartridge
- Two-handle faucets: fixing valves and seats
- Pull-down/pull-out kitchen faucets: restoring spray function and reattaching hose
- Ball-type faucets: identifying ball, seals, and cam issues
Single-handle faucets diagnosing and replacing the cartridge
Diagnose a single-handle faucet by first identifying visible symptoms—drips, difficulty shifting between hot and cold, or reduced flow—and confirming the handle controls both temperature and volume through a single cartridge assembly.
Shut water, remove handle and trim, note cartridge type, then extract cartridge with pliers or a puller.
Inspect O-rings and seals; replace cartridge if worn.
Reassemble and test for leaks and smooth operation.
Two-handle faucets fixing valves and seats
Start by isolating water to the fixture and covering the drain to prevent lost parts.
Remove handle caps, screws and handles, then extract valve stems or cartridges.
Inspect seats and O-rings for wear; clean mineral deposits with vinegar or replace seats using a seat wrench.
Reassemble with new seals, test for leaks, and adjust packing to guarantee smooth operation and no dripping.
Pull-down/pull-out kitchen faucets restoring spray function and reattaching hose
After servicing valve stems and seats, attention can shift to the pull-down/pull-out kitchen faucet, where spray problems often stem from a clogged aerator, tangled hose, or a worn spray head.
Inspect and clean the aerator, retract the hose fully to untangle and check for kinks.
Remove and replace the spray head or internal check valve if flow remains weak, then reattach and test.
Ball-type faucets identifying ball, seals, and cam issues
Inspecting a ball-type faucet begins with recognizing its distinct components: a chrome or stainless steel ball seated in a cylindrical housing, rubber seals and springs that press against ports, and a cam or cam washer that guides handle movement.
Damage to the ball’s surface, hardened or torn seals, or a worn cam causes leaks, drips, or erratic flow; replacing those parts restores proper sealing and alignment.
How to Clean or Replace an Aerator to Stop Splashing
Next, the article explains how to remove and inspect the aerator by unscrewing it with pliers or by hand to check for worn screens or stripped threads.
It then covers cleaning mineral buildup and trapped debris with vinegar and a brush or replacing parts if corroded.
Finally, guidance is given on selecting the correct aerator size, flow rate, and thread type and on reinstalling it to eliminate splashing.
How to remove and inspect an aerator
Begin by turning off the faucet and wrapping the aerator with a cloth to protect the finish before attempting removal.
Using pliers gently on the cloth-wrapped aerator, unscrew counterclockwise. If hand-tight, twist off by hand.
Inspect the housing, screen, and gasket for cracks, deformation, or corrosion.
Note thread damage or missing components.
Replace the aerator or parts if any damage or severe wear is present.
How to clean mineral buildup and debris
Many aerators accumulate mineral deposits and debris that disrupt water flow and cause splashing, so cleaning or replacing them restores a steady stream.
Remove the aerator, disassemble screens and flow restrictors, soak parts in vinegar to dissolve scale, brush gently, rinse, and reassemble.
If damage or persistent clogging remains, replace the aerator.
Reinstall, test flow, and adjust seating to prevent leaks.
How to choose and install the correct aerator
After cleaning or replacing a clogged aerator, determining the correct replacement guarantees proper flow and prevents future splashing.
Measure thread size and flow rate, match male/female fittings, and choose material resistant to mineral buildup.
Install with plumber’s tape, hand-tighten then slight wrench snug, avoid overtightening.
Test for leaks and spray pattern, adjust or replace if turbulence or reduced flow persists.
Addressing Water Pressure and Flow Problems
The guide explains how to test water pressure safely using a pressure gauge and basic precautions.
It then covers adjusting pressure regulators and supply valves to correct high or low pressure.
Finally, it outlines steps to diagnose supply line blockages that can restrict flow.
Testing water pressure safely
Begin by confirming that testing occurs only with the main water supply valves accessible and the area clear of electrical hazards; this guarantees measurements reflect actual system performance and prevents accidental damage.
Use a calibrated pressure gauge at an outdoor or utility faucet, record static and running pressures, note fluctuations or hammering, inspect aerators and supply lines for blockages, and document results before further adjustments.
Adjusting pressure regulators and supply valves
With pressure readings and supply-line inspections documented, attention shifts to adjusting pressure regulators and supply valves to correct low or erratic flow.
The technician locates the regulator, notes inlet/outlet pressures, and makes small clockwise or counterclockwise adjustments while monitoring gauges.
Supply valves under sinks are opened fully or throttled incrementally to balance flow.
Recheck pressures and test faucet performance for stability.
Diagnosing supply line blockages
Diagnosing supply line blockages requires isolating segments of the system and inspecting for debris, corrosion, or collapse that restricts flow.
The technician shuts valves, detaches flexible lines and measures flow at points to locate restriction.
Visual inspection and flushing reveal sediment or mineral buildup; kinked, crushed, or corroded tubing indicates replacement.
Restoration may involve cleaning, descaling, or replacing affected sections to restore pressure.
Replacing Seals, O-Rings, and Washers
A clear inspection of seals and O-rings reveals common signs of wear such as cracking, flattening, or mineral buildup.
The following section outlines a concise step-by-step replacement procedure, including disassembly, part removal, and reassembly with proper lubrication.
It also explains how to identify and source matching parts by size, material, and model to guarantee a reliable repair.
How to identify worn seals and O-rings
How can one tell when seals and O-rings are failing in a faucet?
Inspect for persistent dripping, reduced water pressure, or spray deflection despite clean aerators.
Look for visible cracking, flattening, or brittleness on rubber parts and oily residue or mineral buildup preventing a tight fit.
Movement of handles that feels loose or jerky also indicates worn seals needing attention.
Step-by-step replacement procedure
Once worn seals, O-rings, or washers have been identified, the repair proceeds with a methodical removal and replacement to restore a watertight fit.
Shut water, disassemble faucet components, note order, and remove old parts with pliers or picks.
Clean mating surfaces, lubricate new O-rings lightly with plumber’s grease, seat seals and washers correctly, reassemble in reverse, test for leaks, and adjust as needed.
Matching and sourcing correct parts
Several common measurements and material details determine which seals, O-rings, or washers will fit a faucet: inner and outer diameters, cross-sectional thickness, material (rubber, silicone, EPDM, neoprene), and whether the part is flat, cupped, or beveled.
Measure removed parts, note model numbers, photograph assemblies, and consult manufacturer catalogs or plumbing suppliers.
Match hardness and chemical resistance for longevity.
When Mineral Buildup Is the Problem
When faucet parts show reduced flow or sticky movement, mineral deposits are often the cause and can be removed with white vinegar or a commercial descaler.
Small components can be soaked or soaked-wiped according to product instructions, rinsed thoroughly, and reinstalled to restore function.
A routine descaling schedule—quarterly in hard-water areas, biannually elsewhere—helps prevent recurrence.
How to descale faucet components with vinegar or commercial cleaners
Descale faucet parts by soaking or wiping them with a mild acid solution—white vinegar is the most accessible option—because lime and calcium deposits dissolve readily in acids.
Remove aerators, cartridges, and detachable spray heads; soak in vinegar or a commercial descaler per instructions.
Scrub gently with an old toothbrush, rinse thoroughly, and reassemble.
Test for smooth operation and leaks before regular use.
Preventive descaling schedule
A regular preventive descaling schedule helps keep mineral buildup from restricting flow and shortening faucet component life.
Inspect aerators, cartridges, and spray heads monthly in hard-water areas; quarterly elsewhere. Remove deposits with vinegar or a commercial descaler as needed.
Replace worn seals annually and record dates. Consistent attention prevents sprays, improves efficiency, and extends faucet lifespan.
Troubleshooting Persistent Leaks or Spray After Repairs
After reassembly, the technician runs specific diagnostic checks—pressure tests, cartridge alignment, and flow observations—to confirm proper function.
Common causes of continued leaks or spray include misaligned seals, damaged O-rings, improper reassembly, or unseen corrosion, each requiring targeted re-evaluation.
If repeated repairs fail or the valve body and internal components are compromised, a full faucet replacement is recommended.
How to run diagnostic checks after reassembly
Begin by verifying that all fittings are tightened to spec and the valve components are seated correctly before turning the water back on.
Gradually restore water pressure, observing for leaks, spray, or drips.
Cycle hot and cold handles, monitor aerator flow, and check under-sink connections.
Use a dry paper towel to detect slow seepage.
Record findings and isolate remaining faults for targeted correction.
Common reasons repairs fail and how to re-evaluate
Reassess the repair systematically when leaks or spray persist, focusing on installation errors, worn parts, and overlooked components.
Inspect seat and valve alignment, cartridge seating, and O-ring condition.
Verify correct part selection and torque levels.
Check aerator and sprayhead for debris or misassembly.
Confirm supply line connections and sealant integrity.
Re-test under typical water pressure to reproduce the issue.
When a full faucet replacement is the best option
When persistent leaks or spray continue despite systematic troubleshooting, a full faucet replacement becomes the most practical solution; this is especially true if multiple internal components show extensive corrosion, plastic parts are brittle or deformed, replacement parts are obsolete or prohibitively expensive, or the valve body itself is cracked.
Replacement restores reliable seals, modernizes worn finishes and valves, prevents recurring failures, and often saves time and long‑term cost.
Replacing the Entire Faucet
When damage is extensive, parts are obsolete, or leaks persist despite repairs, replacement becomes the practical choice.
Selection should match the sink’s installation type (deck- or wall-mounted), desired features, and budget.
Removing the old faucet and installing the new one involves shutting off water, disconnecting supply lines and mounting hardware, transferring or replacing seals, and testing for leaks after reassembly.
Signs you should replace rather than repair
Why choose replacement over repair? Persistent leaks after multiple fixes, widespread corrosion, cracked or pitted valve bodies, obsolete parts no longer available, and recurring internal failures indicate systemic decline.
Frequent repairs that escalate costs beyond a new unit justify replacement. Poor water efficiency or structural damage compromising sink or countertop stability also favors installing a new faucet for reliability and safety.
Choosing a replacement based on installation type and features
After determining that replacement is the better option, consider the sink and plumbing configuration to select a compatible faucet.
Count mounting holes, measure deck and spout reach, verify supply line sizes and clearances.
Choose between single‑handle, centerset, widespread, or wall‑mount styles and prioritize durable materials, water‑saving aerators, and valve types (ceramic disc vs. cartridge) for performance and longevity.
Basic steps to remove old faucet and install new one
Begin by shutting off both hot and cold water supply valves and opening the faucet to relieve pressure; this prevents leaks while the old fixture is removed.
Disconnect supply lines, remove mounting nuts beneath the sink, and lift out the old faucet.
Clean the sink surface, position the new faucet with gasket or plumber’s putty, secure mounting hardware, reconnect supply lines, restore water, and test for leaks.
Preventive Measures to Avoid Future Splashing and Leaks
Preventive care reduces the chance of future splashing and leaks by addressing wear, water quality, and improper pressure. A simple routine and a few targeted upgrades can extend faucet life and restore steady flow.
The following items outline practical steps to keep problems from recurring:
- Establish a regular maintenance checklist for inspections, cleaning, and seal replacement.
- Consider water quality treatments (softeners or filters) to limit mineral buildup.
- Install modern aerators to stabilize flow and reduce splash.
- Add or adjust pressure regulators to prevent stress on valves and fittings.
Regular maintenance checklist
A concise regular maintenance checklist helps homeowners catch small faucet issues before they become leaks or persistent splashes.
Inspect handles, spout, and aerator monthly for looseness or wear. Tighten fittings, replace worn O-rings and cartridges, and clear debris from aerators.
Check supply lines and shutoff valves for seepage.
Record dates and actions to track recurring problems and schedule professional inspection if needed.
Water quality treatment options to reduce mineral buildup
Alongside monthly inspections, addressing water quality can greatly reduce mineral buildup that leads to gritty aerators, stiff cartridges, and eventual splashing or leaks.
Homeowners may install water softeners, use point‑of‑use filters, or apply periodic vinegar descaling to reduce hardness and scale.
Testing water for hardness informs appropriate treatment choices; routine maintenance of treatment systems preserves effectiveness and prevents recurrence of mineral‑related faucet issues.
Recommended parts and upgrades (modern aerators, pressure regulators)
When upgrading to reduce future splashing and leaks, homeowners should prioritize modern aerators and pressure regulators that match fixture flow rates and local water pressure.
Choose aerators with flow-control inserts and removable screens for easy cleaning.
Install a pressure-reducing valve if mains pressure exceeds recommended levels.
Select corrosion-resistant materials and compatible threads.
Properly sized, quality parts extend fixture life and improve stream performance.
Cost and Time Estimates for Common Repairs
Cost and time estimates help readers decide whether to tackle a faucet repair themselves or hire a professional. The following quick reference compares typical DIY and professional cost ranges alongside expected completion times. Use these figures as general guides; actual costs and durations vary by model and local rates.
| Repair Type | DIY vs. Pro (Cost & Time) |
|---|---|
| Replace cartridge | DIY: $10–$50, 30–60 min; Pro: $80–$200, 30–60 min |
| Replace O-rings/seat | DIY: $5–$25, 15–30 min; Pro: $60–$120, 20–45 min |
| Fix leak at base | DIY: $10–$60, 20–60 min; Pro: $80–$250, 30–90 min |
| Replace faucet | DIY: $50–$200, 1–3 hrs; Pro: $150–$600, 1–3 hrs |
Typical DIY vs. professional service cost ranges
Typical repairs fall into two broad categories—simple parts-and-time fixes that a homeowner can tackle and more complex issues that usually require a plumber’s tools and expertise.
DIY costs commonly range from $5–$60 for replacement cartridges, O‑rings and aerators.
Professional service calls plus labor typically run $100–$350, higher for specialty parts or extensive valve replacement; estimates vary by region and urgency.
Typical time to complete each repair type
Following the cost overview, time estimates help homeowners and professionals plan repairs and schedule service calls.
Simple fixes—tightening fittings, replacing aerators—typically take 15–30 minutes.
Cartridge or valve replacements usually require 30–90 minutes.
O-ring or seal swaps often take 20–45 minutes.
Complex tasks like replacing entire faucet assemblies or addressing hidden supply-line issues can span 1–3 hours, depending on access and corrosion.
Troubleshooting Scenarios and Solutions
Common faucet spray problems can usually be traced to aerator buildup, cartridge wear, or misaligned spray heads. Each has specific fixes like cleaning, replacing parts, or realigning nozzles.
Intermittent spraying suggests loose connections, sediment in the diverter, or a failing cartridge that should be inspected and tightened or replaced.
Spray from side holes or unexpected directions often indicates clogged or damaged spray outlets or seal issues. This can be corrected by cleaning, replacing the spray face, or reseating seals.
Low flow but no spray likely causes and fixes
Diagnose reduced water flow without spray by isolating likely culprits: clogged aerator, partially closed supply valves, mineral buildup in the cartridge, or an obstructed diverter.
Remove and clean the aerator, flush supply lines, fully open valves, and inspect the cartridge for scale; soak or replace it if stiff.
Clear or replace the diverter.
Reassemble and test flow to confirm restoration.
Intermittent spray what to inspect
When spray alternates between steady flow and sudden bursts, begin by inspecting components that control flow consistency: the aerator for partial clogging or worn screens, the cartridge or valve assembly for worn seals or stuck spools, the pull-down hose and weight for kinks or debris, and the diverter for intermittent obstruction or failure.
Also check supply shutoffs for sediment, pressure fluctuations, and loose fittings causing intermittent surges.
Spray only from side holes or unexpected directions targeted fixes
Inspect the spray pattern to pinpoint precise causes: water exiting only from side holes or spraying at odd angles usually indicates blocked aerator jets, a damaged or misaligned spray head, mineral buildup inside the spout or pull-down nozzle, or a compromised cartridge/diverter that redirects flow improperly.
Clean or replace the aerator, descale the nozzle, realign or replace the spray head, and inspect or swap the cartridge/diverter.
Safety Tips and Best Practices While Repairing Faucets
Before beginning any faucet repair, basic safety steps and household protections should be observed to prevent injury and avoid further damage. The following points outline shutting off and depressurizing the water supply, guarding finishes and surrounding surfaces, recognizing signs that indicate professional assistance is needed, and other practical precautions. Clear adherence to these measures reduces risk and keeps repairs controlled.
- Turn off the correct shutoff valves and open the faucet to relieve pressure; know where the main shutoff is if local valves fail.
- Use towels, painter’s tape, and a basin to protect sinks, countertops, and fixtures from scratches, dents, and stray parts.
- Wear gloves and eye protection when working with tools, old seals, or cleaning chemicals to prevent cuts and splashes.
- Stop and call a licensed plumber if leaks persist after reassembly, if corrosion or broken components are found, or if work requires soldering or complex valves.
How to shut off water and relieve pressure safely
Shut off the water and relieve pressure before touching any faucet components to prevent flooding and protect internal seals.
Locate and close the local shutoff valves under the sink; if unavailable, turn off the main supply.
Open the faucet to drain remaining water and release trapped pressure.
Keep towels and a bucket ready.
Verify no flow before disassembling to avoid unexpected sprays.
Protecting finishes and surrounding surfaces
A layer of protection for surrounding surfaces and fixture finishes prevents accidental damage during faucet repairs.
Use soft cloths, painter’s tape, and a silicone mat to shield countertops, sinks, and chrome.
Remove jewelry and cover nearby electronics.
Place a towel in the basin to catch dropped parts.
Avoid abrasive tools or cleaners that scratch or strip finishes; test cleaners discreetly first.
When to stop and seek professional help
When should work stop and a professional be called in?
If leaks persist after replacing cartridges, seals, or aerators, or if corrosion, stripped fittings, or hidden valve issues are found, stop.
Also call a pro for persistent water pressure problems, plumbing behind walls, electrical components nearby, or uncertainty about tools and steps.
Prioritize safety and preventing further damage.
Conclusion
Like a gardener pruning a wayward fountain, the homeowner trims frustrations: tighten, clean, replace, and patience restores calm water to its rightful course. Small tools and simple parts tame sprays that once startled sinks, while routine checks keep future splashes at bay. With each careful turn and gentle scrub, leaks shrink and silver fixtures regain quiet dignity—transforming chaotic bursts into a steady, obedient stream that whispers reliability.