How to Turn On Rheem Water Heater: Step-by-Step Guide for Gas & Electric Models
To turn on your Rheem water heater, first ensure safety by checking that power or gas is off, the tank is filled, and venting is clear. For gas models, purge any gas, light the pilot according to the unit’s instructions, hold the control until the thermocouple senses flame, and then set the temperature. For electric models, restore power at the breaker after filling and adjust the thermostats. If issues arise, troubleshoot the pilot, thermocouple, elements, or valves as necessary. For detailed steps and diagnostics, refer to the full guide.
How to Turn On a Rheem Water Heater: Quick Overview
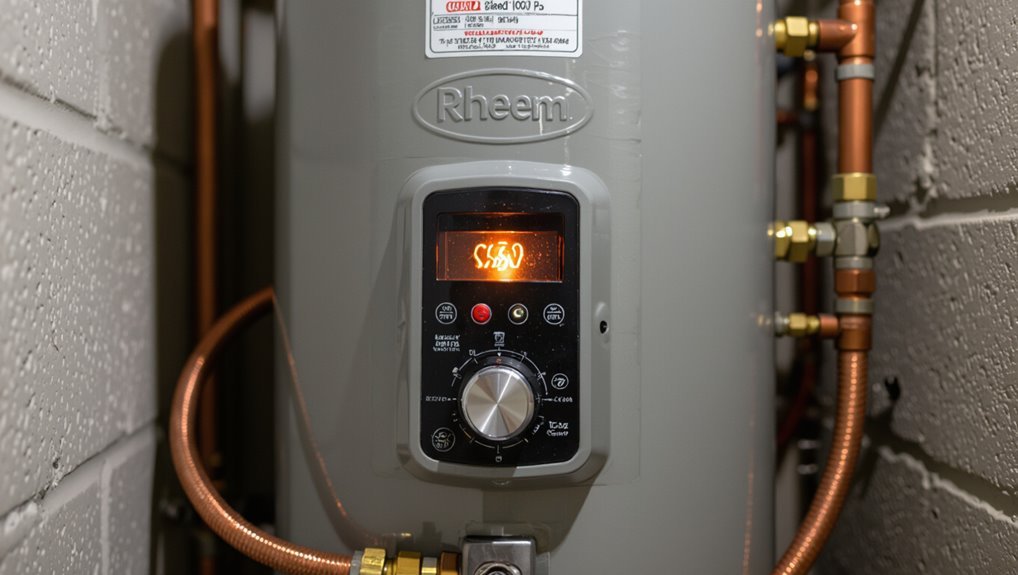
For gas Rheem models, ignition is checked, gas is turned on, and the pilot or electronic ignition sequence is followed.
For electric Rheem models, power is restored at the breaker and thermostat settings are verified before energizing the elements.
Before beginning either process, confirm adequate ventilation, shut off power and gas as needed, and have a working carbon monoxide detector and safety gear on hand.
One-sentence summary for gas models
Ignite the pilot (or reopen the gas valve and relight the pilot following the manufacturer’s sequence) to restore a Rheem gas water heater to operation.
For a concise how to turn on rheem water heater summary: confirm gas supply, set thermostat, follow pilot relight instructions on the unit, wait for flame stabilization, then verify hot water flow and check for gas odors or leaks before regular use.
One-sentence summary for electric models
Switch on the circuit breaker supplying the Rheem electric water heater. Set the thermostat to the desired temperature, and verify the unit’s power and indicator lights.
After allowing time for the elements to heat, check for hot water at a tap and guarantee no tripped breakers or error codes are present.
If water remains cold, confirm proper voltage at the heater, inspect thermostats and elements, and reset as needed.
Safety-first checklist before you begin
Before powering a Rheem water heater, verify basic safety steps are completed: confirm the area is dry and well-ventilated, locate and identify the electrical breaker or gas supply, shut off power or gas, and turn off the cold-water inlet.
A technician or owner should also confirm drains and pressure relief access.
Follow these core checks:
- Inspect for leaks
- Verify ventilation
- Confirm power/gas isolation
How Rheem Water Heaters Work Key Components to Know
The section outlines the core components that make Rheem water heaters operate, differentiating gas units—burner, pilot, thermocouple, and gas valve—from electric models—heating elements, thermostats, and the circuit breaker.
It also notes where to locate the model and serial number on the unit for identification and parts reference.
Understanding these parts helps diagnose ignition, heating, and control issues when turning the heater on.
Major parts of a gas Rheem water heater (burner, pilot, thermocouple, gas valve)
A gas Rheem water heater relies on several key components—burner, pilot, thermocouple, and gas valve—that work together to ignite and regulate the flame that heats the tank.
The burner produces heat; the pilot provides initial ignition; the thermocouple detects pilot flame and signals safety shutdown if extinguished; the gas valve controls gas flow and integrates thermostat input to maintain set temperature safely and efficiently.
Major parts of an electric Rheem water heater (elements, thermostats, circuit breaker)
Electric Rheem water heaters depend on a simpler set of components than their gas counterparts: electric heating elements, thermostats, and a dedicated circuit breaker.
Two immersion elements heat water in separate zones; adjustable thermostats control each element and prevent overheating; temperature cutoffs provide safety.
A dedicated circuit breaker isolates the unit, protecting wiring and allowing power shutdown for maintenance or emergency.
Where to find the model and serial number
After identifying the heater’s elements, thermostats, and breaker, locating the model and serial number helps match parts and service instructions to the specific unit.
Rheem units display a metal or vinyl data plate on the tank side or rear, near the top or bottom. For gas models, check the access panel; for electric models, inspect behind lower panels.
Record numbers for warranty and parts.
Preparations Before Turning On Your Rheem Water Heater
Before powering or opening the gas valve, the technician verifies the fuel and electrical supply to guarantee safe operation.
A visual inspection for leaks, corrosion, dents, and loose connections follows, along with confirming the water supply is filled and pressure is within specifications.
Necessary tools and personal protective equipment are gathered so the start-up proceeds without delay.
Verify fuel and power supply (gas line, electricity)
Confirming that the water heater has a reliable fuel and power connection is essential before attempting to start a Rheem unit.
Verify gas supply and pilot availability or confirm electric circuit breakers and wiring are correct. Ascertain shutoff valves are open and no unusual odors exist.
Follow these checks:
- Gas line pressure and valve open
- Breaker on and wiring intact
- Pilot/light ignition functional
Inspect for leaks, corrosion, or physical damage
Inspect the unit and surrounding plumbing for signs of leaks, corrosion, dents, or other physical damage before energizing the Rheem water heater.
Check fittings, valves, T&P discharge pipe, and tank base for moisture, rust, bulges, or loose connections.
Note any compromised components and tag them for repair or replacement.
Do not power the heater if structural integrity is doubtful.
Confirm water supply: filling and pressure checks
One essential step is ensuring the heater is fully filled and supplied at the correct pressure before energizing the unit.
The appliance inlet valve should be opened slowly until the tank fills and water flows from a nearby hot faucet.
Check household water pressure with a gauge (typically 40–60 psi).
Verify no air remains by running hot taps until steady flow is achieved.
Required tools and safety gear
Gather basic tools and appropriate personal protective equipment before powering a Rheem water heater to reduce risk and streamline startup.
A concise kit prevents delays and improves safety during ignition or electrical connection.
Recommended items include:
- Adjustable wrench, screwdriver set, and pliers.
- Safety goggles, gloves, and ear protection.
- Multimeter, gas leak detector, and flashlight.
Step-by-Step: Turning On a Gas Rheem Water Heater
The operator first checks the unit’s instruction label for model-specific guidance and safety notes.
They switch the gas control to OFF and wait the recommended time to clear any residual gas before attempting ignition.
Following the manufacturer’s pilot relight sequence, they set the thermostat to the desired temperature and confirm the burner lights with a steady, blue flame.
Locate and read the instruction label on the unit
Locate the instruction label on the water heater’s outer jacket—usually affixed to the front or side near the control panel—and read it carefully before attempting ignition.
The label lists model-specific warnings, lighting instructions, thermostat settings, and required clearances.
Note any sequence diagrams, pilot lighting procedures, and electrical or gas ratings.
Follow manufacturer details verbatim to guarantee safe, correct operation and warranty compliance.
Turn the gas control to OFF and wait (why this step matters)
Before attempting ignition, the gas control must be set to OFF and allowed to sit for several minutes; this confirms any residual gas in the combustion chamber and supply lines dissipates, reducing the risk of ignition or explosion when the pilot is lit.
Waiting also guarantees accurate pressure conditions for the pilot assembly and prevents false readings or premature faults, improving safety and reliable startup.
Relight the pilot (detailed sequential steps)
After confirming the gas control has been OFF for the prescribed wait period, proceed to relight the pilot following the manufacturer’s sequence.
Turn the control to “Pilot,” depress and hold the pilot button, ignite with the built-in igniter or match per model instructions, continue holding for 30–60 seconds until stable flame appears, then slowly release.
Verify continuous flame before returning the control to its operating position.
Set the gas control to the desired temperature
Set the gas control knob to the desired temperature using the marked temperature dial on the Rheem control panel.
The operator selects a setting—typically between Low, Warm, Hot, and Very Hot or a specific degree marking—then firmly returns the knob to its normal position.
Confirm the pointer aligns with the chosen mark.
Avoid abrupt adjustments; change gradually to prevent scalding and energy waste.
Verify burner ignition and proper flame characteristics
Observe the burner assembly immediately after opening the gas valve to confirm ignition and flame quality.
The flame should be steady, blue, and centered on the burner ports; yellow tipping or lifting indicates adjustment needed.
Note sound, odor, and prompt ignition timing.
Follow these checks:
- Flame color and steadiness
- Flame size and coverage
- Absence of soot or odor
Troubleshooting common pilot and ignition issues
When the pilot won’t light or the burner fails to stay lit, systematic troubleshooting isolates the cause quickly.
Check thermocouple, pilot orifice, and gas supply sequentially; each can prevent ignition. Clean or replace fouled parts, guarantee proper gas pressure, and verify venting.
If unresolved, contact a licensed technician.
Key checks:
- Thermocouple connection
- Pilot orifice cleanliness
- Gas valve and pressure
Step-by-Step: Turning On an Electric Rheem Water Heater
Before any work begins, the electric supply must be confirmed off at the breaker and proper lockout/tagout procedures followed.
The tank should be filled and hot-water lines purged of air before power is restored and thermostats set to the desired temperature.
During the initial heating cycle, the installer should monitor temperature rise, note any abnormal noises or leaks, and consult troubleshooting steps for common electric startup issues.
Confirm circuit breaker and power isolation procedures
Although electrical work can seem straightforward, validating the circuit breaker and power isolation for an electric Rheem water heater is essential for safety and correct startup.
Verify the dedicated breaker is labeled and switched off, lock or tag it if available, and test with a non-contact voltage tester at the heater’s junction box.
Ascertain no residual power before proceeding with any connections or access.
Fill the tank and purge air from hot-water lines
Open the cold-water supply and allow the Rheem tank to fill until water exits a nearby hot faucet, indicating the unit is full and internal air pockets are cleared.
Close the faucet once steady flow appears.
Inspect visible connections for leaks.
Open additional hot fixtures briefly to purge trapped air.
Verify the tank’s pressure relief valve shows no continuous discharge before proceeding to power restoration.
Restore power at the breaker and set thermostat(s)
With the tank full and air purged, restore power at the breaker and set the thermostat(s) to complete activation of the electric Rheem water heater.
Flip the dedicated circuit breaker to ON.
Adjust upper and lower thermostats to the manufacturer-recommended temperature (typically 120°F).
Confirm thermostat tabs are engaged and covers replaced.
Verify no tripped GFCI and test for power at the unit’s indicator lights.
Monitor initial heating cycle and temperature rise
Once power is restored and thermostats are set, monitor the heater’s initial cycle closely to confirm it is drawing current, heating the tank, and rising toward the set temperature without faults.
Observe indicator lights or multimeter readings, listen for element operation, and check tank temperature periodically.
Expect gradual rise; document time-to-temperature and note any unusual noises or persistent indicator warnings for later reference.
Troubleshooting common electric startup problems
If the heater fails to heat, trips breakers, or displays fault indicators during initial startup, a systematic troubleshooting approach isolates the cause quickly.
Check power and breaker, verify thermostat settings, and inspect element continuity. Follow safe procedures and shut power before testing.
Recommended steps:
- Confirm supply voltage and breaker condition.
- Test thermostats and elements with a multimeter.
- Inspect wiring and connections for faults.
Safety Warnings and When to Call a Professional
The section outlines critical safety signs and immediate responses, such as the smell of gas, symptoms of carbon monoxide exposure, and steps to evacuate and ventilate.
It also highlights electrical hazard indicators—sparks, burning smells, or tripped breakers—and advises stopping and disconnecting power.
Finally, it specifies circumstances that require a licensed plumber or HVAC technician, including persistent leaks, pilot assembly failures, or suspected combustion-system faults.
Signs of gas leaks or carbon monoxide risk and immediate actions
A persistent sulfurous odor, hissing near the gas line, yellow or flickering pilot flames, or symptoms such as headaches and dizziness can indicate a gas leak or carbon monoxide presence; these signs require immediate cessation of appliance use, evacuation of the premises, and contacting emergency services or the gas supplier before re-entering.
Follow these steps:
- Evacuate everyone immediately.
- Call 911 or the gas company from a safe location.
- Do not re-enter until cleared by professionals.
Electrical hazard indicators and when to stop
When should power to a Rheem water heater be cut and a professional summoned?
Visible arcing, burning smells, scorch marks, melted insulation, persistent tripping breakers, wet electrical panels, or shock sensations indicate electrical danger.
Immediately shut off power at the breaker and stop attempts to operate or troubleshoot.
Leave inspection, wiring repairs, and component replacement to a qualified electrician to avoid fire, electrocution, or further damage.
Situations requiring licensed plumber or HVAC technician
Several clear situations demand a licensed plumber or HVAC technician rather than DIY efforts: persistent leaks from the tank or fittings, recurring loss of hot water tied to sediment buildup or element failure inside the tank, malfunctioning or corroded pressure-relief valves, gas smell or pilot/light failures on gas models, and noisy operation that suggests internal scale or mechanical wear.
Additional reasons include failed thermostats, repeated tripped breakers, or visible corrosion compromising tank integrity.
Optimal Temperature Settings and Energy Tips
Recommended thermostat settings balance comfort and safety, with 120°F often cited as a good default to reduce scald risk while providing hot water for household use.
Energy can be conserved by insulating the tank and pipes, using timers or vacation modes, and lowering the thermostat a few degrees when full heat is unnecessary.
Because higher temperatures increase scald potential, the article will note mitigation measures such as anti-scald valves and routine temperature checks.
Recommended temperature settings for comfort and safety
What temperature balances safety, comfort, and efficiency for most households? The recommended setting is 120°F (49°C), which reduces scald risk while providing adequate hot water for bathing, washing, and dishes.
Higher settings increase scalding and energy use; lower settings may allow bacterial growth.
Households with vulnerable individuals should consider anti-scald devices and cautious adjustments by a qualified technician.
Energy-saving tips (insulation, timers, lowering thermostat)
A few straightforward measures can substantially reduce a water heater’s energy use: insulating the tank and hot water pipes, installing a timer or smart controller, and lowering the thermostat to 120°F (49°C) or slightly less when appropriate.
Proper insulation minimizes standby heat loss. Timers limit heating to needed periods, and modest thermostat reductions cut fuel or electricity consumption without compromising routine domestic use.
How temperature affects scald risk and mitigation measures
Lowering a water heater’s thermostat to around 120°F (49°C) reduces energy use and also substantially lowers the risk of scalding. Each 10°F increase above that point raises scald severity and shortens the time to cause injury, especially for children, elderly, and those with limited sensation.
- Set thermostat to 120°F for safety and efficiency.
- Install thermostatic mixing valves at fixtures.
- Use anti-scald faucet/shower devices and test regularly.
Maintenance Tasks to Prevent Startup Problems
A concise maintenance routine helps prevent common startup issues with a Rheem water heater.
Recommended tasks include a regular inspection checklist, periodic tank flushing to remove sediment with step-by-step procedure, and checking the anode rod for corrosion or replacement indicators.
The pilot assembly and heating elements should also be inspected and cleaned or serviced as needed to guarantee reliable ignition and operation.
Regular inspection schedule and checklist
Although routine checks may seem minor, a consistent inspection schedule is essential to catch issues that could prevent a Rheem water heater from starting.
Inspect monthly for leaks, corrosion, pilot light or burner condition, and proper venting. Record findings and corrective actions.
Recommended checklist items:
- Visual leak and corrosion check
- Pilot/burner and vent inspection
- Pressure relief valve and connections testing
Flushing the tank to remove sediment (steps)
Flush the tank to remove accumulated sediment that can reduce heating efficiency and cause noisy operation or premature failure.
Shut power/gas, close cold inlet, attach hose to drain valve and direct to safe drain.
Open hot faucet, open drain valve and flush until clear.
Close valve, refill tank, bleed air by opening hot faucet until steady flow, then restore power or gas.
Anode rod inspection and replacement indicators
Sacrificial anode rods protect the tank from corrosion by attracting corrosive elements; regular inspection identifies wear before leaks or premature failure occur.
Inspect annually: remove rod, check for heavy pitting, thinning (less than 1/2 inch), or complete consumption.
Replace if markedly corroded or coated in mineral deposits.
Timely replacement prolongs tank life and reduces risk of interior rust contamination.
Pilot assembly and heating element maintenance tips
After checking and replacing anode rods to prevent tank corrosion, attention should turn to the pilot assembly and heating elements, since ignition and heat transfer failures are common causes of startup problems.
Inspect pilot tubing, thermocouple, and pilot orifice for soot or blockage; clean or replace faulty parts.
For electric models, test elements for continuity, descale and tighten connections to guarantee reliable operation.
Common Problems After Turning On and How to Fix Them
After startup, common issues include no hot water, incorrect temperature, odd noises, and leaks.
The article outlines quick diagnostics for a no-heat condition, checks for thermostat and heating element faults when water is too hot or too cold, and explains typical noise causes with simple remedies.
It also describes immediate containment steps for a leaking unit and options for repair or professional service.
No hot water diagnostic steps
Begin troubleshooting by confirming the basics: verify the water heater has power or a lit pilot, the thermostat is set above the desired temperature, and the gas or circuit breaker supplying the unit is open.
Then inspect for these likely causes:
- Closed cold-water inlet or hot-water outlet valves.
- Tripped breaker or unlit pilot.
- Faulty thermostat or heating element needing testing or replacement.
Water is too hot or too cold thermostat and element checks
Confirming proper thermostat settings and verifying heating elements is the next step when water temperature is incorrect; both can cause water to be too hot or too cold even when the heater otherwise appears to function.
Inspect thermostat setpoint, adjust to 120°F (49°C) or desired level, then test.
For electric units, check elements for continuity and replace faulty ones.
For gas units, verify thermostat/pilot linkage and controls.
Strange noises causes and remedies
Several distinct noises can indicate underlying issues once a Rheem water heater is running: popping or rumbling usually signals sediment buildup on the tank bottom, hissing often points to a leaking or failing pressure-relief valve, while continuous clicking or ticking may come from thermal expansion or a failing heating element.
Diagnosing the sound’s character and source guides the appropriate remedy, such as flushing the tank, replacing valves, or tightening/insulating components.
Routine inspection, timely descaling, element testing and secure pipe supports typically resolve noises; persistent or worsening sounds warrant professional evaluation to prevent damage.
Leaking unit immediate containment and repair options
Address leaks immediately to minimize water damage and assess repair options.
The water supply and power/gas should be shut off, and a bucket placed under the source.
Inspect visible connections: drain valve, pressure relief valve, inlet/outlet fittings and tank seams.
Minor valve leaks may be tightened or replaced; tank leaks require professional replacement.
Document damage for warranty or insurance claims.
Comparison of Gas vs Electric Rheem Startup Considerations
A concise comparison of gas and electric Rheem startup considerations highlights differences in cost, heating speed, safety, and maintenance that affect user choice. Below is a quick reference table summarizing key contrasts to guide initial setup and expectations. Readers should weigh upfront and long-term costs, recovery time, safety requirements, and routine service needs before starting either system.
| Aspect | Gas vs Electric Considerations |
|---|---|
| Cost | Gas often has higher installation cost but lower operating cost in some regions |
| Speed of heating | Gas typically provides faster recovery; electric may be slower but steady |
| Safety | Gas requires venting and leak checks; electric avoids combustion risks |
| Maintenance | Gas needs burner and vent inspection; electric needs element and thermostat checks |
| Startup complexity | Gas may require pilot/ignition and gas-supply verification; electric mainly involves power and thermostat settings |
Cost, speed of heating, safety, maintenance differences
Cost, heating speed, safety profiles, and maintenance demands differ notably between gas and electric Rheem water heaters, and these factors should guide startup choices. Gas heats faster and costs vary with fuel; electric is simpler, safer, and often cheaper upfront. Regular vent/combustion checks for gas; element inspections for electric. Choose based on efficiency, local utility rates, and service access.
| Factor | Implication |
|---|---|
| Cost | Fuel vs electricity operating costs |
| Speed | Gas faster; electric slower |
| Safety | Gas needs venting; electric less risk |
| Maintenance | Gas: burner/vent checks; Electric: element/tank checks |
Quick Reference: Checklist and Troubleshooting Flowchart
A concise, printable startup checklist is provided to confirm power/fuel, valves, pilot/ignition, and safety settings before first use.
A stepwise troubleshooting flowchart follows for fast diagnosis of common startup problems, guiding the reader through symptoms to likely causes and next actions.
Together they serve as a quick-reference pair for safe, efficient commissioning and problem resolution.
Startup checklist you can print
Before powering the unit, the checklist provides a concise sequence of visual inspections, valve positions, and electrical or gas verifications to guarantee safe startup.
A printable one-page checklist lists items for quick pre-start confirmation and a space for technician initials.
Useful elements include:
- Visual inspection: leaks, vents, combustion area clear
- Valves: water supply, temperature-pressure relief
- Power/gas: breaker on or gas line open
Stepwise troubleshooting flowchart for fast diagnosis
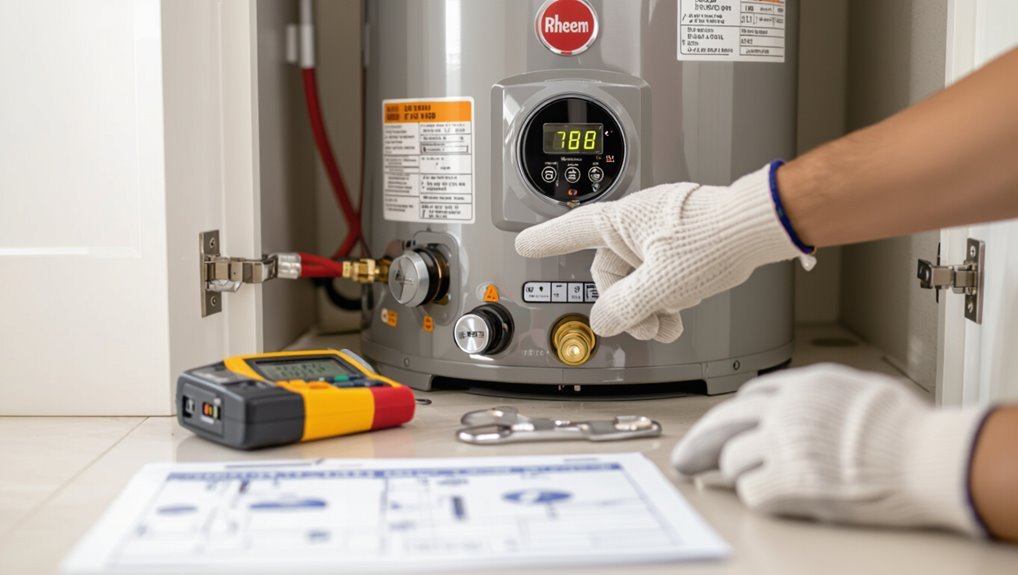
Begin with a clear, linear flow that guides technicians from symptom to solution: the stepwise troubleshooting flowchart condenses common faults into decision nodes—such as no heat, pilot out, or leak—and maps each to targeted checks and corrective actions.
It presents concise yes/no branches: verify power/gas, inspect pilot/igniter, test thermostat and elements, check valves and drain, isolate leak sources, then recommend repair or parts replacement.
Conclusion
Turning on a Rheem water heater, whether gas or electric, restores warmth like flipping a sunrise switch—simple yet essential. After confirming fuel or power, valve positions, and safety checks, follow model-specific ignition or circuit steps. Routine maintenance and prompt troubleshooting keep the system humming. With care and correct sequence, the appliance moves from cold silence to steady warmth, reliably delivering hot water and peace of mind to the household.