
How to Repair Water Heater: Step-by-Step Fixes for Leaks, No Hot Water, and Strange Noises
This guide offers clear solutions for common water heater problems, such as leaks, lack of hot water, and unusual noises. Start by prioritizing safety: turn off power or gas, drain or depressurize the tank, and wear protective gear. Troubleshooting involves checking fittings, valves, thermostats, pilot lights, and heating elements. Repairs may include tightening fittings, replacing valves, flushing sediment, or swapping out thermostats or heating elements. For significant tank breaches, contact a licensed plumber. Follow along for detailed step-by-step instructions, necessary tools, and advice on when to seek professional help.
How to Repair a Water Heater: Quick Overview and When to Call a Pro
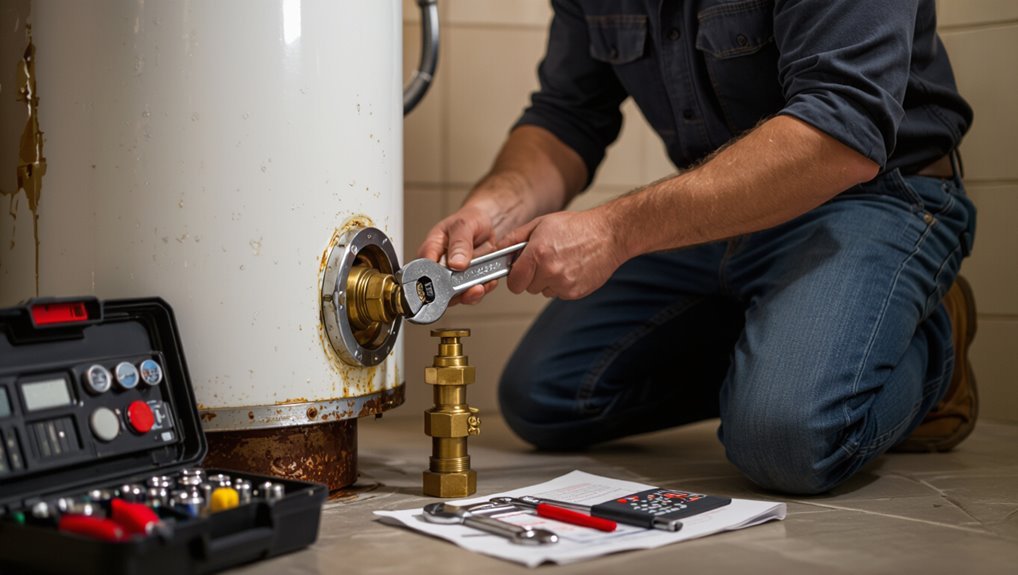
The section outlines common signs that a homeowner can address—such as a faulty thermostat, minor leaks at fittings, or sediment buildup—versus indications that require a professional, like gas smells, major leaks, or electrical faults.
It also summarizes essential safety steps to complete before any work, including shutting off power and water and testing for gas.
Additionally, it provides a concise tools-and-materials checklist for typical repairs.
Readers are guided to assess risk and call a licensed technician when hazards or complex systems are present.
Common signs you can fix versus signs needing professional service
Many household water heater issues are straightforward enough for a competent DIYer to handle, while others require a licensed technician to guarantee safety and code compliance.
Signs amenable to DIY include minor leaks at fittings, thermostat resets, sediment flushing and pilot relighting—core aspects of how to repair water heater.
Call a pro for gas smell, tank rupture, complex wiring or repeated failures.
Safety precautions before any repair
Before any work begins, power and fuel sources must be fully isolated and confirmed off to prevent electrocution, fire, or explosion.
The technician should verify isolation with appropriate testers, depressurize the tank, and drain as required.
Adequate ventilation, protective gloves and eyewear, and clear work area protocols reduce injury risk.
If uncertainty exists, a licensed professional must be contacted immediately.
Tools and materials checklist
Once power and fuel have been verified off and the tank is depressurized, attention turns to assembling the tools and materials needed for common water heater repairs.
Essential items include wrenches, replacement valves, and a multimeter.
A basic checklist:
- Adjustable wrench, pipe wrench, channel locks
- Replacement T&P valve, drain valve, sacrificial anode
- Multimeter, flashlight, plumber’s tape, gloves, bucket
Understanding How Water Heaters Work
Residential water heaters come in several types—tank, tankless, and hybrid—each using different methods to heat and deliver water.
Key components such as the tank (when present), heating element or burner, thermostat, temperature-and-pressure valve, anode rod, dip tube, and drain valve perform specific roles that affect performance and maintenance.
Typical lifespans vary by type and materials, with common failures including corrosion of the tank or anode rod, heating element or burner failure, and thermostat or valve malfunctions.
Types of residential water heaters (tank, tankless, hybrid)
Home water heating systems come in three common configurations—storage-tank, tankless (on-demand), and hybrid (heat pump) units—each using different methods to heat and deliver hot water and offering distinct trade-offs in cost, efficiency, and installation.
- Storage-tank: simple, lower upfront cost, limited supply.
- Tankless: compact, energy-efficient, higher install cost.
- Hybrid: very efficient for moderate climates, higher initial price but lower operating cost.
Core components and their functions (tank, heating element/burner, thermostat, T&P valve, anode rod, dip tube, drain valve)
A water heater consists of several essential parts that work together to store, heat, control, and safely deliver hot water.
The tank stores water; heating element or burner raises temperature; thermostat regulates setpoint; temperature-and-pressure (T&P) valve prevents overpressure; anode rod reduces corrosion; dip tube directs cold inlet to tank bottom; drain valve allows sediment flushing and draining for maintenance.
Typical lifespan and common failure points
Many water heaters last roughly 8–12 years, though actual lifespan varies with type, quality, installation, and maintenance; key failure points include tank corrosion and leaks, sediment buildup, thermostat or heating-element burnout, T&P valve failure, and degraded anode rods.
Regular inspection, flushing, and anode replacement extend service life.
Electric units face element failure; gas units suffer burner or vent issues.
Replace tanks when corrosion breaches insulation.
Diagnosing the Problem: Step-by-Step Troubleshooting
The technician begins by categorizing the symptom as a leak, lack of hot water, or unusual noises to narrow the cause.
External connections, valves, and fittings are inspected first, followed by checks for internal tank leaks or corrosion.
Power or gas supply, thermostat and heating element or burner are tested for no-heat cases, while sediment, thermal expansion, and loose parts are evaluated as noise sources.
How to determine if issue is leak, no hot water, or strange noises
How can one quickly tell whether a water heater problem stems from a leak, lack of hot water, or unusual noises?
A rapid assessment notes symptoms: visible pooling or dampness indicates leakage; consistently cold or fluctuating supply points to heating failure, thermostat, or fuel/element issues; rumbling, ticking, or popping suggests sediment buildup or thermal expansion.
Prioritize safety: shut power/gas before deeper checks.
Inspecting for external leaks (connections, valves, fittings)
Begin by visually examining all external connections—supply lines, drain valve, pressure relief valve, and any threaded fittings—for signs of moisture, corrosion, mineral buildup, or wetness on adjacent floors and insulation.
Tighten loose fittings, replace deteriorated flexible connectors, and verify the drain valve seats properly.
Check for weeping at soldered joints and around isolation valves; note locations and severity for repair or replacement.
Checking for internal tank leaks and signs of corrosion
After external connections have been inspected and obvious repairs addressed, attention shifts to the tank itself to determine whether leaks or internal corrosion are present.
The technician examines the tank base, seams, and welds for wetness, rust streaks, or blistering paint.
Probing anode rod condition and checking interior via the drain valve reveal perforation risks; pervasive corrosion typically mandates tank replacement.
Testing for no hot water (power/gas supply, thermostat, heating element/burner)
When a water heater produces no hot water, systematic testing isolates whether the issue lies with the power or gas supply, the thermostat, or the heating element/burner.
Verify electrical feed and reset breakers; confirm pilot light and gas valve for gas units.
Measure thermostat settings and continuity.
Test electric elements for resistance or replace faulty burners/thermostats.
Document findings before replacing parts.
Identifying noise sources (sediment, thermal expansion, loose parts)
Listen for clues that pinpoint the source of a noisy water heater: popping or rumbling often indicates sediment buildup on the tank bottom.
Ticking or pinging can signal thermal expansion of metal components or nearby piping.
Rattling suggests loose fittings, heating elements, or mounting hardware.
Inspect anode rod and drain for sediment, tighten connections, secure insulation, and test temperature settings to isolate and resolve the noise.
Fixing Leaks: Targeted Repairs
The section explains targeted repairs for common leak sources, beginning with tightening or replacing pipe connections and fittings and addressing a faulty drain valve.
It then covers diagnosing and correcting leaks from the temperature-and-pressure relief valve.
Finally, it outlines when a leaking tank requires replacement rather than repair and the interim steps to minimize water damage.
Repairing leaks at pipe connections and fittings
Start by isolating the source: inspect pipe connections, unions, threaded fittings, and sweat joints around the tank to pinpoint dripping or seepage.
Tighten loose fittings, replace degraded washers or packing, and reapply thread sealant or PTFE tape on disassembled threads.
For soldered joints, cut out and re-sweat or install a compression coupler.
Retest under pressure and check for recurrence.
Replacing or repairing the drain valve
Inspecting the drain valve is the next step when leaks persist at the tank’s lowest point: a failing valve, cracked plastic body, or loose packing can allow steady seepage or sudden drips.
Shut off power and water, attach a hose, drain enough to access the valve, then tighten packing, replace the washer, or remove and install a new brass valve.
Test for leaks.
Addressing leaks from the temperature & pressure (T&P) relief valve
Check the temperature-and-pressure (T&P) relief valve when water is escaping near the top or side of the tank, since a faulty valve or trapped debris often causes persistent dripping or sudden discharges.
Inspect the discharge pipe, lift the lever to flush debris, replace a corroded or leaking valve with the correct pressure-rated part, and retest to verify proper operation and no further leakage.
What to do if the tank itself is leaking
If water is escaping from the tank body rather than a fitting or relief valve, the situation is more serious and usually requires faster action.
The tank is corroded or cracked; repair is temporary at best.
Turn off power and water, drain the tank, and contact a licensed plumber.
Replace the heater promptly to prevent flooding, structural damage, or contamination.
Fixing No Hot Water: Electric and Gas Models
When a water heater stops producing hot water, troubleshooting follows different paths for electric and gas units.
For electric models, the focus is on tripped breakers, faulty thermostats, or failed heating elements and how to test or replace them.
For gas units, the checks target pilot light or ignition issues, burner and thermocouple condition, and correct thermostat and temperature settings.
Electric water heaters resetting breaker and testing thermostat/heating elements
A common cause of sudden loss of hot water in electric heaters is a tripping circuit breaker or a failed thermostat/heating element; diagnosing these components methodically isolates electrical faults from heating failures.
Begin by confirming power at the panel, resetting breakers, and checking for blown fuses.
Use a multimeter to verify voltage at the heater, inspect thermostat continuity, and look for signs of overheating or corrosion without attempting element replacement here.
How to test and replace electric heating elements
Begin by cutting power to the water heater at the breaker and confirming zero voltage at the access panel; safety comes first because testing and replacing elements require direct electrical and plumbing access.
Drain enough water below the element, remove cover and insulation, test element continuity with a multimeter, replace faulty element, reseal with new gasket, refill tank, restore power, check for leaks and proper heat.
Gas water heaters checking pilot light and ignition system
If the tankless or storage gas water heater fails to produce hot water, the pilot light and ignition system are the primary areas to inspect first; these components control flame initiation and sustained burner operation.
Technicians should verify pilot presence, check the ignition spark or thermopile voltage, confirm gas supply and valve positions, and test safety switches.
Replace faulty igniters or control modules per manufacturer instructions.
Cleaning/servicing gas burners and thermocouples
Inspecting and servicing gas burners and thermocouples restores reliable ignition and efficient combustion in gas water heaters.
Technicians shut gas, remove burner assembly, brush or vacuum soot and corrosion, and clean or replace clogged orifices.
The thermocouple is inspected for damage, cleaned with fine emery, and tested for millivolt output; faulty units are replaced.
Reassemble, leak-test, and confirm stable flame and operation.
Resetting and adjusting thermostats and temperature settings
Resetting and adjusting a water heater’s thermostat and temperature settings is a common and effective step when diagnosing no-hot-water complaints for both electric and gas units.
Technicians inspect thermostat continuity, reset high-limit switches, and verify dip-switch positions or digital settings.
For electric models, power must be cut before access; for gas, confirm pilot operation.
Adjust to 120°F, test, and document results.
Eliminating Strange Noises and Improving Efficiency
To address strange noises and restore efficiency, the technician recommends flushing the tank to remove sediment and replacing a worn anode rod to cut corrosion-related sounds.
Rumbling, popping, and knocking often indicate trapped sediment or heat-trap issues and should be inspected and cleared.
Adding insulation and performing regular maintenance will improve performance and extend the heater’s service life.
Flushing the tank to remove sediment
Flushing the water heater tank removes accumulated sediment that causes popping noises, reduces heating efficiency, and can shorten the appliance’s lifespan.
A routine flush improves heat transfer and prevents clogging. Steps typically include:
- Turn off power and water supply.
- Attach a hose to the drain valve and open it to purge sediment.
- Refill, restore supply, and check for leaks.
Replacing the anode rod to reduce corrosion and noise
After the tank has been flushed to remove sediment, attention should turn to the anode rod, a sacrificial metal core that prevents tank corrosion and can be a source of rumbling or knocking as it degrades.
Inspect the rod for heavy pitting or replacement-level wear. Shut off power and water, extract the rod with a suitable socket and breaker bar, and install a new compatible rod, sealing connections properly.
Addressing rumbling, popping, and knocking sounds
Investigate rumbling, popping, and knocking sounds promptly, as they often indicate sediment buildup, trapped steam, or a failing heating element that reduce efficiency and shorten tank life.
Drain and flush the tank to remove sediment, check and replace a deteriorated heating element, and inspect dip tubes for damage.
Confirm proper burner operation on gas models and tighten loose plumbing or mounting straps causing vibration.
Insulation and maintenance to improve performance
Once sediment, faulty elements, or loose fittings have been addressed, attention turns to insulation and routine maintenance to silence lingering noises and boost efficiency.
Adding a jacket, insulating hot and cold pipes, and sealing drafts reduces heat loss.
Schedule annual flushes, check the anode rod, tighten fittings, and test pressure relief valves.
Consistent maintenance prolongs lifespan and lowers energy costs.
Parts Replacement: When and How to Replace Key Components
This section outlines when key water heater components require replacement and how to perform those repairs safely.
It covers thermostats and temperature sensors, step-by-step safety checks for replacing electric heating elements, and replacement of dip tubes, anode rods (including sacrificial anodes), the temperature-and-pressure relief valve, and the drain valve.
Clear signs of failure, required tools, and basic procedures are summarized to guide a competent DIYer or inform a technician.
Replacing thermostats and temperature sensors
Diagnose thermostat and temperature sensor issues by first confirming symptoms such as fluctuating water temperatures, inability to reach set temperature, or complete lack of heat.
These signs often indicate a failed thermostat or sensor rather than a tank or element problem.
Power off unit, verify electrical connections, test component continuity with a multimeter, replace faulty thermostat or sensor with OEM parts, restore power and verify proper operation.
Replacing heating elements (electric) with step-by-step safety checks
Begin by cutting power to the electric water heater at the breaker and confirming absence of voltage at the element terminals with a multimeter; safety checks precede any component removal.
Drain enough water, isolate and label wiring, then loosen the element with an element wrench.
Remove old gasket, fit new element and gasket, tighten, reconnect wiring, refill tank, purge air, restore power, and test for leaks and proper heating.
Replacing dip tube, anode rod, and sacrificial anode
Identify worn internal parts promptly: the dip tube, anode rod, and sacrificial anode each play distinct roles—directing cold water to the tank bottom and protecting the tank from corrosion—and should be inspected and replaced when leaking, flaking, delivering rusty water, producing frequent corrosion or low hot-water volume, or after the manufacturer’s recommended interval (typically 3–7 years for anodes; dip tubes vary).
Replace with compatible parts, shut off power and water, drain, unscrew old components, install new units using proper fittings and anti-seize, refill, restore power, and check for leaks and normal operation.
Replacing the T&P relief valve and drain valve
Replace the temperature-and-pressure (T&P) relief valve and the drain valve when they leak, fail to open under overpressure, corrode, or show signs of blockage, since both are critical for safe operation and routine maintenance.
Drain the tank, relieve pressure, then unscrew and replace valves with compatible, rated parts.
Test the T&P operation and check for leaks after refilling and repressurizing.
Preventative Maintenance Schedule and Checklist
A clear preventative maintenance schedule outlines monthly and annual tasks to keep a water heater reliable and efficient.
It should cover regular tank flushing and inspection, routine testing and timely replacement of the anode rod, and measures to prevent freezing, corrosion, and scaling.
A concise checklist helps prioritize actions, set intervals, and record performed maintenance.
Monthly and annual maintenance tasks
Begin a routine of monthly and annual checks to preserve performance, extend service life, and reduce the risk of failures.
- Monthly: inspect visible fittings, pressure relief valve operation, and check for dampness or corrosion.
- Quarterly: test thermostat settings, monitor pilot or ignition, and verify adequate ventilation.
- Annually: have a licensed technician perform full inspection, safety tests, and replace sacrificial anode if needed.
How to flush and inspect the tank regularly
Regularly flushing and inspecting the water heater tank prevents sediment buildup, improves efficiency, and reveals early signs of corrosion or leaks.
A quarterly flush is recommended: shut power/gas, attach hose to drain valve, drain until clear, then refill.
Inspect fittings, pressure relief valve operation, and exterior for rust or wetness.
Record date, observations, and any corrective actions for the maintenance log.
When to test and replace the anode rod
Following the tank flush and inspection, attention should turn to the anode rod, which protects the heater from corrosion by sacrificing itself to attract corrosive elements.
Test annually by measuring rod thickness or visual condition; replace when heavily corroded, less than half original diameter, or coated in mineral buildup.
Replace sooner in soft or aggressive water.
Record dates and observations in the maintenance log.
Tips to prevent freezing, corrosion, and scaling
When temperatures dip or water quality threatens longevity, a concise preventative schedule helps avert freezing, corrosion, and scaling: inspect insulation, add pipe heat tape, and maintain 120°F thermostat settings;
flush the tank annually to remove sediment;
check and replace the anode rod every 3–5 years;
monitor water hardness and install a softener or descaler as needed;
document dates and actions in a checklist.
Cost Estimates and When Replacement Is Better Than Repair
Typical repair costs for common issues such as thermostats, heating elements, and pressure-relief valves are outlined to help homeowners gauge expenses.
Indicators that replacement is more economical—age over 8–12 years, repeated failures, major tank leaks, or repair costs approaching half the price of a new unit—are summarized.
Guidance on selecting a replacement covers appropriate capacity, choice of tank vs. tankless or heat-pump types, and efficiency ratings to match household needs and long-term savings.
Typical repair cost ranges for common fixes
Repair costs for common water-heater issues vary widely depending on the problem, unit type, and local labor rates. Typical ranges: minor parts or thermostat $75–$250, element replacement $100–$300, valve or leak repairs $150–$400. Below is a concise comparison.
| Issue | Typical Cost | Notes |
|---|---|---|
| Thermostat/Controls | $75–$250 | Quick fix |
| Heating Element | $100–$300 | Electric only |
| Pressure/Relief Valve | $150–$350 | Safety part |
| Tank Leak Repair | $200–$500+ | May signal replacement necessity |
Signs that indicate replacement is more economical
How can a homeowner tell whether fixing a water heater is worth the expense?
Age over 10–15 years, repeated failures, major component failure (tank, heat exchanger), rising repair frequency and cost approaching replacement price, significant corrosion or leaks, poor efficiency causing high energy bills, and inability to meet household hot-water demands all indicate replacement is more economical than continued repairs.
How to choose a replacement water heater (size, type, efficiency)
Which water heater will meet a household’s needs depends on three primary factors: tank capacity or flow rate, fuel and technology type, and energy efficiency.
Select capacity by household size and peak demand; choose fuel (electric, gas, propane) and technology (tank, tankless, hybrid) for site compatibility and recovery needs; prioritize ENERGY STAR-rated units for lower operating costs.
Include installation and permit estimates when budgeting.
Safety and Compliance Considerations
Repairing a water heater requires strict attention to gas lines and electrical connections to prevent leaks, shocks, or fires.
Proper compliance with local building codes, permits, and regulations for disposal of old units is essential to avoid fines and guarantee safe removal.
Environmental considerations, including energy-efficiency incentives for upgrades, should be weighed when deciding between repair and replacement.
Handling gas lines and electrical connections safely
Exercise extreme caution when working near gas lines or electrical connections for a water heater: both systems present immediate shock, fire, and explosion hazards and demand strict adherence to local codes and manufacturer instructions.
Shut off power and gas at source, verify with a tester, ventilate the area, use proper tools and rated connectors, and consult a licensed plumber or electrician for any unfamiliar or complex repairs.
Local codes, permits, and disposal of old units
After securing gas and electrical connections and confirming systems are inert, attention must turn to compliance: local building codes and permit requirements often dictate how water heater work may proceed and how old units must be handled.
Contractors or homeowners should verify permit needs, follow installation and venting standards, and arrange approved disposal or recycling of tanks per municipality rules to avoid fines and liability.
Environmental considerations and energy-efficiency incentives
While ensuring code compliance and safe disposal, consideration should also be given to environmental impacts and opportunities to improve efficiency:
The guide highlights reducing standby losses, insulating pipes and tanks, and selecting low-NOx or high-efficiency replacement units.
It recommends recycling old components, checking local rebates or tax credits for efficient models, and documenting upgrades to qualify for utility incentives and lower long-term operating costs.
Troubleshooting Examples and Real-World Scenarios
The section presents three practical troubleshooting scenarios that illustrate common water heater faults and their fixes.
Case 1 covers diagnosing and resolving intermittent heating with a step‑by‑step approach.
Case 2 shows a quick repair for a slow drain‑valve leak.
Case 3 explains sediment removal and necessary follow‑up checks for loud rumbling.
Case 1: Intermittent heating Step-by-step diagnosis and fix
Diagnose intermittent heating by isolating variables and testing components in a logical sequence: confirm fuel or power supply stability, inspect thermostats and controls for erratic behavior, test heating elements or burners for consistent operation, and check for thermal cutoffs or cycling caused by sediment buildup or restricted flow.
Document findings, replace faulty thermostats/elements, flush tank to remove sediment, and verify stable operation under varied loads.
Case 2: Slow leak at drain valve Quick repair walkthrough
After confirming that intermittent heating is not the source of water loss, attention turns to a slow leak at the drain valve.
The technician shuts off power and water, opens a nearby hot tap to relieve pressure, places a bucket, then tightens or replaces the valve packing.
If corrosion or damage exists, the valve is replaced.
Finally, water is restored and the repair is checked for leaks.
Case 3: Loud rumbling Sediment removal and follow-up checks
Investigating a loud rumbling begins with recognizing that trapped sediment in the tank often causes noise and reduced efficiency.
The technician drains and flushes the tank, agitating deposits and clearing the outlet until water runs clear.
After refilling, they inspect the anode rod, test burner or heating elements, verify thermostat settings, and monitor operation to confirm noise elimination and restored performance.
Further Resources and Tools
A brief list of recommended spare parts and trusted replacement brands helps readers prepare for common repairs.
Links to concise video tutorials and manufacturer manuals provide step-by-step guidance and model-specific specs.
Clear criteria for when to contact a licensed plumber or HVAC technician outline safety, warranty, and complexity thresholds.
Recommended spare parts and replacement brands
Spare parts for water heaters fall into several clear categories—anode rods, thermostats, heating elements, pressure-relief valves, and sacrificial or magnesium liners—and choosing reliable replacements reduces long-term cost and failure risk.
Trusted brands include AO Smith, Rheem, and Bradford White for tanks; Emerson and Honeywell for thermostats; and DuraHeat or Titan for elements.
- AO Smith
- Rheem
- Bradford White
Video tutorials and manufacturer manuals
Many online video tutorials and manufacturer manuals offer step-by-step guidance for common water heater repairs, combining visual demonstrations with safety cautions and model-specific procedures.
Users can compare official manuals for torque specs, wiring diagrams, and part numbers with independent videos that show teardown and reassembly techniques.
Verify publication dates, match model numbers, and prefer sources that cite safety standards and original manufacturer procedures.
When to contact a licensed plumber or HVAC technician
After reviewing video tutorials and manufacturer manuals, homeowners should recognize limits of DIY and know when professional intervention is required.
Seek a licensed plumber or HVAC technician for gas leaks, persistent pressure or temperature issues, major tank corrosion, electrical faults, or failed pilot/ignition systems.
Also call professionals when local codes, permits, or warranty terms require certified service to guarantee safety and compliance.
Conclusion
To sum up, the guide equips readers with practical steps to diagnose and repair common water heater issues, while emphasizing safety and when to call a professional. As the adage goes, “an ounce of prevention is worth a pound of cure,” underscoring routine maintenance to avoid bigger failures. With clear repair options, cost considerations, and compliance reminders, users can make informed decisions—choosing repair or replacement based on age, damage, and long‑term value.

