How to Relight a Gas Fireplace Pilot Light Safely: Step-by-Step Guide
To safely relight a gas fireplace pilot light, start by ensuring there’s no gas odor and ventilate the area. Make sure smoke and carbon monoxide detectors are functioning. Turn off the gas supply and wait a few minutes. Then, set the valve to PILOT, press the control knob, and ignite the pilot using a long lighter or match. Hold the knob until the flame stays lit, then release it and turn the valve to ON. Check for any damage or issues if the pilot light goes out again; further safety checks are included in the guide.
How to Relight a Gas Fireplace Pilot Light Safely: Quick Overview
The section outlines when a homeowner can safely relight a pilot—such as after routine outages or following the manufacturer’s reset procedure—and when to stop and call a qualified technician, for example with suspected gas leaks or recurring failures.
It lists basic tools and safety equipment like a long-reach lighter, screwdriver, and a carbon monoxide detector or gas-sensing equipment.
It also summarizes common pilot types (standing, intermittent) and ignition methods (manual match/lighter, piezo, electronic spark) to guide correct procedures.
When to relight the pilot light and when to call a professional
When should a homeowner attempt to relight a gas fireplace pilot versus call a professional?
A homeowner may follow basic how to relight a gas fireplace pilot light steps after verifying no gas smell, obvious damage, or persistent outages.
Call a professional if the pilot won’t stay lit, there’s a gas odor, frequent failures, suspected valve or thermocouple issues, or after recent appliance changes or repairs.
Required tools and safety equipment
Several basic items and a few safety-specific pieces of equipment are essential before attempting to relight a gas fireplace pilot.
Required tools typically include a long lighter or match, a flashlight, and pliers or a screwdriver for access panels.
Safety equipment should consist of a carbon monoxide detector, a fire extinguisher rated for gas fires, and protective gloves and eye protection.
Typical pilot light types and common ignition methods
Many gas fireplaces use one of a few standard pilot setups—standing (open) pilot, electronic ignition with a pilot, or direct spark/automatic ignition—each requiring a different relighting approach.
Standing pilots are manually lit; electronic pilots use a thermocouple or thermopile and an ignition module; direct spark systems ignite automatically when the main valve opens.
Identify type before attempting relight and follow specific manufacturer instructions.
Safety Precautions Before You Begin
Before attempting to relight the pilot, the gas supply and fireplace controls should be turned off to eliminate immediate ignition risks.
The room should be ventilated and checked for any gas odor, while the appliance and burner area are inspected for visible damage or blockages.
Additionally, carbon monoxide detectors and smoke alarms must be verified as operational before proceeding.
Shut off the gas supply and turn off fireplace controls
Shut off the gas supply and power to the fireplace to eliminate the risk of accidental ignition while working on the pilot.
The valve at the appliance or main gas line should be closed, and any electrical switches, igniters, and blowers turned off.
Confirm controls are in the “off” position and wait a few minutes to verify no residual flow before proceeding.
Ventilate the room and check for gas odor
If a gas smell is present or suspected, increase ventilation immediately by opening windows and doors and turning off any fans that might spread fumes through the house.
The person should step outside, avoid creating sparks (no phones or lighters), and do not attempt ignition.
Wait several minutes for odor to dissipate.
If smell persists, contact the gas utility or a qualified technician before proceeding.
Inspect the fireplace for visible damage or blockages
Carefully examine the fireplace interior, pilot assembly, and venting pathways for cracks, corrosion, loose components, debris, bird nests, or soot buildup that could impede operation or pose a hazard.
Note damaged seals, warped metal, or obstructed flues. If any structural defects, severe corrosion, or persistent blockages are found, stop and contact a qualified technician rather than attempting repairs.
Safety checks for carbon monoxide detectors and working smoke alarms
Before attempting to relight the pilot, confirm that carbon monoxide (CO) detectors and smoke alarms in the home are functioning and positioned correctly, because working sensors are the primary early-warning defense against invisible combustion hazards.
Test each detector per manufacturer instructions, replace batteries if needed, verify placement near sleeping areas and the fireplace, and replace any unit older than its recommended service life.
Identify Your Fireplace and Pilot Assembly
The reader should first locate the pilot assembly, gas valve, and control knob to understand the fireplace’s control layout.
They should determine whether the unit uses a standing pilot or an electronic ignition, since relighting procedures differ.
Visible signs such as a weak or yellow pilot flame, corrosion, or a bent thermocouple can indicate a faulty pilot or thermocouple.
Locate the pilot assembly, gas valve, and control knob
A quick visual inspection reveals the pilot assembly, gas valve, and control knob as distinct components: the pilot assembly sits near the burner with a small metal tube and thermocouple.
The gas valve is a larger box or knob-mounted unit supplying gas, and the control knob (often labeled ON/PILOT/OFF) protrudes from the valve or nearby.
Note any labels, wiring, or access panels before proceeding.
Identify standing pilot vs. electronic ignition systems
With the pilot assembly, gas valve, and control knob located, the next step is to determine whether the fireplace uses a standing pilot or an electronic ignition system.
A standing pilot has a continuously burning small flame and a manual pilot knob; electronic ignition lights only when the thermostat calls for heat and uses spark or hot surface igniters, often paired with a battery or control module.
Visual cues that indicate a faulty pilot or thermocouple
Signs of a failing pilot assembly or thermocouple often appear as inconsistent flame behavior, ignition difficulties, or unusual odors near the burner.
Visual indicators include a weak, flickering, or yellowish pilot flame; soot or corrosion on the pilot tube or thermocouple; loose or disconnected wiring; and visible bends or damage to the thermocouple rod.
Prompt replacement prevents shutdowns and unsafe leaks.
Step-by-Step: Relighting a Standing Pilot (Manual Ignition)
The process begins by preparing the area and turning the gas valve to OFF, then waiting the recommended time before proceeding.
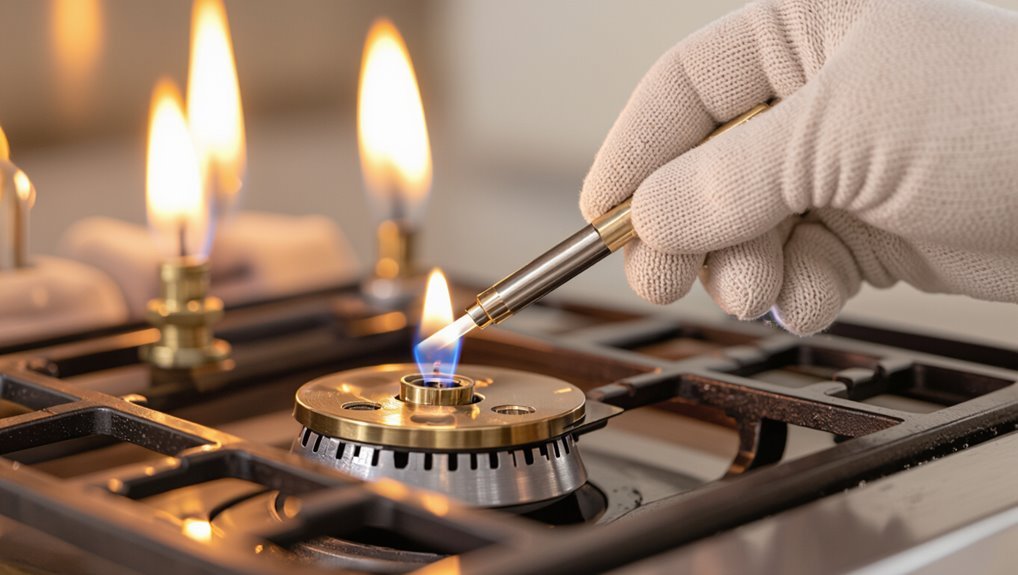
Next, the valve is set to PILOT while the control knob is depressed and the pilot is lit with a long lighter or match, holding it until the flame is established.
After releasing the knob to confirm the pilot remains lit, the valve is returned to ON and the main burner is tested.
Step 1 Prepare and set the gas valve to OFF and wait
Shut off the fireplace’s gas supply at the valve and allow several minutes for any residual gas to disperse before proceeding.
The user should verify the valve is fully in the OFF position, keep the area ventilated, and avoid open flames or sparks.
Inspect for obvious gas odor; if detected, evacuate, ventilate, and contact the gas company.
Proceed only when no smell remains.
Step 2 Set valve to PILOT and depress the control knob
Move the control knob to the PILOT position and press it down firmly to allow gas to flow to the pilot assembly; maintaining pressure prevents the safety thermocouple from closing the gas line while ignition is attempted.
The person should keep the knob depressed for the entire lighting sequence and for a short burn-after period to guarantee the thermocouple heats and registers, then release slowly to verify pilot stays lit.
Step 3 Light the pilot with a long lighter or match and hold
Ignite a long-reach lighter or strike a long match and bring the flame carefully to the pilot opening while keeping the control knob fully depressed; apply the flame directly to the pilot until the gas ignites.
Observe the pilot flame—steady, blue, and centered. Maintain depression of the control knob for the required interval specified by the appliance.
If ignition fails after several attempts, stop and ventilate.
Step 4 Release the knob and confirm pilot stays lit
Release the control knob slowly and watch the pilot to guarantee the flame remains steady and centered.
If the flame stays lit, the pilot is properly seated; if it dims or extinguishes, repeat ignition steps after waiting several minutes for gas to dissipate.
Note any irregular flicker, yellow coloring, or sputtering—these indicate venting, dirt, or a faulty thermocouple requiring inspection or professional service.
Step 5 Set the valve to ON and test the main burner
With the pilot confirmed steady, turn the control knob fully to the ON position to allow gas to flow to the main burner and then engage the main gas valve or switch per the manufacturer’s instructions.
Observe ignition; burner flames should establish evenly along the burner ports.
If ignition is delayed, shut off gas, wait five minutes, and repeat.
Do not force operation if irregular.
Step-by-Step: Relighting an Electronic Ignition Pilot
For electronic ignition systems, relighting begins with a power cycle and confirming the gas supply is off.
The technician then follows the spark-ignition reset procedure and the manufacturer’s specific sequence to re-establish the pilot.
If ignition fails, common faults such as continuous clicking or lack of spark are diagnosed and addressed.
Step 1 Power cycle the fireplace and turn off gas
Begin by cutting power to the fireplace and shutting off the gas supply to guarantee the system is safe to work on.
Verify both electrical disconnect and gas shutoff at the valve. Wait several minutes for residual gas to clear. Confirm no smell of gas before proceeding.
Use manufacturer’s service switch or breaker; do not attempt ignition while power or gas remains connected.
Step 2 Reset procedure for spark ignition systems
Proceed to the reset sequence specific to spark ignition systems, which clears electronic faults and primes the pilot circuit for relight.
Locate the reset or control module, typically near the gas valve.
Follow manufacturer markings: press and hold the reset button for the specified seconds, or cycle power to the module if no button exists.
Observe indicator lights for normal status before attempting ignition.
Step 3 Re-establish pilot using manufacturer-specific sequence
With the control module reset and indicator lights showing normal status, the next step is to re-establish the pilot using the exact sequence specified by the fireplace manufacturer.
Follow the manual’s button‑press timing: hold the pilot or ignition button, observe the spark or glow, then release per instructions.
Confirm steady flame size and thermocouple/sensor response before restoring full valve operation.
Step 4 Troubleshooting common ignition faults (clicking/no spark)
Address common ignition issues by systematically isolating causes when the pilot module clicks but no spark appears.
Inspect electrode gap, corrosion, or soot; clean or replace the electrode per manufacturer guidance.
Verify wiring and secure connectors, test the igniter with a multimeter, and confirm the control board receives voltage.
If spark still absent, shut off gas and contact a qualified technician for safe diagnosis and repair.
Troubleshooting If the Pilot Won’t Stay Lit
If the pilot flame repeatedly extinguishes, begin by checking and cleaning the pilot orifice and burner ports to remove soot or debris that can disrupt flow.
Next, inspect and test the thermocouple or thermopile for proper operation, and verify gas pressure and supply to rule out delivery issues.
If these checks fail to resolve the problem, look for signs that the pilot assembly or control components need replacement.
Check and clean the pilot orifice and burner ports
Begin by turning off the gas and allowing the pilot assembly to cool before inspecting the pilot orifice and burner ports for soot, debris, or corrosion that can restrict gas flow.
Use a soft brush, compressed air at low pressure, or a non-metallic probe to clear obstructions.
Reassemble and restore gas, then attempt relighting; if blockage persists, consult a qualified technician.
Inspect and test the thermocouple or thermopile
Inspect the thermocouple or thermopile next, since these safety sensors often cause a pilot to extinguish if they fail or sit too far from the flame.
Visually check position and cleanliness. Use a multimeter to test millivolt output while the pilot is lit. Replace if readings are low or intermittent.
- Check alignment to flame
- Clean gently with fine sandpaper
- Measure voltage
- Replace if unstable
Verify gas pressure and supply issues
Several factors related to the gas supply can prevent a pilot from staying lit, so verify pressure and flow before replacing components.
Check that the main gas valve is fully open, inspect supply lines for kinks or visible damage, and guarantee no recent work shut off the service.
Use a manometer or call the gas utility to validate correct pressure and steady flow before further troubleshooting.
Signs the pilot assembly or controls need replacement
When recurring pilot outages persist after confirming adequate gas pressure and supply, the problem often lies within a failing pilot assembly or its control components; recognizing specific signs can direct a targeted replacement rather than continued adjustment.
Indicators include intermittent or weak pilot flame, soot or corrosion on the thermocouple/pilot orifice, frequent thermocouple failure, erratic control valve response, or persistent ignition module faults requiring electrical replacement.
Maintenance to Prevent Pilot Light Problems
Routine maintenance reduces pilot light failures and extends component life.
A regular cleaning schedule—using a soft brush, compressed air, and turned-off gas—prevents soot and debris buildup, while worn parts such as the thermocouple, igniter, or pilot tube should be replaced at the first sign of corrosion or inconsistent performance.
Seasonal checks and annual professional inspections catch issues early and guarantee safe, reliable operation.
Regular cleaning schedule and how to clean safely
A predictable cleaning cadence keeps a gas fireplace’s pilot assembly functioning reliably and reduces the risk of blockages or soot buildup; most manufacturers recommend inspection and light cleaning at least once a year, with more frequent attention in heavy-use seasons.
Technicians or informed homeowners should shut off gas and power, remove debris with a soft brush and vacuum, clean accessible openings, and avoid solvents or metal tools that could damage components.
When to replace the thermocouple, igniter, or pilot tube
Keeping the pilot assembly clean only postpones wear on its parts; eventually the thermocouple, igniter, or pilot tube will fail and require replacement to maintain safe, reliable ignition.
Replace the thermocouple when the pilot won’t hold flame despite proper position, the igniter when sparking is intermittent or absent, and the pilot tube when clogged, corroded, or misaligned after cleaning attempts.
Seasonal checks and professional inspections
Although pilot issues can arise unexpectedly, seasonal checks and annual professional inspections greatly reduce the risk of failures by catching wear, blockages, and adjustment needs before cold weather use.
Homeowners should clean burners, vents, and pilot assemblies, verify flame characteristics, and test safety shutoffs.
A certified technician inspects gas lines, pressure, and controls, documents findings, and performs calibrated repairs to guarantee reliable, safe operation.
Common Mistakes and How to Avoid Them
The article highlights common mistakes and practical precautions when relighting a pilot light.
It warns against unsafe lighting practices, misreading gas odors and postponing response, and attempting repairs better left to licensed technicians.
Clear examples and corrective steps follow to help prevent hazards.
Unsafe lighting practices to never do
Avoid actions that compromise safety when relighting a gas fireplace pilot; several common mistakes can create serious hazards if not recognized and corrected.
Never attempt lighting while smelling strong gas without ventilating and shutting off supply.
Avoid using matches or lighters near leaks.
Do not bypass safety valves or modify controls, and never ignore manufacturer instructions or skip routine inspections by qualified professionals.
Misinterpreting gas smells and delaying action
Mistaking normal combustion odors or faint household smells for a gas leak—or conversely dismissing a rotten-egg scent—can lead to dangerous delays in response.
Individuals should immediately evacuate, avoid switches or phones indoors, and call the gas company from a safe distance.
If uncertain, treat the odor as a potential leak: ventilate exterior areas and seek professional inspection rather than guessing or procrastinating.
DIY repairs that require a licensed technician
Recognize that certain gas fireplace issues—such as pilot assembly replacement, gas valve repairs, and control module diagnostics—require a licensed technician due to safety regulations, specialized tools, and the risk of gas leaks or carbon monoxide exposure.
Homeowners should avoid attempting internal gas line work, regulator adjustments, or complex electrical troubleshooting.
Hiring licensed professionals prevents hazards, guarantees code compliance, and preserves warranties and insurance coverage.
When to Call a Professional Technician
If there is any smell of gas or other safety concern, a professional technician should be contacted immediately.
Repeated pilot failures after basic troubleshooting also warrant expert diagnosis rather than further DIY attempts.
Complex electronic control faults or suspected gas pressure issues require a trained technician to assess and repair.
Safety or gas leak concerns
When unusual odors, persistent hissing, visible corrosion on valves, or a pilot that repeatedly will not stay lit are present, a professional technician should be called immediately.
These signs can indicate a gas leak, malfunctioning control components, or unsafe combustion that require trained diagnosis and repair.
The homeowner should evacuate, avoid sparks or flames, shut the gas at the meter if safe, and contact emergency services or a licensed gas technician.
Repeated pilot failure after basic troubleshooting
After ruling out obvious safety hazards and taking immediate precautions for suspected leaks, persistent pilot light failure despite basic troubleshooting signals a problem beyond routine homeowner fixes.
A qualified technician should inspect gas valves, thermocouples, vents, and burner assemblies.
Professional diagnosis prevents unsafe repairs, guarantees correct parts and calibration, and verifies compliance with local codes before restoring operation.
Schedule service promptly to avoid hazards.
Complex electronic control or gas pressure issues
Recognize that complex electronic control faults and abnormal gas pressure readings require professional attention beyond homeowner capabilities; these issues involve sealed control modules, pressure regulators, or electronic ignition systems that demand specialized tools and training.
A qualified technician should inspect diagnostics, verify regulator and manifold pressures, test safety sensors, and replace faulty control boards.
Attempting repairs without certification risks injury, leaks, or voided warranties; arrange service promptly.
Quick Reference Checklist and Safety Reminders
A concise checklist and safety reminders help guarantee the pilot is relit correctly and risks are minimized.
Key steps and emergency actions are summarized below for quick reference:
- Turn off gas and wait; ventilate area.
- Follow the manufacturer’s step-by-step relighting procedure.
- If you smell gas, evacuate immediately and call emergency services.
- If unsure at any point, contact a qualified technician.
Step-by-step quick checklist for relighting
Begin by confirming the area is safe: verify the gas valve is off, the room is well ventilated, and there is no smell of gas before attempting to relight.
Gather tools, read manufacturer instructions, turn control to pilot, press and hold knob, ignite pilot per instructions, continue holding for recommended time, release, set to on, observe steady flame, and monitor for normal operation.
Emergency steps if you detect a gas leak
If a gas smell appears at any point while preparing to relight the pilot, stop the procedure immediately and follow emergency steps: evacuate everyone from the building, avoid operating electrical switches or using phones inside, shut off the gas supply at the main valve only if it can be reached safely, call the gas company or emergency services from a safe distance, and do not reenter until a qualified technician declares the area safe.
Additional reminders: ventilate only after evacuation, keep ignition sources away, document observations for responders.
Comparison of Common Pilot Systems and Typical Repair Costs
Different pilot systems—standing pilots, intermittent pilots, and electronic ignition—vary in complexity, reliability, and cost. Standing pilots are simple but less efficient; intermittent pilots reduce gas use; electronic ignition is most efficient but pricier. Typical repairs: cleaning, thermocouple replacement, control module service, or full ignition replacement.
| System | Typical Repair Cost |
|---|---|
| Standing | $50–$150 |
| Intermittent | $100–$300 |
| Electronic | $200–$600 |
Conclusion
After following the steps, the homeowner felt relief—like finding a compass in fog. One winter, a neighbor’s pilot stayed out until a service call fixed a cracked thermocouple; that $220 repair underscored how small parts steer safety. Data shows routine checks cut emergency calls by 40%. With correct precautions and knowledge of the pilot type, relighting is straightforward; if doubt remains, treat the situation like storm navigation and call a pro.