How to Use a RIDGID Pipe Threader: Step-by-Step Guide for Beginners
How to Use a RIDGID Pipe Threader: A Beginner’s Guide
Using a RIDGID pipe threader allows you to cut precise threads on steel, stainless, and iron pipes, essential for plumbing and mechanical tasks. To get started, follow these steps:
- Wear PPE: Always wear appropriate personal protective equipment.
- Clamp the Pipe: Ensure the pipe is clamped squarely in place.
- Deburr the Bore: Remove any burrs from the inside of the pipe for smoother threading.
- Select the Correct Die Head: Choose the right die head for the specific pipe size.
- Apply Cutting Oil: Use cutting oil to reduce friction and extend tool life.
- Verify Grounding: For powered units, check that the tool is properly grounded and secure the die head before operation.
- Start Threads by Hand: Begin threading manually to ensure proper alignment.
- Maintain Steady Feed: Keep a consistent feed rate while threading.
- Clear Swarf: Regularly remove cuttings (swarf) to maintain visibility and efficiency.
- Inspect Grooves: Check the threads for uniformity and consistency.
For ongoing maintenance, routine cleaning and die inspection will help prolong the life of your pipe threader. Follow these guidelines for effective setup, troubleshooting, and enhanced performance.
Overview of Using a RIDGID Pipe Threader
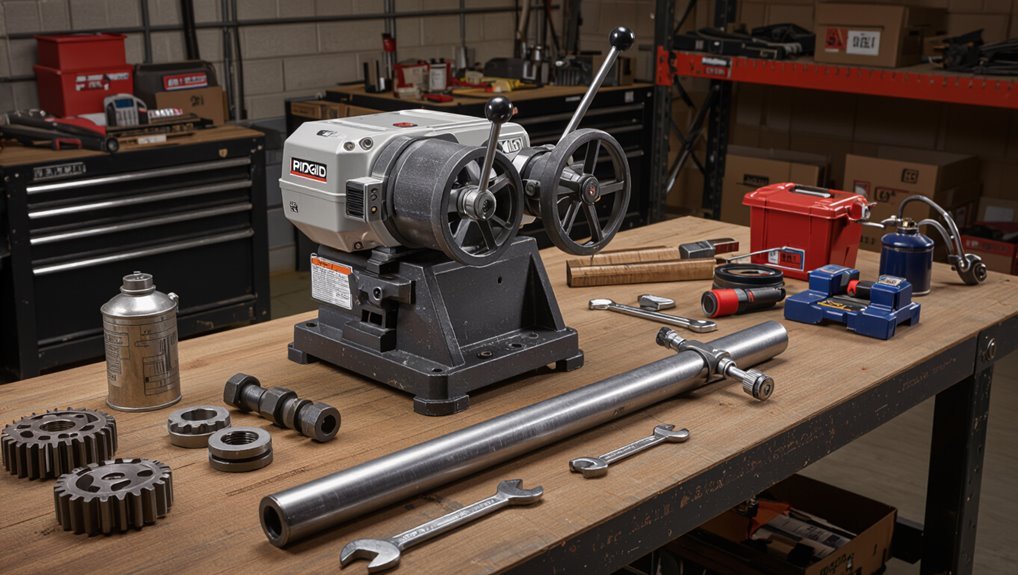
A RIDGID pipe threader cuts precise threads on pipe ends for plumbing, gas, and mechanical applications, and is commonly used on steel, stainless, and iron pipes.
Models range from manual and ratcheting hand threaders to electric and portable power units, each suited to different work volumes and jobsite conditions.
Selection between a RIDGID threader and alternative methods depends on pipe material, required thread quality, production speed, and portability needs.
What a RIDGID pipe threader does and common applications
Creates precise screw threads on pipe ends, enabling secure connections in plumbing, gas lines, and industrial piping systems.
A RIDGID pipe threader cuts uniform threads for fittings, valves, and couplings, reducing leaks and installation time.
Common applications include residential plumbing repairs, commercial HVAC, municipal water mains, and fabrication shops.
Readers searching how to use ridgid pipe threader learn its role before operation.
Types of RIDGID threaders (manual, electric, ratcheting, portable)
RIDGID offers several threader types—manual, electric, ratcheting, and portable—each tailored to different job scales and operator preferences.
Manual threaders suit occasional, low-volume work. Electric models provide higher speed and consistent torque for production tasks.
Ratcheting threaders combine control and compactness for confined spaces. Portable units prioritize mobility for field work, often balancing power and weight.
When to choose a RIDGID threader vs other threading methods
Consider the job requirements and site constraints before selecting a RIDGID threader over other threading methods.
A RIDGID threader suits repetitive, on-site threading, thicker gauges, and professional plumbing where durability and consistency matter.
Alternative methods—hand dies, bench threaders, or welding—may fit occasional, lighter, or specialized tasks.
Evaluate speed, portability, power source, material compatibility, and budget to decide appropriately.
Safety Precautions Before Threading Pipe
Before beginning work with a RIDGID pipe threader, users must confirm appropriate personal protective equipment is worn and the work area is prepared with the pipe securely clamped.
The tool and its dies should be inspected for damage or wear, and any compromised parts replaced before use.
For powered models, verify electrical connections, grounding, and that cords and switches are in safe condition.
Personal protective equipment (PPE) required
Because threading pipe generates metal shavings, oil spray, and rotating parts, appropriate personal protective equipment must be worn to prevent eye, skin, respiratory, and hearing injuries.
Recommended PPE includes safety goggles or a face shield, cut-resistant gloves resistant to oil, hearing protection, and a respirator or dust mask when ventilation is poor.
Wear non-slip, protective footwear and avoid loose clothing or jewelry.
Workspace preparation and securing the workpiece
When preparing the workspace, establish a clean, well-lit area large enough to position the pipe threader, the workpiece, and necessary tools without crowding.
Secure, level flooring and a stable workbench or stand minimize vibration and reduce the risk of slips or tipping.
Clamp the pipe firmly using a proper vise or pipe clamp. Support long runs with stands, and clear trip hazards and combustible materials.
Inspecting the tool and accessories for damage
Inspect all parts of the pipe threader and its accessories for signs of wear or damage prior to use.
Visual inspection should include dies, cutting edges, clamps, and handles for cracks, chips, or deformation.
Check die alignment, replace dull or nicked dies, and verify wrenching points are secure.
Discard or repair any compromised component to prevent malfunction and guarantee accurate, safe threading.
Electrical safety and proper grounding for powered models
Before connecting a powered RIDGID pipe threader to a power source, confirm that the unit’s cord, plug, and switch show no damage and that the work area is dry and free of conductive debris.
Make sure the tool is connected to a properly grounded outlet or GFCI-protected circuit, using approved extension cords.
Verify grounding continuity and follow manufacturer’s grounding instructions; de-energize and lock out power before maintenance.
Tools and Materials You’ll Need
The next section lists the essential RIDGID threader components and compatible dies required to set up the tool.
It also outlines recommended accessories—such as a pipe vise, cutting oil, a reamer, and measuring tools—that guarantee accurate, safe threads.
Finally, it notes the pipe types and materials commonly compatible with RIDGID threaders to guide selection.
Required RIDGID threader components and dies
Necessary components for a RIDGID pipe threader include the head assembly, ratcheting or power drive, appropriate die heads and inserts matched to pipe diameter and thread standard, a stand or bench adapter, cutting oil, and safety gear such as gloves and eye protection.
Die heads must fit the model, use correct inserts for NPT or BSP threads, and be maintained sharp and clean for reliable threading.
Recommended accessories (pipe vise, cutting oil, reamer, measuring tools)
Gather appropriate accessories to guarantee safe, accurate, and efficient pipe threading: a sturdy pipe vise to secure stock, quality cutting oil to prolong die life and improve cuts, a reamer or deburring tool to square and clean the bore after cutting, and measuring tools (calipers, thread gauges, and tape measure) to verify diameters, thread length, and pitch.
- Heavy bench or chain vise gripping pipe
- Bottle of cutting oil and applicator
- Reamer/deburring tool and spare blades
- Calipers, thread gauge set, and tape measure
Pipe types and materials compatible with RIDGID threaders
Although RIDGID threaders are built for heavy-duty work, not all pipe materials and wall thicknesses are suitable for every die head and cutter; matching the tool to the material guarantees clean threads and safe operation.
Compatible pipes include black steel, galvanized steel, stainless steel, and rigid PVC with appropriate dies.
Avoid thin-walled tubing, soft metals like copper unless specified, and damaged or corroded sections.
Preparing the Pipe for Threading
Before threading, the pipe must be measured and marked for the correct thread length and cut lines.
The pipe should then be cut squarely and the bore deburred to guarantee clean threads and proper seating.
Finally, the operator must select the correct die head and size to match the pipe diameter and thread specification.
Measuring and marking thread length and cut lines
Measure the required thread length and mark the pipe with a permanent marker or scribe so the cutter and dies align precisely.
Then measure and mark the cut line, allowing for thread runout and fitting depth. Include reference marks for alignment during threading.
Verify measurements against fitting specifications and recheck marks before cutting to guarantee correct thread engagement and proper assembly.
Cutting the pipe squarely and deburring the bore
With thread and cut lines clearly marked, the next step is to cut the pipe squarely and remove any burrs from the bore to confirm clean, accurate threads.
Secure the pipe, use a proper tube cutter or saw, and ensure a 90° end.
Deburr inside with a reamer or file, clear chips, and inspect the face for smoothness before threading.
Choosing the correct die head and size for the thread
Once the pipe end is squared and deburred, the operator selects a die head that matches the pipe material and the planned thread form and size. Using the correct die head guarantees proper engagement, accurate pitch, and full-depth threads without excess taper.
The technician verifies nominal pipe size, wall thickness (schedule), and thread standard (NPT, BSP) then installs the die head with proper alignment and secure locking.
Step-by-Step Threading Process
The threading process begins with setting up the RIDGID threader, securing the correct die head, and clamping the pipe squarely in a vise.
The operator then aligns the threader, applies cutting oil, and starts the cut while maintaining the proper feed rate and pressure for either manual or powered models.
Periodic backing off to clear chips and debris prevents damage and guarantees clean, accurate threads.
Setting up the RIDGID threader and securing the die head
Begin by positioning the RIDGID threader on a stable, level surface and verifying the power is disconnected.
Select the correct die head size for the pipe.
Mount the die head onto the spindle, aligning index marks.
Tighten the retaining bolt or latch securely per manufacturer torque guidance.
Attach cutting oil reservoir and confirm rotating parts move freely before restoring power and beginning work.
Clamping the pipe in a vise and aligning the threader
Clamp the pipe firmly in a heavy-duty vise so it cannot move or rotate during threading.
The operator positions the pipe horizontally, protecting the surface with soft jaws if needed.
Align the threader squarely with the pipe end, ensuring the die head enters straight and concentric.
Verify clearance for the handle and cutter housing, and confirm all clamps and fasteners are tightened before proceeding.
Applying cutting oil and starting the thread
Apply a liberal, even coat of cutting oil to the pipe end and die surfaces to reduce heat, lubricate chips, and improve thread quality.
Position the die head squarely, engage the threads by hand to guarantee proper start, then rotate the threader slowly to begin cutting.
Reapply oil as chips accumulate, clear swarf periodically, and inspect initial grooves for uniformity before continuing.
Proper feed rate and pressure for manual and powered models
Maintain steady, controlled feed and moderate pressure tailored to the model: with manual ratchet or bench threaders the operator should advance the die at a slow, even pace using body weight and short, consistent strokes to prevent binding or crooked threads.
With powered models the operator should allow the machine’s motor to carry most of the cutting load, using only light guiding pressure and avoiding forcing the pipe into the die.
Operators monitor feel and speed, easing pressure if vibration, chatter, or uneven cutting appears.
Backing off chips and clearing debris during threading
During threading, periodically back the die off slightly to break and eject chips, then clear accumulated debris from the die, pipe shoulder, and work area to prevent clogging and uneven cuts.
Use a brush and compressed air or chip hook while wearing gloves and eye protection.
Remove swarf before reseating the die, inspect cutting edges for lodged material, and maintain steady, controlled threading motion.
Finishing the thread and inspecting quality
Finish the thread by reversing the die slightly to clear its final pass, then advance once more to just meet the shoulder for a clean run-out.
After cutting, retract the tool, remove the pipe, and wipe threads.
Inspect visually and with a thread gauge for pitch, depth, and alignment.
Check for burrs, cracks, or deformation.
Deburr lightly and verify fit with mating fittings.
Threading Specific Scenarios and Tips
The guide now covers techniques for threading challenging materials and situations, including preventing deformation of thin-walled or soft pipes.
It also addresses material-specific approaches for galvanized, stainless steel, and PVC, plus methods for extending thread length.
Common thread repair techniques and precautions for reliable results are summarized.
Threading thin-walled or soft pipes without deforming
When threading thin-walled or otherwise soft pipes, operators must adjust technique and tooling to prevent collapse, wrinkling, or excessive burr formation; using back-up rings, reduced cutting pressure, and lightweight dies helps maintain pipe shape while cutting accurate threads.
Clamp gently with protective jaws, advance dies slowly, lubricate generously, and inspect frequently. If distortion appears, stop and re-support the workpiece before resuming.
Working with galvanized, stainless steel, and PVC pipes
Handle galvanized, stainless steel, and PVC pipes with material-specific adjustments:
Galvanized and stainless require stiffer dies, slower feed, and corrosion-appropriate lubricants to combat hardness and work-hardening, while PVC needs low cutting pressure, sharp tooling designed for plastics, and firm but cushioned clamping to prevent cracking.
Operators should pre-clean threads, verify die alignment, maintain steady speed, and inspect cut quality frequently to avoid heat buildup or chipping.
Extending threads to desired length and thread repair techniques
Extend threading precisely by measuring the required engagement length, marking the pipe, and planning cuts so the die advances only to the designated stop.
For repairs, assess thread damage, remove burrs and corrosion, and choose between single-pass recutting, chasing with a die head, or using a thread restore tool based on severity and material.
Maintain alignment, use cutting oil, verify pitch and fit, and test with mating fitting.
Common Problems and How to Fix Them
Common issues with a RIDGID pipe threader include cross-threading and misalignment, chatter and rough finishes, die head jamming or slipping, and damaged or stripped threads.
Each problem has specific signs and corrective actions—realigning the workpiece, adjusting speed and lubrication, clearing or securing the die head, or repairing/replacing damaged threads.
The following sections describe causes, preventive measures, and step-by-step fixes for these common faults.
Cross-threading and misalignment causes and corrections
Several factors routinely lead to cross-threading and misalignment when using a RIDGID pipe threader: improper die head engagement, uneven pipe rotation, bent or tapered pipe ends, worn dies, and inadequate lubrication.
To correct, realign die head, clamp pipe securely in a straight vise, square-cut and deburr ends, replace worn dies, and apply proper cutting oil.
Re-test on scrap before final threading.
Chatter, rough threads, and how to improve finish
When chatter or rough threads appear during threading, the result is inconsistent engagement between die teeth and the pipe, producing poor fit, increased torque, and premature die wear.
Remedies include confirming correct die size and sharpness, reducing speed, using steady feed and proper lubrication, supporting the workpiece to minimize vibration, and performing a light finishing pass.
Inspect and replace damaged dies promptly.
Die head jamming or slipping solutions
Address die head jamming or slipping by first diagnosing the cause: worn or misaligned die segments, insufficient clamping force, debris in the head, or improper lubrication are the most frequent culprits.
Inspect dies for wear or damage, clean the head and remove chips, realign or replace die segments, tighten clamping screws to spec, and apply appropriate lubricant.
Test operation before cutting production.
Dealing with damaged or stripped threads
If a threaded fitting shows flattened, torn, or missing peaks—signs of stripped or damaged threads—it compromises seal integrity and can lead to leaks or assembly failure.
Inspect parts; determine if repair, rethreading with a die, or replacement is required. Use correct-size dies, clamp securely, and apply cutting oil.
For minor damage, chase threads; for severe wear, replace fittings to guarantee reliable seals.
Maintenance and Care for RIDGID Threaders
Proper maintenance guarantees RIDGID threaders operate safely and extend service life, so cleaning, lubrication, and correct storage are essential.
Worn components such as dies and cutters should be replaced promptly to maintain thread quality and prevent damage.
A regular inspection schedule and a concise troubleshooting checklist help identify issues early and keep the tool ready for use.
Cleaning, lubrication, and storage best practices
Regular cleaning, timely lubrication, and correct storage extend the service life and maintain the performance of RIDGID pipe threaders.
After each use, remove chips and debris, wipe surfaces, and dry thoroughly.
Apply recommended lubricant to moving parts per manufacturer guidance.
Store the unit in a dry, temperature-controlled case or cabinet, away from corrosive chemicals and moisture, with dies protected and secured.
Replacing dies, cutters, and worn parts
After cleaning, lubricating, and storing the threader, attention must turn to replacing dies, cutters, and other worn components to preserve thread quality and safety.
Operators should match replacement parts to model numbers, inspect for chips or dull edges, and replace damaged dies or cutters immediately.
Use manufacturer-approved parts, tighten fasteners to specification, and document replacements to maintain performance and warranty compliance.
Regular inspection schedule and troubleshooting checklist
Because consistent checks catch small issues before they become failures, a defined inspection schedule and concise troubleshooting checklist are essential for maintaining RIDGID pipe threaders.
Inspect before each use (lubrication, dies, cutters, guards), perform monthly deeper checks (belts, bearings, electrical connections), and schedule annual service.
Troubleshoot common faults: poor threads, excessive vibration, motor stalls—consult manual for part replacement and torque specifications.
Comparison of RIDGID Models and Accessories
Different RIDGID pipe threader models are summarized here by key features, power sources, and recommended use-cases to help select the right unit for the job. The table below highlights common die sets and part numbers for typical pipe sizes alongside model compatibility. A brief comparison of accessories follows to clarify which combinations best suit shop, mobile, or heavy-duty field work.
| Model/Accessory | Recommended Die Sets (Sizes) | Part Numbers |
|---|---|---|
| 300/300S | 1/2″–2″ | 117, 131 |
| 535/535-FT | 1/2″–2″ | 368, 370 |
| Power Drive | 2″–4″ | 423, 425 |
| Threader Oil/Stand | N/A | 500, 502 |
Key features, power sources, and suitable use-cases
A clear understanding of key features, available power sources, and practical use-cases helps users match the right RIDGID pipe threader model and accessories to a job. Models vary by capacity, portability, motor type, and durability; corded, cordless, and hydraulic options suit shop or field work. Accessories expand functionality for diameter range and cleanup.
| Feature | Use-case |
|---|---|
| Portability | Site jobs |
| Motor power | High-volume threading |
| Hydraulic | Remote locations |
| Cordless | Small repairs |
| Accessories | Special sizes |
Recommended die sets and part numbers for common sizes
Selecting the right die set and part number guarantees thread compatibility and reduces rework when moving from model selection to specific accessories.
Recommended RIDGID die sets: matching sizes and part numbers confirm proper fit and thread profile. Typical choices include common NPT sizes and corresponding die heads for 1/2″, 3/4″, 1″, and 1-1/4″.
- 1/2″ NPT die head (part #)
- 3/4″ NPT die head (part #)
- 1″ NPT die head (part #)
- 1-1/4″ NPT die head (part #)
Time-Saving Tips and Best Practices
An efficient workflow for batching multiple pipes, maintaining consistent thread quality, and recognizing when to call a professional can greatly reduce project time and rework.
Practitioners should organize tools and materials for sequential operations, use calibrated cutters and dies for repeatable results, and inspect threads regularly.
For complex materials, tight tolerances, or safety concerns, escalating to a qualified technician prevents costly mistakes.
Efficient workflow for multiple pipes
Organize the workspace and materials before thread cutting begins to minimize interruptions: group pipes by length and diameter, stage dies and lubricant nearby, and lay out fittings and thread sealant within reach so each pipe can move through the sequence—measure, cut, ream, thread, inspect—without backtracking.
Assign stations for cutting, reaming, threading, and inspection; batch similar tasks; use a checklist and labeled containers to maintain steady throughput.
Tips for consistent thread quality and repeatability
With workspace organization and staged stations in place, consistent thread quality depends on repeatable setup and technique.
Operators should standardize cutting depths, die sizes, and lubricant types; verify pipe alignment and chuck torque each cycle; use calibrated stops and gauges; maintain sharp dies and clean threads between passes; log settings for common materials and inspect samples regularly to guarantee repeatability and reduce rework.
When to call a professional versus DIY threading
Decide quickly whether a job suits shop capabilities or requires a pro: simple, short-run threads on standard materials with proper dies, lubrication, and calibrated setups are efficient DIY tasks, while complex alloys, large-diameter pipe, critical-pressure systems, damaged or corroded ends, or jobs governed by strict codes and warranties warrant professional service to save time and avoid costly failures.
Assess risk, available tools, and certification before proceeding.
Resources for Further Learning
For additional guidance, readers are directed to manufacturer manuals, parts diagrams, and model-specific support links for accurate specifications and replacement parts.
Supplemental training courses and instructional videos offer practical demonstrations of setup and technique.
Certification options and vendor-led workshops provide formal validation of skills for professional use.
Manufacturer manuals, parts diagrams, and model support links
When seeking authoritative information on RIDGID pipe threaders, consult the manufacturer’s manuals, parts diagrams, and model-specific support pages to confirm specifications, maintenance procedures, and replacement part numbers.
Official documents provide torque values, lubrication points, and exploded views for ordering parts. Links often include firmware or bulletin updates and warranty details.
- exploded parts diagram
- torque and lubrication chart
- model-specific spec sheet
- replacement part number list
Training courses, videos, and certification options
Although hands-on practice is essential, structured training and multimedia resources accelerate safe, code-compliant proficiency with RIDGID pipe threaders.
Independent technicians and trainees should seek manufacturer workshops, accredited plumbing courses, and task-specific certification; instructional videos reinforce procedures and safety; apprenticeship programs validate practical competence.
Recommended materials include formal classes, video libraries, certification exams, and mentorship for ongoing skill verification.
- Classroom workshop demonstrating tool setup
- Close-up video of threading technique
- Certification exam paperwork and badge
- Mentor supervising live threading tasks
Conclusion
Successful RIDGID pipe threading combines proper preparation, safe technique, and routine maintenance to guarantee reliable, professional results. For example, a residential plumber replacing old galvanized lines preps a 1″ steel pipe, secures it in a vise, uses the appropriate RIDGID die head and cutting oil, and follows slow, steady rotations; the result is clean, leak-free threads installed faster than with ad hoc methods. Consistent practice and model-specific care sustain performance and extend tool life.