
How to Clean Washer Gasket Fast: Step-by-Step Mold & Mildew Removal Guide
To clean your washer gasket quickly and effectively, follow these steps to remove mold and mildew: First, inspect the gasket for dark spots, slimy patches, and musty odors, as these indicate buildup. With gloves and eye protection, spray a vinegar or diluted bleach solution into the crevices. Use a soft brush to scrub the area, then rinse thoroughly and dry with a microfiber cloth. Run a hot maintenance cycle to flush out any remaining residues. To prevent future buildup, leave the washer door ajar after each use and repeat this cleaning process monthly. For persistent issues, further steps and possible replacements are available.
Why Mold and Mildew Grow in Washer Gaskets
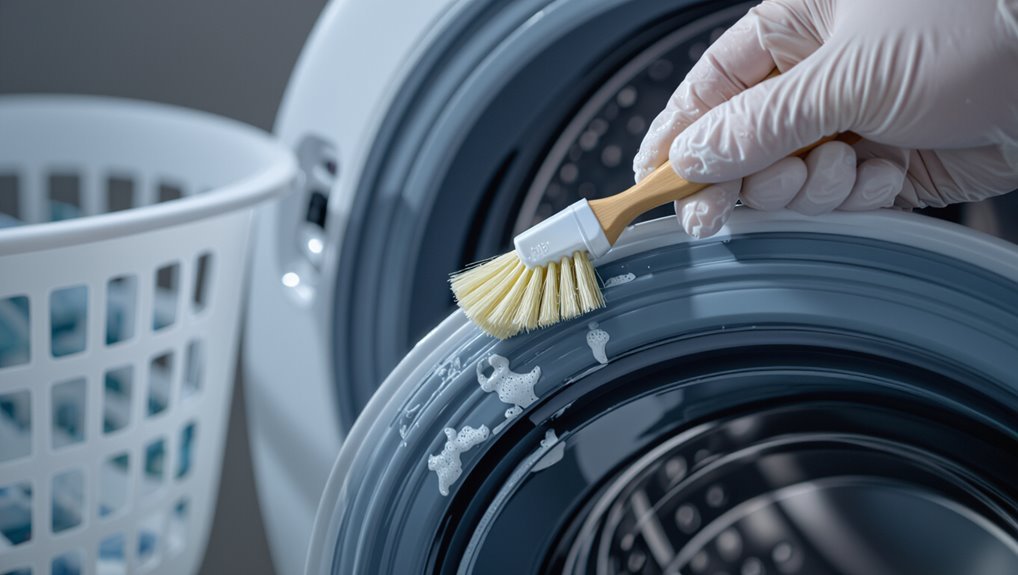
Trapped moisture, detergent residue and certain fabrics create a damp, nutrient-rich environment that encourages mold and mildew to grow in washer gaskets.
Early signs include musty odors, visible dark spots or staining, and slimy buildup around the seal.
If left untreated, mold can trigger allergies and respiratory issues and accelerate gasket deterioration, leading to leaks and costly repairs.
Common causes of gasket mold (trapped moisture, detergent residue, laundry types)
Many factors converge in the rubber seal of a front‑loading washer to create a hospitable environment for mold and mildew.
Trapped moisture, pooled water after cycles, and detergent or fabric‑softener residue feed growth. Heavy loads of sweaty or soiled laundry increase organic matter.
Poor ventilation and infrequent maintenance compound buildup. This context explains why tutorials on how to clean washer gasket focus on residue removal and drying.
Signs you have mold or mildew in the gasket
Those conditions make it likely that mold or mildew will appear in the gasket, and recognizing it early helps prevent spread and odor.
Signs include dark spots or discoloration along the rubber fold, fuzzy or slimy patches, musty smells after cycles, persistent staining that resists wiping, and rubber deterioration or sticky residue.
Visible biofilm near the drain area also indicates growth.
Health and appliance risks of untreated mold
Consequences of untreated mold in a washer gasket include both health hazards and progressive appliance damage.
Mold spores can trigger allergies, respiratory irritation, and exacerbate asthma in occupants.
Left unchecked, mold degrades rubber seals, causes odors, and promotes leaks, leading to corrosion, mechanical failure, and costly repairs.
Prompt removal and preventive drying mitigate health risks and extend washer lifespan.
Quick Assessment: How to Inspect Your Washer Gasket
A brief visual checklist directs attention to gasket folds, hidden pockets, and any discoloration that may signal mold.
A simple smell and moisture test helps confirm active growth or lingering dampness.
If stains persist, odors remain after cleaning, or the gasket shows damage, a professional inspection is recommended.
Visual inspection checklist (folds, hidden pockets, discoloration)
Visual inspection begins with a systematic scan of the gasket’s visible surfaces and hidden folds to spot signs of mold, trapped debris, or fabric caught in creases.
Next, check inner pockets and underlip channels for dark spots, slimy residue, or lint buildup.
Note irregular discoloration, surface pitting, or tears.
Record locations and severity to prioritize targeted cleaning and potential replacement.
Smell and moisture tests
Several quick senses can reveal underlying issues: smelling for musty or sour odors and feeling for dampness around the gasket provides an immediate assessment of hidden mold, trapped water, or failing seals.
Note localized strong odors, persistent damp spots, and soggy folds.
Test after a cycle and with the door closed overnight; consistent smell or moisture indicates deeper cleaning is needed.
When to call a professional
If persistent odors, visible mold growth that reappears after cleaning, recurring leaks, or torn and brittle rubber are detected during inspection, it is time to contemplate professional help.
Technicians can diagnose hidden damage, replace seals, and address drainage or mechanical faults beyond routine cleaning.
A professional assessment is warranted when DIY measures fail, electrical components are suspected, or warranty-covered repairs may be required.
Supplies and Safety Precautions
Recommended cleaning supplies and tools for gasket maintenance are listed, including brushes, microfiber cloths, and appropriate cleaners.
The section highlights safe chemicals and effective natural alternatives such as diluted bleach, vinegar solutions, and commercial mildew removers.
Guidance on personal protective equipment and proper ventilation is provided to minimize exposure and guarantee safe handling.
Recommended cleaning supplies and tools
A compact set of supplies will make gasket cleaning efficient and safe: a soft-bristled brush or old toothbrush for scrubbing, microfiber cloths or disposable rags for wiping, a spray bottle for diluted cleaners, and a small plastic scraper or credit card to lift grime without damaging the rubber.
Protective gloves and eye protection are advised; keep a flashlight for inspection.
- Prepare
- Protect
- Inspect
Safe cleaning chemicals and natural alternatives
Choose cleaners that kill mold and bacteria without harming the rubber gasket or the machine’s finishes.
Mild bleach solutions, hydrogen peroxide, and enzyme cleaners are effective; avoid undiluted harsh acids or solvents.
Natural options like vinegar and baking soda work for light buildup but may need longer contact.
- Bleach (diluted)
- Hydrogen peroxide or enzyme cleaner
- Vinegar + baking soda
Personal protective equipment and ventilation tips
Wear gloves, eye protection, and a mask when cleaning a washer gasket to prevent skin contact, splashes, and inhalation of fumes from bleach, hydrogen peroxide, or enzyme products.
Guarantee adequate ventilation by opening windows and running an exhaust fan. Dispose of contaminated rags safely. Avoid mixing chemicals. Keep children and pets away.
Replace disposable PPE after heavy exposure; launder reusable items separately.
Step-by-Step Fast Cleaning Method for Front-Load Washer Gaskets
The guide outlines a quick, practical routine for cleaning front-load washer gaskets, beginning with preparing the machine and clearing the surrounding workspace.
It describes an initial wipe to remove visible grime, targeted application of a deep-clean solution with effective scrubbing, followed by thorough rinsing, drying, and a short maintenance wash.
Time-saving tips for faster completion are included to streamline each step without sacrificing results.
Prepare the washer and workspace
Begin by unplugging the washer and turning off its water supply to eliminate electrical and flood risks.
The technician clears the surrounding area, removes laundry, and opens the door to access the gasket.
They place towels and a shallow tray to catch drips, set adequate lighting, and gather gloves, safety glasses, spray bottle, scrub tool, and cleaning solution nearby for efficient, safe operation.
Initial wipe and removal of visible debris
Using a microfiber cloth or paper towel, the technician pulls back the rubber gasket and wipes away loose lint, hair, and visible residue from the folds and inner lip.
He inspects seams and drain holes, removing trapped debris with gloved fingers or a soft brush.
Collected material is placed in a trash receptacle, and the area is rechecked for remaining visible grime before proceeding.
Deep-clean solution application and scrubbing technique
Mix a potent yet appliance-safe cleaner—one part white vinegar to one part water or a commercial washing-machine cleaner—into a spray bottle, then saturate the gasket folds and inner lip so the solution penetrates crevices.
Allow dwell time for loosening, then use a soft-bristled brush and microfiber cloth to scrub in circular motions, lift residue, and reach behind folds.
Inspect for remaining spots and repeat targeted scrubbing.
Rinse, dry, and run a maintenance wash cycle
Rinse the gasket and surrounding seal thoroughly with clean water to remove loosened residue and cleaner, paying special attention to folds and the inner lip where buildup hides.
Pat dry with a lint-free cloth, open the door to air the drum, then run a hot maintenance wash with detergent or a washer cleaner on the hottest, longest setting to flush remaining debris and sanitize the interior.
Time-saving tips to finish faster
After rinsing and running a maintenance cycle, a faster, step-by-step method helps finish gasket cleaning without sacrificing thoroughness.
Use a spray bottle with diluted cleaner, target crevices, and wipe with a microfiber cloth. Work in sections, keep a small brush handy for stubborn spots, and dry immediately.
Schedule quarterly quick cleans and keep the door ajar between loads to prevent recurrence.
Step-by-Step Cleaning Method for Top-Load Washer Seals (if applicable)
For top-load machines, the procedure begins with safe access to the seal area—unplug the washer, lift the lid, and remove any agitator or cover as needed to expose the gasket.
Cleaning steps differ from front-load units and should include targeted brushing and wiping with an appropriate cleaner, paying attention to crevices and the inner tub rim.
After cleaning, run a short hot-water or maintenance cycle to rinse residues and inspect the seal and surrounding components for damage or missed spots.
Accessing the gasket area safely
Before opening or reaching into the washer, confirm the machine is unplugged and the water supply valves are shut off so access can be gained without electrical or flooding risk.
Inspect the lid, drum rim and gasket visually. Use a flashlight and gloves.
Remove items from the drum. If needed, loosen retaining clips or trim panels per the manufacturer’s instructions to expose the gasket, avoiding force that could damage seals.
Cleaning steps tailored to top-load designs
Many top-load washers have a visible rubber gasket or seal around the rim and under the agitator that can trap grime and mildew.
This step-by-step method focuses on safely loosening and removing buildup, using gentle tools and appropriate cleaners while preserving the seal’s integrity.
Remove debris, apply diluted vinegar or a mild detergent, scrub with a soft brush, rinse thoroughly, and dry the seal with a microfiber cloth.
Post-cleaning checks and cycle
Once the gasket has been wiped, rinsed, and dried, a brief inspection and a short rinse cycle confirm that no residue or loosened debris remains.
The technician checks seals, drain filter, and surrounding drum for moisture, lint, or cleaning solution.
A cold rinse cycle with an empty load verifies clarity; any remaining spots are re-cleaned.
Door or lid is left ajar to air-dry.
Stubborn Mold and Mildew Removal Techniques
For persistent mold and mildew on washer gaskets, recommended approaches balance chemical and mechanical methods.
Safe bleach use on rubber requires proper dilution and rinsing, while alternatives such as vinegar, baking soda, or hydrogen peroxide can remove stains without degrading seals.
Stubborn deposits may need agitation with a toothbrush, small plastic scraper, or targeted steam cleaning to fully lift growth.
Using bleach safely on rubber gaskets
Begin by evaluating the gasket’s condition and the washer’s manufacturer guidelines before applying bleach; concentrated solutions can remove stubborn mold but may also degrade some rubber compounds or void warranties.
When appropriate, dilute household bleach (about 1:10) and apply briefly with a soft cloth or sponge. Rinse thoroughly, ventilate the area, and allow complete drying.
Wear gloves and eye protection.
Vinegar, baking soda, and hydrogen peroxide methods
Several effective household alternatives—white vinegar, baking soda, and hydrogen peroxide—can remove stubborn mold and mildew from washer gaskets without resorting to harsh commercial cleaners.
Apply vinegar undiluted to loosen growth, let sit 10–15 minutes, then wipe.
Sprinkle baking soda for gentle abrasion and neutralization.
Use 3% hydrogen peroxide to disinfect, allow contact time, then rinse thoroughly and air dry the gasket.
Mechanical options: toothbrushes, small scrapers, steam cleaners
Mechanical tools offer targeted ways to dislodge mold and mildew from washer gaskets when chemical methods fall short.
A stiff toothbrush accesses folds; plastic or nylon scrapers remove cured residue without damaging rubber.
Steam cleaners soften and lift spores, sanitizing with heat. Work slowly, using gentle pressure and repeat steam passes.
Rinse thoroughly and dry gasket to prevent immediate regrowth.
Preventive Maintenance to Keep Gasket Mold-Free
Routine habits can greatly reduce moisture and residue buildup on the gasket, such as leaving the door ajar and wiping the seal after use.
A monthly deep-clean routine with a suitable cleaner and thorough rinsing helps prevent mold from taking hold.
Choosing the right detergent, using appropriate cycle settings, and running occasional hot-water or sanitize cycles further minimizes mold risk.
Daily habits to reduce moisture and residue
A few simple daily habits can greatly reduce moisture and residue that lead to gasket mold, preserving both seal integrity and laundry hygiene.
After each load, the door should be propped open and the gasket lightly wiped with a microfiber cloth. Remove visible lint, spills, and soap film.
Use short, ventilating cycles when appropriate and promptly remove wet laundry to minimize damp conditions.
Monthly deep-clean routine
Perform a thorough monthly deep-clean to remove hidden grime and prevent mold from reestablishing in the gasket folds.
Inspect the gasket, peel back folds, and remove debris. Sanitize accessible surfaces and hinge crevices, then dry completely. Reassemble and run a maintenance cycle if recommended.
- Inspect and clear trapped debris
- Sanitize accessible gasket areas
- Guarantee complete drying before closing
Best detergents, cycle settings, and water temperature tips
Select detergents and cycle settings that target mildew without damaging the gasket: enzyme-based detergents break down organic soils, oxygen bleach is safe for most seals, and powdered formulations often contain higher concentrations of cleaning agents than liquid ones.
Use warm to hot water for effective microbial removal when fabric care allows, choose longer soak or sanitize cycles, and avoid harsh chlorine bleach or high-alkaline cleaners that degrade rubber.
Common Mistakes That Make Gasket Mold Worse
Common errors can accelerate gasket mold, such as relying on too much bleach or other harsh chemicals that damage seals and leave residues.
Small mold spots often worsen when they are ignored until they spread.
Leaving the door closed or failing to dry the gasket properly creates the moist environment mold needs to thrive.
Overuse of bleach or harsh chemicals
Using large amounts of bleach or harsh chemical cleaners can actually accelerate gasket deterioration and encourage more persistent mold growth.
Repeated exposure breaks down rubber, creating microcracks where spores lodge. Residual chemicals can inhibit beneficial cleaners and alter surfaces, reducing future cleaning effectiveness.
Instead, milder detergents or diluted bleach applied sparingly with rinsing preserve gasket integrity while controlling mold without worsening the problem.
Ignoring small mold spots until they spread
After noting that frequent strong chemicals can weaken the gasket, homeowners often make the opposite error of waiting until mold is obvious before taking action.
Small discoloration or musty odor signals early growth; ignoring them lets spores spread into folds and seams.
Prompt, gentle cleaning prevents entrenched colonies, reduces staining, and limits the need for aggressive treatments or gasket replacement later.
Incorrect drying or leaving the door closed
Failing to dry the gasket properly or keeping the washer door closed traps moisture in the rubber folds, creating an ideal environment for mold and mildew to take hold.
Regularly wiping bare moisture, leaving the door or detergent drawer ajar between uses, and ensuring good air circulation prevent damp pockets.
These simple habits dramatically reduce odor, staining, and recurrent cleaning needs.
When to Replace the Gasket Instead of Cleaning
If persistent cracks, hardening, or deep, recurring mold stains appear, the gasket is likely beyond effective cleaning and should be replaced.
Replacement typically involves part cost and either a homeowner’s labor investment or a service call, with variability based on model complexity.
Consider OEM gaskets for guaranteed fit and longevity versus aftermarket options that may be cheaper but vary in quality.
Signs a gasket is beyond cleaning
Several clear signs indicate a washer gasket has deteriorated beyond cleaning and requires replacement.
Visible deep cracks, tears, or missing chunks compromise seals and trap moisture. Persistent, foul odors or recurring mold after repeated cleanings signal embedded damage.
Warping, brittleness, or detachment from the drum prevents proper sealing. Leaks during cycles or excessive vibration also indicate replacement is necessary.
Cost and process overview for gasket replacement
When replacement is warranted, homeowners should expect both parts and labor costs plus a short, straightforward process:
Typical gasket parts range from inexpensive to moderate; professional labor adds hourly fees.
Replacement involves draining, removing the door or panel, extracting the damaged gasket, installing the new seal, testing for leaks, and reassembling.
Total time is usually one to two hours.
Choosing OEM vs aftermarket gaskets
Choosing between an OEM gasket and an aftermarket replacement hinges on priorities of fit, material quality, and cost: original equipment parts usually match factory specifications and offer predictable durability, while aftermarket options can be cheaper and sometimes superior in material but vary widely in fit and warranty. Replace when cracks, persistent leaks, or deformation occur.
| Factor | OEM | Aftermarket |
|---|---|---|
| Fit | Exact | Variable |
| Cost | Higher | Lower |
| Warranty | Manufacturer | Varies |
Product and Tool Recommendations
Recommended products include EPA-approved mold removers and enzyme-based cleaners known to break down residues on rubber gaskets.
Essential tools consist of soft-bristled brushes, microfiber towels, and a small inspection flashlight or mirror for checking folds and crevices.
Specific brand choices and purchase tips follow to help readers select effective, safe options.
Top-rated cleaners and mold removers for washer gaskets
Although many household products can remove grime, selecting cleaners and mold removers specifically formulated for rubber gaskets yields faster, safer results; look for products labeled for washing-machine rubber, mildew, or mold with nonabrasive formulas, EPA registration (for antimicrobials) or hydrogen peroxide/oxygen-based ingredients, and clear instructions for use on rubber surfaces.
- Oxygen-based cleaner — gentle, effective on organic stains.
- EPA-registered antimicrobial spray — for persistent mold.
- Hydrogen-peroxide gel — clings to folds, brightens rubber.
Brushes, towels, and inspection tools to buy
A small kit of the right brushes, microfiber towels, and inspection tools makes gasket cleaning faster and more thorough.
Recommended items focus on access, agitation, and inspection.
Compact, stiff-bristle brush for crevices; soft nylon detail brush for seals; lint-free microfiber for drying and wiping.
- Stiff crevice brush
- Soft nylon detail brush
- Lint-free microfiber towels
Quick Troubleshooting and FAQ-Style Tips
The guide then addresses common problems and concise fixes, covering why mold may return within weeks and steps to prevent recurrence.
It outlines methods for eliminating stubborn odors after a cleaning and when to repeat additional treatments.
It also recommends a safe frequency for running deep-clean cycles to maintain gasket health.
What to do if mold returns within weeks
Why does mold reappear so quickly even after a thorough cleaning? Residual spores, trapped moisture, and missed crevices allow regrowth.
Inspect gasket folds, drain, and dispenser areas; repeat targeted cleaning using an antimicrobial solution.
Increase ventilation, leave the door ajar between cycles, run periodic hot-water or maintenance cycles, and dry seals after use.
Replace the gasket if recurrent colonies persist despite these measures.
How to remove persistent odors after cleaning
If odors persist after removing visible mold, residual buildup in hidden creases or the drain often remains the source.
Inspect and wipe gasket folds with a microfiber cloth and diluted white vinegar; flush the drain with baking soda followed by hot water.
Leave the door slightly ajar to air dry.
Repeat targeted spot-cleaning and run an empty hot-water cycle with a cup of vinegar if smell remains.
Safe frequency for deep-clean cycles
Regularly scheduling a deep-clean cycle every 1–3 months keeps the gasket, drum, and drain free of mold and buildup without overworking the machine; frequency should lean toward monthly in high-use households or where loads are frequently damp or soiled, and toward quarterly for light, infrequent use.
Technicians advise using hot-water or sanitizing cycles, inspecting seals monthly, and increasing frequency if musty smells or residue reappear.
Conclusion
Regular cleaning keeps washer gaskets sanitary and extends appliance life. Studies show that up to 40% of front-load washers develop mold or mildew within two years without routine maintenance, highlighting the importance of timely action. By inspecting seals, using safe cleaning agents, and following the step-by-step methods outlined, homeowners can remove grime quickly and prevent recurrence. When cleaning fails or damage is evident, gasket replacement guarantees reliable, odor-free laundry performance.
