How to Improve Hot Water Pressure Fast: DIY Fixes and When to Call a Plumber
To quickly improve low hot water pressure, start by checking that all supply valves are fully open, cleaning faucet aerators and showerheads, testing and adjusting the pressure-reducing valve (PRV), and flushing your water heater to eliminate sediment buildup. If low pressure persists or if you encounter issues like corroded pipes, leaking tanks, or electrical problems, it’s best to call a licensed plumber for assistance. Below are detailed steps and diagnostics for further troubleshooting.
Why Hot Water Pressure Drops and When It Matters
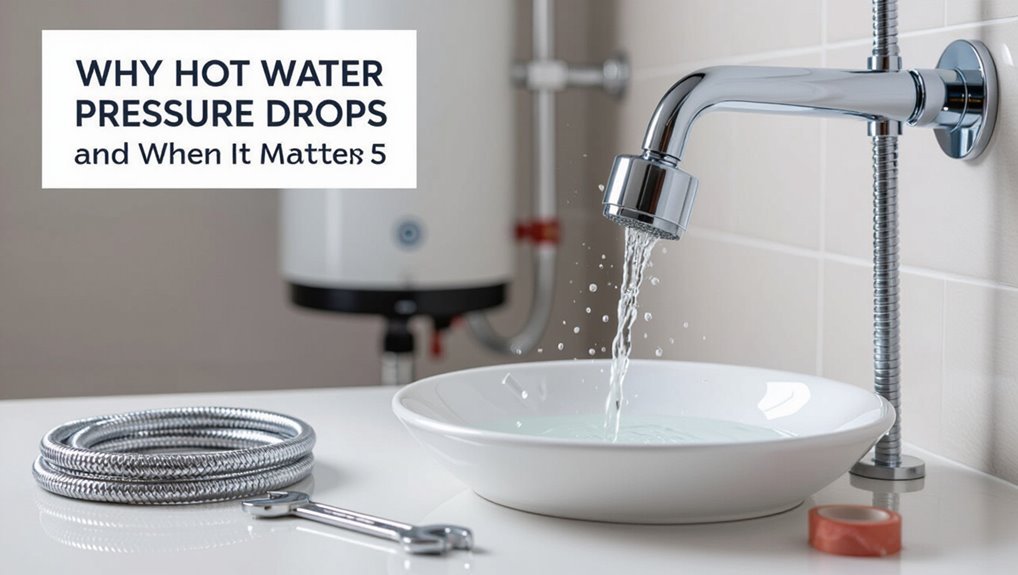
Hot water pressure can fall for several reasons, including mineral buildup in the water heater or fixtures, failing valves or pressure-reducing devices, and issues specific to tankless or older systems.
Determining whether low pressure affects only hot taps or the entire plumbing network helps isolate the source and directs appropriate repairs.
Addressing the problem promptly is important for safety and health, since very low hot flow can increase scald risk from compensating adjustments, encourage bacteria growth in lukewarm systems, and harm appliances that rely on adequate hot-water supply.
Common causes of low hot water pressure
Several factors can reduce hot water pressure, ranging from simple fixture blockages to more serious supply or heater problems.
Common causes include mineral buildup in aerators and showerheads, partially closed valves, corroded or clogged pipes, malfunctioning pressure-reducing valves, and sediment accumulation in water heaters.
Identifying causes helps prioritize fixes and decide when to call a professional about how to improve hot water pressure.
How to tell if the problem is hot-water-specific or whole-house
How can one determine whether low water pressure affects only heated taps or the entire plumbing system?
Check multiple fixtures: compare cold versus hot flow at sinks, showers, and outdoor spigots.
Note differences at various times of day and after water heater cycles.
Inspect pressure at the main shutoff or install a gauge.
Consistent low pressure indicates whole-house; isolated hot issues suggest heater or dedicated piping.
Safety and health considerations (scalding, bacteria, appliance damage)
Because changes in hot-water pressure can affect safety and equipment, identifying when low pressure poses a risk is essential.
Low pressure may force higher thermostat settings, increasing scald risk, or allow stagnation in tanks and pipes, promoting Legionella.
Appliances like dishwashers and water heaters can operate inefficiently or be damaged.
Prompt diagnosis prevents injury, bacterial growth, and costly repairs.
Quick DIY Fixes You Can Try Right Now
A handful of straightforward checks can restore hot water pressure without calling a plumber.
The homeowner should confirm main supply valves are open, clean faucet aerators and showerheads, and test or adjust the pressure-reducing valve (PRV).
Flushing the water heater to remove sediment and tightening plumbing connections and shutoff valves are additional quick remedies to try.
Reset and check main water supply valves
Check the main water supply valves and reset them if necessary to restore proper hot water pressure.
The homeowner should locate the main shutoff and any branch valves to the water heater, verify they are fully open, and cycle them closed then open if partially stuck.
Inspect for visible leaks, corrosion, or obstructions.
If resistance or damage exists, contact a plumber.
Inspect and clean faucet aerators and showerheads
Inspecting and cleaning faucet aerators and showerheads can quickly restore hot water flow without tools beyond basic household items.
Remove aerators and soak in vinegar to dissolve mineral buildup, brush gently, and rinse.
For showerheads, detach if possible, soak or use a vinegar-filled bag secured with a rubber band, then scrub nozzles.
Reinstall and test flow; repeat if necessary.
Test and adjust pressure-reducing valve (PRV)
After cleaning fixtures, attention can turn to the home’s pressure-reducing valve (PRV), which controls incoming water pressure and can affect hot-water flow throughout the house.
Test pressure with a gauge on an outdoor spigot or utility sink. If below 40–60 psi, slightly loosen the locknut, turn the adjustment screw clockwise to raise pressure, retest, then secure the nut.
Flush the water heater to remove sediment buildup
Flush the water heater to clear accumulated sediment that can restrict hot-water flow and reduce efficiency.
Draining and flushing the tank removes mineral deposits that settle and clog outlets or heating elements.
Turn off power/gas, attach a hose to the drain valve, open a hot tap, drain until clear, then briefly open cold inlet to stir and flush.
Refill and restore power.
Check and tighten plumbing connections and shutoff valves
Check all accessible plumbing connections and shutoff valves for looseness or visible leaks, since even slight gaps can reduce hot-water pressure or cause intermittent flow.
Use an adjustable wrench to gently tighten fittings and cycle each shutoff valve fully open and closed to clear minor obstructions.
Replace damaged washers, seals, or corroded fittings; retest pressure afterward to confirm improvement.
Temporary bypasses and workarounds while awaiting repairs
Consider simple temporary bypasses and workarounds that restore usable hot-water flow until professional repairs can be made: these include manually adjusting nearby shutoff valves to reroute pressure, installing a temporary flexible hose in place of a corroded rigid line, or using a pressure-balanced shower diverter to concentrate available hot water.
Use basic tools, confirm valve positions, avoid permanent alterations, and document changes for the plumber.
Step-by-Step: Flushing a Water Heater to Restore Pressure
The process begins by gathering tools and materials and observing safety precautions, such as shutting off power or gas and closing the cold-water supply.
Next, a hose is attached to the tank’s drain valve to empty the water heater.
Finally, the tank is flushed until the discharge runs clear, then refilled and the power or gas supply is restored.
Tools and materials needed
Several basic tools and a few common materials are required to flush a water heater safely and effectively.
Required items include a garden hose, adjustable wrench, bucket, screwdriver, and pliers.
Materials: Teflon tape, replacement drain valve (if needed), and a wet/dry vacuum for stubborn sediment.
A helper and flashlight improve access; optional: hose connector and rags for cleanup.
Safety precautions before starting
Before any work begins, verify that power and water supplies are isolated and that the area is well ventilated to prevent electrical shock, scalding, or gas buildup.
Inspect for leaks, corrosion, and combustible materials. Wear protective gloves and eye protection. Keep a fire extinguisher nearby.
Confirm a clear escape path and that helpers know emergency shutoffs and contact numbers before proceeding.
Step 1 Turn off power/gas and water supply
Shut off both the water feed and the heater’s power or gas supply to eliminate flow and energy during the drain-and-flush procedure.
Confirm the circuit breaker is off for electric units or the gas valve is closed for gas models.
Close the cold-water inlet valve.
Open a nearby hot faucet to relieve pressure and verify the tank is isolated before proceeding with draining.
Step 2 Attach hose and drain tank
Connect a garden hose to the water heater’s drain valve and route the other end to a suitable drain or outside area that can handle hot, sediment-laden water.
Open a hot water faucet to relieve vacuum, then carefully open the drain valve a quarter turn to start outflow.
Monitor hose connections for leaks and guarantee the discharge location remains clear and safe from scalding or contamination.
Step 4 Flush until clear water runs, then refill and restart
Begin flushing the tank until the discharged water runs clear, which indicates most sediment has been expelled; this typically takes several minutes of steady flow.
Once clear, close the drain valve, remove the hose, and close any open pressure-relief or access points.
Refill the tank by opening the cold-water supply, vent trapped air by opening a hot faucet, then restore power or gas to resume normal operation.
Common problems during flushing and how to handle them
Expect a few common issues during flushing that can interrupt the process or signal deeper problems: slow or no flow, persistent cloudy or foul-smelling discharge, leaking valves or fittings, and difficulty refilling the tank.
Address blockages by increasing drain hose diameter and gently backflushing; replace corroded drain valves; sanitize if odor persists; confirm cold inlet is open and tank refills slowly to avoid airlocks.
Inspecting and Cleaning Fixtures and Supply Lines
Inspection of faucets, showerheads, and visible supply lines can quickly identify common causes of low hot water pressure.
Simple steps like removing aerators and soaking showerheads in vinegar remove mineral scale or allow distinction between scale and trapped debris.
If parts are corroded, cracked, or repeatedly clogged after cleaning, replacement is recommended rather than continued repair.
How to remove and clean aerators and showerheads
Removing and cleaning aerators and showerheads restores flow and removes mineral buildup that commonly restricts hot water pressure.
Turn off taps, unscrew aerator or showerhead with pliers using a cloth to protect finishes.
Disassemble, soak parts in vinegar or descaling solution, brush passages, rinse, and reassemble.
Test flow and repeat if necessary.
Replace damaged washers or screens for proper sealing and performance.
Recognizing mineral scale vs. debris clogs
How can one tell whether restricted hot water flow stems from mineral scale or from loose debris?
Inspectors note scale appears as hard, white to brown crusts around openings and inside aerators or showerheads; it resists gentle scraping.
Debris clogs show loose particles, rust flakes, or silt that rinse away.
Flow that worsens with low water hardness points to debris; consistent buildup indicates scale.
When to replace fixtures vs. clean them
After distinguishing scale from loose debris, attention turns to whether fixtures and supply lines should be cleaned or replaced.
Inspectors assess corrosion, persistent low flow after descaling, visible damage, and age.
Showerheads and aerators often respond to cleaning; braided supply lines, heavily corroded valves, or fixtures with internal pitting require replacement.
Safety, cost, and long-term reliability guide the decision.
Dealing with Pressure-Related Appliance and Valve Issues
Next, attention turns to appliances and valves that directly affect hot water pressure.
The discussion covers diagnosing a failing pressure-reducing valve, adjusting or replacing mixing and anti-scald valves, and checking the water heater’s dip tube, thermostat, and heating elements.
Clear signs that a water heater needs repair or replacement will also be outlined.
Diagnosing a failing pressure-reducing valve (PRV)
When water pressure problems persist despite checking fixtures and supply lines, a failing pressure-reducing valve (PRV) is a likely culprit and should be diagnosed promptly.
Inspect for leaks, corrosion, or rattling; measure inlet and outlet pressures with a gauge; compare readings to manufacturer specs.
If outlet pressure fluctuates, won’t hold setpoint, or gauge shows abnormal swings, the PRV likely needs repair or replacement.
Replacing or adjusting mixing valves and anti-scald devices
Addressing pressure-related problems often requires inspecting and adjusting mixing valves and anti-scald devices, since these components balance hot and cold flow to maintain safe delivery temperatures and stable pressure.
Technicians should check for blockages, worn cartridges, incorrect setpoints and thermal bypass faults. Replacing faulty valves or recalibrating temperature limits often restores balanced pressure; always isolate water, follow manufacturer instructions, and consider professional help if uncertain.
Water heater dip tube, thermostat, and element checks
Several key water heater components—the dip tube, thermostat, and heating elements—can indirectly cause perceived drops in hot water pressure by disrupting flow, temperature balance, or recovery rate.
Inspect the dip tube for cracks or detachment reducing hot outflow.
Verify thermostat settings and responsiveness to guarantee proper temperature.
Test and, if accessible, clean or replace heating elements to restore efficient recovery and consistent hot-water delivery.
Signs a water heater needs repair or replacement
A failing water heater often announces itself through measurable changes rather than sudden breakdowns: reduced hot-water pressure, inconsistent temperatures, slow recovery after use, unusual noises, or visible leaks indicate the unit or its valves and pressure-related components may require repair or replacement.
Additional signs include rusty or discolored water, frequent thermostat cycling, pressure relief valve discharge, and age over 10–15 years—prompt evaluation recommended.
When the Problem Is in the Plumbing System
When hot water pressure problems stem from the plumbing system itself, attention turns to supply pipes that may be corroded or obstructed.
Technicians also look for hidden leaks and sections where pressure drops locally rather than system-wide.
The choice between repiping affected sections and performing targeted repairs depends on pipe condition, cost, disruption, and long-term reliability.
Identifying corroded or obstructed supply pipes
Corroded or obstructed supply pipes are a common cause of reduced hot water pressure and can develop gradually, often without obvious external signs.
Inspect accessible metal and galvanized lines for rust, pitting, or scale. Check for uneven flow between fixtures served by the same pipe run.
Listen for knocking or restricted flow. When internal buildup or corrosion is suspected, replacement or professional inspection is advised.
Detecting hidden leaks and localized pressure loss
Several signs point to hidden leaks or localized pressure loss within the plumbing system, including unexplained drops in hot water flow at specific fixtures, unusually high water bills, or damp spots and discoloration on walls and ceilings.
Further indicators include hissing sounds in walls, sudden yard wetness, or unexplained meter movement with all taps off.
Targeted isolation tests and thermal imaging can locate the problem.
Pros and cons of repiping sections vs. localized fixes
If a plumbing system shows repeated failures confined to a run or material type, deciding between repiping a section and performing localized repairs hinges on scope, cost, longevity, and disruption.
Sectional repiping offers extensive, long-term reliability and higher resale value but costs more and is disruptive.
Localized fixes are cheaper and quicker, ideal for isolated faults, yet risk recurrence and may mask systemic issues requiring future replacement.
When to Call a Plumber: Red Flags and Complex Issues
Certain hot water issues—such as persistent leaks, gas pilot or electrical problems, and major pipe corrosion—warrant a licensed plumber.
Typical repairs like replacing a pressure-reducing valve, fixing a leaking tank, or rerouting corroded piping have predictable cost and time ranges that a professional can estimate.
Homeowners should ask about licensing, warranties, itemized quotes, expected timeline, and any prep needed before the visit.
Problems that require licensed professionals
When persistent low hot water pressure stems from recurring leaks, corrosion, or issues within the main supply lines, a licensed plumber should be consulted. These problems often require diagnostic tools, code knowledge, and sealed permits.
Other professional-only issues include damaged water heaters, compromised pressure-reducing valves, cross-connections risking contamination, and complex repiping. Attempting these without certification can worsen damage and violate regulations.
Estimated costs and time for common professional repairs
Several common professional repairs for low hot water pressure typically fall into predictable cost and time ranges, helping homeowners budget and schedule accordingly.
Pipe repair or partial repipe: $200–$1,500, 2–8 hours.
Water heater repair or replacement: $150–$2,500, 1–6 hours (replacement longer).
Pressure regulator replacement: $150–$400, 1–3 hours.
Complex diagnostics or mains issues increase both cost and duration.
What to ask a plumber and how to prepare for a service visit
How should a homeowner prepare before a plumber arrives and which questions will help diagnose low hot water pressure efficiently?
A homeowner should clear access to the water heater and affected fixtures, note symptoms (when, duration, scope), and shut off valuables.
Ask: when did issue start, any recent work, pressure readings, signs of leaks or sediment, warranty status, estimated diagnosis time and cost, and recommended fixes.
Preventive Maintenance to Keep Hot Water Pressure Strong
Regular preventive maintenance preserves hot water pressure by combining scheduled tank flushing and system inspections with water-softening or filtration to limit scale buildup.
Homeowners are advised to flush tanks and check valves annually (or more often in hard-water areas) and to evaluate softeners, descalers, or point-of-use filters where mineral deposits are common.
For persistent low pressure over time, upgrading to larger supply lines or installing a pressure booster offers a long-term solution.
Recommended schedule for flushing and inspections
Maintenance schedules provide a clear framework for preserving hot water pressure and preventing buildup that degrades performance.
Recommend flushing tanks every six to twelve months depending on water hardness and usage.
Inspect pressure relief valves, shutoff valves, and visible piping biannually.
Check sacrificial anode rods yearly.
Document dates and findings; escalate to a licensed plumber if sediment, corrosion, leaks, or persistent pressure loss appear.
Water-softening, filtration, and scale-prevention options
Because mineral-laden water accelerates scale buildup inside tanks and on heating elements, implementing targeted softening, filtration, and scale-control measures is key to preserving hot water pressure.
Homeowners should consider whole-house softeners, point-of-use filters, and magnetic or electronic descalers where appropriate.
Routine maintenance, resin replacement, and periodic backwashing prevent clogs and element fouling, maintaining flow and extending heater lifespan.
Upgrades that improve long-term pressure (larger pipes, pressure boosters)
When domestic plumbing consistently delivers weak hot water flow despite routine care, targeted upgrades such as upsizing supply lines and installing pressure-boosting systems can restore and preserve long-term performance.
Larger-diameter pipes reduce friction losses; replacing undersized branches balances distribution.
Constant-pressure boosters or variable-speed pump systems maintain steady delivery and protect fixtures.
Professional assessment guarantees correct sizing, backflow protection, and code compliance for reliable, durable results.
Comparison of Solutions: DIY vs. Professional
A concise comparison helps readers choose between DIY methods and hiring a professional by weighing effectiveness, cost, time, and risk for each common fix. The table below summarizes relative trade-offs to make that choice clearer. The following discussion will reference these categories when evaluating specific solutions.
| Solution Type | Typical Cost | Typical Risk |
|---|---|---|
| DIY (e.g., aerator cleaning) | Low | Low–Moderate |
| Professional (e.g., repiping) | High | Low |
Effectiveness, cost, time, and risk for each common fix
Compare common fixes for low hot-water pressure across four practical dimensions—effectiveness, cost, time, and risk—to determine whether a DIY approach or professional service is appropriate.
Cleaning aerators or showerheads: high effectiveness, low cost, short time, low risk.
Flushing water heater: moderate–high effectiveness, low–moderate cost, moderate time, moderate risk.
Replacing valves or pipes: high effectiveness, higher cost, longer time, higher risk—hire a pro.
Troubleshooting Checklist You Can Print and Use
A concise, printable troubleshooting checklist guides users through a step-by-step diagnostic flow from the simplest fixes to when to call a professional.
The checklist includes:
- Basic user checks (valves, aerators, pressure settings).
- Intermediate inspections (sediment, tank issues, pipe obstructions).
- When to contact a licensed plumber or technician.
This structured approach helps prioritize actions and avoid unnecessary repairs.
Step-by-step diagnostic flow from easiest fixes to professional help
Begin by following a clear, prioritized checklist that moves from the simplest, homeowner-level fixes to items requiring a professional: check cold-water shutoffs and fixture aerators, confirm the water heater’s temperature and pressure-relief valve, inspect visible supply lines and mixing valves for leaks or obstructions, test flow at multiple hot outlets to isolate the problem, and only then consider tank flushing, element or valve replacement, or calling a licensed plumber or HVAC technician.
Follow sequential steps: note symptoms, perform visual checks, clear aerators, measure flow, flush tank if sediment suspected, replace accessible parts, document findings, and escalate to a pro with photos and measurements if pressure remains low.
Typical Costs and Time Estimates for Repairs and Upgrades
Costs and expected downtime for common fixes are summarized briefly to help plan whether a DIY approach or hiring a pro is appropriate.
- DIY parts: low cost, short downtime;
- Professional service: higher cost, moderate downtime;
- Major upgrades (tank/booster): highest cost, longer downtime.
Readers can use these ranges to compare estimates and scheduling.
Cost ranges for DIY parts and professional services
Price estimates help homeowners decide whether to tackle a hot-water pressure issue themselves or hire a professional.
Common DIY parts—new showerheads, aerators, flexible hoses, and basic valves—typically range $10–$100.
Replacement pressure regulators, expansion tanks, or water heater components run $50–$400.
Professional service calls, diagnostics, and repairs commonly range $100–$800+, depending on complexity and regional labor rates.
Expected downtime for each repair type
How long service interruptions last while addressing hot-water pressure problems depends on the repair type and whether a homeowner or a professional handles it.
Simple tasks—cleaning aerators, adjusting valves, flushing tanks—typically cause 15–60 minutes of downtime.
Replacing pumps, pressure regulators, or valves often requires 2–6 hours.
Major upgrades like repiping or water-heater replacement can take a day to multiple days with potential scheduling delays.
Conclusion
When hot water pressure falters, swift, sensible actions restore flow like pruning a tangled vine: simple DIY rinses, fixture clearing, and a heater flush often revive pressure; persistent clogs, corroded valves, or compromised supply lines signal professional intervention. Regular maintenance prevents recurrence, balancing cost and convenience. Homeowners weigh time, skill, and safety against service fees, using the troubleshooting checklist to decide whether to proceed alone or summon a plumber for reliable, lasting results.