How to Use PTFE Tape on an Outside Tap: Step-by-Step Guide for a Leak-Free Seal
How to Use PTFE Tape on an Outside Tap: Step-by-Step Guide for a Leak-Free Seal
To effectively seal an outside tap and prevent leaks, follow these steps: First, shut off the water supply and drain the spout. Next, inspect and clean the male threads to ensure they are dry and undamaged. Wrap PTFE tape clockwise around the threads with 2–3 snug, overlapping turns, finishing flush with the end. Hand-tighten the fitting, then use a wrench to snug it further without over-torquing. Finally, restore the water supply and check for leaks, rewrapping if necessary. For more detailed steps, alternatives, and troubleshooting tips, continue reading.
How to Use PTFE Tape on an Outside Tap for a Leak-Free Seal
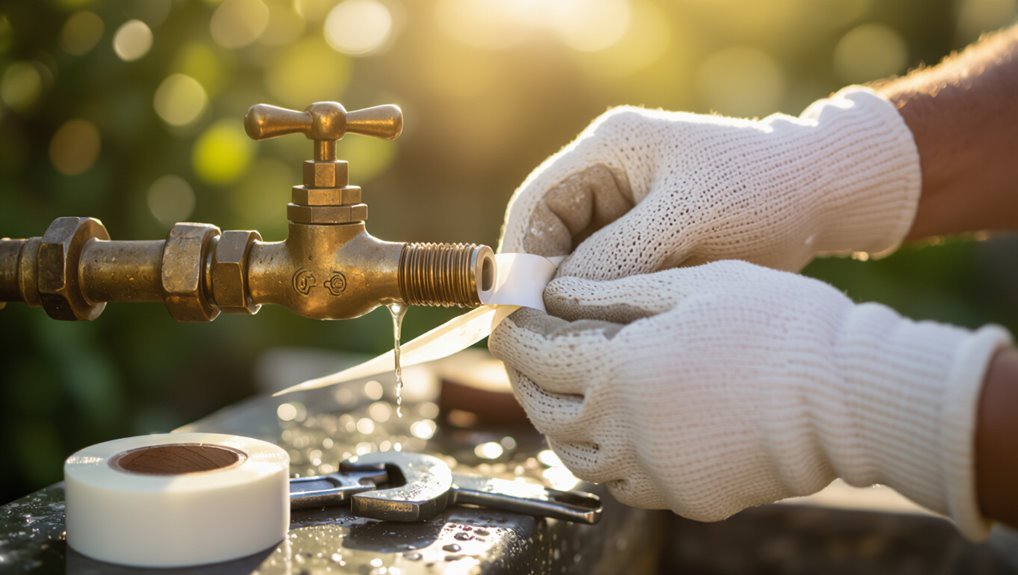
The method involves wrapping PTFE tape clockwise around the tap’s threaded spout, typically with two to three snug layers.
Then, tighten the fitting to compress the tape and form a seal. When applied correctly, this simple technique prevents drips and resists pressure leaks common at outdoor connections.
Results are a dry, reliable joint that can be retaped if future maintenance is required.
Quick overview of the method and expected results
Begin by shutting off the water supply and draining the outside tap; this prevents pressure or residual water from interfering with the repair.
The guide explains how to use PTFE tape on outside tap threads: clean threads, wrap tape clockwise three to five tight turns, reinstall and tighten.
Expected results: a durable, leak-free seal suitable for outdoor taps when applied correctly and inspected for leaks.
Why PTFE Tape Works for Outside Taps
PTFE tape seals outside taps by filling thread gaps and offering a low-friction, water-resistant barrier that conforms to metal connections.
Its chemical inertness and temperature tolerance make it suitable for most garden and household spigot fittings.
It is not appropriate for tapered compression fittings, certain plastics that can creep, or applications requiring thread-locking compounds rather than a simple seal.
Properties of PTFE tape that create a seal
A thin, conforming film of polytetrafluoroethylene (PTFE) fills microscopic gaps and prevents direct metal-to-metal contact at threaded joints, creating a reliable barrier against leaks.
Its low surface energy and chemical inertness resist water and common plumbing chemicals. The tape’s lubricity eases assembly while cold-flowing under compression to occupy imperfections, maintaining pressure-tight seals without degrading or hardening over time.
When PTFE tape is appropriate vs when it is not
When is tape the right choice for sealing an outdoor tap, and when should a different method be used?
PTFE tape suits metal threaded fittings, minor leaks, and temporary repairs because it fills gaps and resists water.
It is inappropriate for plastic threads, damaged seals, compression fittings, or when thread compound or pipe dope is specified; those situations require proper gaskets, replacement parts, or liquid sealants.
Tools and Materials You Need
The section lists the essential and optional items for wrapping an outside tap with PTFE tape.
Required items include PTFE tape, an adjustable wrench or spanner, and a clean cloth.
Optional aids such as silicone grease, plumber’s tape dispensers, and thread sealant can simplify the task.
Required items
Essential tools and materials for tap sealing include PTFE tape, an adjustable wrench, a wire brush or cloth for cleaning threads, and pipe joint compound or thread sealant if extra protection is desired.
The user should also have gloves, a rag, and appropriate replacement washers. Properly sized tape and a secure wrench guarantee a reliable seal when applied correctly.
- PTFE tape
- Adjustable wrench
- Cleaning cloth
Optional items that make the job easier
Beyond the core items already listed, a few optional tools can simplify work and improve outcomes.
These items save time, increase safety, and guarantee a neater seal when using PTFE tape on an outside tap.
- Adjustable wrench with thin jaws for better grip.
- Pipe thread sealant paste for extra protection.
- Flashlight or headlamp for visibility in tight or dark spaces.
Preparing the Outside Tap Before Applying PTFE Tape
Before wrapping PTFE tape, the water supply to the outside tap should be shut off at the nearest isolating valve to prevent leaks and pressure.
The tap’s male threads and adjacent fittings must be inspected for damage, corrosion, or old sealant that could compromise the seal.
Any debris, oil, or moisture should be thoroughly cleaned and dried so the tape adheres evenly.
How to shut off water safely
Locate and turn off the correct supply to the outdoor faucet to prevent water flow while wrapping the threads with PTFE tape.
Confirm shutoff by opening the tap briefly until water stops. If the tap still flows, locate and close the home’s main valve or the isolation valve serving that zone.
Relieve residual pressure and keep the area dry before proceeding.
Inspecting the threads and surrounding fittings
Inspect the spout threads and nearby fittings for damage, corrosion, or old sealant that could prevent a tight seal with PTFE tape.
Note cross-threading, flattened or bent threads, and mineral buildup that might hide defects.
Verify mating surfaces on the hose bib and any adapters are intact and not warped.
Confirm fittings align properly to avoid stress when tightened.
Cleaning and drying the threads for best adhesion
Start by removing any loose debris, old sealant, and mineral deposits from the spout and mating threads using a stiff brush or a small wire brush.
Stubborn buildup can be loosened with a vinegar soak or a commercial lime remover.
Rinse thoroughly with clean water, then dry completely with a lint-free cloth or compressed air.
Confirm no residue or moisture remains before applying PTFE tape.
Step-by-Step: Applying PTFE Tape to an Outside Tap
The following steps outline the practical process for wrapping PTFE tape on an outside tap, beginning with proper positioning of the installer and the tape.
They cover wrap direction and count, how to maintain consistent tension and overlap, and how to finish the tape end.
The sequence concludes with reassembling the fitting, initial tightening, and guidance to achieve a secure seal without overtightening.
Step 1 Position yourself and the tape
Stand facing the outdoor faucet with the water supply shut off and a cloth or rag at hand to catch drips.
The person kneels or stands comfortably to access the threaded spout, ensuring clear visibility.
Hold the PTFE tape roll so it unwinds smoothly.
Clean threads of debris and corrosion before applying tape.
Position tape near the thread start for controlled application.
Step 2 Direction and number of wraps
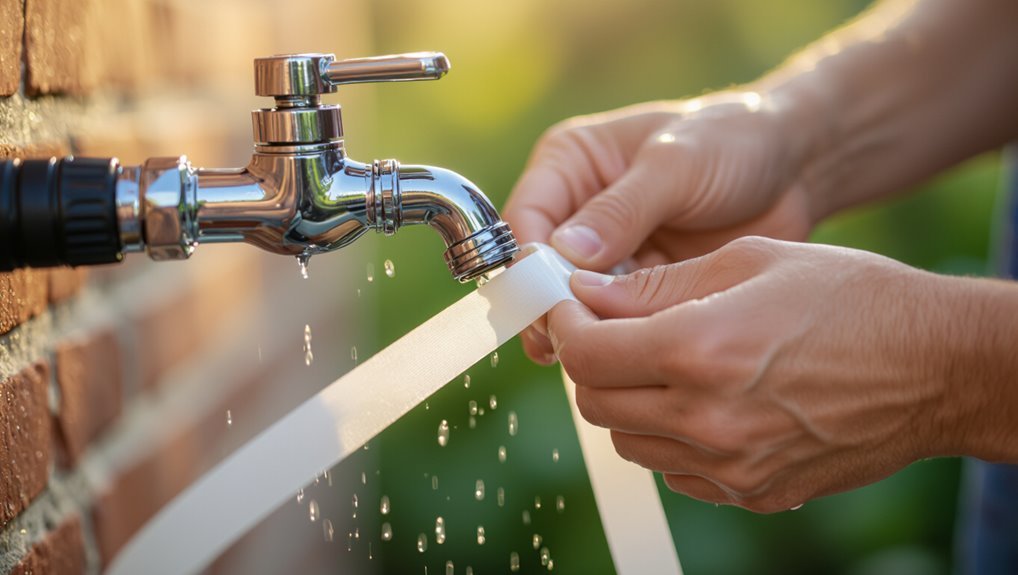
With the threads cleaned and the tape held near the start, the installer orients the tape so it unrolls clockwise when viewed from the end of the spout; this matches the direction of the male threads and prevents unwinding when the fitting is tightened.
They wrap the tape smoothly along the threads, overlapping each pass slightly, typically making three to five full wraps to guarantee adequate sealing without building excessive bulk.
Step 3 Tension, overlap, and finishing the end
Maintain consistent tension while wrapping so the tape conforms to the thread profile without bunching or tearing.
Overlap each wrap by roughly half the tape width, creating an even, layered seal that fills thread voids.
Smooth the tape with a fingertip to seat edges.
Finish by tearing or cutting the tape flush with the end of the male thread, avoiding loose tails.
Step 4 Reassembling the fitting and initial tightening
Reconnect the taped male thread to the mating fitting, aligning threads by hand to guarantee they engage smoothly without cross-threading.
Once hand-tight, use an appropriate wrench on the fitting body—apply steady, even force while holding the tap steady to prevent twisting the pipe.
Stop when resistance increases noticeably; inspect the joint for flush seating and confirm no PTFE is exposed in the flow path.
Step 5 Final tightening guidance and avoiding overtightening
Begin tightening gradually using a wrench, applying short, controlled turns and pausing frequently to check the joint’s seating and alignment.
Finish when hand-tight plus one to two wrench turns produces firm resistance and no visible gaps.
Stop before metal-to-metal grinding or deformation occurs.
Test for leaks under low pressure, then slightly retighten if necessary.
Excessive force risks thread damage and seal failure.
Testing the Seal and Troubleshooting Leaks
After reassembly, the water should be turned on slowly at the main valve or stopcock to restore pressure and check for immediate leaks.
The tap and surrounding joints should be inspected for slow weeps—watch threads, the spout base, and any hose connections for drips or moisture.
If leakage continues despite correctly applied PTFE tape, the fittings may need greater tightening, fresh tape, damaged threads, or replacement parts, and professional help should be considered.
How to turn the water back on safely
Open the main supply valve slowly and observe the tap and joint closely for any immediate drips or dampness.
Gradually increase pressure, watching fittings and hose connections. If water appears, shut the valve, relieve pressure by opening the tap, tighten the joint or rewrap PTFE tape, then retest.
Once stable with no visible leaks, fully restore supply and monitor briefly for changes.
Checking for slow leaks and where to look
With the supply restored and fittings observed for immediate leaks, attention should shift to detecting slower seepage that may not appear under initial pressure.
Inspect joints, hose connections, and the valve stem for wetness or mineral deposits. Feel for dampness along pipe runs and under insulation.
Leave the tap under normal pressure for 15–30 minutes, then recheck; mark any suspect areas for monitoring.
What to do if leaks persist after PTFE tape
If leaks persist despite properly applied PTFE tape, proceed to systematically test the seal and isolate the source: run the tap at normal pressure while inspecting all threaded joints, the valve stem, and hose connections for active drips or signs of seepage.
Then apply a soapy water solution to each suspect area to reveal tiny bubbles from pressurized leaks.
Tighten fittings, replace damaged washers or O-rings, retape threads, and if leakage continues, replace the faucet assembly or consult a plumber.
Common Mistakes to Avoid
When using PTFE tape on an outside tap, common mistakes can compromise the seal and cause leaks.
These include wrapping the tape against the thread direction, applying too many or too few layers, and attempting to seal damaged or tapered threads with tape alone.
Readers should be warned to follow proper wrapping technique, use the correct amount, and inspect threads for damage before proceeding.
Applying tape in the wrong direction
Applying PTFE tape against the thread rotation causes it to bunch and unravel during tightening, reducing seal effectiveness and increasing leak risk.
The installer should wrap tape in the same direction the fitting turns when tightened, keeping tension even and overlaps flat.
Incorrect orientation leads to gaps and shredded edges that compromise the seal; correct direction guarantees smooth seating and reliable thread engagement.
Using too much or too little tape
Too much or too little PTFE tape both undermine a reliable seal: excess tape can bunch and prevent threads from fully engaging, while too little leaves gaps that allow leaks.
Proper application uses two to three snug wraps, covering threads evenly without overhang.
After wrapping, inspect for smoothness and remove loose strands; tighten fittings steadily to compress the tape and confirm a watertight connection.
Using tape on damaged or tapered threads
Avoid using PTFE tape as a fix for damaged or tapered threads, since tape cannot restore stripped or misshapen threads and may conceal defects that cause leaks or cross-threading.
Instead, inspect threads, clean debris, and replace or re-tap fittings with proper thread repair tools or new parts.
Using tape on compromised threads risks failure; correct the underlying damage before sealing.
When to Use Alternative Sealants
In certain cases, thread sealant paste or pipe dope provides a more reliable seal than PTFE tape, particularly on damaged, tapered, or irregular threads.
Guidance is needed on when to choose paste over tape and on the correct technique for combining a light layer of paste with PTFE tape when compatibility permits.
Safety and compatibility checks should be emphasized to prevent chemical incompatibility or clogging of fittings.
Situations where thread sealant paste or pipe dope is better
When metal-on-metal threads are damaged, porous, or unusually tapered, thread sealant paste (pipe dope) often outperforms PTFE tape because its thicker, malleable consistency fills irregularities and bonds to the mating surfaces, providing a more reliable seal under pressure or vibration.
Paste is also preferable for buried, high-temperature, or high-pressure fittings, and when threaded joints require permanent or semi-permanent assembly.
Using both PTFE tape and paste safely {comparison}
Consider combining PTFE tape and thread sealant paste only when their complementary properties are required: tape provides a quick, clean barrier to prevent leaks on smooth, undamaged threads, while paste fills gaps and adheres on imperfect or high-pressure joints. Use minimal paste over tape, avoid solvent-incompatible combinations, and follow manufacturer cure times.
| Benefit | Use case |
|---|---|
| Seal speed | Quick repairs |
| Gap filling | Damaged threads |
| Pressure rating | High-pressure joins |
| Compatibility | Check materials |
| Removal | Easier if minimal paste |
Maintenance and Long-Term Care of Outside Taps
Routine seasonal checks and simple winterizing steps help prevent freeze damage and prolong valve life.
The article then covers when to shut off and drain outdoor lines, insulate exposed fittings, and inspect for corrosion or leaks.
Guidance is also provided on how often PTFE tape should be reapplied and when a fitting merits re-servicing.
Seasonal checks and winterizing tips
Inspecting outside taps at the change of seasons helps prevent freeze damage and leaks that can worsen over time.
The homeowner should drain and shut off exterior supply lines before freezing weather, remove hoses, and insulate exposed valves with foam covers.
In autumn and spring, check for corrosion, cracked fittings, and proper insulation; repair or replace compromised components promptly to maintain integrity.
How often to reapply PTFE tape or re-service fittings
After seasonal checks and winterizing, attention should turn to the longevity of thread seals and moving parts: PTFE tape and fittings do not last indefinitely and benefit from periodic review.
Inspect joints yearly, and reapply tape when threads show wear, leakage, or after disassembly.
Replace washers and corroded fittings every 3–5 years or sooner if deterioration, freezing damage, or persistent drips occur.
Quick Troubleshooting Flowchart for Common Scenarios
Begin with a clear, step-by-step decision path that guides the user from symptom to solution by asking targeted yes/no questions about leaks, low flow, or hard-to-turn valves.
Identify symptom, then ask: Is water present when off?
If yes, tighten or replace packing.
If no, test flow: reduced?
Clean aerator or debris, check supply.
If still problematic, inspect tape/threads and re-seal.
Summary Checklist for a Leak-Free Outside Tap Seal
While ensuring a reliable seal requires attention to several details, this checklist distills the essential steps for a leak-free outside tap:
- Clean threads, inspect for damage, and dry thoroughly before applying PTFE tape.
- Wrap tape clockwise 3–5 turns, overlap evenly, press to conform, and avoid excess.
- Reassemble, tighten to hand-plus-quarter-turn, test under pressure, and recheck for leaks.
Conclusion
In one suburban case, a homeowner replaced a leaking outdoor tap by wrapping PTFE tape clockwise around the clean, dry male threads three times, tightening the fitting until hand-tight plus a quarter turn; the leak stopped immediately. PTFE tape works because it fills thread gaps without hardening, but it performs best on metal threads and with proper prep. Regular checks after winter and replacing tape during major servicing keep outside taps durable and leak-free.