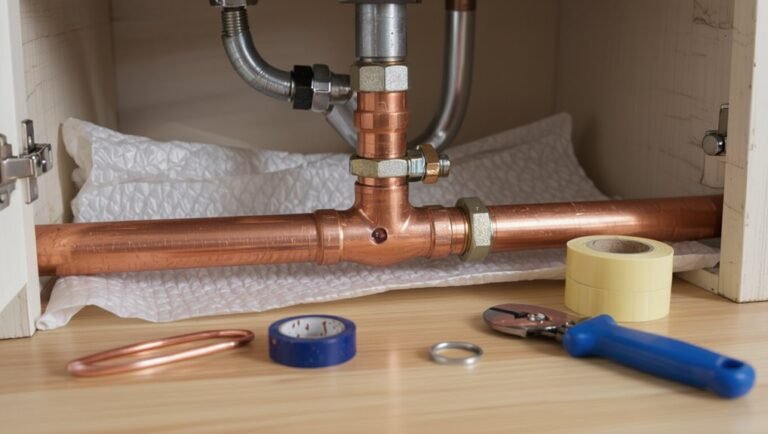
How to Install PVC Pipes in the Kitchen: A Step-by-Step DIY Guide
Installing PVC pipes in your kitchen involves careful planning and execution. Begin by measuring your drain and vent routes, choosing DWV-rated PVC or CPVC as necessary, and adhering to local plumbing codes. Cut and deburr the pipe ends, then dry-fit all components to ensure a proper fit. Apply primer and solvent cement to the joints, making sure to maintain the correct slope and trap placement. Secure the pipes with hangers and test for leaks. Remember to wear safety gear and check if permits and inspections are required. For a comprehensive guide, including detailed steps, tools, and troubleshooting tips, continue reading.
Overview of Installing PVC Pipes in a Kitchen
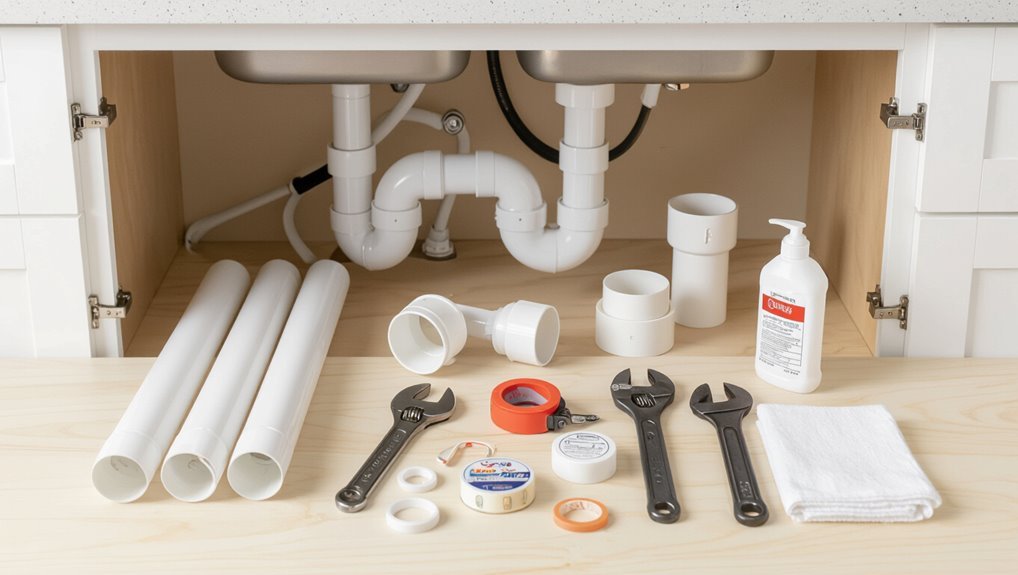
Installing PVC pipes in a kitchen involves measuring and cutting pipe, fitting joints and seals, and routing lines for drains, vents, or limited cold-water supply.
PVC is commonly used for waste and venting but has restrictions for hot-water or high-pressure supply, so typical applications and material limits should be identified up front.
Required tools, materials, basic safety steps, and adherence to local plumbing codes must be confirmed before work begins.
What installing PVC pipes in a kitchen involves
A kitchen PVC installation requires planning, basic plumbing skills, and the right tools to route drainage and supply lines safely and efficiently.
The process covers measuring runs, cutting and deburring pipes, dry-fitting assemblies, solvent-welding joints, installing supports and traps, and pressure-testing for leaks.
Safety, local code compliance, and careful material selection are emphasized when explaining how to install PVC pipes in the kitchen.
Typical use cases and where PVC is appropriate (drain, vent, supply limitations)
Choose PVC for locations where its properties match the job: it excels in kitchen drain and vent lines due to chemical resistance, smooth interior for waste flow, and ease of solvent-weld assembly, but it is generally inappropriate for pressurized hot-water supply without specific CPVC or approved alternatives.
PVC suits soil, waste, and venting; white PVC commonly used for DWV.
Use certified materials and follow local code limits.
Tools and materials you’ll need
Several essential tools and materials are required before beginning PVC work in a kitchen: PVC pipe and fittings (DWV-rated for drains/vents), primer and solvent cement, a tape measure, a deburring tool or utility knife, a PVC cutter or fine-tooth saw, a level, pipe hangers/supports, rubber gaskets or flashing for appliance connections, and appropriate safety gear (gloves and eye protection).
- Measure and cut accurately
- Deburr and test dry-fit
- Prime, cement, assemble
- Support and seal connections
Safety precautions and local code considerations
Because plumbing work affects both safety and compliance, installers should prioritize protective measures and adherence to local codes before cutting any pipe.
They must wear eye protection, gloves, and respirators when solvent welding, shut off water and electricity near work areas, and ventilate.
Verify pipe materials, slope, trap placement, and permitted fittings against local plumbing codes; obtain permits or inspections when required.
Quick Start: Step-by-Step Summary for a Simple Kitchen Sink Installation
A concise sequence outlines the main actions: measure and mark pipe lengths, cut to size, dry-fit components, apply primer and solvent cement, then run water to test for leaks.
The typical straightforward kitchen sink installation takes about 1–3 hours for a DIYer with basic tools.
Difficulty is low to moderate, with attention to fit and sealing being the critical factors.
Brief sequence of major steps (measurement, cut, dry-fit, glue, test)
Begin by laying out the overall workflow: measure the pipe runs, cut to length, dry-fit the pieces to confirm alignment, apply solvent and assemble, then pressure-test for leaks.
Next, mark accurate measurements, use a square cut, deburr edges, mock-up the assembly, clean fittings, apply primer and cement, join with proper rotation, allow cure time, then run water and inspect all joints for seepage.
Estimated time and difficulty level
Most straightforward kitchen sink PVC installs take about 1–3 hours for someone with basic tools and DIY experience.
Complexity rises with fixture type, cramped access, or additional fittings. Novices should allow extra time for measurement and drying.
Difficulty is generally low-to-moderate: requires basic cutting, solvent cementing, and leak testing skills.
Professional help is advised for unfamiliar plumbing codes or complex drains.
Preparing the Work Area
Before any cutting or gluing begins, the person should shut off the water supply and clear the cabinet space to access the pipes.
They then remove existing plumbing, assess the layout, and measure routes for new runs and fittings.
Finally, they identify the trap arm, vent locations, and required slope to guarantee proper drainage.
Shutting off water and clearing cabinets
Shut off the water supply at the home’s main valve and confirm faucets are dry to prevent leaks while working under the sink.
Empty cabinets and remove shelf items, appliances, and loose goods.
Lay down towels or a waterproof mat and place a bucket for residual water.
Verify good lighting and clear floor space for tools, parts, and safe movement during the PVC installation.
Removing old plumbing and assessing existing layout
Loosen and remove the old trap, tailpiece, and any connected fittings, working systematically from the sink downward while containing dripping water with a bucket and towels.
Inspect remaining pipe surfaces for corrosion, hair, debris, and previous repair materials.
Verify wall and cabinet clearances, note vent and cleanout locations, and photograph the layout.
Label pipes and fittings for reference before disposal.
Measuring and planning pipe runs and fittings
One clear set of measurements and a simple plan prevent most fitment errors: measure vertical drops, horizontal runs, and distances to vents and cleanouts. Then sketch the route and list required pipe lengths and fittings.
Verify wall and cabinet clearances, note obstruction locations, record existing pipe diameters, and choose appropriate connectors and adapters.
Calculate extra length for joints and cutting tolerances.
Identifying trap arm, vent, and slope requirements
Before beginning work, the installer must locate the trap arm, vent connection, and required slope to guarantee proper drainage and code compliance.
Determine trap arm length and orientation to prevent siphoning, identify the vent tee or stack to maintain air admittance, and calculate slope—typically 1/4″ per foot for horizontal drain runs.
Mark routes, note offsets, and verify local code variations before cutting.
Selecting the Right PVC Pipe and Fittings
Selection begins with identifying common PVC types and sizes used in kitchen drains and supply lines, such as 1¼–2 inch DWV PVC for sink drains and ½–¾ inch for water supply.
Appropriate fittings—elbows, P-traps, slip joints and vent connectors—should match pipe material and thread or solvent-weld requirements to guarantee watertight joints.
Where higher temperature resistance, code requirements, or existing systems dictate, CPVC, ABS, or metal piping may be chosen instead.
PVC types and sizes commonly used in kitchens
Choosing the correct PVC type and size for kitchen plumbing guarantees safe, code-compliant performance and long-term reliability.
Schedule 40 PVC is typical for drain, waste, and vent lines; 1-1/2″ for sink drains, 2″ for runs and disposals.
For cold-water supply, CPVC or PVC pressure-rated pipe in 1/2″ and 3/4″ sizes is common.
Confirm local code and pressure ratings.
Choosing fittings for sinks, traps, and vent connections
Several common fittings are required to connect kitchen sinks, traps, and vents into a reliable drainage system: Proper selection guarantees leak-free joints, correct flow, and code compliance.
Consider trap adapters, wye fittings, sanitary tees, and vent connectors sized to match pipe diameter and slope.
Use solvent-weld or threaded connections per fixture requirements and local regulations.
- Trap adapters
- Wye fittings
- Sanitary tees
- Vent connectors
When to use CPVC, ABS, or metal instead
Although PVC is common for kitchen drain lines, alternative materials are chosen when temperature, local code, chemical exposure, or durability requirements demand it.
CPVC suits hot water supply where higher heat resistance is needed.
ABS is used for cold drains and where local code permits.
Metal (copper, galvanized, or stainless) fits exposed, high-strength, or fire-rated installations and commercial fixtures requiring robust longevity.
Step-by-Step Installation Process
The installer begins by marking and cutting PVC to length with safe tools and techniques.
After dry-fitting the layout and confirming clearances, pipe ends and fittings are prepared for solvent welding.
Final assembly uses proper solvent application and alignment, with the P‑trap and trap arm set to the correct slope.
Marking and cutting PVC pipe safely
Begin by measuring the run and marking each cut clearly with a pencil or fine-tip marker, ensuring measurements are taken from the pipe end and account for any coupling or fitting insertion depth.
Wear safety glasses and gloves. Secure pipe in a vise or clamp. Use a fine-tooth PVC or hacksaw, cutting squarely.
Deburr and chamfer edges with a file or deburring tool before cleaning and solvent preparation.
Dry-fitting the layout and checking clearances
Lay out all cut pipe and fittings along the planned run to assemble a dry-fit mockup, checking that joints seat fully and that lengths, offsets, and branch locations match the measured plan.
Confirm alignment with fixtures, cabinets and walls, verify slope for drainage, guarantee access for future maintenance, and adjust supports and hangers.
Note any interference requiring reroute or trim before final assembly.
Preparing pipe ends and fittings for solvent welding
Before solvent welding, each pipe end and fitting must be precisely prepared to confirm a secure, leak-free joint.
Cut ends squarely, remove burrs and shavings with a deburring tool or utility knife, and test-fit components.
Lightly chamfer outer edges, clean surfaces with PVC cleaner or primer, and allow drying.
Mark alignment to ascertain correct orientation during final assembly.
Proper solvent welding and assembly technique
Positioning each component correctly and working steadily, the installer applies solvent weld in a systematic sequence to guarantee full contact and proper fusion between pipe and fitting.
Each joint receives primer where required, then a thin, even coat of cement on both surfaces. Parts are fully inserted with a quarter-turn twist, held briefly to set, and excess cement wiped away for a neat, secure assembly.
Installing the P-trap and trap arm with correct slope
Begin by aligning the tailpiece, P-trap body, and trap arm to guarantee a continuous downward slope from the sink outlet to the wall drain.
Measure and cut trap arm to fit, deburr ends, apply primer and solvent where required, and assemble with slip nuts and washers.
Set trap so water seals form properly, confirm alignment, and tighten connections without over-stressing joints.
Connecting to DWV system or stub-out
Connect the trap arm to the home’s DWV stub-out by confirming pipe sizes, dry-fitting the pieces, and preparing mating surfaces for a secure, code-compliant joint.
Apply primer and solvent cement per manufacturer instructions, fully seating the trap arm into the stub-out adapter.
Check alignment and slope again, wipe excess cement, and allow cure time before testing with a water run to verify leak-free connection.
Installing support straps and securing pipes
Secure the run with appropriately spaced straps and hangers to prevent sagging, noise, and undue stress on joints.
Install straps every 3–4 feet on horizontal runs, closer near long fittings and offsets.
Use cushioned hangers for thermal expansion, anchor supports to structural members, and avoid overtightening.
Verify alignment and slope remain correct while securing to maintain proper drainage and joint integrity.
Pressure/leak testing and first run water test
With the run properly supported and alignment confirmed, pressure and leak testing should be performed before concealing or finishing the installation.
Close all fixtures, fill the system, and pressurize per local code using a pump or air/water tester.
Inspect joints for leaks, monitor for pressure loss over the required hold time, repair any defects, then perform a first-run water test through fixtures to confirm proper flow and drainage.
Common Problems and How to Fix Them
Common installation issues include leaks at joints, improper slope causing slow drainage, noisy or vibrating pipes, and incompatible fittings or materials.
For each, the article outlines simple diagnostic steps and targeted repairs such as re-seating or re-gluing joints, regrading or adding pipe sections to correct slope, installing supports or insulation to stop noise, and replacing mismatched fittings.
Practical tips and replacement criteria help determine when a quick fix suffices versus when parts must be replaced.
Leaks at joints diagnosis and repair
Begin by inspecting each joint for visible signs of water or residue, since most kitchen PVC leaks occur at connection points where fittings, glued seams, or compression fittings fail.
Tighten loose compression nuts, dry and reapply solvent cement on failed glued joints after cutting back to sound pipe, replace cracked fittings, and test with low-pressure water.
Use thread tape on threaded connections.
Improper slope causing slow drainage correction steps
Check the drain line for its fall per foot, since inadequate slope is a frequent cause of slow kitchen drainage.
Measure run and adjust to 1/4 inch per foot for horizontal PVC.
Loosen supports, regrade pipe or add angled fittings, then resecure with hangers at proper spacing.
Test flow, inspect for standing water, and trim or reconfigure segments until drainage is brisk and consistent.
Noisy pipes or vibrations mitigation
After correcting slope-related drainage issues, attention should turn to noises and vibrations that indicate loose or unsupported PVC in the kitchen plumbing.
Secure pipes with proper clamps every 3–4 feet, add cushioned hangers or rubber-lined straps to dampen movement, and isolate PVC from studs or metal to prevent resonance.
Check for contact points causing rattle and tighten or pad as needed.
Incompatible fittings or materials what to replace
When incompatible fittings or mixed materials are present, they can cause leaks, corrosion, or joint failure that compromise the kitchen plumbing system.
Identify mismatched metals, old galvanized, or non-compatible plastic connections.
Replace with PVC-compatible adapters, dielectric unions for metal-to-metal joins, and standardized solvent-weld or threaded PVC parts.
Guarantee correct size, pressure rating, and use proper seals and primers to prevent future failures.
Tips to Ensure Long-Term Performance
To guarantee long-term performance, attention to proper solvent welding techniques and observing recommended curing times is essential.
Protecting and insulating pipes under the sink helps prevent thermal stress and physical damage.
Regular preventive maintenance and periodic inspections catch minor issues before they become failures.
Best practices for solvent welding and curing times
Apply solvent welding with steady, deliberate motions and controlled solvent use to create durable, leak-free joints; proper surface preparation, correct primer and cement selection, and adequate cure time are essential for long-term performance.
Clean, deburr, and dry surfaces, apply primer per manufacturer instructions, then coat evenly with PVC cement.
Hold fittings until initial set; respect full cure times before pressure testing or covering to avoid joint failure.
Insulating and protecting pipes under the sink
Insulate and shield under-sink PVC and supply lines to prevent heat loss, condensation, and mechanical damage that can shorten service life.
Apply closed-cell foam sleeves to cold lines and pipe wrap to drain runs; secure with corrosion-resistant tape or zip ties.
Protect exposed fittings with insulating caps and install a splash guard against leaks and abrasion.
Maintain clear access for future work.
Preventive maintenance and periodic checks
Establish a simple schedule of preventive maintenance and periodic checks to catch small issues before they become major problems:
- Inspect joints and fittings monthly for leaks or looseness.
- Clear trap and drain lines quarterly to prevent buildup.
- Verify insulation and pipe supports before winter.
- Replace worn washers, seals, or damaged sections promptly to maintain flow and prevent corrosion.
When to Hire a Professional
Complex situations—such as extensive rerouting, connections to main sewer lines, or work involving gas or structural changes—typically require a licensed plumber.
Projects that trigger permits or inspections should be handled by someone familiar with local codes to avoid fines or failed approvals.
Homeowners should compare estimated professional fees, including permit costs, against DIY expenses and risks before deciding.
Complex scenarios that require a licensed plumber
When unexpected issues arise—such as extensive pipe corrosion, repeated blockages, or uncertain connections near gas lines—a licensed plumber should be engaged to diagnose and remedy the problem.
These situations often involve building-code considerations, hidden damage, or risks that exceed typical DIY scope.
Professionals handle complex rerouting, sewer-line failures, structural penetrations, compromised joints, and backflow or contamination concerns, using specialized tools, tests, and liability protection.
Permit and inspection triggers
Permits and inspections are legal and safety checkpoints that determine whether a kitchen PVC plumbing project stays within local codes. Projects that alter pipe sizes, relocate fixtures, penetrate fire-rated assemblies, or connect to the main sewer typically trigger a permit.
Homeowners should consult local jurisdictions before work begins.
Inspections verify workmanship, protect health and property, and often require licensed contractors for code-critical or multi-trade alterations.
Estimating professional cost vs DIY
Deciding between hiring a professional and tackling PVC plumbing as a DIY project hinges on scope, skill level, and risk tolerance: small repairs or simple sink drain replacements can be cost-effective for capable homeowners, while work that affects sewer connections, structural elements, or code-required components typically warrants a licensed plumber.
Compare labor rates, permit fees, material costs, time value, warranty, and potential repair risks when choosing.
Tools, Materials, and Parts Checklist for This Project
Typically, a clear checklist of tools, materials, and replacement parts makes the PVC installation faster and reduces mistakes.
The guide lists essentials for common kitchen runs, safety gear, measuring tools, cutting and joining supplies, and spare fittings for quick swaps.
Recommended items include:
- Tape measure, marker, level, utility knife.
- PVC cutter, saw, deburring tool, clamps.
- PVC primer, cement, thread sealant, sandpaper.
- Straight pipes, elbows, tees, end caps, washers.
Troubleshooting Table for Common Installation Issues
When installations show leaks, slow drains, misaligned joints, or fitting failures, a concise troubleshooting table helps identify probable causes, diagnostic steps, and corrective actions so the repair is efficient and targeted. The table below summarizes common faults, checks, and fixes for quick reference.
| Issue | Check | Fix |
|---|---|---|
| Leak | Loose/glue error | Recut, clean, re-glue |
| Slow drain | Clog/venting | Clear debris, vent check |
| Misalignment | Poor measurement | Realign, trim, support |
Conclusion
A homeowner once patched a leaking sink with duct tape until a small puddle became a basement lake—illustrating that quick fixes rarely hold. Installing PVC properly prevents such surprises: studies show 90% of DIY plumbing failures stem from poor joint preparation. With the right parts, tools, and patience, a durable kitchen plumbing system is achievable. When unsure, hiring a pro avoids costly damage, ensuring a reliable, long-lasting result.