How to Install Yard Hydrants: Step-by-Step Guide for DIY and Pros
Installing a yard hydrant is straightforward and involves several key steps. First, mark the site, then trench to the frost depth, and lay a suitably sized supply line. Next, align and brace the hydrant stem, connect it securely, and backfill with compacted granular bedding. Basic plumbing skills and utility locates are important, and you may need permits depending on local codes. Proper testing and seasonal maintenance ensure reliable operation. This guide provides detailed instructions for each step, ensuring a successful installation.
What a Yard Hydrant Is and Why You Might Install One
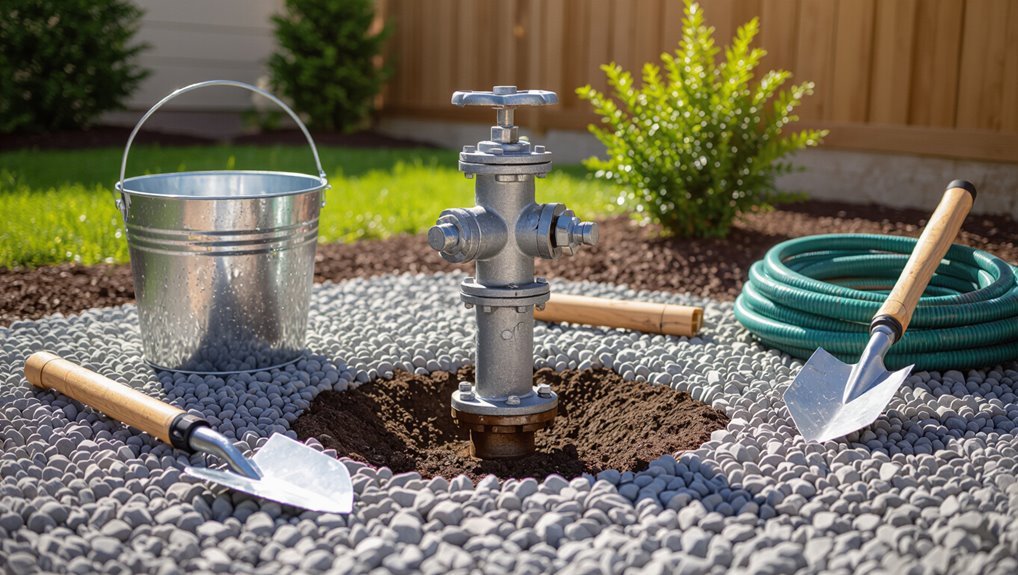
A yard hydrant is an aboveground outdoor spigot designed to provide reliable water access for residential yards, farms, and commercial sites.
Its frost-free mechanism, durable construction, and potential for long-term cost savings make it a practical choice where year-round or seasonal water supply is needed.
Different models—varying by mounting, valve type, and materials—change performance and dictate installation methods and site preparation.
Definition and common uses for residential, agricultural, and commercial properties
Yard hydrants are outdoor frost-resistant valves that provide an accessible, pressurized water supply where plumbing or municipal hookups are impractical.
They serve residences for lawn care, vehicle washing, and outdoor faucets; farms for livestock watering, irrigation, and equipment cleanup; and commercial sites for construction, landscaping, and maintenance.
Guides on how to install yard hydrants explain siting, trenching, connection, and winterization steps.
Benefits: frost-free design, water access, durability, and cost savings
After outlining typical placements and installation steps, the discussion shifts to why homeowners, farmers, and businesses choose yard hydrants.
Frost-free valves prevent freezing by locating shutoff below the frost line, ensuring reliable year-round water access for livestock, irrigation, and maintenance.
Robust materials and simple mechanics yield long service life and low maintenance, translating into upfront savings and reduced utility interruptions.
Types of yard hydrants and how selection affects installation
Because different jobs demand different features, selecting the right yard hydrant begins with understanding its basic types and how those choices change installation requirements.
Standpipe, freeze-free, and angle hydrants vary in depth, mounting, and drainage needs.
Material choice (bronze, stainless, galvanized) affects corrosion resistance and trenching.
Valve style and outlet size determine flow and necessary pipe diameter, influencing labor and cost.
Quick Overview: Can You Install a Yard Hydrant Yourself?
A typical yard hydrant installation is achievable for a homeowner with basic plumbing skills, common trenching tools, and a half- to full-day for a straightforward site.
More complex soil conditions, deep frost lines, or uncertain water access increase tools, time, and the likelihood of needed permits.
Professional help is advisable when tasks require heavy equipment, precise setbacks, or when the installer lacks confidence in waterline connections.
Typical skill level, tools required, and time estimates
While not requiring professional plumbing certification, installing a yard hydrant does demand basic trenching and pipe-joining skills, comfort with hand and power tools, and a working knowledge of frost-line depth and local plumbing codes.
Typically, a competent DIYer needs shovels, trenching tools, pipe wrenches, fittings, PVC or galvanized pipe, tape, and sealant.
Expect 4–8 hours for a straightforward install; complex sites take longer.
When to hire a pro versus DIY
Decide based on skill, site complexity, and local regulations whether to tackle the yard hydrant installation as a DIY project or hire a professional.
DIY suits those with plumbing experience, appropriate tools, and straightforward sites.
Hire a pro for uncertain soil, deep frost lines, complex connections, permit requirements, or lack of time.
Professionals guarantee code compliance, reliable freeze protection, and warranty-backed workmanship.
Permits, Codes, and Site Considerations Before Installation
Before beginning installation, the installer should confirm local plumbing and water utility regulations and obtain any required permits.
They must locate existing underground utilities using professional marking services to prevent damage.
Site selection should consider slope, frost line depth, and convenient access to the water source to guarantee reliable year-round operation.
Local plumbing and water utility regulations to check
Because yard hydrant installations interact with public water systems and local infrastructure, owners must verify permits, plumbing codes, and utility requirements before any excavation or connection begins.
Check municipal permit processes, backflow prevention mandates, metering and billing rules, pipe material and sizing standards, frost‑proof installation specifications, inspection schedules, and required contractor licensing.
Document approvals and retain copies for compliance and future reference.
Locating existing utilities and using utility marking services
Call the appropriate regional one‑call number or utility locating service to identify buried lines and mark their positions before any digging begins.
Contractors and homeowners should verify gas, electric, sewer, fiber, and water locations, request both paint flags and electronic locates, keep records of tickets and marks, respect clearance distances, and avoid excavation until markings are confirmed and any utility owner instructions or standby escorts are arranged.
Choosing the optimal location: slope, frost line, and water source access
When selecting a yard hydrant location, priority should be given to grade, frost depth, and proximity to a reliable water source to guarantee year‑round operation and ease of connection.
Choose a gently sloped site for drainage, respect local frost‑depth setbacks to keep bury depth below freeze lines, and locate near an accessible main or service line to minimize trenching, pressure loss, and permit complications.
Materials, Parts, and Tools Checklist
The installer should first list the essential yard hydrant components and any model-specific parts required for the chosen unit.
Next, choices of pipe material, fittings, valves, and backflow prevention devices must be identified to match local codes and site conditions.
Finally, the necessary tools and equipment—wrenches, pipe cutters, trenching tools, and testing gear—should be gathered before work begins.
Essential yard hydrant components and model-specific parts
A reliable yard hydrant installation begins with a clear list of essential components and any model-specific parts required for the chosen unit.
Core items include the hydrant riser assembly, stem/operating rod, sealing washer, frost-proof valve assembly, mounting flange or anchor kit, and appropriate gaskets.
Model-specific extras may include replacement packing, special handles, anti-siphon features, or unique adapter fittings.
Pipe options, fittings, valves, and backflow prevention
Following the parts list for the hydrant itself, attention turns to the supply plumbing and controls that connect it to the water source.
Options include galvanized steel, copper, PVC, or CTS polyethylene, sized per flow and frost depth. Necessary fittings: adapters, elbows, unions.
Valves: gate, ball, or stop-and-waste. Include an appropriate backflow preventer (RPZ or vacuum breaker) to protect potable water.
Tools and equipment
Gather necessary tools and equipment before breaking ground to secure an efficient, safe installation. A concise checklist guarantees readiness and avoids delays; items include hand tools, safety gear, and installation-specific materials.
Verify quality and compatibility, and prepare spares for common wear parts.
- Shovel, trenching bar, and pipe cutter
- Adjustable wrenches and socket set
- Safety glasses, gloves, and boots
- Hydrant kit, pipe, fittings, and sealant
Step-by-Step Installation Guide (DIY and Pros)
The step-by-step installation covers site preparation, including marking the footprint, excavating to the proper depth, and trenching for the supply line.
It then moves through pipe preparation and layout, setting and aligning the hydrant stem and barrel, and making the connection to the water supply with required shutoff valves.
Finally, the guide addresses backfilling, proper bedding, and frost-proofing measures to guarantee reliable year‑round operation.
Preparing the site: marking, excavation depth, and trenching
Before any digging begins, the site should be precisely marked and measured so the hydrant lines up with underground utilities, desired outlet location, and frost-depth requirements.
Stake endpoints, flag utility zones, and record depths.
Excavate to frost-line depth plus bedding allowance, maintaining a straight, sloped trench for drainage.
Keep spoil clear, stabilize edges, and verify measurements before proceeding to supply-line work.
Installing the supply line: pipe preparation and layout
Begin by laying out the supply line route using the marked trench as a reference, confirming pipe size, material, and required fittings against local codes and frost-depth requirements.
Cut and deburr pipe ends, dry-fit sections and fittings, and plan offsets and valves. Guarantee correct slope for drainage, mark coupling locations, and verify clearances from utilities before lowering pipe into the trench for final joining and support.
Setting and aligning the hydrant stem and barrel
With the supply line set in the trench and final couplings ready, attention moves to positioning the hydrant stem and barrel so the unit aligns with the buried piping and finish-grade outlet.
The installer sets the stem vertically, checks depth against grade, slides the barrel over the stem, confirms plumb and outlet orientation, temporarily braces, and verifies clearances before backfilling.
Connecting to the water supply and installing shutoff valves
Establishing the connection to the main water supply and installing the shutoff valve are critical tasks that guarantee reliable flow control and future serviceability.
The installer verifies pipe sizing and pressure ratings, prepares clean, square pipe ends, and confirms coupling types (threaded, soldered, flanged, or compression) match the hydrant inlet before making the joint.
The shutoff is placed accessible, tested for leak-free isolation, and documented.
Backfilling, bedding, and frost-proofing around the hydrant
After the shutoff and supply connections are verified, attention shifts to backfilling, bedding, and frost-proofing to protect the hydrant and its piping from movement, settling, and freeze damage.
Place compacted granular bedding around the pipe, avoiding large stones. Backfill in 6–8 inch lifts, compacting each.
Install insulation or frost sleeve to required depth and slope soil for drainage away from the stem.
Initial testing, pressure check, and leak inspection
Begin by slowly restoring supply to the hydrant and observing system response. The installer should open the upstream shutoff just enough to pressurize the line without causing water hammer.
Check operating pressure with a gauge at the hydrant. Cycle the valve to confirm smooth operation. Inspect all joints, packing, and fittings for seepage, and tighten or repair leaks.
Record readings and corrective actions.
Winterizing and commissioning the hydrant
With pressure verified and any leaks corrected, attention turns to winterizing and commissioning the yard hydrant to guarantee reliable off-season performance and a proper service start-up.
Drain the barrel, close isolation valves, and install insulation or frost-proof covers.
Operate the hydrant to confirm full shutoff and drainage.
On commissioning, slowly restore supply, check for leaks, and verify smooth operation before regular use.
Alternative Installation Methods and Professional Techniques
The article contrasts direct-bury installations with concrete anchor base methods, outlining when each provides greater stability or ease of maintenance.
It notes the role of compressed-air testing and pro-grade tools in verifying seals and detecting leaks before backfilling.
Specialized approaches for shallow frost lines or high groundwater—such as extended drop legs, insulation, or raised pedestals—are summarized to inform appropriate technique selection.
Direct bury vs. concrete anchor base methods
Installation options for yard hydrants typically fall into two categories: direct burying the riser into compacted soil or anchoring it to a concrete base. Each method balances cost, permanence, frost resistance, and maintenance needs; choice depends on soil, traffic, and longevity preferences.
| Method | Feeling | Trade-off |
|---|---|---|
| Direct bury | Practical | Lower cost |
| Concrete base | Secure | Higher cost |
| Hybrid | Reassuring | Moderate trade-offs |
Using compressed air testing and pro-grade tools
Professionals often employ compressed-air testing and pro-grade tools to verify hydrant integrity and expedite installation while minimizing callbacks.
They use regulated compressors, inline pressure gauges, and quick-connect fittings to detect leaks and check valve seating before backfill.
Torque wrenches, pipe threaders, and cylinder lifts speed safe assembly.
Test reports document pressures and durations, supporting warranty claims and quality assurance.
Special considerations for shallow frost lines or high groundwater
When frost depth is shallow or groundwater lies near the surface, standard bury depths and riser styles may not provide reliable freeze protection or drainage.
Installers must accordingly adapt by selecting alternatives such as above-ground insulated risers, frost-proof hydrants mounted on raised concrete piers, or packaged valve vaults that isolate the service line below the frost line.
Site-specific measures include proper drainage, sump pumps, corrosion-resistant materials, and local code compliance.
Common Problems During and After Installation
Common problems encountered during and after yard hydrant installation include leaks at joints or packing, failure to drain properly, and reduced flow or air in the line.
Causes range from loose fittings and worn seals to improper slope, debris, or obstructions, while remedies include tightening or replacing packing, clearing blockages, and correcting grade or piping.
Long-term issues such as corrosion and freeze damage require inspection, parts replacement, and, when necessary, component or hydrant replacement to restore reliable operation.
Leaks at joints or packing and how to fix them
Leaks at joints or around the packing gland are among the most frequent post-installation issues with yard hydrants and typically indicate either improper assembly, insufficient sealing materials, or wear on components.
Inspect seals, tighten flange bolts evenly, replace deteriorated packing with compatible material, apply thread sealant or tape to pipe threads, and retest.
Replace corroded fittings to guarantee a watertight system.
Hydrant not draining properly causes and remedies
Inspecting a yard hydrant that fails to drain reveals a limited set of typical causes—improper installation slope, obstructed or damaged drain ports, a warped or misaligned valve seat, or frozen and swollen components—and each requires specific corrective steps to restore proper gravity drainage.
Diagnose slope with a level; clear or replace blocked drains; reseat or replace valve components; thaw and repair frozen parts; retest drainage.
Low flow or air in line troubleshooting
Diagnose low flow or air-in-line issues by systematically checking the installation and supply conditions: confirm shutoff and isolation valves are fully open, verify pipe sizing and length against manufacturer recommendations, and look for kinks, debris, or partial blockages in supply lines and fittings.
Inspect joints and valves for leaks, purge trapped air by slowly opening hydrant, and ascertain upstream pressure is adequate; replace faulty check valves.
Corrosion, freezing damage, and repair options
After confirming flow and air issues are resolved, attention turns to damage from corrosion and freezing, which are among the most common problems encountered during and after yard hydrant installation.
Corrosion weakens valves and stems; replace compromised hardware with stainless or brass.
Freezing can split pipes; excavate, thaw, inspect, and replace damaged sections, improving drainage, adding frost collars, or lowering bury depth to prevent recurrence.
Maintenance Schedule and Seasonal Care
A clear maintenance schedule covers routine inspections, lubrication of moving parts, and checks for leaks to guarantee reliable operation.
Seasonal tasks include winterizing procedures to prevent freezing and safe thawing methods if icing occurs.
Long-term care recommendations address timely replacement of worn components and possible upgrades to improve durability and performance.
Routine inspections and lubrication
Inspectors should perform routine inspections and lubrication of yard hydrants on a scheduled basis to guarantee reliable operation and extend service life.
They examine valves, packing nuts, and spindles for wear, leaks, corrosion, and proper drainage.
Lubricants rated for potable water systems are applied sparingly to moving parts.
Records of findings, actions, and dates support trend analysis and timely repairs.
Winter preparation and thawing procedures
How should yard hydrants be prepared for freezing temperatures to prevent damage and guarantee accessibility?
Prior to freeze, drains are opened, valves fully closed, and aboveground parts insulated or fitted with frost caps.
Water lines are bled where possible and hoses removed.
If frozen, thaw slowly using warm air or electric heat tape; avoid open flame and excessive pressure to prevent pipe or valve failure.
Long-term part replacement and upgrade recommendations
Schedule routine part replacements and consider targeted upgrades to maintain reliability and reduce emergency repairs.
A simple maintenance schedule extends service life: replace seals and packing annually, inspect valves and risers every 3–5 years, and upgrade to frost-free models or stainless components when corrosive conditions exist.
- Annual: seals, packing
- Every 3–5 years: valve, riser inspection
- As needed: replace corroded pipe
- Upgrade: frost-free or stainless parts
Cost Breakdown and Budgeting Tips
Typical material and labor costs for a yard hydrant installation are outlined for DIY and professional approaches to help compare budgets.
Estimates show DIY projects often require lower labor expense but may still incur $100–$500 in materials, while professional installs commonly range higher due to labor and equipment fees.
Practical cost-saving measures—such as sourcing tested components, scheduling work off-peak, or combining tasks—are suggested to reduce expense without compromising reliability.
Typical material and labor cost ranges for DIY vs. professional install
When comparing DIY and professional yard-hydrant installations, costs diverge most noticeably in labor and site-preparation needs: materials for a basic frost-free hydrant and necessary fittings typically range from $80 to $250.
A homeowner doing the work can expect to spend an additional $50–$300 on rental tools and consumables, whereas hiring a plumber or contractor often adds $300–$1,200 or more in labor depending on excavation difficulty, piping length, and local rates.
DIY projects save labor but may require more time; pros offer warranties and faster completion.
Cost-saving measures without sacrificing reliability
After weighing DIY versus professional installation costs, homeowners can target specific areas to trim expenses while maintaining a reliable yard-hydrant system.
Prioritize quality for the hydrant, frost-proof components, and proper trenching.
Save by sourcing bulk pipe, renting specialty tools, and scheduling work during off-season.
Shop multiple suppliers, reuse undamaged fittings, and verify local code to avoid costly corrections.
Comparison of Popular Yard Hydrant Brands and Models
A concise side‑by‑side comparison of leading yard hydrant brands highlights differences in features, materials, and expected longevity.
The analysis identifies top models suited to residential, farm, and commercial uses based on reliability and cost of ownership.
Readers are guided toward selections that match their specific application and maintenance expectations.
Side-by-side feature and durability comparison
Comparing popular yard hydrant brands and models side-by-side reveals clear differences in materials, valve design, freeze resistance, and ease of maintenance. A concise matrix highlights trade-offs: cast iron and stainless options, piston versus ball valves, tested freeze ratings, and serviceability scores to inform selection without recommending specific uses.
| Brand/Model | Material | Valve/Rating |
|---|---|---|
| A | Cast iron | Piston/High |
| B | Stainless | Ball/Medium |
| C | Brass | Piston/Low |
Best picks for residential, farm, and commercial applications
Selection of the best yard hydrant depends on planned use, balancing material, valve type, freeze resistance, and maintainability to match residential, farm, or commercial demands.
For residences, compact bronze or stainless models with simple screw valves suffice.
Farms benefit from rugged cast-iron hydrants with frost-proof stems.
Commercial sites require heavy-duty steel units with quick-service replacement parts and high-flow capacities for frequent, high-volume use.
Safety Considerations and Best Practices
When installing yard hydrants, attention to personal protective equipment and safe excavation techniques minimizes injury and protects underground utilities.
Proper backflow prevention and correct connection methods are essential to avoid cross-connections and maintain potable water quality.
Following established safety protocols and local codes guarantees both installer safety and long-term system integrity.
Personal protective equipment and safe excavation practices
Although yard hydrant installation is a straightforward task, proper personal protective equipment (PPE) and careful excavation practices are essential to prevent injury and property damage.
Workers should use hard hats, safety glasses, gloves, high-visibility clothing, and steel-toed boots while following established trenching and shoring procedures, utility-locate protocols, and soil-stability checks before and during digging.
Equipment inspection, clear communication, and barricades minimize risks.
Preventing cross-connection and ensuring potable water safety
Several straightforward measures are critical to prevent cross-connections and protect potable water during yard hydrant installation: install approved backflow preventers, maintain physical separation between potable and nonpotable lines, cap unused outlets, avoid submerged intakes, and follow local codes.
Regular inspections, pressure testing, and documented maintenance guarantee ongoing safety and regulatory compliance for potable water systems connected to yard hydrants.
Troubleshooting Quick Reference
A concise troubleshooting quick reference lists common symptoms, their likely causes, and immediate fixes for yard hydrant issues.
Each entry pairs an observable problem—such as leaks, low flow, or freezing—with the most probable source and a recommended short-term remedy.
This section is designed as an accessible first step before detailed inspection or professional repair.
Symptoms, likely causes, and immediate fixes
When a yard hydrant fails to deliver water, leaks, or operates intermittently, identifying the observable symptom quickly narrows probable causes and guides immediate corrective steps.
- No flow: frozen line or closed valve — thaw, open valve, inspect for blockage.
- Weak flow: partial obstruction or low supply pressure — clear debris, check feed.
- Drips: worn packing or loose fittings — tighten or replace seals.
- Intermittent: airlock or faulty valve — bleed air, service valve.
Recommended Resources and Next Steps
The article points readers to reputable suppliers for parts and to directories for locating licensed installers in their area.
It also highlights links to manufacturer manuals for model-specific guidance and to local plumbing or building code resources for compliance.
These resources help users plan purchases, verify installation requirements, and arrange professional assistance if needed.
Where to buy parts and how to find licensed installers
Several reliable channels exist for sourcing yard-hydrant parts and locating licensed installers, each offering different trade-offs in price, availability, and support.
Hardware stores and plumbing supply houses stock common fittings; online retailers provide wider selection and reviews.
Local contractor directories and trade associations help find licensed installers with warranties and references.
Compare prices, certifications, and lead times before purchasing or hiring.
Links to manufacturer manuals and local code resources
Where can installers and DIYers find authoritative guidance for yard-hydrant selection, installation, and compliance?
Manufacturer manuals, municipal plumbing codes, and industry standards offer definitive instructions and requirements.
Consult sources below for model-specific assembly, pressure limits, frost protection, and permit rules:
- Manufacturer installation manuals and parts diagrams
- Local building/plumbing department codes and permits
- State plumbing code and amendments
- Industry standards (ANSI/ASME) and trade associations
Conclusion
After the final wrench turn, a quiet settles over the freshly set yard hydrant — but the real test is still ahead. The installer steps back, watching frost-laced mornings and dusty summers stretch in potential. Will this simple pipe become a dependable workhorse or reveal hidden leaks and regrets? The guide leaves them prepared, tools gleaming and instructions memorized, yet the outcome will unfold only with the first winter and the first trusted pour.