How to Cap Off Sink Plumbing Safely: Step-by-Step Guide for DIYers
To safely cap off sink plumbing, start by shutting off the water supply and draining the lines. Wear safety gear and remove the P-trap. Identify the pipe material and choose the appropriate cap type—push-fit, threaded, compression, or test plug. Cut and deburr the pipe if necessary, then apply PTFE tape or sealant, and tighten the fittings. Finally, pressure-test for leaks and monitor the system. Be sure to follow local codes for temporary versus permanent closures. For detailed step-by-step guidance and tips, continue reading.
Why and when you should cap off sink plumbing
Capping sink plumbing is commonly required during remodels, when units sit vacant, or after removing a fixture to prevent unwanted flow.
Leaving pipes open risks water damage, pest entry, foul odors, and potential code violations.
Simple shutoffs and threaded caps may suit straightforward cases, but complex systems or uncertain conditions warrant a professional plumber.
Common scenarios for capping a sink (remodels, vacant units, fixture removal)
When a sink is removed during a remodel, left vacant between tenants, or permanently taken out to simplify plumbing, the exposed water and drain lines should be securely capped to prevent leaks, contamination, and odor.
Common scenarios for how to cap off sink plumbing include kitchen or bathroom remodels, unit turnover in rentals, temporary shutoffs during construction, and fixture removal when converting spaces or reducing plumbing fixtures.
Risks of leaving pipes open (water damage, pests, odors, code violations)
After a sink is removed or left unused, exposed supply lines and open drains create several tangible hazards that make prompt capping advisable. Open plumbing risks water damage, pest entry, foul odors, and potential code violations. Immediate capping prevents leaks, contamination, and fines; documented closures protect property value and safety.
| Risk | Consequence | Preventive action |
|---|---|---|
| Leak | Structural damage | Cap supply |
| Pest | Infestation | Seal drain |
| Odor | Uninhabitable air | Trap/plug |
| Code | Fines | Follow regs |
When to call a professional versus DIY
Who should handle sink plumbing closures depends on the complexity of the job and the homeowner’s skill level.
Simple tasks—turning off supply, capping lines, removing trap—suit competent DIYers with basic tools.
Call a licensed plumber for corroded piping, hidden leaks, code compliance, multi-fixture changes, or uncertainty.
Pros guarantee proper materials, secure seals, permits, and prevent costly damage or unsafe work.
Quick overview: the safest way to cap sink plumbing
A concise step-by-step summary presents shutting off water, draining the lines, selecting the correct cap or plug, and securely fastening it to prevent leaks.
Before starting, the procedure requires turning off supply valves, relieving pressure, wearing eye and hand protection, and ensuring proper ventilation if solvent-based sealants are used.
The brief overview emphasizes safety and preparedness so the full instructions can be followed without unexpected hazards.
Direct answer: step-by-step summary for immediate action
Begin by shutting off the water supply to the sink and testing that taps no longer deliver water; this prevents pressure buildup or accidental leaks during capping.
Drain remaining water, disconnect supply lines and trap, inspect threads, choose correct cap or plug, apply plumber’s tape or sealant, tighten securely, restore water slowly and check for leaks, and discard or store removed parts properly.
Required safety precautions before starting
Before any work begins, the water must be shut off and the fixtures tested to confirm no flow; this prevents accidental flooding and reduces pressure in the lines while capping.
Wear safety glasses and gloves, ventilate the area if adhesives or solvents are used, and place a bucket to catch residual water.
Confirm power to any nearby disposal or dishwasher is disconnected.
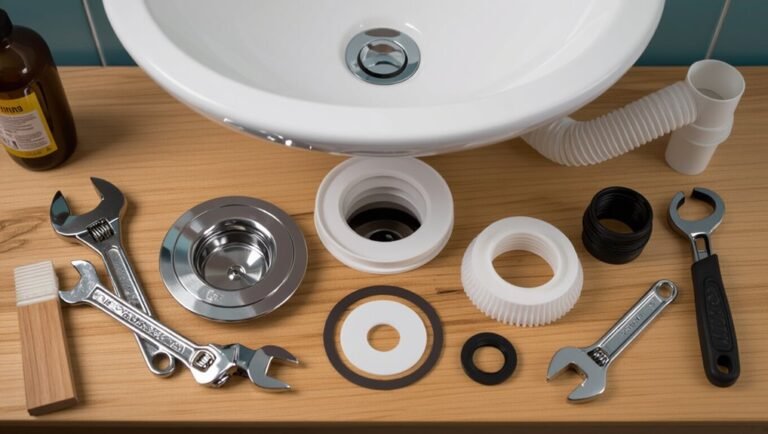
Tools and materials needed
A concise inventory of tools and materials sets the foundation for capping both drain and water supply lines safely.
Essential items include wrench sets, pipe cutters, pliers, and sealant tools, while cap and connector options span push-fit, threaded, compression fittings, and test plugs.
Personal protective equipment—gloves, eye protection—and extras like plumber’s tape, rags, and a bucket should also be on hand.
List of tools for capping drain and water supply lines
Several basic hand tools and a few plumbing-specific supplies are required to cap both drain and water supply lines safely.
Essential items include cutting, sealing, and fastening tools plus safety gear. Selection depends on pipe material and access, but accuracy and proper fit prevent leaks and damage.
- Pipe cutter or hacksaw
- Adjustable wrench
- Plumber’s tape (PTFE)
- Slip-joint pliers
- Safety gloves
Types of caps and connectors (push-fit, threaded, compression, test plugs)
With the basic cutting, sealing, and fastening tools on hand, choosing the right cap or connector depends on pipe material, thread type, and whether a temporary or permanent seal is required.
Options include push-fit for quick nonthreaded joins, threaded caps for metal pipes, compression fittings for copper or plastic, and inflatable test plugs for pressure checks.
Consider compatibility and longevity.
- Push-fit caps
- Threaded caps
- Compression fittings
- Test plugs
- PVC solvent-weld caps
Personal protective equipment and additional supplies
Personal protective equipment and a few additional supplies are essential before any sink plumbing is capped off to prevent injury and guarantee a clean, secure job.
Gloves, safety glasses, and a dust mask protect against debris and chemicals.
Also include plumber’s tape, silicone sealant, a bucket, rags, pipe cutter or hacksaw, adjustable wrench, and replacement caps matched to pipe material and size.
How to cap off the sink drain
Before capping the sink drain, the water should be shut off and isolation verified to prevent surprises.
The P-trap is removed to identify the pipe material—PVC, ABS, cast iron, or metal—which determines the appropriate cap type.
The chosen cap should be either a removable test cap or a permanent cap, installed and pressure-tested for leaks and a proper seal.
Shutting off water and verifying isolation
One essential step is shutting off the water supply and confirming that the sink is isolated before cutting or capping the drain.
Locate and close individual shutoff valves under the sink or the main house valve. Open the faucet to relieve residual pressure and verify no flow.
Use a bucket to catch minor drips and recheck valves for tightness before proceeding.
Removing P-trap and assessing pipe type (PVC, ABS, cast iron, metal)
Loosen the slip nuts and remove the P-trap to expose the sink tailpiece and drain line, then inspect the piping to determine material and connection type—PVC typically has white plastic and solvent-welded joints, ABS is black plastic, cast iron is heavy with a flared hub or leaded joints, and older metal (galvanized or copper) will show threaded or soldered connections—so the correct cap and seal method can be selected.
| Material | Color/Weight | Connection |
|---|---|---|
| PVC | White, light | Solvent-weld |
| ABS | Black, light | Solvent-weld |
| Cast iron | Heavy | Flared/leaded |
| Metal | Metallic, variable | Threaded/soldered |
Choosing the right drain cap for your pipe material
Select a drain cap that matches the pipe material and connection type to guarantee a secure, code-compliant seal.
For PVC or ABS use solvent-weld or threaded plastic caps sized to the pipe; for metal pipes choose brass or stainless caps compatible with threading or compression fittings.
Verify gasketed options for smooth-cut ends and confirm local code for approved materials and pressure ratings before final selection.
Installing a removable test cap vs a permanent cap
Decide whether a temporary or permanent cap best fits the situation by weighing future access against durability and code requirements.
A removable test cap allows inspections, pressure testing, and easy reopening; select proper material and secure O-rings or threaded fittings.
A permanent cap—glued, soldered, or threaded with thread sealant—provides long-term reliability but restricts future alterations and may require plumbing-code approved methods.
Testing the cap for leaks and proper sealing
Begin by filling the capped section with water and observing all joints and fittings for drips.
Then apply a soapy solution or leak-detection spray to each seam and watch for bubbling that indicates escaping air.
If bubbles appear, tighten fittings or reseal with appropriate tape or compound.
After repairs, repeat the test and monitor for several minutes to confirm a reliable, dry seal before restoring normal use.
How to cap water supply lines
Before capping water supply lines, the plumber locates and shuts the appropriate local shutoff or, if necessary, the main house valve.
After draining residual water from the lines, they select the correct cap for the material—compression or threaded caps for copper/PEX and fittings or shutoff-style caps for flexible braided lines, including compatible push-fit (SharkBite) options.
Finally, the capped lines are pressure-tested and inspected for leaks before finishing the job.
Locating and shutting off local supply valves versus main shutoff
When a sink’s supply lines must be capped, the homeowner should first locate and close the local shutoff valves under the sink, as these isolate the fixture without disrupting the entire house.
If local valves are seized, corroded, or absent, the homeowner must turn off the main shutoff and notify occupants.
Label valves after use and confirm no flow before proceeding to cap lines.
Draining remaining water from supply lines
With the local shutoffs confirmed closed (or the main valve secured), any residual water trapped in the supply lines must be drained to prevent leaks and pressure buildup during capping.
Open faucet handles and collector valves to release water, loosen line fittings slightly to let remaining fluid escape into a bucket, then fully drain and dry exposed pipe ends before proceeding with caps or plugs to guarantee a tight, leak-free seal.
Capping flexible braided lines and copper/PEX supply lines
After the supply lines have been emptied and dried, attention turns to sealing the actual fittings: flexible braided connectors and rigid copper or PEX lines each require different caps and techniques.
Flexible hoses are closed at their factory nuts or removed and fitted with matching end caps.
Copper requires clean cuts, deburring and solderless cap options; PEX needs a compatible end cap and secure crimp or clamp connection.
Using compression caps, threaded caps, and sharkbite fittings
Select the appropriate cap type based on pipe material and access:
compression caps compress a ferrule onto copper or soft brass tubing for a durable mechanical seal;
threaded caps screw onto male pipe threads or adapter fittings and rely on tape or compound to seal;
push-fit (SharkBite) fittings simply seat onto clean, deburred copper, PEX, or CPVC and lock in place for a fast, tool-free closure.
Install per manufacturer torque.
Pressure-checking and leak testing after capping
Begin by pressurizing the capped line to confirm a watertight seal before concealing or restoring normal use.
Close valves, turn on water slowly, and inspect joints, threads, and fittings for drips.
Use a pressure gauge or household test pump to hold recommended PSI for several minutes.
Check again after 24 hours.
If pressure drops or moisture appears, depressurize and resolve leaks before finishing.
Dealing with specific pipe materials and situations
Different pipe materials and building contexts demand specific capping methods to guarantee a reliable seal and code compliance.
PVC and ABS drains typically require solvent welds or approved mechanical caps, while copper and galvanized lines may be soldered or fitted with compression or threaded mechanical caps.
Cast iron and older systems often need specialty plugs or adapters, and multi-unit or commercial buildings raise additional concerns about shared stacks and landlord/tenant regulations.
PVC and ABS drain pipes: solvent weld vs mechanical caps
When capping PVC or ABS drain lines, the choice between solvent-weld fittings and mechanical caps hinges on permanence, code requirements, and the condition of the pipe: solvent-weld caps create a permanent, watertight bond appropriate for finished systems and pressure against sewer gases, whereas mechanical caps (threaded, test plugs, or compression types) offer removability for future work or temporary testing but may require specific materials or gaskets to meet local plumbing codes.
| Type | Use case |
|---|---|
| Solvent-weld | Permanent, finished systems |
| Mechanical | Temporary, testing, or removable access |
Copper and galvanized drain or supply lines: soldering vs mechanical cap
Addressing copper and galvanized drain or supply lines requires selecting between permanent joints and removable closures based on metal type, system function, and future access needs.
Copper often accepts soldered caps for durable, leak-free seals; flux and proper heat are essential.
Galvanized steel resists soldering—use threaded, compression, or mechanical caps with corrosion-resistant sealant.
Confirm pressure rating and inspect for corrosion before capping.
Cast iron drains and older plumbing: specialty plugs and adapters
After covering copper and galvanized options, attention turns to cast iron and other older materials that require different solutions. These pipes often have thicker walls, irregular fittings, and corrosion that preclude standard caps.
Specialty rubber compression plugs, expanding mechanical seals, and threaded adapters matched to hub dimensions provide reliable seals.
Guarantee proper sizing, corrosion inspection, and occasional professional refitting when adapters cannot seat securely.
Capping in multi-unit or commercial buildings (shared stacks)
Many multi-unit and commercial buildings rely on shared soil and waste stacks. Capping a single fixture line requires consideration of the entire system’s hydraulics, code, and tenant access.
Coordination with building management, permit confirmation, and smoke/water testing prevent cross-contamination and trap seal loss.
Use approved materials and techniques for cast iron, copper, or PVC; document work and restore access panels for inspections.
Temporary vs permanent capping: how to choose
The choice between temporary and permanent caps hinges on planned duration and testing needs: temporary test caps offer quick, reversible sealing for pressure checks but may not be rated for long-term use.
Permanent caps are chosen when a fixture is removed indefinitely and should be installed with approved materials and techniques for the pipe type.
Local code often limits the use of temporary caps for prolonged closures, so inspectors’ requirements and labeling for test fittings must be considered.
Advantages and limitations of temporary test caps
Temporary test caps offer a quick, nonpermanent way to seal sink drains for pressure testing or short-term closure, but they are designed for provisional use and come with both benefits and constraints.
They enable fast installation, visual leak checks, and easy removal without soldering.
Limitations include limited pressure ratings, potential slipping on damaged pipes, material compatibility issues, and unsuitability for long-term sealing or buried installations.
When to install a permanent cap and recommended methods
While temporary test caps serve well for short-term closures and leak checks, situations arise where a permanent cap is more appropriate—such as long-term decommissioning, concealed or buried installations, or when the capped line will be pressurized regularly.
Permanent options include threaded brass caps for metal pipes, solvent-welded PVC end caps, or soldered/copper fittings.
Choose durable, material-matched methods and guarantee proper joint preparation for longevity.
Code compliance considerations for temporary caps
Because code requirements differ between short-term testing and long-term closures, choosing between temporary and permanent caps requires referencing applicable plumbing codes, local ordinances, and the authority having jurisdiction.
Temporary caps must permit pressure testing, resist displacement, and prevent contamination; they often require tagging, inspection, and time limits.
Permanent closures demand approved fittings, documentation, and compliance with venting and access regulations.
Common mistakes and how to avoid them
Common mistakes when capping sink plumbing include choosing the wrong cap size or type, failing to fully drain and depressurize lines, and overlooking venting or trap seal problems.
Professionals also note that ignoring local plumbing codes and permit requirements can lead to costly corrections.
Addressing each of these issues upfront reduces leaks, odors, and compliance risks.
Using the wrong cap size or type
Choosing the wrong cap size or type is a frequent cause of leaks, slow drainage, and premature damage when capping sink plumbing. A mismatched cap won’t seat properly or may crack under pressure.
Use fittings matched to pipe material and diameter, verify thread type, and select pressure-rated components. Inspect seals and test for leaks immediately after installation to confirm compatibility and integrity.
Failing to fully drain and depressurize lines
Any neglected residual water or pressure left in sink lines can cause bursts, sprays, or contaminated spills when capping is attempted.
The guide emphasizes shutting off supply valves, opening faucets to relieve pressure, and using a bucket to catch remaining water.
Draining both hot and cold lines and checking for trapped air prevents surprises.
Verify dryness visually and with a rag before installing the cap.
Overlooking venting and trap seal issues
Several overlooked venting or trap-seal problems can silently compromise a capped sink: a blocked vent, an improperly installed P-trap, or an insufficient water seal all allow sewer gas to enter the space or cause slow drainage and siphoning. Inspect vents, confirm trap orientation, and maintain a 2-inch water seal when capping.
| Issue | Cause | Fix |
|---|---|---|
| Sewer gas | Dry trap | Add water/test |
| Siphoning | Poor vent | Re-route/vent |
| Slow drain | Partial blockage | Clean/check |
Ignoring local plumbing codes and permits
Why check local codes before capping a sink? Ignoring permits or code requirements can lead to failed inspections, fines, or unsafe alterations.
The article recommends verifying municipal regulations, obtaining necessary permits, and following approved materials and methods.
If uncertain, consult a licensed plumber or building department to guarantee compliance, avoid liability, and preserve property value.
How to verify the job is safe and code-compliant
A brief verification routine should follow capping work, starting with a visual inspection checklist to confirm proper seals, slope, and venting.
Supply lines should be tested with an appropriate pressure or water test to detect leaks or weaknesses.
If local codes require it or if structural changes were made, a permit and a licensed inspector’s review should be scheduled.
Visual inspection checklist after capping
After completing the cap, inspect the work systematically to verify a secure, code-compliant seal and identify any immediate hazards.
Confirm visible tightness, absence of leaks, correct cap type and material, proper orientation of trap/vent connections, and adherence to local code markings.
Maintain clear access and record observations for future reference.
- Check for drips or moisture
- Verify cap material matches pipe
- Inspect joint fittings and seals
- Ascertain trap and vent alignment
- Note compliance labels and clearances
Performing a pressure or water test for supply lines
Begin the verification by isolating the capped supply line and applying a controlled pressure or water test to confirm integrity and code compliance.
Use a calibrated gauge or fill with water, pressurize to local code-specified psi, and monitor for the required duration.
Inspect fittings, joints, and cap for leaks or pressure drop; document results and remedy any failures before final concealment.
When to schedule an inspection or get a permit
Once pressure testing confirms no leaks and fittings meet code pressures, determine whether a permit or inspector involvement is required by local jurisdiction before closing walls or concealing work. Contact local building department for permit thresholds, record inspection scheduling, and retain paperwork. If unsure, request a site visit. Below is a quick checklist:
| Item | Action |
|---|---|
| Permit needed? | Check local code |
| Inspection | Schedule if required |
| Documentation | Keep permits |
| Timing | Before concealing |
| Contact | Building dept. |
Maintenance and reversal: how to reopen or replace a capped line
When a capped line must be reopened or replaced, care is taken to remove temporary caps without scoring or deforming the pipe.
The process includes cleaning and inspecting the stub-out so it can accept new fittings for fixtures or remodel work.
For long-term storage, caps and exposed ends are protected from corrosion, debris, and sunlight to preserve their integrity.
Removing temporary caps without damaging pipes
To remove a temporary cap without harming the pipe, inspect the fitting to determine type and condition, then choose a method—unscrewing, cutting, or dissolving sealant—that matches the material and installation.
Use appropriate tools: adjustable wrench for threaded caps, tubing cutter for plastic with clean square cuts, and solvent or heat for removable adhesives.
Test joints for leaks after reassembly.
Preparing capped lines for new fixtures or remodels
Several straightforward steps let a homeowner or plumber convert a capped supply into an active line for a new fixture or remodel: verify the cap type and pipe material, check for pressure and water damage, remove or replace the cap using the appropriate method, and install compatible fittings and shutoffs rated for the desired use.
| Task | Tool | Note |
|---|---|---|
| Inspect cap | Flashlight | Identify material |
| Test pressure | Gauge | Isolate supply |
| Remove cap | Wrench | Use correct method |
| Fit adapter | PTFE tape | Match size |
| Install shutoff | Valve | Accessible location |
Long-term storage tips for capped stub-outs
Any capped stub-out meant for long-term storage should be documented, protected, and periodically inspected to remain serviceable.
Clear labeling, a durable weatherproof cap or plug, and a moisture barrier at the joint reduce corrosion and contamination risks.
Store records and photos, check seals annually, and recoat exposed metal with anti-corrosion compound.
When reopening, cut back to sound pipe, replace fittings, pressure-test, and verify compliance with codes.
Cost estimate and time required
Typical material and tool expenses for capping a sink range from basic fittings and seals to a few specialized adapters, with cost varying by part quality and whether new valves are required.
Time estimates also vary: a drain-only cap can often be completed in under an hour, a supply-only shutoff and cap may take one to two hours, and a combined job commonly requires two to four hours.
The following section breaks these ranges down and notes factors that can extend cost or duration.
Typical costs for materials and tools
Estimating costs for capping off sink plumbing depends on the materials chosen, the complexity of the job, and whether a homeowner hires a professional. Typical DIY material costs: caps, adapters, plumber’s tape, sealant, and basic tools. Professionals add labor. Below is a simple cost-visual:
| Item | Low | High |
|---|---|---|
| Cap | $3 | $15 |
| Adapter | $2 | $12 |
| Tape/sealant | $1 | $10 |
| Tools | $0 | $60 |
| Pro labor | $0 | $200 |
Estimated time for drain-only, supply-only, and combined capping jobs
When evaluating time and cost for capping sink plumbing, the scope—drain-only, supply-only, or combined—largely determines labor and materials required.
Drain-only jobs typically take 30–60 minutes with basic traps and trap adapter parts.
Supply-only capping often requires 45–90 minutes for shutoff valves and compression or soldered caps.
Combined work usually requires 1.5–3 hours, increasing materials and potential permit costs.
Troubleshooting common problems
Common issues after capping a sink include persistent leaks at the cap, lingering sewer odors, and fittings that are seized or corroded and resist removal.
The article outlines quick fixes for minor leaks, steps to address odors or trapped sewer gas, and safe methods for freeing or replacing stubborn hardware.
Readers are advised to assess the severity of each problem before attempting repairs or contacting a professional.
Leaks after capping and quick fixes
Leaks that appear after capping a sink line usually stem from improperly seated fittings, damaged threads, or residual water pressure; identifying the leak source quickly reduces water damage.
Inspect joints, tighten fittings to specified torque, and replace cracked caps or washers.
For threaded connections, apply fresh thread tape or pipe dope.
If leaks persist, drain the line and reseat or swap components before retesting under pressure.
Odors or sewer gas after capping a drain
Why is there a foul smell after capping a drain?
Residual sewer gas can escape if the trap was removed, improperly resealed, or if a vent is blocked.
Biofilm or trapped debris inside the line can also cause odor.
Inspect seals, restore or reinstall a P-trap, clean the pipe interior, and guarantee venting is clear.
Use an approved cap and test for leaks and odor recurrence.
Stiff or corroded fittings that won’t remove
If a capped line gives off no odor but the fittings refuse to budge, corroded or seized connections are often the cause.
Apply penetrating oil, wait 15–30 minutes, then use proper-sized wrenches and steady force.
Heat fittings with a torch cautiously to expand metal if safe.
Replace heavily corroded sections and use anti-seize compound on new threads to prevent recurrence.
Recommended resources and products
Recommended resources include trusted cap brands and compatible fittings, with examples selected for durability and code compliance.
Manufacturer instructions and links to local plumbing codes should be consulted before purchasing or installing components.
The guidance also notes common signs that warrant hiring a licensed plumber and suggested questions to ask during the service call.
Examples of reliable cap brands and fittings
Brands and fitting types matter when choosing caps for sink plumbing because durability, material compatibility, and seal reliability directly affect leak prevention and long-term performance.
Examples include trusted brands and common fitting types for various materials and threads:
- Oatey brass test caps (NPT)
- Fernco rubber caps (flexible, slip-on)
- SharkBite push-to-connect plugs
- Mueller compression caps (copper/PEX)
- GAYLORD PVC threaded caps
Links to manufacturer instructions and local code resources
Because proper installation and compliance hinge on manufacturer guidance and local codes, installers should consult original instructions and municipal regulations before capping sink plumbing.
Recommended links include product manuals, local plumbing codes, permit portals, utility shutdown guidelines, and safety datasheets.
Useful resources:
- Manufacturer installation PDF for chosen cap
- Local building department code page
- State plumbing code repository
- Permit application portal
- Hazardous materials/safety datasheets
When to hire a licensed plumber and what to ask them
When should a licensed plumber be engaged for capping sink plumbing?
A professional should be hired for complex or code-sensitive work, gas or shared drains, uncertain leaks, sewer connections, or when permits are required.
Ask about licensing, insurance, experience with sink capping, permit handling, materials used, warranty, cost breakdown, timeline, and inspection arrangements.
Request references and written estimates.
Conclusion
After a parade of warnings, lists, and triumphant wrench-twirling, one learns that capping sink plumbing is both mundanely practical and mildly heroic. The cautious DIYer, now armed with tape, caps, and slightly bruised confidence, has closed leaks and opened fewer invoices. Ironically, the neatest plumbing solution is often invisible—silent pipes doing their job—proving that success in home repair is measured not by spectacle but by the absence of dripping, panic, and weekend emergency calls.