
How to Get Rid of Garbage Disposal Odor Fast: 9 Simple Solutions That Work
To quickly eliminate garbage disposal odor, focus on removing trapped food, grease buildup, and bacteria. Effective methods include running cold water while using the disposal, grinding citrus peels, flushing with a mixture of baking soda and vinegar, and using ice with rock salt to dislodge residue. For stubborn odors, deep-clean the splash guard, pour boiling water down the disposal, or apply an enzymatic cleaner. Regular maintenance and safety precautions will help prevent future smells. More detailed solutions are outlined below.
Why Garbage Disposal Odors Happen
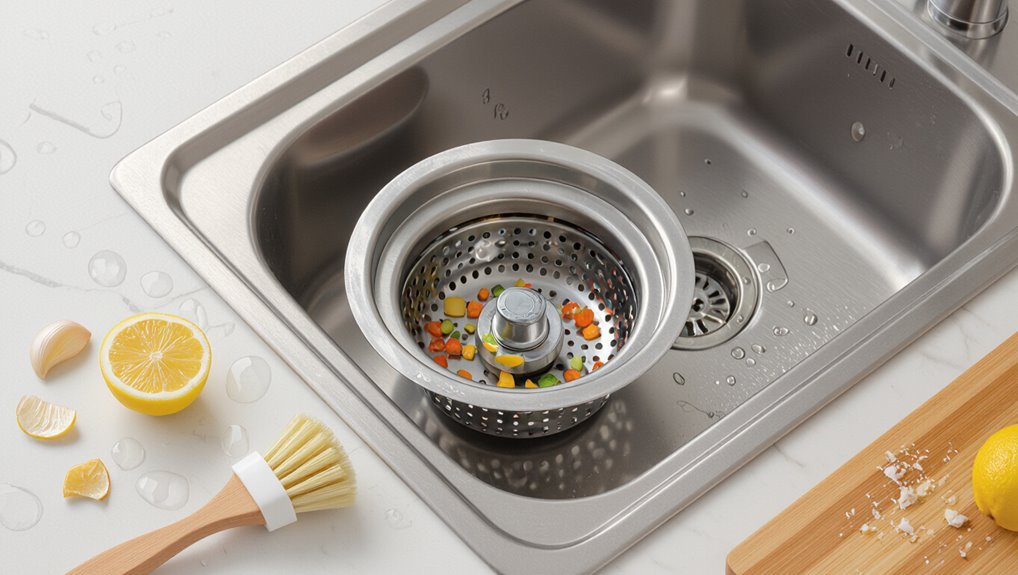
Odors from a garbage disposal typically arise from trapped food particles, grease buildup, and bacterial growth in crevices.
Certain foods—like coffee grounds, starchy peels, and fatty scraps—break down in ways that produce stronger smells and cling to the unit.
Persistent odors, slow drainage, grinding noises, or a change in performance indicate the disposal may need cleaning or repair.
Common causes of bad smells in disposals
A foul smell from a kitchen sink usually signals organic matter trapped and decomposing inside the garbage disposal.
Common causes include food particles lodged in the impellers, buildup on splash guards, stagnant water in traps, bacterial films on inner surfaces, and neglected maintenance.
Regular cleaning and prompt attention explain how to get rid of garbage disposal odor and prevent recurrence.
How food types and buildup contribute to odor
Having identified where odors typically originate, it helps to examine how specific food types and gradual buildup accelerate decomposition and smell.
Soft, fibrous scraps (onions, garlic, citrus peels) cling to surfaces and rot quickly.
Starchy residues and grease form sticky films that trap bacteria.
Small trapped particles in crevices ferment, generating volatile sulfur compounds and sour odors until removed or broken down.
Signs your disposal needs cleaning or repair
When should a homeowner suspect the disposal needs attention? Indicators include persistent foul odors despite cleaning, slow draining, gurgling, humming without grinding, frequent jams, leaks under the sink, or visible corrosion and residue.
Unusual noises, tripped breakers, or lingering food particles signal cleaning or mechanical repair is required. Prompt inspection prevents odor recurrence and further damage.
Quick Fixes to Eliminate Disposal Odor Fast
A few quick tricks can neutralize garbage disposal odors in moments, from one-minute deodorizing sprays or baking soda rinses to a short cold-water and soap flush.
Ice and coarse salt tossed into the grind chamber and run briefly will knock debris off the blades and sharpen them.
Rubbing citrus peels against the running blades while flushing with cold water provides an immediate freshening.
Immediate one-minute deodorizing methods
Quick, effective steps can neutralize disposal odor in under a minute. The following rapid actions refresh smell immediately without tools or blade cleaning:
- Run cold water and operate disposal for 20–30 seconds.
- Pour a splash of white vinegar and run briefly.
- Drop a citrus peel, run with water.
- Use a tablespoon of baking soda, then rinse.
- Rinse sink and stopper thoroughly.
Using ice and salt to clean blades
Following the one-minute rinses, ice and coarse salt offer a fast mechanical method to dislodge food buildup on disposal blades and neutralize odors without chemicals.
One cup of ice with a half cup of coarse salt run briefly while cold water flows chips away residue and scrubs metal surfaces.
Repeat as needed, then flush with hot water to clear loosened particles from the drain.
Citrus peels for fast freshening
Toss citrus peels into the disposal and run cold water for a brief burst to release bright, natural oils that mask and neutralize odors.
The method offers immediate freshening: small lemon, lime, or orange pieces deodorize and leave a clean scent.
Peels also help scrape lingering residue from the grind chamber.
Repeat occasionally; avoid overloading the unit with thick rinds.
Running cold water and soap rinse
Run a steady stream of cold water while flushing a small amount of liquid dish soap through the disposal to loosen grease, wash away food particles, and prevent warm-water-powered oils from coating the grind chamber.
This simple rinse dislodges trapped residue, reduces bacterial growth, and keeps seals cleaner.
Perform briefly after each use and periodically run longer, ensuring efficient odor prevention with minimal effort.
Nine Proven Solutions to Remove Odor
The following nine proven solutions focus on safe, effective ways to remove persistent garbage disposal odors. Each method is concise and actionable, from household remedies to commercial enzymatic options.
Key approaches include:
- Deep clean with baking soda and vinegar step-by-step
- Boiling water flush when and how to use safely
- Ice cubes and rock salt grinding detailed method
- Citrus and coarse salt scrub detailed method
- Enzymatic drain cleaner application how to choose and use
1. Deep clean with baking soda and vinegar step-by-step
Begin by unplugging or turning off power to the disposal to guarantee safety before any cleaning begins.
Sprinkle about a cup of baking soda into the drain, then pour one cup of white vinegar slowly. Allow fizzing for 5–10 minutes.
Scrub accessible parts with a long-handled brush or old toothbrush, rinse with cold water, restore power, and run the disposal briefly to clear residue.
2. Boiling water flush when and how to use safely
After finishing the baking soda and vinegar routine, a boiling water flush can help wash away remaining loosened debris and neutralize odors without chemicals.
Use caution: run cold water for 15–30 seconds, then slowly pour one to two kettles of boiling water down the drain in stages.
Avoid pouring onto plastic fittings and make certain no flammable materials are nearby.
Repeat weekly as maintenance.
3. Ice cubes and rock salt grinding detailed method
Use ice cubes and rock salt to mechanically dislodge food particles and grime clinging to the disposal’s impellers and chamber walls.
Pour a handful of rock salt, add several ice cubes, run cold water, then switch on the disposal for short bursts until grinding finishes.
Repeat as needed, then flush with cold water to clear loosened debris and minimize odor sources.
4. Citrus and coarse salt scrub detailed method
Scrub a mixture of fresh citrus peels and coarse salt against the disposal’s interior to break up grime and neutralize odors: the salt acts as an abrasive to dislodge residue while citrus oils provide a natural deodorizing and antiseptic effect.
Work in short bursts, rotating peels to reach all surfaces.
Rinse thoroughly with cold water and run the disposal briefly to flush loosened particles and oil.
5. Enzymatic drain cleaner application how to choose and use
How should a homeowner select and apply an enzymatic drain cleaner to eliminate persistent disposal odors?
Homeowners should choose a biological cleaner labeled for grease and organic waste, matching sink material and local regulations.
Follow manufacturer instructions: run warm water, pour recommended dose, allow dwell time (often overnight), then flush.
Repeat weekly or after heavy use until odors subside; store safely.
6. Manual cleaning: unplugging, removing splash guard, and scrubbing
After applying enzymatic cleaners and allowing them to work overnight, a homeowner should follow up with a hands-on inspection and manual cleaning of the disposal.
Unplug or turn off power, remove the splash guard, and use a stiff brush and mild detergent to scrub the rubber flaps, chamber, and impellers.
Rinse thoroughly, reinstall parts, restore power, and test for residual odor.
7. Bleach or disinfectant caution and correct use
Exercise caution when using bleach or strong disinfectants in a garbage disposal: these chemicals can neutralize odors but may damage rubber components, corrode metal parts, and pose inhalation or mixing risks if combined with other cleaners.
If used, dilute according to label instructions, run cold water, apply briefly, rinse thoroughly, and never mix with ammonia or acidic cleaners.
Limit frequency to avoid material degradation.
8. Using a disposal brush or long-handled scrub tool
Following caution with chemical cleaners, attention should turn to a hands-on method: using a disposable or dedicated disposal brush—or a long-handled scrub tool—to remove trapped grime from the grinding chamber and splash guard.
The tool scrubs food residue, biofilm, and slimy buildup unreachable by rinsing. After brushing, run cold water and briefly operate the disposal to flush loosened debris and restore neutral odor.
9. Professional-grade odor eliminators and when to call a pro
When simple home remedies fail, professional-grade odor eliminators offer concentrated formulas and application methods designed to neutralize entrenched smells rather than merely mask them.
Technicians use enzymatic treatments, oxidizers, or ozone generators targeted at biofilms and trapped residues.
Homeowners should call a pro when persistent odors resist cleaning, when plumbing issues are suspected, or when safety concerns arise with strong chemicals or electrical equipment.
Safety Precautions When Cleaning a Garbage Disposal
Before any cleaning begins, the unit should be powered off and unplugged or the circuit breaker turned off to prevent accidental activation.
Care must be taken to avoid mixing chemical cleaners and to use noncaustic alternatives when possible.
Wearing gloves and eye protection and using appropriate, nonmetallic tools reduces the risk of injury.
How to power off and unplug the unit safely
Turn off the disposal at the wall switch and then disconnect power at the source to guarantee no accidental activation; if the unit is hardwired, switch off the corresponding circuit breaker and confirm the power is off with a non-contact voltage tester before proceeding.
After confirming no power, unplug the unit if possible or remove the disposal’s plug from its outlet, lock out the breaker if available, and proceed.
Avoiding chemical hazards and mixing cleaners
With power confirmed off, attention shifts to chemical safety: many household cleaners can react dangerously when combined or applied in confined spaces like a sink.
Avoid mixing bleach with ammonia, acids, or vinegar; never pour multiple commercial drain products together.
Use small, labeled amounts, rinse thoroughly between different treatments, and ventilate the area.
If unsure, opt for mild, single-ingredient cleaners or consult product instructions.
Proper protective gear and safe tool use
Proper eye protection, chemical-resistant gloves, and sturdy footwear form the baseline of safe disposal cleaning; goggles prevent splashes, nitrile or neoprene gloves protect against caustic cleaners and sharp food fragments, and closed-toe shoes reduce injury risk from dropped tools.
Hands must stay clear of activated blades; always unplug or lock out power, use nonconductive tools or wooden implements, and work in well-lit conditions.
Preventive Routine to Keep Your Disposal Smelling Fresh
A concise preventive routine keeps odors from forming and prolongs disposal life.
It should include a daily and weekly maintenance checklist, guidance on foods to avoid, and a recommended cleaning schedule with seasonal deep-clean tips.
Clear, simple habits reduce buildup and the need for intensive fixes.
Daily and weekly maintenance checklist
Establishing a simple daily and weekly routine prevents buildup and keeps a garbage disposal smelling fresh.
Routine steps minimize odor sources and prolong appliance life.
- Run cold water and grind citrus peels briefly each day.
- Flush with cold water for 15 seconds after use.
- Weekly scrub splash guard with soapy brush.
- Monthly grind ice and salt.
- Inspect and remove visible debris safely.
Best foods to avoid putting in the disposal
Many common kitchen scraps can clog or rot in a disposal, so homeowners should avoid putting fibrous, starchy, greasy, or hard items down the drain.
Avoid celery, corn husks, onion skins, potato peels, rice, pasta, coffee grounds, grease, bones, and fruit pits.
Dispose of these in compost or trash and run cold water briefly after using the disposal for small soft scraps.
Recommended cleaning frequency and seasonal deep-clean tips
Routine maintenance preserves disposal performance and prevents odors before they start.
Weekly rinses with cold water and brief runs after use clear particles; biweekly citrus or baking soda refreshes odors.
Monthly inspections and blade-safe scrubs remove buildup.
Seasonally, perform a deep clean: disconnect power, scrub with vinegar soak, flush with boiling water, and reassemble.
Replace seals annually or if leaking.
Diagnosing Persistent Odors and When to Repair or Replace
A focused inspection begins with checking the grinding chamber and splash guard for trapped food, visible mold, or grease buildup that resists simple cleaning.
Persistent odors accompanied by grinding noise, leaks, or a sour, musty smell can indicate mechanical damage or established bacterial colonies inside the unit.
When evaluating costs, compare the price of targeted repairs and parts versus replacement, factoring in appliance age, warranty status, and the likelihood of recurring odors.
How to inspect for trapped food, mold, or grease buildup
Inspect the disposal and surrounding plumbing systematically to locate trapped food, mold, or grease buildup that can cause persistent odors.
Remove the splash guard and use a flashlight to check the grind chamber, baffle, and rubber flaps.
Inspect the drain trap, tailpiece, and P-trap for residue or slow drainage.
Note visible mold, sticky grease, or compacted food and document locations for targeted cleaning.
Signs of mechanical damage or internal bacterial colonies
Several clear indicators can distinguish mechanical damage or entrenched bacterial colonies from ordinary food residue when diagnosing persistent garbage disposal odors.
Persistent sewage-like or sulfurous smells despite cleaning, grinding noises, reduced blade action, irregular vibrations, visible corrosion or pitting, foul odors emanating from the unit when unplugged, and recurring mildew shortly after sanitizing point to internal bacterial biofilms or mechanical failure requiring professional assessment.
Cost and decision guide: repair vs. replacement
When persistent odors indicate deeper mechanical failure or entrenched bacterial colonies, homeowners must weigh repair costs, expected lifespan, and replacement benefits to decide the most cost-effective course. Assessage: repair for localized faults under $150–300; replace if motors or corrosion dominate. Consider warranty, frequency of issues, and labor.
| Option | Cost range | When to choose |
|---|---|---|
| Repair | $150–300 | Isolated faults |
| Replace | $200–600+ | Recurrent failures |
Natural vs Chemical Cleaners: Effectiveness and Environmental Impact
The section compares natural remedies like baking soda, vinegar, and citrus with commercial chemical cleaners, highlighting their relative effectiveness on odor, grease, and biofilm.
It outlines pros and cons of each approach—safety, cost, and short- versus long-term results—and notes environmental and plumbing impacts.
Finally, it recommends eco-friendly product options and usage guidelines for minimizing harm while maximizing odor control.
Pros and cons of natural remedies (baking soda, vinegar, citrus)
Although natural remedies like baking soda, vinegar, and citrus lack the industrial strength of some chemical cleaners, they offer effective odor control for routine garbage-disposal maintenance while posing lower risks to plumbing, septic systems, and indoor air quality.
They deodorize, mildly disinfect, and freshen without harsh fumes; however, results are temporary, may require frequent repeat treatments, and won’t dissolve heavy grease or scale.
Pros and cons of commercial chemical cleaners
Balance guides choices between commercial chemical cleaners and natural alternatives for garbage-disposal odor: chemical products typically offer faster, stronger breakdown of grease, biofilm, and mineral buildup, reducing odors more quickly and with fewer repeat treatments.
However, they can contain corrosive ingredients, volatile compounds, and preservatives that may harm plumbing seals, septic bacteria, or indoor air.
Conversely, their concentrated formulas and dosing convenience can increase accidental exposure risks and environmental persistence, so users must weigh efficacy against potential impacts on health, pipes, and wastewater systems.
Chemical cleaners excel at rapid odor removal, yet potential corrosivity, toxicity, and downstream effects argue for cautious use, correct dosing, protective measures, and occasional reliance on gentler methods.
Eco-friendly product recommendations
How can consumers choose eco-friendly disposal cleaners without sacrificing effectiveness?
Third-party certified natural enzymes and bicarbonate-vinegar mixes often match mild chemical performance while reducing aquatic toxicity.
Selection should balance cleaning power, biodegradability, and packaging.
- Enzyme-based powders
- Baking soda + vinegar
- Citrus peels (mechanical scrub)
- Phosphate-free detergents
- Refillable concentrated formulas
Quick Reference: Fastest Methods Ranked by Speed and Effectiveness
For quick decision-making, a concise comparison highlights which methods work fastest and which sustain results. The table below summarizes top choices for a renter needing an immediate fix and a homeowner seeking long-term prevention. The following notes briefly explain both recommendations.
| Situation | Fastest Method | Effectiveness |
|---|---|---|
| Renters/guests | Ice + salt grind | Immediate, short-term |
| Homeowners | Regular enzymatic treatment | Slower onset, long-term |
| General tip | Citrus + hot water rinse | Quick freshen, moderate effect |
Best immediate solution for renters or quick guests
Several quick fixes reliably neutralize garbage disposal odor for renters or short-term guests.
Immediate options include grinding ice with citrus peels, running cold water with baking soda then vinegar for a short fizz, or using store-bought disposal deodorizers.
Each method requires minimal tools, no permanent changes, and leaves a neutral or fresh scent within minutes—ideal when rapid, noninvasive results are needed.
Best long-term solution for homeowners
Renters’ quick fixes are useful short-term, but homeowners benefit from more durable approaches that prevent odor recurrence and reduce maintenance.
Install a stainless steel disposal, schedule periodic professional cleanings, and replace worn splash guards.
Use enzyme-based cleaners monthly, run cold water with citrus peels after use, and inspect drain traps.
These proactive steps minimize buildup, odors, and costly repairs over time.
Troubleshooting Common Cleaning Problems
When odors return after an initial cleaning, common causes such as residual food buildup, trapped odors in rubber gaskets, or ineffective deodorizers should be identified and addressed with targeted repeat treatments.
If the disposal clogs during cleaning, safe clearing methods—manual removal with the unit powered off, using a hex wrench at the flywheel, and avoiding chemical drain cleaners—are recommended.
For persistent mold or bacterial smells, more advanced remediation like disassembling the splash guard, soaking removable parts in vinegar or baking-soda solutions, and professional inspection may be necessary.
Odor returns after cleaning likely causes and fixes
Persistent disposal odor after cleaning usually signals an underlying issue rather than ineffective scrubbing: trapped food particles, biofilm buildup, a malfunctioning seal or gasket, or bacterial growth in the drain line can all reintroduce smells.
Inspect and remove debris from the splash guard and impeller area. Sanitize with enzymatic cleaners, replace worn seals, and flush the drain line with hot water and baking soda plus vinegar to prevent recurrence.
Disposal clogs while cleaning how to clear safely
If odors can signal trapped debris or bacterial buildup, the act of cleaning itself sometimes dislodges material that then clogs the disposal or drain.
When a clog occurs, power should be off. Use a flashlight, pliers or tongs to remove visible debris; avoid hands.
For stubborn blockages, reset the unit and use the manual crank or a plumber’s snake. Run water and test function.
Persistent mold or bacterial smell advanced remediation steps
Addressing a lingering mold or bacterial odor requires targeted remediation beyond routine cleaning, focusing on hidden reservoirs of growth and compromised plumbing components.
Inspect and clean the splash guard, strainers, and discharge hose; remove and disinfect the P‑trap; target biofilms with enzyme cleaners or diluted bleach, rinsing thoroughly; dry components to prevent regrowth.
Consider professional plumbing service if odors persist despite these steps.
Maintenance Products and Tools Worth Buying
A concise selection of brushes, enzymatic cleaners, and deodorizing products can make routine disposal maintenance faster and more effective.
Buyers should prioritize durable bristles, food-safe formulas, and easy-dispense packaging when choosing cleaning tools.
When replacing a unit, attention to motor power, noise ratings, anti-jam features, and corrosion-resistant components helps prevent future odors.
Recommended brushes, cleaners, and deodorizing products
When selecting maintenance tools and cleaning agents for a garbage disposal, prioritize brushes and cleaners designed specifically for food-waste grinders and corrosion-resistant components.
Recommended items include safe enzymatic cleaners, non-abrasive paste cleaners, and compact brushes for splash guards and grooves.
Consider deodorizing tablets or natural citrus-based sprays for routine freshness.
- Enzymatic sink and drain cleaner
- Silicone disposal brush
- Non-abrasive paste cleaner
- Citrus deodorizing tablets
- Odor-neutralizing spray
Features to look for when buying a new disposal unit
While shopping for a new garbage disposal, buyers should prioritize durability, grind performance, noise reduction, and ease of maintenance to guarantee long-term reliability.
Look for stainless steel components, higher horsepower for tougher food waste, multi-stage grinding, and anti-vibration insulation.
Consider corrosion-resistant mounts, easy-access reset switches, dishwasher connection, and replaceable splash guards.
Warranties and reputable brands indicate service support and parts availability.
Step-by-Step Monthly Maintenance Plan
The monthly maintenance plan outlines simple recurring tasks to keep odors from returning, including brief weekly actions, a focused monthly deep-clean procedure, and an annual inspection checklist.
Each element specifies tools, timing, and expected results so homeowners can follow it reliably.
Clear separation of weekly, monthly, and yearly steps simplifies upkeep and catches problems early.
Weekly tasks
Each week, a brief set of tasks keeps the garbage disposal functioning odor-free and prevents buildup:
Run cold water and operate the disposal for 30 seconds after each heavy use.
Grind small citrus peels once or twice weekly for natural freshening.
Flush with a cup of baking soda followed by a stream of vinegar, then hot water.
Inspect splash guard and clean debris.
Monthly deep-clean procedure
When monthly maintenance is due, a systematic deep-clean restores the disposal’s performance and eliminates trapped odors through a few focused steps.
First, disconnect power, flush with hot water, then pour a cup of baking soda followed by vinegar; let fizz, rinse.
Scrub the splash guard and grinding chamber with a brush, grind ice and citrus peels, run cold water, reconnect power, test for smooth operation.
Annual inspection checklist
Because an annual inspection catches wear and minor issues before they become failures, a concise checklist guides a thorough review of the garbage disposal’s electrical, mechanical, and plumbing components.
Inspect mounting and splash guard, test reset and switch function, check for leaks and loose fittings, examine impellers and grinding chamber for wear, verify drain flow, and document findings with recommended repairs and schedule follow-up.
Conclusion: Fastest Practical Strategy to Eliminate Disposal Odor Today
The article closes with a concise, three-step immediate action plan to neutralize current disposal odors: rinse, scrub, and deodorize.
It then summarizes long-term prevention measures focused on regular maintenance, mindful use, and periodic deep cleaning.
Readers are invited to apply the checklist now and follow the prevention tips to keep odors from recurring.
Immediate action plan (3-step checklist)
Act quickly: follow a focused three-step checklist that eliminates the most common causes of disposal odor with minimal tools and time.
First, power off and clear visible debris.
Second, scrub accessible parts with baking soda and vinegar.
Third, run cold water and grind citrus or ice to flush residue.
- Cut power
- Remove debris
- Scrub seals
- Flush with cold water
- Grind citrus peels
Long-term prevention summary
Following the quick three-step checklist, a compact long-term plan keeps odors from returning by combining routine maintenance, mindful use, and occasional deep cleaning.
Regular weekly rinses with cold water, monthly citrus or baking-soda treatments, avoiding fibrous or starchy scraps, and prompt drying of the sink prevent buildup.
Annual inspections and professional servicing as needed guarantee seals, drains, and blades remain odor-free and efficient.
Conclusion
To eliminate garbage disposal odor today, follow simple actions, follow safe steps, follow reliable fixes: rinse with hot water, grind citrus peels, scrub the splash guard, deodorize with baking soda and vinegar, sanitize with ice and salt, and replace worn parts. Clean regularly, check seals, and run cold water during use. Practice caution, wear gloves, and unplug before reaching inside. Maintain a short monthly routine, and prevent odors before they start.
