How to Use Pipe Heat Tape: Step-by-Step Installation and Safety Tips
To effectively use pipe heat tape for preventing freezing and maintaining fluid temperature, follow these steps: Choose between self-regulating or constant-wattage tape, ensuring it meets indoor/outdoor ratings and confirms circuit capacity with GFCI protection. Start by cleaning and drying the pipe, then attach the tape according to manufacturer spacing—using parallel runs for constant-wattage types. Secure the tape with approved clips or tape, add thermal insulation, and seal all electrical connections. Before burying the installation, test for continuity, grounding, and proper operation. Additional guidance is available for sizing, controls, and safety checks.
What Pipe Heat Tape Is and Why It’s Used
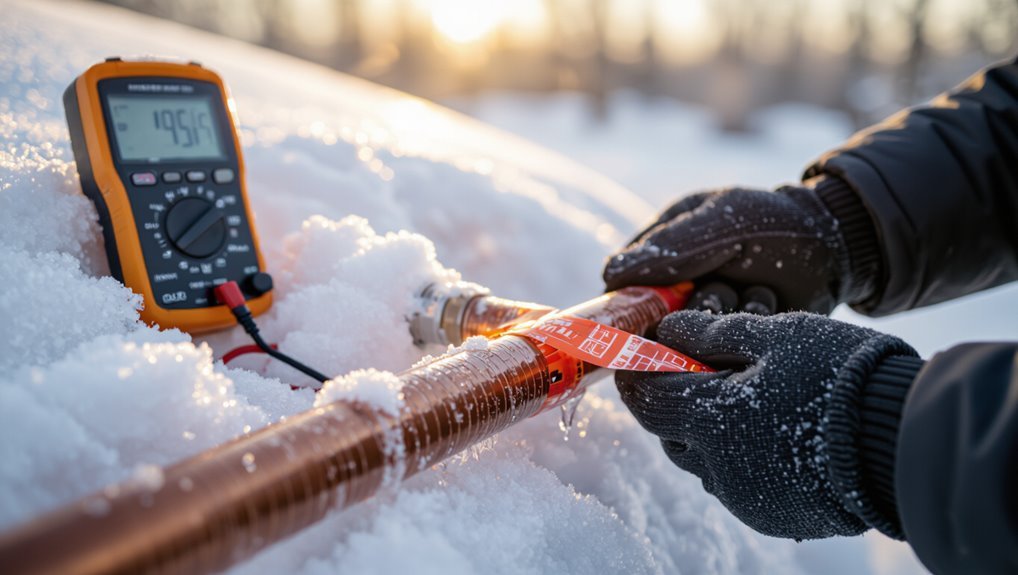
Pipe heat tape is a flexible electrical heating element, typically composed of a resistive core, insulation, and an outer jacket, designed to wrap around or run along pipes to maintain temperature.
It is used across residential, commercial, and industrial settings to prevent freezing, maintain process temperatures, and reduce condensation.
Unlike passive insulation or circulating systems, heat tape actively supplies heat and can be controlled or thermostatically regulated for targeted protection.
Definition and basic components
A flexible, electrically heated strip designed to wrap around plumbing runs, heat tape supplies controlled warmth to prevent freezing and maintain fluid flow in exposed pipes.
Components include the heating element, insulating jacket, power cord, thermostat or self-regulating conductor, and mounting materials.
Understanding these parts clarifies how to use pipe heat tape safely and select the right type for specific pipe materials and lengths.
Common applications (residential, commercial, industrial)
Heat tape finds widespread use across residential, commercial, and industrial settings to prevent freezing, maintain fluid viscosity, and protect equipment from cold-related damage.
Residential uses include water service, irrigation, and gutter protection.
Commercial applications cover HVAC condensate lines, plumbing risers, and rooftop drains.
Industrial deployments address process piping, tanks, valves, and instrumentation where temperature stability prevents downtime and preserves material properties.
How heat tape differs from other pipe-freezing prevention methods
Although often compared with insulation, electrical heat tape is an active heating solution that applies controlled warmth directly to piping, unlike passive methods that only slow heat loss.
It targets vulnerable spots, offers rapid response, and can operate with thermostatic control.
Compared to circulating systems or insulation, heat tape is simpler to install and more energy-focused but requires correct selection, installation, and monitoring for safety.
Quick overview: When to use pipe heat tape
Signs that pipes need heat tape include repeated freezing, visible frost or condensation, and frequent cold drafts around pipe runs.
Practical thresholds are typically near or below 32°F (0°C), with attention to prolonged cold snaps, wind chill, and poorly insulated locations.
Installers should also check local building codes and insurance requirements before applying heat tape.
Signs your pipes need heat tape
When should pipe heat tape be considered? Visible frost, ice buildup, or condensation on exposed pipes indicates vulnerability.
Repeated slow drips after cold nights, signs of previous freezing or cracked insulation, and pipes routed through unheated spaces or near exterior walls suggest need.
Frequent pressure loss or intermittent flow during cold spells also signals preventive installation to avoid freezing damage.
Temperature thresholds and environmental conditions
Noting visible frost or repeated drips helps identify vulnerable pipes. The next consideration is the specific temperatures and conditions that warrant heat tape.
Heat tape is recommended when sustained ambient temperatures approach freezing (around 32°F/0°C) or lower, during prolonged cold snaps, in uninsulated or poorly ventilated spaces, and when wind chill or radiative cooling increases freeze risk for exposed or exterior water lines.
Local codes and insurance considerations
Although building codes and insurance policies vary by jurisdiction, they commonly influence whether and how pipe heat tape may be installed.
Installers should verify local plumbing and electrical codes, required permits, and approved product types.
Insurance providers may require certified installation, documentation, or prohibit DIY setups.
Noncompliance can void coverage or lead to fines; prioritize code adherence and insurer notification before installing heat tape.
Types of Pipe Heat Tape and How to Choose One
Choosing the right pipe heat tape depends on how and where it will be used, since different types offer distinct temperature control, durability, and installation needs. Attention should be paid to whether the tape is self-regulating or constant-wattage, whether it’s rated for indoor or outdoor use, what power source and electrical requirements are needed, and how to size the tape for the pipe length and heat loss.
The following points summarize key selection factors to evaluate.
- Self-regulating vs. constant-wattage: control and safety differences
- Indoor vs. outdoor-rated: weather and exposure considerations
- Power source options: hardwired, plug-in, and voltage compatibility
- Electrical requirements: circuit capacity, grounding, and GFCI needs
- Sizing and length: match tape length and heat output to pipe and conditions
Self-regulating vs. constant-wattage tape
When selecting pipe heat tape, homeowners and professionals must understand the functional differences between self-regulating and constant-wattage designs, since each responds differently to temperature, installation conditions, and safety requirements.
Self-regulating tape adjusts output as pipe temperature changes, reducing overheating risk and allowing overlap.
Constant-wattage delivers fixed heat, simpler but riskier if overlapped or insulated improperly; choice depends on specific pipe characteristics.
Indoor vs. outdoor-rated heat tape
Climate rating is a primary factor distinguishing indoor from outdoor-rated heat tape: indoor tape is designed for protected, dry environments and may lack heavy weatherproofing, while outdoor-rated products include robust jackets, UV resistance, and temperature sensors to withstand moisture, sunlight, and freezing conditions.
Selection should match installation exposure, pipe material, and local climate; outdoor-rated tape offers greater durability and safety for exposed runs.
Power source options and electrical requirements
Outdoor-rated heat tape often requires different electrical considerations than indoor models, so evaluating power source options and wiring needs follows naturally from selecting the correct product.
Users should compare plug-in versus hardwired units, voltage (120V or 240V), circuit capacity, GFCI protection, and compatible thermostats or self-regulating controls.
Compliance with local codes and use of weatherproof connections guarantees safe, reliable operation.
Sizing and length selection guidelines
How long should the heat tape be and which type suits a given pipe? Selection depends on pipe length, diameter, insulation, and exposure.
Measure run including turns; prefer slightly longer tape for overlap and terminations.
Choose self-regulating for variable temperatures, constant-wattage for consistent heat needs.
Match tape wattage to pipe material and ambient conditions; consult manufacturer charts for proper sizing and circuit requirements.
Tools and Materials Needed for Installation
Before beginning a pipe heat tape installation, the installer should assemble the necessary tools, safety gear, and any optional accessories that will streamline the job.
Essential electrical tools and protective equipment guarantee proper connections and safe handling. Optional items like insulation and thermostats improve system performance and longevity.
- Wire stripper and crimper
- Heat-shrink tubing and electrical tape
- Multimeter for continuity and voltage checks
- Personal protective equipment (gloves, eye protection) and approved junction boxes
- Pipe insulation, thermostatic controls, and cable clips
Required tools (wire stripper, heat-shrink, multimeter, etc.)
Gathering the correct tools guarantees a safe, reliable heat-tape installation: a wire stripper and crimping tool for clean conductor preparation, heat-shrink tubing or waterproof splice kits for insulated joints, a multimeter to verify continuity and proper voltage, electrician’s tape and cable ties for secure routing, and appropriate personal protective equipment such as gloves and safety glasses.
Additional items include a utility knife, measuring tape, and marker.
Safety gear and electrical materials
Several essential items protect installers and guarantee safe electrical connections when fitting pipe heat tape.
Required safety gear includes insulated gloves, safety glasses, and nonconductive footwear.
Electrical materials comprise GFCI-protected power supply, weatherproof connectors, heat-shrink tubing, corrosion-resistant wire nuts, appropriate gauge copper wire, and labeled circuit breakers.
All components must meet local electrical codes and manufacturer specifications for safe, compliant installation.
Optional accessories (insulation, thermostats, junction boxes)
Additional optional accessories—pipe insulation, thermostats, and weatherproof junction boxes—enhance performance, efficiency, and protection but are not always required for basic heat tape operation.
Insulation retains heat and reduces energy use.
Thermostats or self-regulating controllers prevent overheating and conserve power.
Weatherproof junction boxes protect electrical connections outdoors.
Select components compatible with pipe size, tape type, and local electrical codes.
Step-by-Step Installation Guide
The installation guide begins with pre-installation safety checks and a clear plan for the work.
The pipe surface should be inspected and prepared before mounting self-regulating tape (wrapped with proper spacing) or installing constant-wattage tape as a parallel run secured per manufacturer instructions.
Finally, the guide covers safe connection to power with wiring best practices and grounding requirements.
Pre-installation safety checks and planning
Before installing pipe heat tape, inspect the piping route, electrical supply, and surrounding materials to confirm compatibility and identify hazards.
Verify circuit capacity, ground-fault protection, and local codes.
Plan tape length, power access, and thermostat placement.
Identify combustible materials and moisture sources to avoid.
Guarantee proper permits and shutoff procedures are arranged before work begins to minimize risks and delays.
Inspecting and preparing the pipe surface
Begin by thoroughly inspecting the pipe surface for corrosion, flaking paint, scale, oil, or moisture, as these conditions can prevent proper adhesion and heat transfer.
Clean affected areas with a wire brush, solvent, or mild detergent; remove loose material and dry completely.
Repair or replace severely damaged sections.
Verify pipe insulation integrity and guarantee surfaces are smooth and dry before proceeding to mounting.
Mounting self-regulating heat tape: wrapping and spacing
Position the self-regulating heat tape along the pipe starting at the power source end, ensuring the heater’s conductive side contacts the pipe and the thermostat sensor (if separate) runs parallel to the tape.
Wrap with consistent overlap or spacing per the manufacturer’s specification, secure with approved fasteners at recommended intervals, and avoid kinks or tight bends that could damage the cable.
Maintain spacing through fittings, straps, and insulation.
Installing constant-wattage tape: parallel run and attachment methods
When moving from self-regulating tape to constant-wattage systems, installers must adopt a parallel-run approach that keeps the heating conductors laid alongside the pipe rather than wrapped helically.
The tape should follow the pipe’s length, secured with approved fasteners or fiberglass tape at consistent intervals.
Avoid tight bends, maintain manufacturer spacing, and protect the element with insulation and appropriate vapor barriers before finishing.
Connecting to power: wiring best practices
Power connection for pipe heat tape requires strict adherence to wiring codes, manufacturer instructions, and safe-practice sequencing to guarantee reliable operation and prevent hazards.
Qualified personnel should use correct wire gauge, GFCI protection, weatherproof junctions, and secure conduit.
All connections must be tight, insulated with approved materials, and accessible for inspection.
Verify polarity, ground continuity, and circuit labeling before energizing.
Adding thermostats, controllers, or timers
Before installing thermostats, controllers, or timers, confirm the heat tape type, voltage, and local code requirements. Then gather the compatible device, mounting hardware, and necessary tools.
Install the control between the heat tape and its power source per manufacturer wiring diagrams.
Mount sensors on representative pipe sections, program setpoints or schedules, verify operation with multimeter and functional test, and label the control for maintenance.
Sealing, insulating, and weatherproofing connections
Protect all electrical and thermal interfaces by sealing, insulating, and weatherproofing each connection to maintain heat-tape performance and prevent moisture intrusion.
Use proper-rated silicone sealant at splice points, waterproof electrical tape or heat-shrink with adhesive, and corrosion-resistant junction boxes.
Wrap exposed pipe sections with compatible insulation over the taped heat trace, secure with stainless-steel bands, and slope seals to shed water away from joints.
Final electrical checks and first-power test
Confirm all wiring, terminations, and protective devices are correctly installed and accessible before energizing the system.
A qualified person verifies continuity, insulation resistance, correct grounding, and proper breaker sizing.
Thermostat and sensor wiring are tested for expected resistance.
Restore power briefly while monitoring for abnormal heat, tripped protection, or fault indicators.
De-energize and correct any issues before completing insulation and final mounting.
Common Installation Scenarios and Specific Instructions
The following section compares material-specific requirements and placement challenges for common pipe types and locations.
It outlines distinctions for metal versus plastic pipes and gives targeted guidance for runs in crawl spaces, attics, and exterior walls.
Instructions for long runs, junctions, fittings, and installation on copper, PEX, and PVC are provided.
Metal vs. plastic pipes
Different pipe materials demand distinct heat-tape approaches: metal pipes conduct heat well and tolerate higher tape temperatures, while plastic pipes require lower-heat tapes and careful spacing to prevent softening or melting.
For metal, maximize contact and use higher-wattage or self-regulating tapes.
For plastic, choose manufacturer-approved low-temperature tapes, avoid overlapping, use thin thermal insulation, and strictly follow temperature and installation limits.
Pipes in crawl spaces, attics, and exterior walls
Cold-prone locations like crawl spaces, attics, and exterior walls each pose unique challenges for heat-tape installation and require tailored strategies to guarantee freeze protection without creating fire or pipe-damage hazards.
Installers should choose appropriate tape type, secure it directly to the pipe, maintain manufacturer-recommended clearances, add insulation over the tape, protect against moisture, and route cords safely to power sources while ensuring access for inspection.
Long runs, junctions, and fittings
Several common scenarios—long runs, junctions, and fittings—require distinct installation steps to maintain even heat distribution and safe operation.
For long runs, use continuous tape or overlapping sections with manufacturer-approved splices and power feeds per distance limits.
At junctions and fittings, contour tape closely, secure with approved tape, insulate exposed areas, and avoid kinking or crossing to prevent hotspots and failure.
Working with copper, PEX, and PVC
After addressing long runs, junctions, and fittings, installers must adjust techniques for specific pipe materials—copper, PEX, and PVC—because each conducts heat and responds to fastening and insulation differently.
For copper, guarantee direct contact and thin insulation; for PEX, avoid excessive compression and use compatible heat tape; for PVC, maintain lower heat settings and secure tape to prevent deformation, following manufacturer limits and codes.
Safety Precautions and Code Compliance
Safety and code compliance are paramount when installing pipe heat tape, covering electrical grounding, proper circuit protection, and avoidance of fire or overheating risks.
Installers should follow manufacturer instructions to preserve warranty and reduce hazards, and verify that materials and methods meet local codes.
Where required, permits and inspections should be obtained and installations referenced to applicable electrical and building code sections.
Electrical safety and grounding requirements
Confirm all electrical work for pipe heat tape follows local electrical codes and manufacturer instructions to prevent shock, fire, or equipment damage.
Install ground-fault protection (GFCI) where required, and guarantee the heating cable and thermostat have proper grounding.
Use appropriately rated conduit, connectors, and circuit breakers.
Verify wire sizes, junction boxes, and bonding continuity.
Have installations inspected and documented per code.
Avoiding fire hazards and overheating
With grounding and electrical protections in place, preventing fire and overheating requires strict adherence to installation limits and manufacturer guidelines.
Maintain proper spacing from combustible materials, avoid overlapping or crossing tape, and secure connections with approved fasteners.
Use temperature and overcurrent protection, inspect for damage before energizing, and follow local codes for routing and clearances to minimize ignition and thermal failure risks.
Manufacturer instructions and warranty considerations
Consult the manufacturer’s instructions before installation to guarantee compliance with specified temperature ratings, mounting methods, and compatible pipe materials.
The installer should follow wiring diagrams, connection types, and approved adhesives or tapes to preserve warranty. Deviations, unauthorized repairs, or improper grounding may void coverage.
Retain purchase records and registration details; document installation date and model for future warranty claims and technical support.
Permits, inspections, and relevant code references
Local building codes and electrical regulations dictate when permits and inspections are required for installing pipe heat tape.
Installers must verify applicable municipal, state, and national standards before beginning work.
Required permits, conduit and wiring specifications, grounding, GFCI protection, and inspection checkpoints often reference the NEC, local amendments, and manufacturer installation guidelines.
Document approvals, keep records, and schedule inspections before energizing the system.
Troubleshooting and Maintenance
Troubleshooting begins with simple diagnostics like checking for power, testing continuity, and noting symptoms such as no heat or tripping breakers.
A routine inspection checklist should cover tape condition, secure attachment, insulation, and electrical connections.
Guidance should also distinguish repairable faults from reasons to replace the heat tape, plus outline seasonal setup and winterization steps.
Diagnosing common problems (no heat, tripping breakers)
Several common issues can cause heat tape to fail or repeatedly trip breakers, and diagnosing them requires a methodical check of the tape, power supply, and sensor components.
Inspect for visible damage, moisture ingress, or crushed sections. Test continuity and insulation resistance with appropriate meters.
Verify correct wiring, grounding, breaker capacity, and thermostat/sensor operation. Replace defective elements and retest before normal operation.
Routine inspection checklist
A concise routine inspection checklist helps guarantee pipe heat tape remains safe and effective.
Inspect tape for cracks, fraying, or exposed conductors; verify adhesive and fasteners remain secure.
Check thermostat and power connections for corrosion or overheating signs.
Confirm insulation integrity and proper coverage.
Test operation in cold conditions and note any unusual noises, odors, or intermittent function for prompt service.
When to replace heat tape vs. repair
Routine inspections reveal wear patterns and failure indicators that inform whether heat tape can be safely repaired or requires replacement.
Minor sheath abrasions, isolated cold spots, or loose connections may justify targeted repairs or component replacement.
Extensive damage, exposed heating elements, frequent malfunctions, or aged tape beyond manufacturer service life necessitate full replacement to guarantee safety and reliable freeze protection.
Seasonal setup and winterization tips
Each autumn, homeowners should plan a concise checklist for heat tape setup and winterization to confirm reliable freeze protection.
Inspect tape and insulation, replace damaged sections, verify thermostat and GFCI functionality, and clear debris.
Secure connections and fasteners, confirm overlap per manufacturer, and test system before first freeze.
Store spare components and document installation dates for seasonal reference and future maintenance.
Energy Use, Cost, and Efficiency Considerations
Estimating power consumption and operating costs helps owners budget for heat tape over a season and compare models by wattage and run-time. Practical ways to reduce energy use include adding pipe insulation, using thermostatic control, and grouping circuits for zoning to heat only necessary runs. The table below summarizes typical wattage, estimated monthly cost, and suggested efficiency measures for quick comparison.
| Typical Wattage per ft | Estimated Monthly Cost* | Efficiency Measure |
|---|---|---|
| 2–5 W | $3–$8 | Insulation around heated runs |
| 8–12 W | $12–$20 | Thermostats with ambient/pipe sensors |
| 15–20 W | $22–$30 | Zoning to limit powered sections |
*Costs assume average electricity price; actual costs vary by usage and local rates.
Estimating power consumption and operating costs
Calculating the power consumption and operating costs of pipe heat tape requires multiplying the tape’s wattage per foot by the total length in use, then converting that figure into kilowatt-hours based on expected run hours.
This provides a reliable baseline for monthly and seasonal energy estimates. Multiply kWh by local electricity rate, add fixed fees and tax, and prorate for anticipated usage days to estimate total cost.
Ways to reduce energy use (insulation, thermostats, zoning)
After determining expected energy use and costs, homeowners and installers can cut consumption by combining targeted insulation, smart temperature controls, and sectional activation.
Use closed-cell pipe insulation and heat tape sleeves to reduce heat loss. Select programmable or Wi-Fi thermostats to set lower standby temperatures. Zone circuits so heat tape runs only where needed.
Regularly inspect seals and adjust schedules seasonally for peak efficiency.
Mistakes to Avoid During Installation
Common installation mistakes can compromise both performance and safety, so attention to detail is essential. Typical errors include improper attachment or spacing, selecting a tape incompatible with the pipe material or environment, and ignoring the electrical load on the circuit. Addressing these issues upfront reduces failure risk and maintenance costs.
- Failing to secure the tape tightly and maintain recommended spacing
- Installing a tape not rated for the pipe’s material (metal vs. plastic)
- Using heat tape unsuitable for outdoor, wet, or high-temperature conditions
- Overlooking the circuit’s capacity and adding excessive load
- Skipping manufacturer instructions and local electrical codes
Improper attachment and spacing errors
Improper attachment and incorrect spacing are frequent causes of heat tape failure and can leave pipes vulnerable to freezing despite an otherwise correct system.
Loose, overlapping or unevenly spaced runs create cold spots and stress points. Adhesive clips, proper fasteners and manufacturer spacing guidelines guarantee uniform contact.
Inspect and secure tape after installation and after thermal cycling to prevent gaps or damage.
Using wrong tape type for pipe material or environment
Choose the correct heat tape type to match the pipe material and exposure conditions, because mismatches can cause poor heat transfer, insulation damage, electrical hazards, or premature failure.
Installers must verify compatibility with metal, plastic, or composite pipes and with outdoor, submerged, or chemically exposed locations.
Using tape rated for specified temperature range and mounting method prevents degradation, leaks, and unsafe operation.
Overlooking electrical capacity and circuit loading
How much current will the heat tape draw and can the circuit handle it?
Installers must calculate tape amperage, assess existing circuit load, and confirm breaker and wiring capacity. Ignoring cumulative loads risks tripped breakers, overheating, or fire.
Use manufacturer specs, measure cumulative device draw, and consult an electrician when loads approach panel limits or when dedicated circuits or GFCI protection are required.
When to Hire a Professional
Signs that a licensed electrician or plumber is needed include unclear wiring, complex pipe layouts, or local code requirements.
The professional typically assesses system compatibility, performs safe wiring and attachment, and provides documentation of work.
Homeowners should ask about licensing, insurance, experience with heat tape, and request references or permits as applicable.
Indicators you need licensed electrician or plumber
When unexpected sparking, burning smells, or frequent tripping of breakers occur during heat-tape installation, a licensed electrician is needed; similarly, visible pipe corrosion, persistent leaks, or frozen sections despite proper tape use signal a plumber should be called.
Also seek professionals for complex wiring, unknown circuit issues, inaccessible piping, repeated system failures, or when local codes and permits are required to guarantee safe, compliant repairs and installations.
What to expect from a professional installation
A professional heat-tape installation typically includes a site assessment, selection of appropriately rated tape and thermostats, secure attachment and sealing of the tape along the pipe, proper electrical hookup by a licensed electrician, and a final system test to confirm safe operation and adequate freeze protection.
The technician documents wiring, demonstrates thermostat settings, secures insulation and weatherproofing, and provides maintenance guidance and a concise service record.
Questions to ask and credentials to verify
Who should be trusted with heat-tape installation depends on specific qualifications and clear answers to targeted questions.
Ask about licensing, insurance, experience with heat-trace systems, manufacturer-approved products, local code familiarity, and warranty handling.
Verify electrician or plumber credentials, proof of past installations, and references.
Confirm written estimates, safety procedures, permit acquisition, and post-install inspection commitments.
Quick-reference Checklist for Installing Pipe Heat Tape
A concise checklist helps guarantee a safe and effective pipe heat tape installation by covering materials, pre-power steps, and post-install inspections.
The guide lists required tools and parts, a step-by-step pre-power safety routine, and a final inspection to confirm secure attachment and proper operation. Readers are encouraged to follow each item in order and stop if any condition seems unsafe.
- Verify materials and tools: heat tape, thermostat (if required), insulation, electrical tape, and appropriate fasteners
- Confirm pipe condition and insulation plan before applying heat tape
- Follow the pre-power checklist: wiring, grounding, GFCI protection, and manufacturer instructions
- Perform post-install inspection: secure fastening, no overlaps, correct thermostat placement, and insulation coverage
- Test operation and document installation date, model, and any observed issues
Materials and tools check
Checklist items guarantee the installation proceeds safely and efficiently.
A concise materials and tools check lists heat tape of correct length/type, compatible thermostat and GFCI protection, pipe insulation, waterproof electrical tape, cable ties, junction box, wire stripper, screwdriver, measuring tape, marker, and personal protective equipment.
Confirm voltage rating, manufacturer specifications, and absence of damaged components before beginning installation.
Step-by-step pre-power checklist
Before applying power, the installer verifies each required step in sequence to guarantee safety and proper function.
Confirm correct tape type and length, secure even contact along pipe, insulate per manufacturer, maintain required clearances, install thermostat and ground-fault protection, route and fasten wiring, seal terminations and junctions, label circuits, and document locations and settings before energizing.
Post-install inspection checklist
The post‑install inspection verifies that the heat tape and associated components were installed correctly and are ready for safe operation.
Inspect for secure attachment, correct spacing, intact insulation, and absence of kinks or overlaps.
Confirm thermostat and GFCI function, proper wiring and labeling, and clearances from combustibles.
Document installation details, photos, and test results; schedule periodic inspections and maintenance.
Conclusion
While many believe pipe heat tape simply prevents freezing, investigating the theory that it also extends pipe lifespan reveals nuanced truth: when properly selected and installed, heat tape reduces freeze-related stress and corrosion cycles, potentially lengthening service life; when misapplied, it can cause damage. Consequently, careful choice, correct installation, and routine inspection matter most. Used judiciously, heat tape is both a reliable freeze-prevention tool and a modest protector of long-term pipe integrity.