How to Open a Damper in an Air Duct: Step-by-Step Guide for Homeowners
To open a damper in an air duct, first identify if it’s manual or motorized, typically located at the furnace outlet, branch takeoffs, or return plenum. Begin by turning off the HVAC power for safety. For manual dampers, loosen any locks or screws, then rotate or slide the blade to the open position and re-tighten fasteners. For motorized dampers, check the electrical connections and actuator operation before adjusting the controls. Finally, perform airflow checks and schedule seasonal maintenance to ensure proper function.
How to Open a Damper in an Air Duct: Quick Overview
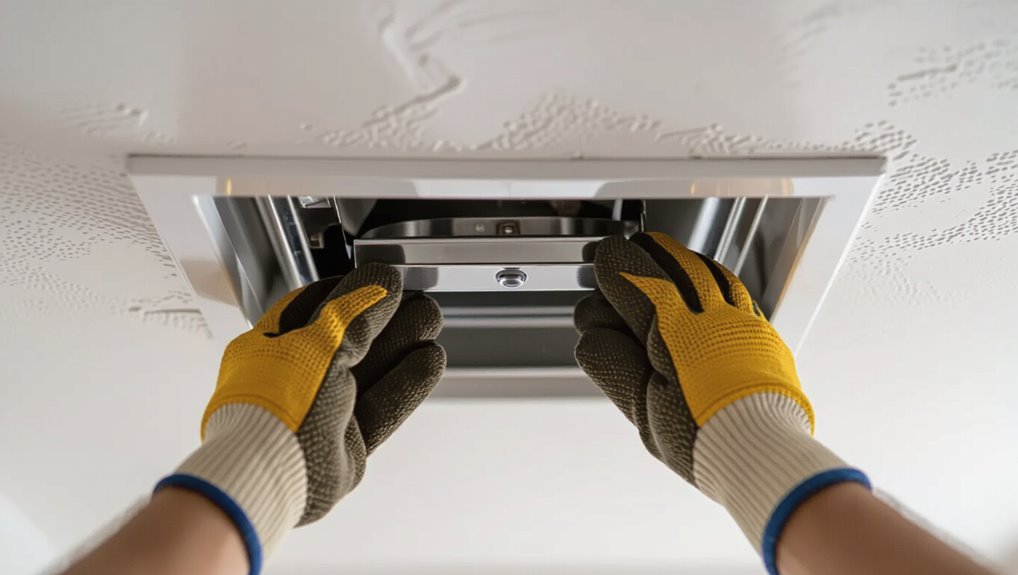
Opening a damper in an HVAC system means adjusting the internal flap to increase airflow through a specific duct.
It is typically done when balancing rooms, restoring flow after blockages, or when seasonal changes require different ventilation.
Before attempting it, homeowners should have basic protective gear, a flashlight, and simple tools like a screwdriver while ensuring the system is powered off.
What “opening a damper” means in HVAC systems
Adjusting a damper in an HVAC duct means changing the position of a built-in or inline blade to increase airflow through a specific branch of the system.
Opening a damper normally rotates that blade toward the parallel position, reducing restriction.
Understanding how to open a damper in air duct contexts clarifies manual or motorized control, affects zone balancing, and distinguishes opening from full removal or service actions.
When you should open a damper (common scenarios)
After defining what it means to open a damper, the discussion moves to typical situations that call for increasing a damper’s openness.
Common scenarios include balancing uneven room temperatures, restoring airflow after blocked vents, improving ventilation in frequently used rooms, compensating for closed registers elsewhere, and preparing spaces for gatherings.
Opening can also address weak HVAC performance during seasonal temperature extremes.
Safety and tool checklist for homeowners
A short safety and tool checklist helps a homeowner prepare before handling an air-duct damper to avoid injury and prevent system damage.
Confirm power to HVAC is off, wear gloves and eye protection, and use a dust mask if needed.
Gather a flashlight, screwdriver or nut driver, adjustable wrench, pliers, and ladder.
Keep a phone nearby for emergencies.
Identify the Type and Location of the Damper
First, determine whether the damper is manual (adjusted by a lever), motorized (controlled by an actuator), or part of a zoning system with linked dampers.
Next, note that dampers are commonly found near furnace outlets, branch takeoffs, or return plenums in basements, attics, and wall cavities.
Finally, consider access strategies for hard-to-reach locations such as using a flashlight and long-handled tool in crawlspaces, a stable platform or attic hatch, or temporarily removing duct sections in basements.
Difference between manual, motorized, and zone dampers
When determining how to access and operate a damper, it helps to distinguish manual, motorized, and zone dampers by their control mechanisms, typical locations, and designated functions;
manual dampers use a simple lever or blade adjusted by hand and are usually found in individual ducts or register boots.
Motorized dampers contain an electric actuator mounted near the plenum or branch takeoff for automated control,
and zone dampers are integrated with a zoning system—often located at duct branches or inside a central plenum—to modulate airflow for multiple conditioned areas.
Manual types require physical access; motorized units need power and wiring inspection;
zone systems involve thermostats and a control panel.
Where dampers are typically located in residential ductwork
Dampers in residential ductwork are commonly found at predictable points where airflow is divided or controlled: inside the main supply plenum near the furnace or air handler, at branch takeoffs leading to individual rooms, within register boots at floor, wall, or ceiling grilles, and occasionally in return ducts or external dampers on fresh-air intakes.
Manual levers or motorized actuators are mounted where access and control are needed.
How to access hard-to-reach dampers (attic, crawlspace, basement)
Although access can vary widely by home, identifying a hard-to-reach damper begins with confirming its type and exact location: inspect the main supply plenum and branch takeoffs for manual levers or actuator housings, check register boots and ceiling/wall grilles for built-in dampers, and trace any duct runs into attics, crawlspaces, or basements where external intake or return dampers may be mounted.
Use a flashlight, extendable mirror, and camera to map locations before attempting entry; note clearances, insulation, and fasteners, and plan safe access via attic hatch, crawlspace path, or basement entry, considering ladders or temporary flooring as needed.
Prepare the Work Area and Safety Precautions
Before beginning, power to the HVAC system should be shut off and isolated to prevent accidental startup.
The technician should don appropriate PPE and guarantee adequate ventilation while working inside ducts.
Measures to block or reroute airflow and monitor pressure changes must be established to avoid system imbalance.
Turn off HVAC equipment and power isolation
Shut down the HVAC system and isolate its power to eliminate the risk of moving parts or live electrical circuits while working on the duct damper.
Verify shutdown at the thermostat, breaker panel, and any branch switches.
Lock out/tag out or place a visible warning.
Allow capacitors to discharge where applicable and confirm no fan or motor activity before opening access panels or adjusting the damper.
Personal protective equipment and ventilation
With power confirmed off and equipment immobilized, the technician next verifies appropriate personal protective equipment (PPE) and ventilation for the task.
Safety glasses, gloves, and a dust mask or N95 are donned. Long sleeves reduce skin contact.
Portable fans or opening nearby windows guarantee airflow and exhaust dust. A flashlight and ladder with non-slip feet complete the prepared, ventilated work area.
Preventing airflow or pressure issues during the task
Although the damper work is localized, maintaining balanced airflow and static pressure in the system is essential to prevent backdrafts, blower overload, or unintended airflow through other zones.
Temporarily reduce fan speed or turn the system off before adjusting dampers, seal adjacent registers, and monitor pressure with a gauge.
Restore original settings and verify even airflow after completing adjustments to avoid system stress.
Step-by-Step Guide to Opening a Manual Damper
The procedure for opening a manual damper is straightforward when approached methodically.
First, inspect the damper to identify its open/closed indicator and loosen any locks, screws, or clips; then rotate or slide the blade to the fully open position and secure it.
Finally, verify airflow and reseal access points if needed.
- Inspect indicator and loosen fasteners
- Move damper to fully open position
- Secure damper in place
- Verify airflow and reseal access points
Inspect the damper and determine open/closed indicator
Begin by visually examining the damper assembly to locate any markings, levers, or handles that indicate position; many manual dampers include an arrow on the blade, a slot in the shaft, or a labeled plate showing “open” and “closed.”
Note blade orientation relative to airflow, any stop points, corrosion or paint obscuring marks, and whether linkage aligns with indicated positions before proceeding.
Loosen locks, screws, or clip mechanisms
Loosen the fasteners securing the damper mechanism to allow movement while keeping track of each piece.
Using the correct screwdriver or wrench, back out screws, release clips, or disengage small locks just enough to free the linkage without removing parts unnecessarily.
Place removed fasteners in a labeled container. Note their positions for reassembly and avoid disturbing other ductwork components.
Rotate or slide the damper to fully open position
Rotate or slide the damper smoothly until it reaches its full open position, using gentle, steady pressure to avoid stressing the linkage.
The operator observes for unobstructed movement, verifies blades or plates align parallel to airflow, and listens for binding.
If resistance occurs, back off, inspect for debris or misalignment, and clear obstructions before retrying to prevent damage.
Secure the damper in the open position
With the damper fully open and moving freely, the operator next secures it to prevent unintended movement.
They tighten the clamp or fasten the locking screw on the damper shaft, confirm any linkage is seated, and attach a safety clip or zip tie if provided.
Finally, they test the mechanism by gently nudging the blade to guarantee it remains fixed and stable.
Verify airflow and reseal any access points
After securing the damper, the operator verifies airflow and reseals any access points to restore system integrity.
They check registers and use an airflow meter or hand test to confirm balanced delivery.
Any gaps or removed panels receive foil HVAC tape or mastic sealant.
Fasteners are tightened, insulation replaced, and the area inspected for leaks before restoring normal HVAC operation.
Step-by-Step Guide to Opening a Motorized or Zone Damper
The motorized or zone damper requires checking its actuator and control system before attempting to open.
Technicians should confirm wiring and use the thermostat or control panel to send an open command, and be prepared to engage a manual override if needed.
After any intervention, test actuator operation and safely restore power.
- Locate the damper actuator and control wiring
- Use the thermostat or control panel to command open
- Manual override procedures for actuators
- Testing actuator operation and restoring power
Locate the damper actuator and control wiring
Locate the damper actuator and its control wiring before attempting any adjustments, since identifying the motorized component and its electrical connections is essential for safe, correct operation.
Inspect the duct near the damper for a small electric or pneumatic actuator housing. Trace wiring to the thermostat, zone control box, or transformer.
Note wire colors, labels, and secure fasteners; photograph connections for reference.
Use the thermostat or control panel to command open
With the actuator and wiring identified and documented, proceed to use the thermostat or zone control panel to command the damper open.
Select the appropriate zone or vent control, choose “open” or increase airflow setpoint, and send the command.
Confirm actuator response by listening for movement and checking indicator lights or zone status on the panel.
Verify airflow change at the register.
Manual override procedures for actuators
Before applying power or controls, access the damper actuator and engage its manual override to move the blade without motor input; this procedure allows a technician to verify blade position, clear obstructions, or set airflow while troubleshooting or during power interruptions.
Confirm actuator is isolated, use the designated release or crank, position blade gently to avoid binding, then secure override and note the temporary setting.
Testing actuator operation and restoring power
Power may now be restored and the actuator tested to confirm reliable, safe operation of the motorized or zone damper.
Reconnect power at the breaker, then cycle the thermostat or control panel through open/close commands while observing damper movement.
Listen for unusual noises, check travel endpoints and position indicators, and verify airflow changes.
If operation is smooth, secure covers and document settings; if not, isolate power and troubleshoot or call a technician.
Troubleshooting Common Problems
When problems arise after attempting to open a damper, a few focused checks usually identify the cause and next steps. The following items outline common mechanical, electrical, and airflow issues and practical options for repair or adjustment.
Refer to each point to determine whether simple maintenance, part replacement, or professional service is required.
- Damper stuck or difficult to move — mechanical fixes
- Actuator unresponsive — electrical checks
- Leaking or damaged damper blades — when to repair vs replace
- Unbalanced airflow after opening a damper — balancing tips
Damper stuck or difficult to move mechanical fixes
Inspecting a stuck or hard-to-move duct damper begins with a systematic assessment of visible causes and accessible components.
Lubricate pivot points with light machine oil, remove debris and rust, and tighten loose fasteners.
Realign bent blades or brackets, replace failing springs or worn bushings, and verify linkage clearance.
If corrosion is severe, replace the damper assembly to restore smooth operation.
Actuator unresponsive electrical checks
Begin troubleshooting an unresponsive damper actuator by confirming basic electrical conditions and signal continuity before replacing components.
Verify power at the actuator (voltage, fused circuits), inspect wiring for loose connections or corrosion, and test control signals from the thermostat or control board.
Measure resistance and continuity across motor leads. If readings match specifications, suspect control logic or intermittent wiring faults rather than the actuator itself.
Leaking or damaged damper blades when to repair vs replace
Assess damage to damper blades promptly to determine whether repair or replacement is appropriate.
Minor dents, loose seals, or small leaks can often be fixed with sealant, hinge adjustment, or straightening.
Extensive corrosion, cracked blades, warped metal, or repeated failures indicate replacement for reliable airflow and safety.
Consider age, material, and repair cost; prioritize replacement when performance or integrity is compromised.
Unbalanced airflow after opening a damper balancing tips
When a damper is opened and some rooms receive noticeably more or less airflow than expected, unbalanced distribution is usually the cause; resolving it requires methodical measurement and incremental adjustments rather than guessing.
Use a thermometer and anemometer to compare supply vents, partially close dampers feeding over-served rooms, and slightly open under-served branches.
Recheck readings after each change and document positions for future reference.
Tools, Materials, and Replacement Parts to Keep on Hand
A concise inventory of tools, spare parts, and decision points helps homeowners respond quickly to dampers that stick or fail.
Essential items include a basic toolkit for damper adjustments, common replacement parts like actuators, linkages, and seals, and clear criteria for when to call a professional HVAC technician.
The following list outlines practical items to keep on hand.
- Screwdrivers, pliers, adjustable wrench, flashlight, and a tape measure
- Replacement actuators, linkage rods, dampers, and rubber seals
- Lubricant, fasteners, electrical tape, and a multimeter
- Contact information for a licensed HVAC technician and signs that warrant professional service
Basic homeowner toolkit for damper work
Basic hand tools and a few HVAC-specific items allow a homeowner to reliably inspect, adjust, and replace common damper components without calling a technician.
Essential items: screwdriver set (flat and Phillips), adjustable wrench, needle-nose pliers, tape measure, flashlight, replacement screws and self-tapping sheet-metal screws, duct tape and foil tape, utility knife, wire labels, and a small multi-meter for verifying actuator power.
Common replacement parts (actuators, linkages, seals)
After assembling the toolkit, homeowners should stock a small set of common replacement parts to handle the most frequent damper failures.
Essentials include a universal damper actuator, spare linkage rods and clips, rubber or foam seals, and a couple of mounting screws.
Include weatherstripping, lubricant-safe grease, and simple wire connectors.
Label parts and store them near HVAC access for quick repairs.
When to call a professional HVAC technician
When should a homeowner call a professional HVAC technician? A technician is advised for electrical or control-panel issues, inaccessible or rooftop dampers, corroded or broken actuators, persistent airflow imbalance after adjustments, or suspected gas/leak hazards.
They should also be engaged for system-wide diagnostics, permits, or warranty-covered repairs.
Keeping contact information for a licensed HVAC pro guarantees timely, safe resolution.
Preventive Maintenance and Seasonal Checks
Routine inspections of dampers should be scheduled—typically quarterly and before major seasonal changes—to confirm operation and detect wear.
Cleaning moving parts, applying appropriate lubricants, and treating or replacing corroded components will help maintain smooth function and prevent failures.
Technicians should record damper positions and system settings after each check to create a clear maintenance history and aid troubleshooting.
How often to inspect and operate dampers
Regular inspections of duct dampers should occur at least twice a year, with additional checks whenever HVAC systems shift between heating and cooling seasons.
Technicians or informed homeowners should operate each damper to confirm full travel, proper indexing, and secure linkages.
Frequency increases for older systems, properties with frequent renovations, or after service work.
Document results and schedule corrective action when function deviates from expected norms.
Cleaning, lubrication, and corrosion prevention
After confirming damper operation and recording any issues, attention shifts to cleaning, lubrication, and corrosion prevention to preserve function and extend service life.
Remove dust and debris with a soft brush and vacuum; wipe accessible metal surfaces with a damp cloth.
Apply light machine oil to pivots and linkages, use corrosion inhibitor on exposed metal, and recheck movement after servicing.
Documenting damper positions and system settings
Record damper positions and system settings immediately after adjustments or checks, noting blade angles, actuator status, thermostat setpoints, and any manual overrides.
Log date, time, technician/homeowner name, and location of each damper. Include photos or sketches where helpful.
Track changes over seasons to identify trends or recurring issues.
Store records accessibly for future maintenance and troubleshooting.
Energy and Comfort Considerations After Opening Dampers
Opening a damper can alter heating and cooling efficiency by changing airflow balance and system load.
Rebalancing vents and dampers is recommended to restore even comfort and avoid oversized run times.
Automated options such as smart thermostats and zoning controllers can manage damper positions to optimize both energy use and occupant comfort.
Impact on heating and cooling efficiency
Adjusting a duct damper alters airflow patterns and can considerably affect both energy consumption and occupant comfort.
Properly positioned dampers reduce overworking of the furnace or air conditioner by directing conditioned air where needed, lowering runtime and utility bills.
Conversely, improper settings create imbalances, increased cycling, and temperature variability.
Monitoring system response after adjustments helps verify efficiency gains and detect issues promptly.
How to rebalance vents and dampers for comfort
After opening a damper, homeowners should methodically rebalance vents and dampers to restore uniform comfort and maintain energy efficiency.
They should measure room temperatures, adjust vent positions and nearby dampers incrementally, and retest. Aim for minimal adjustments to avoid overcorrection.
Prioritize frequently used rooms, document settings, and allow several hours for the system to stabilize before finalizing balance.
Smart thermostat and zoning options to automate damper control
How can a smart thermostat and zoning system simplify maintaining comfort and efficiency once dampers are opened?
A smart thermostat coordinates thermostats, sensors and motorized dampers to balance temperatures, reducing short-cycling and uneven airflow.
Automated schedules, occupancy sensing and remote control optimize energy use.
Proper installation and configuration guarantee zones respond correctly; professional setup is recommended for complex multi-zone systems.
Common Mistakes to Avoid When Handling Dampers
When handling dampers, common mistakes can lead to mechanical damage, electrical hazards, or degraded system performance. Attention to proper technique, safety with motorized units, and measured adjustments helps prevent these issues.
The following points highlight specific errors to avoid.
- Forcing a stuck damper and causing damage
- Ignoring electrical safety with motorized units
- Overcorrecting airflow and creating pressure issues
- Skipping inspection and documentation before and after adjustments
Forcing a stuck damper and causing damage
Applying excessive force to a stuck damper risks bending the shaft, stripping gears, or breaking the linkage, which can turn a simple adjustment into a costly repair.
A cautious approach—inspecting for obstructions, lubricating pivot points, and checking fasteners—prevents damage.
If resistance persists, stop and consult a technician or refer to manufacturer guidance rather than forcing movement and causing avoidable structural harm.
Ignoring electrical safety with motorized units
After resisting the urge to force a stuck damper, attention must turn to motorized units where electrical hazards present a different set of risks.
Homeowners should disconnect power, verify circuits with a tester, and avoid touching wiring or actuator terminals.
Failure to follow lockout/tagout procedures or to consult a qualified electrician can cause shock, equipment damage, or fire; prioritize proper isolation and expertise.
Overcorrecting airflow and creating pressure issues
Overadjusting dampers to chase perfect airflow can destabilize a home’s pressure balance, leading to drafts, uneven heating or cooling, and stressed HVAC equipment.
Technicians advise incremental changes only, measuring results before further tweaks. Excessive closure or opening forces return-air imbalances, increases infiltration, and raises system run-time.
If persistent issues arise, consult a professional for airflow testing and balanced adjustments to prevent long-term damage.
Visual Aids and Diagrams to Reference
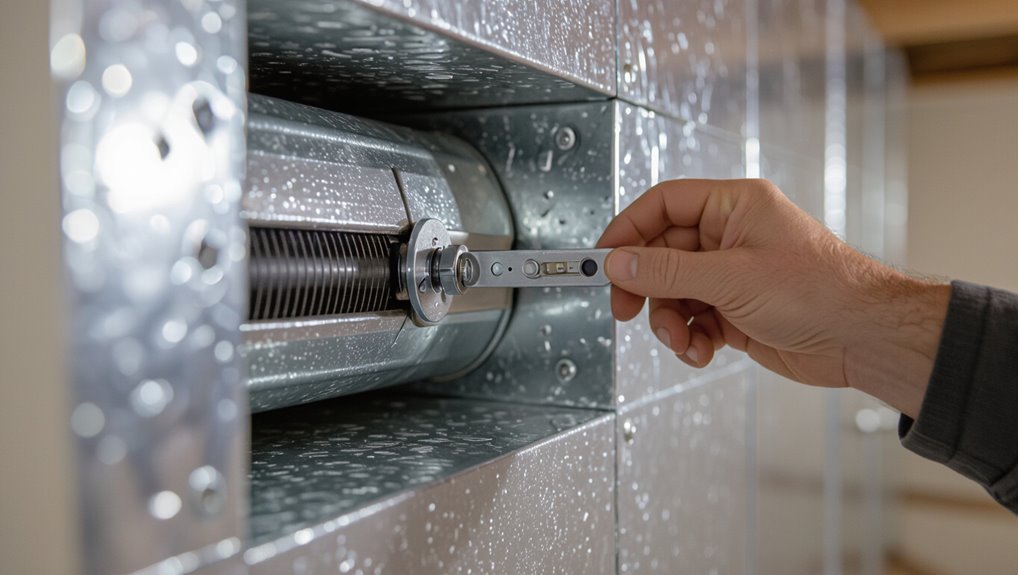
The article provides clear visual aids showing typical manual damper parts and their labels to help identify components before adjustment.
A separate diagram illustrates motorized damper actuator connections for safe wiring and troubleshooting.
An airflow balancing schematic for multi-zone homes demonstrates how dampers affect distribution and where to measure performance.
Typical manual damper parts and labels
A labeled diagram of a typical manual duct damper clarifies the component names and their relationships: blade (or vane), shaft, handle or quadrant, mounting bracket, gasket or seal, linkage, travel stops, and indicator.
Each label shows function and orientation: blade controls flow, shaft transmits motion, handle sets position, bracket secures assembly, gasket prevents leaks, linkage links parts, stops limit rotation, indicator displays opening.
Motorized damper actuator connection diagram
Diagrammatic schematics present the essential wiring, mounting, and signal relationships between a motorized actuator and a duct damper.
Illustrations show power lines (24V or 120V), common, control inputs (open/close or 0–10V), end-stop switches, and grounding.
Mounting details depict bracket alignment and shaft coupling.
Labels for terminal blocks, fuse location, and optional feedback sensors clarify installation and troubleshooting steps.
Airflow balancing diagram for multi-zone homes
Effective airflow balancing diagrams for multi-zone homes distill complex duct layouts, damper positions, and CFM targets into clear visual references that technicians and homeowners can use during setup and adjustment.
They show zone branches, recommended damper openings, target and measured airflow values, and pressure notes.
Color coding, scalable legends, and measurement points enable systematic tuning, verification, and future troubleshooting without guessing or repeated testing.
Conclusion
Homeowners who follow these steps can safely open dampers to improve airflow and comfort. Notably, properly adjusted dampers and routine HVAC balancing can reduce household energy use by up to 10%, according to industry estimates, making this a small task with measurable savings. Regular checks also help prevent uneven heating or cooling and extend system life. With basic safety precautions and occasional maintenance, dampers remain an easy, cost-effective way to optimize home climate control.