How to Clean Air Conditioning Unit: Step-by-Step Guide for Homeowners
To effectively clean your air conditioning unit, start by ensuring safety: turn off the power and equip yourself with gloves, eye protection, and a dust mask. For outdoor maintenance, clear away debris, straighten the fins, apply coil cleaner, and rinse with low-pressure water. Indoors, remove the access panel to clean or replace filters, vacuum the blower, and use a manufacturer-approved coil cleaner, followed by proper rinsing. Don’t forget to inspect ducts and vents, address any drain clogs, and take note of any damage that may require professional repair. Follow this guide for detailed step-by-step procedures and essential safety tips.
What a Homeowner Needs to Know Before Cleaning an Air Conditioning Unit
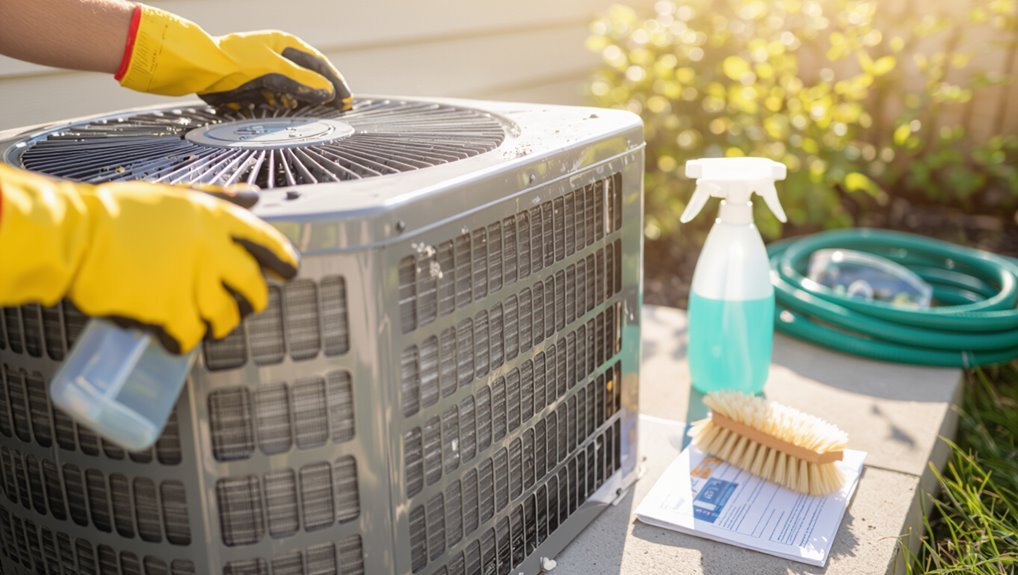
Before beginning, a homeowner should recognize common signs that an air conditioning unit needs cleaning—reduced airflow, unusual odors, higher energy bills, or visible dirt buildup.
They should also review safety precautions and required personal protective equipment, assemble a concise tools-and-materials checklist, and know which tasks are safe for DIY versus those that warrant a professional.
Clear preparation reduces risk and guarantees the cleaning is effective.
Signs your AC needs cleaning
Several clear indicators show when an air conditioning unit requires cleaning: reduced airflow, unusual odors, increased energy bills, visible dirt on coils or filters, and more frequent cycling.
Homeowners noticing these signs should consider researching how to clean air conditioning unit specifics, scheduling regular inspections, and addressing clogged drains or dirty fins promptly to restore efficiency and indoor air quality.
Safety precautions and personal protective equipment
Many homeowners must recognize basic safety steps and appropriate personal protective equipment (PPE) before attempting any AC cleaning to prevent injury and equipment damage.
They should disconnect power, avoid wet contact with electrical components, guarantee stable ladder use, and work in ventilated conditions.
Recommended PPE includes gloves, eye protection, a dust mask or respirator, and long sleeves to guard against debris, chemicals, and sharp fins.
Tools and materials checklist
A concise set of tools and materials makes routine air-conditioner cleaning quicker and safer.
The homeowner should gather basic hand tools, cleaning agents, and replacement parts before starting. Organized preparation reduces interruptions and protects components.
- Soft-bristle brush, shop vacuum, and fin comb
- Coil cleaner, mild detergent, and spray bottle
- Replacement filters, rubber gloves, and rags
When to call a professional versus DIY
Occasionally a homeowner can handle routine cleaning, but certain signs indicate that a professional technician is needed to avoid damage, safety risks, or ineffective repairs.
If refrigerant leaks, electrical faults, unusual noises, persistent performance loss, or inaccessible components are present, contact a licensed HVAC technician.
Also call a pro for warranty-covered systems, complex diagnostics, or when confidence, tools, or permits are lacking.
Preparing the Air Conditioning Unit for Cleaning
Before any work begins, the homeowner should confirm power is cut at the breaker and the unit’s disconnect to prevent electrical hazards.
Next, exterior panels and access covers are removed carefully to expose the coils and fan without bending fins or losing fasteners.
Finally, nearby plants, mulch, and indoor floor areas are shielded with drop cloths or plastic to keep debris and cleaning solutions contained.
Turning off power safely (breaker and disconnect)
When preparing to clean an air conditioning unit, power must be cut at both the indoor circuit breaker and the outdoor disconnect to eliminate risk of electric shock or compressor damage.
Confirm the correct breaker by labeling, switch it off, and open the outdoor disconnect box.
Verify power is off with a noncontact tester or multimeter. Lockout/tagout if available and proceed only after confirming zero voltage.
Removing access panels and exterior casing
After power has been confirmed off at both the indoor breaker and outdoor disconnect, the technician may begin removing access panels and the exterior casing to reach coils, fan blades, and electrical components.
They loosen fasteners, store screws safely, and lift panels straight to avoid bending. Larger housings may require a second person.
Panels are set aside on a clean surface, exposing components for inspection and cleaning.
Protecting nearby landscaping and indoor areas
Though the unit itself is the cleaning focus, surrounding landscaping and indoor spaces require equal precaution to prevent damage from runoff, loose debris, or chemical overspray.
Homeowners should cover nearby plants with plastic sheeting, shield soil with mulch or boards, and place drip trays.
Indoors, seal vents, lay drop cloths, and remove fragile items.
Dispose of contaminated materials safely.
Step-by-Step Cleaning of the Outdoor Condenser Unit
The outdoor condenser unit is cleaned methodically: first by removing debris and trimming nearby vegetation, then by brushing and combing the fins and coils.
A suitable coil cleaner is applied and rinsed carefully, damaged fins are straightened and the unit is inspected for corrosion.
Finally, panels are reassembled and the unit is restarted after confirming safe operation.
Clearing debris and trimming vegetation
Several inches of clearance around the outdoor condenser help guarantee efficient airflow and prevent damage; clearing debris and trimming nearby vegetation is a necessary preliminary step before any deeper maintenance.
Remove leaves, twigs, grass clippings, and accumulated dirt from around and beneath the unit.
Cut back shrubs, branches, and vines to maintain at least 24–36 inches of unobstructed space.
Dispose of debris safely.
Cleaning fins and coils with a soft brush and fin comb
Begin by shutting off power to the outdoor unit at the disconnect or breaker to guarantee safety.
Then remove the protective grille or top cover to access the condenser fins and coils.
Using a soft brush, gently sweep dust and loose debris along fin direction.
For bent fins, employ a fin comb to realign them carefully, matching original fin spacing to preserve airflow and efficiency.
Using a coil cleaner and proper rinse technique
With fins and coils brushed and straightened, attention shifts to removing embedded grime with a commercial coil cleaner formulated for outdoor condenser units.
The cleaner is applied per label, allowed dwell time to emulsify debris, then rinsed thoroughly from top downward using a low-pressure hose to avoid fin damage.
Repeat if necessary and verify no chemical runoff pools near plantings or electrical components.
Straightening bent fins and checking for corrosion
Inspect the condenser fins closely for bends, gaps, or signs of corrosion before reassembly.
Carefully straighten individual fins using a fin comb matched to fin spacing, working gently to avoid further damage.
Remove loose corrosion with a soft brush and treat affected areas with a corrosion inhibitor or contact a professional for extensive deterioration.
Confirm fins remain evenly spaced for proper airflow and heat exchange.
Reassembling and restarting the outdoor unit
After straightening fins and addressing corrosion, the technician gathers tools and safety gear to reassemble the condenser housing and restore power.
Panels and fan guard are reinstalled, fasteners torqued to specification, and electrical connections verified for tightness and insulation.
Refrigerant service ports are checked, debris cleared, and the disconnect switch is re-engaged.
The unit is restarted, observed for normal operation, leaks, and unusual noise.
Step-by-Step Cleaning of the Indoor Evaporator Coil and Air Handler
The next section guides readers through locating and accessing the indoor evaporator coil and the air handler cabinet.
It covers inspecting and replacing the air filter, removing accumulated dust from the blower and housing, applying an appropriate evaporator coil cleaner with proper rinsing methods, and inspecting and clearing the condensate drain and pan.
Safety precautions and basic tools required for each task are noted before procedures begin.
Locating and accessing the evaporator coil
Begin by locating the indoor air handler where the evaporator coil is housed—commonly in a basement, attic, closet, or utility room—so the coil can be accessed for cleaning.
Identify the access panel or service door, shut power at the breaker, remove screws or clips, and gently open the cabinet.
Note coil orientation and nearby components to avoid damage during cleaning and reassembly.
Cleaning or replacing the air filter
With the access panel open and power secured, the next step is to inspect and either clean or replace the air filter before working on the evaporator coil.
The filter’s condition affects airflow and coil cleanliness; a dirty filter should be replaced or washed per manufacturer guidance. Record size/type and date changed to maintain performance.
- Note filter type (disposable vs. washable)
- Check MERV rating
- Replace every 1–3 months
Removing dust from the blower and housing
Remove accumulated dust from the blower and housing to restore airflow and reduce strain on the air handler.
Power is turned off, access panels removed, and the blower wheel inspected.
Soft brushes and a vacuum with a brush attachment remove settled debris; use compressed air sparingly from wheel center outward.
Wipe housing surfaces with a damp cloth and let components dry fully before reassembly and restart.
Applying evaporator coil cleaner and rinsing methods
Spray a manufacturer-approved evaporator coil cleaner evenly across the fins and tubes, allowing the foam or liquid to penetrate grime and organic buildup for the recommended dwell time; then follow the unit-specific rinsing method—low-pressure water from the drain pan upward, a condensate-safe coil rinse, or an internal condensate injection—ensuring all cleaner and loosened debris are flushed toward the drain while avoiding excess water that could enter blower or electrical areas.
Rinse until runoff is clear, inspect fins for bent areas, and repeat spot-cleaning if stubborn deposits remain.
Checking and clearing the condensate drain and pan
Inspect the condensate drain and pan for standing water, sludge, algae, or visible blockages before proceeding with further coil work.
The technician or homeowner should remove debris, flush the drain with warm water, and use a wet-dry vacuum or compressed air to clear clogs.
Apply a recommended biocide or vinegar solution to inhibit microbial growth, then verify proper drainage and reassemble access panels securely.
Ductwork and Vent Cleaning Basics
The homeowner should begin by inspecting vents and grilles for dust buildup, gaps, and loose fittings.
Simple cleaning—vacuuming vent faces, wiping grilles with a damp cloth, and replacing filters—can maintain airflow between professional services.
Professional duct cleaning is recommended when there is visible mold, persistent dust after basic cleaning, or unexplained respiratory symptoms.
Inspecting vents and grilles
Begin by visually evaluating vents and grilles for dust buildup, stains, and signs of mold or pest entry, noting any obstructions that could restrict airflow.
Record locations with excessive debris, discolored areas, or damaged louvers.
Check for loose fasteners, gaps around frames, and evidence of moisture.
Prioritize vents serving high-use rooms and document findings for professional follow‑up if structural or contamination concerns appear.
Simple vent cleaning techniques for homeowners
Homeowners can tackle basic vent cleaning with a few simple tools—vacuum with brush attachment, microfiber cloths, a screwdriver, and mild detergent—focusing on accessible grilles and exposed duct ends while leaving deep ducts to professionals.
Remove grilles, vacuum inside accessible openings, wipe surfaces with damp cloth and mild detergent, dry thoroughly, and reattach.
Regular light cleaning reduces dust and improves airflow.
When to schedule professional duct cleaning
After routine grille and exposed-duct cleaning, professionals should be considered when signs indicate deeper contamination or performance loss.
Indicators include persistent dust, visible mold, unpleasant odors, uneven room temperatures, increased allergy symptoms, or reduced airflow despite filter replacement.
Older systems, recent renovations, pest infestations, or unexplained energy bill spikes also warrant professional inspection and possible thorough duct cleaning to restore efficiency and air quality.
Maintenance Tasks to Improve AC Efficiency
A clear maintenance schedule—monthly filter checks, biannual coil inspections, and annual professional tune-ups—helps preserve system performance.
Seasonal checks should include refrigerant level verification, thermostat calibration, and cleaning of coils and drains.
After cleaning, implementing energy-saving measures such as proper thermostat settings, sealing duct leaks, and ensuring unobstructed airflow can reduce operating costs.
Recommended cleaning and maintenance schedule
Although schedules vary by system and climate, a clear, consistent maintenance calendar is essential to keep an air conditioning unit running efficiently and to prevent costly breakdowns.
Recommend monthly filter checks, quarterly visual inspections of coils and condensate lines, and annual professional servicing for refrigerant levels, motor health, and electrical connections.
- Monthly: filters and basic cleaning
- Quarterly: inspect coils and drains
- Annually: professional tune-up
Seasonal checks and tune-up tasks
Schedule seasonal checks and tune-ups to sustain peak AC efficiency and prevent mid-season failures.
A technician or knowledgeable homeowner should inspect refrigerant levels, clean coils, tighten electrical connections, lubricate motors and fans, verify thermostat calibration, and clear condensate drains.
Replace or clean filters, check ductwork for leaks, and test system cycling.
Document actions and schedule follow-up service as needed.
Energy-saving tips after cleaning
Once cleaning and tune-ups are complete, implementing targeted energy-saving measures preserves those gains and reduces operating costs.
Homeowners should program thermostats, raise setpoints slightly in summer, and use ceiling fans to reduce load.
Confirm vents are unobstructed, insulate ducts, and seal leaks.
Replace filters regularly, consider a smart thermostat, and schedule annual professional inspections to maintain peak efficiency and lower energy bills.
Common Problems Found During Cleaning and How to Fix Them
During cleaning, technicians commonly encounter mold or mildew, stubborn condensate drain blockages, and physical damage to fins or coils that may signal refrigerant issues.
Each problem requires specific, safety-minded steps—such as targeted antimicrobial cleaning, careful drain clearing, fin straightening, and professional assessment for refrigerant leaks.
Unusual noises after service should be diagnosed promptly to distinguish harmless settling from mechanical or airflow faults.
Mold and mildew in the system: safe removal steps
Inspect the evaporator coil, drain pan, and duct openings for visible mold or a musty odor, as these indicate colonization that can reduce efficiency and spread spores.
Wear gloves, goggles, and an N95 respirator.
Isolate the area, vacuum with HEPA filtration, and clean surfaces with a diluted bleach solution or EPA-registered antimicrobial.
Rinse, dry thoroughly, and replace contaminated filters; consider professional service for extensive growth.
Stubborn blockages in the condensate drain
Treat the condensate drain as a common choke point: accumulated algae, mineral deposits, and debris can create stubborn blockages that cause water backups, overflow, and potential water damage.
Inspect the drain pan and access removable piping. Clear clogs with a wet/dry vacuum or flexible brush. Flush with distilled water or a mild bleach solution, and reinstall securely.
Repeat periodic maintenance.
Damaged fins, coils, or refrigerant concerns
Address damaged fins, coils, and refrigerant issues promptly to preserve system efficiency and prevent costly repairs.
Bent fins can be straightened carefully with a fin comb; corroded or leaking coils require professional inspection.
Refrigerant loss causes poor cooling and must be diagnosed and recharged by a licensed technician.
Document damage, avoid DIY refrigerant handling, and schedule timely repairs to protect system lifespan.
Strange noises after cleaning and troubleshooting
After cleaning, unexpected noises often reveal underlying mechanical or airflow problems that went unnoticed before; rattling, squealing, or hissing should prompt systematic troubleshooting rather than immediate part replacement.
Technicians or homeowners should check loose panels, mounting brackets, fan blades, belt tension, motor bearings, and duct obstructions.
Tightening, realigning, lubricating, or clearing blockages typically resolves issues; persistent faults warrant professional diagnosis.
Cost, Time, and Frequency Considerations
Typical DIY cleaning takes one to three hours depending on unit access and extent of buildup.
Costs vary from low-priced supplies and replacement filters to several hundred dollars for a professional service, so comparing time, skill, and warranty implications is important.
Filters, coils, and drain pans have different recommended schedules—filters monthly to quarterly, coils annually, and drain pans inspected seasonally—so maintenance frequency should match component needs.
Typical time required for DIY cleaning
A straightforward DIY cleaning of a standard window or split-system air conditioner usually takes between 30 minutes and 2 hours, depending on the unit’s condition and the homeowner’s experience.
Routine cleanings tend toward the lower end; deeper jobs—coil cleaning, filter replacement, and drain clearing—require more time.
Allow extra time for troubleshooting, drying, and reassembly to guarantee proper operation.
Cost comparison: DIY supplies vs. professional service
Many homeowners find that comparing the costs of DIY supplies versus hiring a professional requires weighing up-front expenses, ongoing maintenance frequency, and time investment. DIY: lower immediate cost, variable effectiveness, personal time. Professional: higher fee, thorough service, warranty. Choose by budget, skill, and appliance age.
| Option | Cost range | Notes |
|---|---|---|
| DIY supplies | $10–$80 | Consumables |
| Professional service | $100–$300 | Includes inspection |
| Hybrid | $50–$150 | Basic DIY + occasional pro |
How often different components should be cleaned
1–2 times per year is a practical baseline for most air conditioning components, but frequency should be adjusted based on usage patterns, local climate, and system age.
Filters: monthly to quarterly.
Coils and condensate pan: annually, or biannually in humid/dusty areas.
Outdoor unit fins: annually, more often if exposed.
Ducts and blower: every 2–3 years, sooner if contamination occurs.
Final Checklist Before Restarting the System
Before powering the unit, the technician confirms all components are properly reassembled and fasteners are secure.
A staged restart follows, with checks for proper airflow, temperature drop, unusual noises, and correct electrical readings to verify performance.
Finally, maintenance actions and observations are recorded and the next service date is scheduled.
Reassembly verification steps
Confirming reassembly is complete and correct prevents damage and guarantees safe operation; this final checklist guides a systematic walk-through of fasteners, seals, clearances, electrical connections, and control settings before restarting the system.
Inspect screw torque and panel alignment, verify gasket seating and filter placement, confirm condensate drain routing, ascertain wiring terminals are tight and insulated, restore safety switches and thermostat settings.
System test and performance checks
Start the system test by restoring power and running a controlled startup sequence to verify safe operation and baseline performance.
Observe compressor engagement, fan rotation, and refrigerant lines for abnormal sounds or vibration. Measure supply and return air temperatures, check airflow at vents, confirm thermostat responsiveness, and inspect condensate drainage.
Note pressure readings and guarantee electrical connections remain cool and secure before finalizing operation.
Record-keeping and scheduling the next maintenance
A concise record of tests, observations, and corrective actions should be completed and filed immediately after system checks to guarantee accountability and facilitate future service.
Include date, technician, measurements, replaced parts, filter type, and any anomalies.
Set the next maintenance date based on manufacturer recommendations and usage; log reminders in calendar or maintenance software.
Retain records for warranty and trend analysis.
Additional Resources and Where to Find Professional Help
For further guidance, readers are encouraged to consult resources on choosing a qualified HVAC technician, including credential checks, references, and warranty considerations.
Recommended consumer products and trusted brands for filters, coil cleaners, and protective covers can streamline routine maintenance.
Manufacturer maintenance guides and service intervals should be referenced directly via official websites or manuals for model-specific instructions.
How to choose a qualified HVAC technician
Where can homeowners find a qualified HVAC technician they can trust?
Homeowners should verify licenses, certifications (NATE, EPA), and insurance; check local trade associations and Better Business Bureau listings; read recent reviews and request references; confirm written estimates, warranties, and clear scope of work; ask about experience with specific systems and maintenance procedures; prefer technicians who provide diagnostic reports and explain necessary repairs.
Useful product types and brands for homeowners
Homeowners who have confirmed technician credentials and compared service options may also benefit from knowing which products and brands reliably support routine maintenance and minor repairs.
Recommended categories include coil cleaners, fin combs, and filter options; reputable manufacturers and HVAC specialty brands offer homeowner-friendly lines and clear labeling to match unit specifications.
- Coil cleaners (noncorrosive)
- Fin combs and condenser tools
- Pleated and washable filters
Links to manufacturer maintenance recommendations
Because manufacturer guidance varies by model and system type, consulting the original equipment maker’s maintenance documents guarantees procedures and intervals match the unit’s specifications.
Homeowners should follow linked manuals for filter types, coil care, and warranty conditions. Official pages reduce risk of improper cleaning and voided coverage.
- Locate model-specific manuals on the manufacturer website.
- Use official maintenance checklists.
- Confirm service intervals and approved cleaners.
Conclusion
The homeowner steps back, surveying a gleaming outdoor coil and a silent, dust-free vent like a garden after rain. Cool, clear air will soon trace new paths through copper and fin, carrying the crisp hush of efficiency into every room. With tools washed, filters replaced and debris banished, the system breathes easier—ready to hum steadily through summer days—its restored rhythm promising comfort, savings and peace of mind.