How to Convert a Single Bathroom Sink Into a Double Vanity: Step-By-Step Guide and Costs
Converting a single bathroom sink into a double vanity involves a few key steps: planning, measuring, and potentially relocating plumbing. You’ll need a wider cabinet (typically 60–72 inches), which may require adjustments to the existing drain and supply lines. After installation, a new countertop and two sinks will complete the transformation. DIY projects can range from $600 to $2,500, while hiring a contractor may cost between $1,800 and $6,500+, depending on the complexity and materials chosen. Most conversions take 1 to 7 days, but this can extend if there are structural or code issues. Detailed guidance follows.
What it takes to convert a single sink into a double vanity
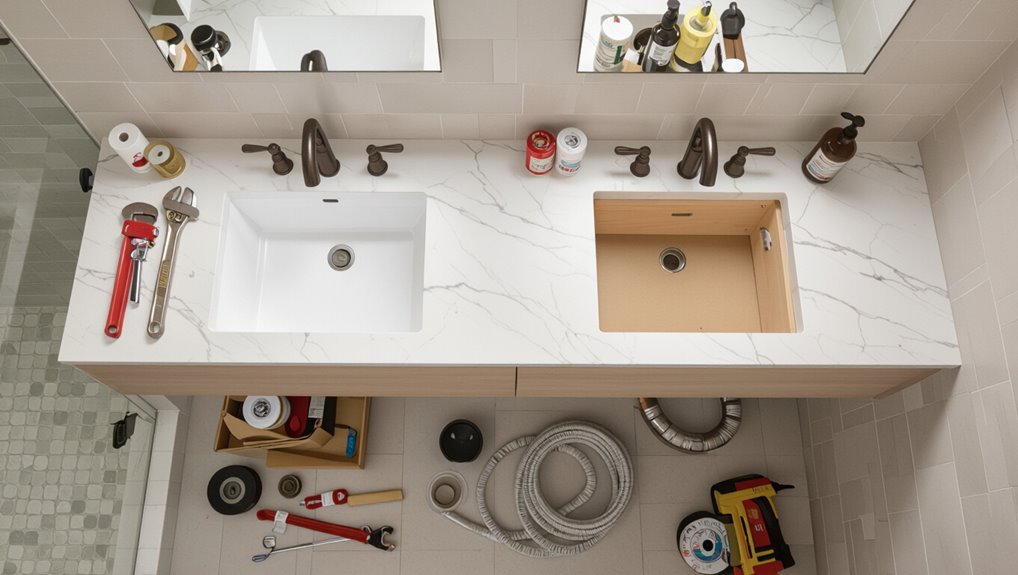
Homeowners often opt for a double vanity to increase counter space, improve storage, and accommodate shared use.
Converting a single sink typically involves measuring and modifying cabinetry, adjusting plumbing and electrical, and possibly extending the countertop.
Projects can range from a weekend update to a multi-week remodel depending on structural changes.
Simple cabinet swaps and minor plumbing can be DIY for experienced homeowners, but major layout changes, plumbing rerouting, or code-sensitive work warrant a professional.
Typical reasons homeowners choose a double vanity
Convenience and resale value are common drivers behind converting a single sink into a double vanity: couples and families gain simultaneous use during busy mornings, and real estate agents often cite dual sinks as a desirable feature that can improve marketability.
Homeowners also cite increased storage, improved aesthetics, and task separation.
Practical inquiries often center on how to turn a single sink into a double without disrupting plumbing or layout.
Quick summary of scope, timeline, and expected complexity
A single-sentence project overview: converting a single sink into a double vanity typically involves replacing or extending the countertop and cabinet, adding a second basin and faucet, rerouting or tying into drain and supply lines, and possibly modifying electrical and wall finishes; it commonly requires 1–3 days for a simple countertop swap with accessible plumbing, but can extend to a week or more if wall framing, plumbing relocations, or structural changes are needed.
Complexity ranges from straightforward cosmetic work to moderately complex plumbing and cabinetry tasks best handled by a licensed contractor.
Scope includes cabinetry, countertop, plumbing, fixtures, and finishes.
Timeline varies with demolition, plumbing work, and finishing.
Complexity depends on site access and required relocations.
When to hire a pro vs. DIY
Evaluating whether to hire a professional or tackle a DIY conversion hinges on scope, skill level, and local code requirements:
A DIY suits cosmetic upgrades, basic cabinet work, and simple plumbing if the homeowner has tools and experience.
Hire a pro for rerouting supply/drain lines, electrical or structural changes, permitting, or when precision and liability concerns outweigh cost savings.
Assess time and confidence.
Measuring and planning for a double vanity
Before cutting into walls or ordering cabinets, measurements and a site plan establish what a double vanity can realistically fit.
The author notes the need to record wall width, plumbing locations, and mirror/light placement while comparing those figures to standard vanity sizes and layout options.
Storage needs, countertop overhang, and toe-kick clearance should be planned so the finished installation is both functional and code-compliant.
Assessing available space and clearance requirements
1. The installer evaluates floor area, door swing, and traffic flow to determine if a double vanity fits comfortably.
Required clearances—typically 30–36 inches in front and adequate side space—are checked against fixtures and cabinetry.
Sightlines for movement and accessibility standards are considered.
Structural obstacles, venting, and storage needs influence layout choices before detailed measurements and design.
Measuring wall width, plumbing locations, and mirror/light placement
How wide is the wall and where do the existing supply lines and drain fall relative to that span? Measure wall width, mark stud locations, and record horizontal and vertical positions of hot/cold lines and drain from one fixed reference. Note electrical outlets, switch boxes, and proposed mirror and light centers. Create a scaled sketch showing all measurements for contractor or permit review.
Standard double vanity sizes and layout options
A double vanity typically occupies 60 to 72 inches of wall space, with common standard depths of 21 to 24 inches and heights ranging from 32 to 36 inches; when planning, the installer should account for sink spacing, countertop overhang, and clearances to adjacent fixtures or doorways. Layout options include straight, split, and corner vanities; spacing guidance guarantees comfortable use.
| Layout | Typical Width | Notes |
|---|---|---|
| Straight | 60–72 in | Most common |
| Split | 72+ in | Separate sinks |
| Corner | 48–60 in | Space-saving |
| Floating | 48–72 in | Modern look |
Planning for storage, countertop overhang, and toe-kick
With the vanity footprint and layout chosen, attention turns to fitting storage, countertop overhang, and the toe-kick so the unit is both functional and fits the room.
Measure drawer and cabinet depths to accommodate plumbing; allow 1–1.5-inch countertop overhang for edge protection and clearance.
Design a 3–4-inch toe-kick for foot space, ensuring floor molding and venting access are maintained.
Permits, codes, and plumbing considerations
Before beginning work, the homeowner should check local permit requirements to determine which alterations require approval.
Applicable building codes for drainage, venting, and water supply dictate trap placement, venting continuity, and proper shutoff valve locations.
If the existing plumbing is centered, options include splitting the line, relocating the supply and drain, or installing an offset sink kit to meet code and layout needs.
Local permit requirements and when they apply
Although simple sink swaps often seem minor, local building codes and permit requirements can become relevant whenever work affects plumbing, drainage, venting, or structural openings.
Permit necessity varies by jurisdiction: moving supply or waste lines, altering wall openings, or changing fixture count often triggers permits.
Homeowners should check municipal rules, consult building departments, and obtain required permits before starting to avoid fines or mandatory corrective work.
Building code requirements for drainage and venting
When installing or replacing a bathroom sink, codes specify clear standards for waste drainage, trap configuration, and venting to protect against sewer gas, backflow, and slow draining.
These requirements dictate trap arm length, trap seal depth, slope of horizontal drain lines, and the location and type of vents or air admittance valves.
Inspectors require proper P-trap installation, correct vent placement, manufacturer-approved AAVs, and accessible cleanouts.
Water supply and shutoff valve placement
Positioning water supply lines and shutoff valves for a bathroom sink requires attention to code requirements, practical access, and permit conditions to guarantee safe, maintainable service connections.
Valves must be accessible, labeled, and within approved distances from fixtures per local codes.
Permit inspections often verify proper materials, seismic restraints, and backflow prevention.
Installations should allow future repairs without removing cabinets or finishes.
Options when existing plumbing is centered (split, relocate, or use an offset sink)
If existing water and waste lines are centered under a vanity but the new sink or cabinet layout requires an offset, homeowners and professionals must weigh three main strategies: splitting the supply and drain, relocating the plumbing, or choosing a sink with an offset inlet and outlet.
Each option demands code compliance, permit review, proper venting, trap alignment and slope, and consideration of access panels, materials, and contractor licensing.
Materials, fixtures, and estimated costs
A clear cost overview helps prioritize choices when converting a bathroom sink. Major categories include labor, sink and countertop, faucet and drain, mounting hardware, and any plumbing or permit fees, each with wide price ranges depending on DIY versus professional installation.
Comparing sink styles (drop-in, undermount, vessel) and countertop materials alongside estimated part and labor costs clarifies trade-offs between upfront expense and long-term durability.
Breakdown of major cost categories
Budgeting for a bathroom sink replacement requires separating expenses into clear categories: materials, fixtures, and labor or incidental costs. The breakdown lists core purchases (vanity, sink, countertop), fixture upgrades (faucets, drains), and incidentals (plumbing supplies, sealants, disposal). Estimates vary by quality; prioritize necessary structural items first and cosmetic upgrades afterward.
| Category | Typical items |
|---|---|
| Materials | Vanity, countertop |
| Fixtures | Sink, faucets |
| Incidentals | Pipes, sealant |
Typical cost ranges for DIY vs. professional installation
Following the cost-category breakdown, typical price ranges differ markedly between DIY and professional installations, driven by labor, skill level, and tools required.
DIY projects commonly cost $600–$2,500 for cabinets, sinks, faucets, plumbing parts, and incidental tools.
Professional installation ranges $1,800–$6,500+, reflecting contractor labor, permitting, specialized tools, and warranty.
Unexpected repairs can push either total higher.
Choosing sinks: drop-in, undermount, vessel
Which sink style best balances aesthetics, maintenance, and cost depends on project priorities and bathroom layout.
Drop-in sinks are economical and DIY-friendly but have rim cleaning.
Undermounts offer a sleek look and easier cleaning; installation and solid counter support raise costs.
Vessel sinks provide visual impact and higher fixture costs, sometimes requiring taller faucets and reinforcement for stability.
Countertop material comparisons and price impact
Countertop choice considerably influences both the finished look and the overall cost of a sink conversion, with material, edge profile, and needed reinforcement driving price and installation complexity.
Laminate offers lowest cost but shorter lifespan; solid surface balances price and repairability; quartz and granite raise costs substantially yet increase durability and resale value.
Wood and concrete require sealing and maintenance, affecting long-term expense.
Faucet, drain, and hardware cost considerations
After choosing a countertop, attention turns to the fixtures that complete the sink assembly: faucets, drains, and supporting hardware.
Budget basic single-hole faucets ($30–$150) versus widespread or wall-mounted options ($150–$600).
Include drains, P-traps, supply lines, and mounting kits ($40–$120).
Premium finishes and valves raise costs; expect a per-sink total of approximately $100–$700 depending on quality and style.
Step-by-step conversion process
The article now outlines the step-by-step conversion process, beginning with preparing the workspace and protecting bathroom finishes.
It then covers demolition of the old vanity and subfloor preparation, followed by detailed rough plumbing instructions for relocating drains and supply lines.
The sequence concludes with installing and securing the new vanity cabinet(s), and precise countertop and sink installation including cutting, sealing, and mounting.
Preparing the workspace and protecting bathroom finishes
Clear the immediate area and establish a controlled work zone before any tools or materials are brought in.
Cover fixtures, flooring, and adjacent walls with durable drop cloths and tape; protect mirrors with cardboard.
Turn off water and electricity at source.
Lay out tools on a designated mat to prevent scratches.
Use temporary barriers to limit dust spread and label removed hardware for reinstallation.
Demolition: removing old vanity and preparing subfloor
Begin by disconnecting utilities and removing visible contents to create an unobstructed work area around the vanity.
Remove countertop, sink, and cabinet fasteners. Lift and extract the vanity, cutting caulk as needed.
Inspect subfloor for rot or water damage; pry up compromised sections.
Clean debris, level the surface, and patch or reinforce joists and subflooring to guarantee a stable foundation for the new double vanity.
Rough plumbing: moving drains and supply lines (detailed steps)
With the subfloor inspected and reinforced, attention shifts to relocating drain and supply lines for the new double vanity.
The planner marks sink centers, cuts and reroutes 2″ drain branches to each location using PVC/ABS with appropriate slopes.
They install a new vent or tie into existing, and run 1/2″ or 3/8″ supply lines with shutoffs.
Pressure-test and inspect before closing walls.
Installing new vanity cabinet(s) and securing to wall
Positioned over the finished rough-in, the new vanity cabinet is set into place and fastened to the wall to guarantee alignment, support, and long-term stability.
Installers shim level, mark stud locations, and predrill through mounting rails. Long exterior-grade screws secure the cabinet into studs.
Verify plumb and adjust shims, trim excess, then caulk back edge for moisture protection before proceeding to countertop and sink work.
Countertop and sink installation (cutting, sealing, mounting)
Measure and verify the countertop layout against the vanity and plumbing before any cutting is attempted, confirming sink location, faucet holes, and clearances for trap and water lines.
Mark cutouts, score and cut with appropriate blade, dry-fit sinks, apply waterproof sealant to cut edges and sink lips, set sinks and secure per manufacturer instructions.
Seal perimeter with silicone, and allow cure before final cleanup.
Installing faucets, P-traps, and testing for leaks
Begin by preparing the faucet and drain components for installation: verify the faucet’s supply lines and mounting hardware match the sink holes, confirm the drain assembly includes its gasket and tailpiece, and have a wrench, plumber’s tape, and silicone putty on hand.
Install faucets per manufacturer torque specs, connect supply lines, assemble and seal drains, attach P-traps to tailpieces, open supplies, and inspect all joints for leaks.
Finishing touches: backsplashes, mirrors, lighting, and trim
A clean, level surface sets the stage for the finishing touches; installing the backsplash, mirror, lighting, and trim follows the plumbing work and ties the conversion together.
Tile or waterproof panels protect walls; caulk seams.
Hang mirrors centered above each sink at eye level.
Install task lighting and switch wiring per code.
Add base and crown trim for a polished, cohesive double-vanity finish.
Common challenges and how to overcome them
Converting a bathroom sink often encounters practical obstacles such as uneven floors, out-of-plumb walls, and tight clearances that interfere with doors or fixtures.
Installers must also reconcile mismatched plumbing stub-outs with new sink locations and be prepared to address any hidden structural or water damage uncovered during the job.
The following section outlines pragmatic solutions and prioritization strategies for these common issues.
Dealing with uneven floors and out-of-plumb walls
Uneven floors and out-of-plumb walls frequently complicate sink installations, creating gaps, misaligned fixtures, and stress on pipe connections if not addressed.
Contractors assess level and plumb, shim cabinets, and scribe countertops to walls.
Use adjustable legs, flexible supply lines, and P-traps with slip joints.
For significant deviation, correct subfloor or stud pack-outs before final installation to guarantee long-term stability.
Solving tight spacing and door/fixture interference
When cabinets are shimmed and walls packed to correct level and plumb, space constraints and door or fixture interference often emerge as the next obstacle.
Solutions include selecting narrower cabinet modules, offsetting sinks, using low-profile faucets, trimming or rehanging doors, and relocating towel bars or electrical switches.
Careful measuring, mock-ups with cardboard, and consulting hinge or plumbing tolerances prevent costly adjustments during installation.
Managing mismatch between plumbing stub-outs and new sink locations
Addressing mismatched plumbing stub-outs is a common hurdle when fitting a new sink into an existing space. The stub-outs often sit too high, too low, or several inches off-center relative to the basin’s drain and faucet locations.
Solutions include using offset trap adapters, flexible supply lines, extension nipples, or rerouting with new copper or PEX runs.
Guarantee proper slope, secure mounts, and code-compliant shutoffs.
When hidden structural or water damage appears
Fixing misaligned stub-outs can uncover a deeper problem: concealed structural rot or hidden water damage behind walls and under floors.
The homeowner should halt work, document damage, and consult a licensed contractor or structural engineer.
Replace compromised framing, subflooring, and insulation; repair or reroute plumbing leaks.
Verify mold remediation, moisture barriers, and permits before proceeding to guarantee safety and code compliance.
Time estimates and project scheduling
A clear timeline helps distinguish a typical DIY conversion, which often spans a weekend to a week, from a contractor-led project that can take several days to a few weeks depending on scope and permitting.
Coordinating subcontractors—plumber, electrician, and countertop fabricator—usually drives the schedule and may require booking weeks in advance.
Planning milestones and contingency days reduces delays and keeps the project on track.
Typical timeline for DIY conversion
Converting a bathroom sink can typically be broken into discrete phases—preparation, removal, installation, and cleanup—each with predictable time ranges that help plan a weekend or multi-day project.
Typical DIY timeline: preparation and measuring 2–4 hours; removal of old fixtures 1–3 hours; cabinet and countertop installation 4–8 hours; plumbing hookup 2–4 hours; finishing, caulking, cleanup 1–3 hours.
Total 1–2 days.
Typical timeline for contractor-led project
Contractor-led bathroom sink conversions typically follow a tighter, more predictable schedule than DIY efforts, with project managers coordinating permits, procurement, labor, and inspections to minimize downtime.
Typical timelines run three to seven days for straightforward swaps; larger layout changes take one to three weeks.
Work phases include demolition, rough plumbing and electrical, drywall and painting, fixture installation, and final inspections and punch-list completion.
Scheduling subcontractors: plumber, electrician, countertop fabricator
After outlining the project timeline, attention turns to sequencing subcontractors—plumber, electrician, and countertop fabricator—to keep work flowing and avoid idle time.
The plumber roughs in supply and drains first (1–2 days). The electrician installs wiring and lighting next (half–1 day). The fabricator measures and installs the countertop last (1–3 days including templating).
Buffer days accommodate delays and inspections.
DIY vs hiring professionals: decision guide
The guide outlines which conversion tasks—such as swapping fixtures or basic cabinet adjustments—are typically manageable for confident DIYers and which—like altering drain lines, moving plumbing, or electrical work—usually require licensed trades.
It also lists key questions to ask contractors and specific quotes to obtain, including scope details, permits, timelines, and warranty terms.
Readers are encouraged to weigh personal skill, local code requirements, and cost estimates when choosing between DIY and hiring professionals.
Tasks suited to confident DIYers
Evaluating which bathroom sink conversion tasks a confident DIYer can tackle hinges on skill level, tools, and local code: straightforward jobs like swapping a drop-in or pedestal sink, replacing a faucet, or rerouting supply lines with basic fittings are generally suitable, while any work involving structural changes, major drain reconfigurations, complex leak repairs, or altering water-service arrangements is safer to assign to a licensed plumber.
Remaining feasible tasks include caulking, cabinet modifications, mirror and light installation, trimming countertop openings, and installing P-traps where access and conditions are simple.
Tasks that usually require licensed trades
Many confident DIYers can handle basic sink swaps and minor plumbing tweaks, but certain tasks should be left to licensed tradespeople to confirm safety, code compliance, and long-term reliability.
Structural changes, relocating water or waste lines, installing new venting, electrical work for lighting or heated fixtures, and permit‑required alterations typically need professionals.
Licensed trades confirm inspections, correct materials, and warrantyable workmanship.
Questions to ask and quotes to obtain from contractors
Where should attention focus when deciding between DIY and hiring a contractor for a bathroom sink conversion?
Costs, scope, permits, timeline, and safety determine whether to hire. Obtain multiple written quotes, confirm licenses and insurance, and request references.
Ask about warranty, change-order policies, and disposal fees.
- License and insurance
- Detailed scope and timeline
- Permits and inspections
- Warranties and guarantees
- Final cost breakdown
Cost-saving strategies and value-adding upgrades
The article outlines practical ways to cut costs on a sink conversion without compromising material quality, such as choosing reputable mid-range fixtures and sourcing surplus or factory-second tiles.
It identifies high-impact upgrades—lighting, faucet and hardware replacements, and improved storage—that tend to raise a bathroom’s resale value.
It also highlights reuse and refinish options for cabinets and countertops, including repainting, refacing, and resurfacing, as budget-friendly alternatives to full replacement.
Where to save on materials without sacrificing quality
Although budget constraints often dictate choices, homeowners can reduce costs on a sink conversion by prioritizing durable fixtures, selecting mid-range materials with proven warranties, and reallocating savings toward visible upgrades like faucets and finishes that add perceived value.
- Buy quality cabinet boxes, refinish doors
- Choose engineered stone over premium quartz
- Reuse existing plumbing where possible
- Opt for reliable mid-range faucets
- Shop seasonal sales and clearance items
High-impact upgrades that increase bathroom value
Several targeted upgrades can substantially boost a bathroom’s resale value without requiring a full remodel.
Installing a second sink, upgrading to durable quartz or porcelain fixtures, replacing outdated lighting with LED vanities, adding modern hardware and a frameless glass shower, and improving ventilation all deliver measurable returns.
Prioritize neutral finishes and professional plumbing and electrical work to reassure buyers and appraisers.
Reuse and refinish options for existing cabinets and countertops
Consider refinishing and repurposing existing cabinets and countertops to stretch a remodel budget while preserving or even enhancing perceived value.
Sanding, painting, or staining cabinets freshens appearance; replacing hardware modernizes style.
Reglazing or resurfacing countertops avoids full replacement.
Add trim, open shelving, or new drawer organizers for function.
These interventions cut costs, shorten timelines, and often yield comparable visual impact to new installations.
Maintenance and care after conversion
After conversion, regular inspections for loose fittings and slow drips help prevent leaks and extend the life of faucets and drain assemblies.
Gentle cleaning routines and appropriate sealants preserve countertop surfaces and sanitary conditions around the sink.
A concise maintenance schedule and prompt repairs minimize long-term costs and protect the investment.
Tips to prevent leaks and prolong fixture life
Maintain regular inspections and simple upkeep to prevent leaks and extend the life of converted sink fixtures.
Routine checks catch drips, loose fittings, and corrosion early. Recommended actions include:
- Tighten supply and drain connections periodically
- Replace worn washers and O-rings promptly
- Inspect and secure mounting hardware
- Monitor flexible hoses for bulges or cracks
- Use thread sealant tape on threaded joints
Cleaning and sealing countertops and sinks
Seal and clean countertops and sinks regularly to protect surfaces and prevent water damage after conversion.
Use pH-neutral cleaners for stone or sealed surfaces and mild soap for porcelain.
Inspect grout and caulk monthly; repair cracks promptly.
Reapply appropriate sealant to natural stone every 6–12 months.
Wipe spills immediately, avoid abrasive pads, and document maintenance to preserve finish and prevent staining or deterioration.
Real project examples and brief case studies
The article presents three compact case studies to illustrate typical conversion approaches.
One example addresses a small bathroom where space constraints required a corner sink and compact fixtures.
Additional examples cover a mid-size remodel involving plumbing relocation for visual symmetry and a budget-friendly conversion that repurposes existing cabinetry with off-the-shelf tops.
Small bathroom conversion: tight space solution
Several homeowners facing cramped layouts achieved full bathroom conversions by prioritizing space-saving fixtures, reconfigured door swings, and strategic storage solutions; brief case studies below illustrate practical trade-offs and measurable outcomes from real projects.
Case A gained a slim double vanity by shaving a corridor wall, improving counter area 40%.
Case B swapped tub for wet shower and recessed medicine cabinets, increasing usable floor space 25%.
Mid-size bathroom conversion: relocating plumbing for symmetry
Balance matters in mid-size bathroom conversions: relocating plumbing to center tubs, sinks, or toilets can create visual symmetry and improve circulation without expanding the footprint.
Several case studies show contractors moving supply and waste lines within walls to align dual sinks, shifting a toilet 12–18 inches for balanced layouts, and repitching drains.
Costs varied with access, averaging moderate contractor time and permit needs.
Budget conversion: cabinet reuse and off-the-shelf tops
Many budget-minded renovators stretch resources by reusing existing vanities and pairing them with affordable, off-the-shelf tops.
Case studies show contractors trimming a center cabinet, reinforcing studs, then installing two vessel sinks on a laminate top for under $600.
Another project replaced a stained top with quartz-look slabs and new faucets, preserving carcass integrity and halving costs compared to full replacement.
Checklist and materials list for the project
Before starting the conversion, a concise pre-project checklist helps verify measurements, shut-off valve locations, and permit or building-code requirements.
A clear tools and materials list for DIY installers should specify items such as wrenches, sealant, replacement drain and trap components, mounting hardware, and any specialty fittings.
Together, these lists reduce surprises and keep the work organized and efficient.
Pre-project checklist
1 clear checklist helps guarantee the sink conversion proceeds efficiently and safely.
The project coordinator verifies permits, measures space, confirms plumbing capacity, schedules a helper, and plans disposal.
Pre-project items:
- Confirm local permit requirements
- Measure vanity width and clearance
- Check existing plumbing capacity
- Arrange helper or contractor availability
- Plan debris removal and timeline
Tools and materials list for DIY installers
A concise list of essential tools and materials helps guarantee a smooth bathroom sink conversion by matching the project’s scope to required equipment, preventing delays and extra trips to the hardware store.
The installer should gather items for demolition, plumbing, mounting, finishing, and safety before starting.
- Adjustable wrench, basin wrench, pipe cutter
- P-trap, tailpieces, supply lines
- Vanity top, sinks, faucets
- Silicone sealant, plumber’s tape
- Safety glasses, gloves, shop vacuum
Conclusion
Converting a single sink into a double vanity can transform both function and resale appeal, but it demands careful planning, proper permits, and deliberate budgeting. With the right measurements, materials, and tradespeople, the project can come together smoothly—no ifs, ands, or buts—turning cramped mornings into streamlined routines. Thoughtful choices and preventive maintenance keep the investment working well for years, making the upgrade both practical and rewarding.