How to Install a Check Valve on a Sump Pump: Step-by-Step Guide for DIY Success
To install a check valve on your sump pump and prevent discharge from flowing back into the pit, follow these steps: First, choose a check valve that matches the size of your discharge pipe—options include PVC, swing, or spring types. Begin by shutting off power to the pump and draining the discharge line. Cut the pipe in a straight section, then dry-fit the valve with the arrow pointing away from the pump. Secure it, seal any joints, and test for leaks to ensure proper function. For additional troubleshooting and detailed instructions, refer to the further steps below.
What a Check Valve Does on a Sump Pump and Why It Matters
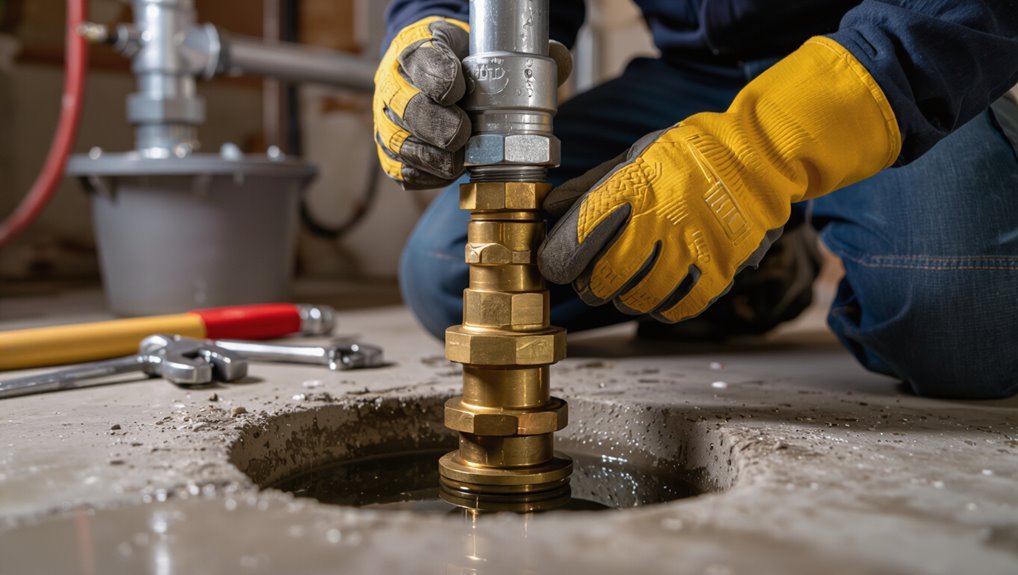
A check valve in a sump pump system permits water to flow out of the basin while blocking return flow, protecting the pump and basement from backflow.
Its benefits include preventing sewage or groundwater from re-entering the sump, reducing unnecessary on/off cycling that wastes energy and stresses components, and thereby extending pump lifespan.
Whether a check valve is required depends on the discharge configuration and local code—it’s essential when discharge piping can allow backflow, and optional in setups where backflow is otherwise impossible.
Purpose of a check valve in sump pump systems
Installing a check valve on a sump pump prevents discharged water from flowing back into the pit, protecting the pump from frequent restarts and reducing wear.
It guarantees one-way flow in the discharge line, maintains system priming, and minimizes risk of flooding between cycles.
For DIYers learning how to install check valve on sump pump, understanding this role clarifies placement and orientation decisions.
Benefits: prevents backflow, reduces pump cycling, extends pump life
Reliability in a sump system hinges on a simple component: the check valve keeps discharged water moving away from the pit so it cannot return and trigger unnecessary pump restarts.
When a check valve is necessary versus optional
Although many sump systems function without interruption, a check valve becomes necessary whenever discharged water can flow back into the pit or when the pump sits above the discharge line.
This is because backflow causes frequent restarts, motor strain, and potential flooding.
It is optional when the discharge remains above the pump outlet, gravity prevents return flow, and reliable external drainage exists; risk assessment guides the choice.
Types of Check Valves Suitable for Sump Pumps
Different check valve designs offer distinct benefits and trade-offs for sump pump discharge lines, including swing (flapper) and spring-loaded (lift) types.
Material choices such as PVC versus brass or metal affect durability, corrosion resistance, and compatibility with the discharge pipe.
Proper selection hinges on matching valve type, size, and material to the pump’s flow rate and the pipe’s diameter and substance.
Swing (flapper) check valves pros and cons
Swing (flapper) check valves consist of a hinged disc that swings open to allow discharge flow and snaps shut to prevent backflow, making them a common choice for sump pump systems.
They are simple, inexpensive, and have low flow resistance.
However, they can stick, slam when closing, and require proper orientation and support to avoid premature wear or leakage over time.
Spring-loaded (lift) check valves pros and cons
Because they use a spring to lift a disc or piston against the flow, spring-loaded (lift) check valves close more quickly and with less slamming than hinged flapper types. This makes them a compact, orientation-tolerant option for sump pump discharge lines.
They offer reliable backflow prevention at varied flow rates, fast response, and space efficiency. However, springs can corrode or fatigue and may restrict flow slightly.
Inline PVC vs. brass/metal check valves
Material choice—PVC versus brass/metal—affects durability, cost, and installation methods for sump pump check valves.
PVC valves are lightweight, corrosion-resistant, and inexpensive, suited for easy solvent-weld or threaded connections but less impact- and heat-resistant.
Brass or stainless steel valves offer superior strength, longevity, and higher pressure tolerance, typically costing more and requiring compatible fittings or adapters for secure installation.
How to choose the right size and material for your discharge pipe
Choosing the correct discharge pipe size and material confirms the check valve performs reliably and the sump pump operates at peak efficiency.
Select pipe diameter matching pump outlet to prevent flow restriction and backpressure.
PVC is lightweight, corrosion-resistant, and suitable for most homes. Rigid ABS or metal (bronze/stainless) suits higher temperatures or outdoor exposure.
Verify fittings and solvent or threaded connections are compatible and secure.
Tools and Materials Required
The section lists the essential tools needed for the job, including wrenches, pipe cutters, and thread sealant.
It then enumerates parts and consumables such as the check valve, PVC or ABS fittings, and replacement hardware.
Finally, it outlines required safety gear and preparatory items like gloves, eye protection, and a bucket for water removal.
Essential tools checklist
A compact set of tools and supplies will streamline installing a check valve on a sump pump; essential items include plumbing wrenches, pipe cutters, appropriate fittings and sealants, and safety gear.
The checklist focuses on efficiency, correct sizing, and safe handling to prevent leaks and guarantee reliable operation.
- Adjustable wrench and pipe wrench
- Tubing/pipe cutter
- Thread sealant or plumber’s tape
- Safety gloves and eye protection
Parts and consumables checklist
Properly selected parts and consumables guarantee a secure, leak-free check valve installation and long-term sump pump performance.
The homeowner should gather matching PVC or ABS check valve, appropriate pipe adapter or coupling, solvent cement or threaded sealant, and replacement hose clamps or mounting hardware.
Verify sizes, materials, and pressure ratings before starting.
- Check valve (correct material/size)
- Adapter/coupling
- Solvent cement/thread sealant
- Clamps/mounting hardware
Safety gear and preparatory items
Several essential safety items and preparatory tools should be on hand before beginning any sump pump check valve installation.
Personal protective equipment, workspace lighting, and a clean dry area reduce risks. Verify power isolation and have replacement seals ready. Follow manufacturer instructions.
- Gloves and safety glasses
- Rubber boots and kneepads
- Flashlight or work light
- Voltage tester and towels
Pre-Installation Preparation
Before beginning work, the sump pump and discharge piping should be inspected for wear, obstructions, and clear flow direction.
The installer measures pipe diameter and confirms upstream/downstream orientation, then turns off power and safely drains the system to prevent spills or electrical hazards.
Finally, the installation location is marked with attention to space for the valve body and future maintenance access.
Inspecting your sump pump and discharge piping
When preparing to install a check valve, the homeowner should closely inspect the sump pump and discharge piping for wear, alignment, and obstructions that could hinder flow or cause leaks.
Examine joints, fittings, and flex hoses for cracks, corrosion, or loose clamps.
Verify pump mounting is secure and vertical.
Clear debris, remove sediment, and note any damaged sections that require repair or replacement before installation.
Measuring pipe diameter and flow direction
Measure the discharge line diameter and confirm flow direction to ascertain the replacement check valve fits and functions correctly.
Using calipers or a tape, record the outside and nominal pipe diameter. Note material type (PVC, ABS, metal) and any fittings.
Mark flow direction with a temporary arrow. Verify unobstructed access and measure coupling lengths to ascertain correct valve orientation and secure connections.
Turning off power and draining the system safely
Shut off the sump pump’s electrical supply at the dedicated circuit breaker and verify de-energization with a non-contact voltage tester at the pump wiring or control box.
Close any inlet valves, open the discharge line slightly at a safe downstream point to relieve pressure, and position a bucket to catch residual water.
Disconnect quick-connect fittings or loosen clamps, allowing the basin and piping to drain fully before proceeding.
Marking the installation location and space considerations
Before drilling or cutting, the installer should identify a straight section of the discharge pipe at least 6–12 inches downstream of the pump outlet where the check valve can be mounted without interfering with existing fittings or the basin rim.
The installer then marks pipe centerline, clearance for valve body and wrench access, and spacing for unions or couplings, ensuring unobstructed vertical or horizontal alignment and service access.
Step-by-Step Installation Guide
The technician begins by removing the existing discharge piping or cap to access the outlet.
Next, the check valve and its supporting hardware are dry-fitted to confirm correct orientation, alignment, and fit.
Once positioned, the valve is secured with unions, couplers, or threaded fittings and all joints are sealed using appropriate thread tape, silicone, or PVC cement techniques.
Removing the existing discharge piping or cap
Begin by clearing any debris around the sump pump outlet and locating the existing discharge piping or cap, noting its connection type (threaded, glued, or clamped) and orientation.
Turn off power, relieve pressure, then loosen clamps or fittings with appropriate tools.
Carefully cut glued or PVC joints near the pump outlet, deburr edges, and remove the old pipe or cap, keeping fittings for reference.
Dry-fitting the check valve and supporting hardware
Dry-fit the check valve and supporting hardware at the pump outlet to confirm alignment, size compatibility, and required clearances before making permanent connections.
Temporarily assemble pipe segments, adapters, clamps, and any mounting brackets.
Verify threads and slip joints seat properly, guarantee gaskets or tape fit, and check for interference with the pit cover or nearby components.
Mark final positions for accurate reassembly.
Proper orientation and alignment of the check valve
Several simple checks confirm the check valve is oriented and aligned correctly before final fastening. The flow arrow must point away from the pump toward the discharge.
Verify the valve sits squarely on pipe ends with no twist or offset. The actuator or flap must move freely; clearances around the body prevent contact with supports.
Recheck direction and straightness before proceeding.
Securing with unions, couplers, or threaded fittings
With the check valve correctly oriented and aligned, the installer secures it to the discharge line using the chosen connection type—union, coupler, or threaded fitting—working methodically from the pump end outward.
Unions allow future removal; couplers join plain pipe ends; threaded fittings require proper engagement without cross-threading.
Tighten fittings evenly, support adjacent piping, and verify there is no strain on the valve body.
Sealing joints: thread tape, silicone, and PVC cement techniques
Begin by preparing each joint surface so sealing materials adhere properly: clean threads and pipe ends of dirt, old sealant, and grease, then dry them completely.
For threaded fittings apply PTFE tape clockwise several wraps; tighten securely. Use silicone sparingly around threaded unions for vibration resistance.
For PVC solvent-weld joints follow manufacturer’s primer and cement sequence, ensuring full contact, proper cure time, and leak testing before use.
Reconnecting and restoring power
After completing all plumbing connections and allowing sealants to cure, the installer restores electrical power methodically: confirm the sump pump and any connected alarms are switched off, verify the circuit breaker or fuse controlling the pump is in the OFF position, and reconnect the pump’s power plug or hardwired conduit following local code and manufacturer instructions.
Finally, turn the breaker ON, reset GFCI outlets, and document circuit labels.
Initial test: verifying valve operation and checking for leaks
Power is restored and fittings have cured, so the initial test focuses on confirming the check valve functions properly and that all joints remain watertight.
The pump is cycled while observing discharge and basin. Watch for reverse flow when pump stops; valve should close promptly.
Inspect seams and thread joints for drips. Tighten or reseal any leak sources, then retest to verify reliable operation.
Common Installation Scenarios and Specific Instructions
The article next compares common installation scenarios and gives specific instructions for each.
It covers differences between vertical and horizontal discharge pipes, methods for attaching a check valve to flexible or corrugated hose, and options for retrofitting without removing the pump.
Special techniques for working in tight spaces or cramped basements are also addressed.
Installing on vertical vs. horizontal discharge pipes
When installing a check valve on a sump pump, orientation—vertical versus horizontal discharge—determines valve selection, placement, and access for maintenance. Each orientation has distinct flow characteristics and gravity effects that influence sealing, support, and the risk of backflow.
Vertical runs typically mount the valve above the pump to prevent water hammer.
Horizontal runs require slope, support clamps, and side-access or inline valves to guarantee reliable seating and serviceability.
Adding a check valve to a flexible hose or corrugated pipe
Installers connecting a check valve to flexible hose or corrugated discharge pipe must account for material fragility, differing diameters, and limited sealing surfaces.
These fittings commonly require clamp-style, barbed, or specially threaded valves and often need adapters or short rigid nipples to guarantee a secure, leak-free connection.
Measure diameters precisely, select compatible valve types, use stainless steel clamps, apply sealant where recommended, and test for leaks under pump operation.
Retrofit installation without removing the pump
Several common retrofit scenarios permit adding a check valve without removing the sump pump, including tight basements with limited clearance, pumps hardwired into the pit, and systems with vertical or horizontal discharge runs.
The installer can shut power, isolate the discharge, cut the pipe above the pump, slip on a retrofit clamp-style or union-mounted check valve, secure connections, and test operation for leaks and proper flow.
Installing in tight spaces or cramped basements
After retrofitting a check valve without removing the pump, attention often shifts to cramped basements where access and maneuvering room are limited.
In confined spaces, choose compact valves, use swivel or flexible connectors, and mark pipe orientation before tightening.
Employ right-angle adapters, low-profile wrenches, and portable lighting.
Maintain clearances for future removal and test operation to confirm leak-free performance.
Testing, Troubleshooting, and Verification
The check valve should be tested under load by running the pump and observing flow and backflow behavior at the discharge.
Common problems—water hammer, air lock, lack of discharge, leaks, reverse flow, and sticking—can be diagnosed by listening for noises, checking for trapped air, inspecting seals and fittings, and verifying valve movement.
Repairs range from tightening or replacing seals and clearing air to full valve replacement when corrosion, persistent reverse flow, or mechanical failure are evident.
How to test valve operation under load
Begin by simulating normal sump pump operation with the system under load to verify the check valve closes reliably and prevents backflow.
Observe flow direction, listen for unusual noises, and monitor discharge line for leaks.
Cycle the pump several times to confirm repeatable closure.
Measure residual water level in the pit after shutoff to guarantee the valve prevents return flow and maintains expected drainage.
Diagnosing common issues: water hammer, air lock, no discharge
Diagnose common issues by observing symptoms and isolating causes for water hammer, air lock, and no discharge in the sump pump check valve system.
Inspect for banging or vibration indicating rapid flow stoppage (water hammer).
Listen for trapped air or intermittent sputtering suggesting air lock.
Confirm pump running yet no outflow to identify blockage, closed valve, or impeller failure.
Record findings for targeted repair.
Fixes for leaks, reverse flow, and valve sticking
Having identified symptoms like water hammer, air lock, or absent discharge, attention shifts to correcting leaks, preventing reverse flow, and freeing a sticking check valve through targeted testing and verification.
Inspect seals and joints, tighten or replace gaskets, and pressure-test the discharge line.
Add or adjust support clamps to reduce stress. Lubricate or cycle the valve; clear debris.
Recheck for proper one-way flow.
When to replace versus repair a check valve
When should a check valve be repaired and when is replacement the safer choice? The decision depends on damage extent, material age, and cost.
Minor debris, stuck flappers, or loose fittings often justify cleaning or part replacement.
Corrosion, cracked bodies, persistent leaks, or repeated failures indicate full replacement.
Safety, long-term reliability, and labor versus part costs should guide the choice.
Maintenance and Long-Term Care
Regular maintenance guarantees the check valve and sump pump continue to operate reliably, so a simple inspection schedule should note valve alignment, seals, and any signs of leakage or obstruction.
Periodic cleaning to remove debris and clear the discharge line, plus checking for wear on rubber flaps or spring mechanisms, helps prevent failures and indicates when replacement is warranted.
Before freezing weather, measures such as insulating exposed piping, draining low points, and confirming the valve closes properly will reduce the risk of freeze-related damage.
Routine inspection schedule and what to look for
A simple, consistent inspection schedule keeps a sump pump check valve functioning reliably: visual checks monthly, functional tests quarterly, and a thorough professional inspection annually.
During inspections, examine for leaks, corrosion, loose fittings, proper valve orientation, and secure mounting.
Listen for abnormal sounds during operation and confirm uninterrupted one-way flow.
Record findings, immediate repairs, and date of next inspection for reliable maintenance.
Cleaning and preventing debris buildup
Inspecting and clearing debris from the check valve and surrounding piping prevents clogs that can impede one-way flow and strain the sump pump.
Periodically remove sediment, lint, and mineral buildup using a soft brush and water; avoid harsh chemicals.
Install a mesh strainer on the intake, secure tight pipe joints, and flush the line after heavy storms to minimize accumulation and maintain reliable operation.
Signs of wear and recommended replacement intervals
After clearing debris and maintaining fittings, the next focus is recognizing wear indicators and knowing when components should be replaced.
Inspect the check valve for cracks, corrosion, persistent leaks, or a noisy or sluggish closing action.
Replace rubber seals and flappers every 2–3 years or sooner if degraded.
Metal valves showing pitting or stiffness warrant immediate replacement to prevent pump backflow.
Winterizing and freeze-prevention tips
Prepare sump pump systems for freezing conditions by draining exposed discharge lines, insulating vulnerable components, and ensuring check valves and unions are secure to prevent ice blockages and backflow.
Inspect and replace failing seals, route discharge to heated or buried sections where possible, and add heat tape or insulation sleeves.
Test operation periodically during cold snaps and clear vents or openings of snow and ice to maintain reliable flow.
Mistakes to Avoid and Safety Precautions
The author warns that installing the check valve with the wrong orientation or size will compromise pump performance and may cause backflow.
Care must be taken not to over-tighten fittings or stress PVC, and proper supports and vibration isolation should be installed to prevent leaks and joint failure.
Electrical precautions and correct wiring are also essential to avoid motor damage and electrical hazards.
Incorrect valve orientation or wrong size
Installers should verify both orientation and size before securing a check valve, since a backwards or improperly sized valve can render the sump pump ineffective and cause backflow, reduced discharge capacity, or premature pump cycling.
Confirm arrow direction matches flow, measure pipe diameter and thread type, and select a valve rated for expected pressure.
Incorrect sizing or reversal risks system failure and water damage.
Over-tightening fittings and cracking PVC
Avoid overtightening threaded fittings or forcing glued joints, as excessive torque can crack PVC, strip threads, or deform seals, leading to leaks and premature failure.
Technicians should use proper-sized wrenches, apply moderate, even pressure, and stop as soon as a secure, snug fit is achieved, relying on thread sealant or primer/solvent cement rather than brute force.
Inspect joints for hairline cracks and test under low pressure before full operation.
Ignoring proper support and vibration control
Failing to secure the pump and discharge piping properly can allow vibration and movement to loosen connections, accelerate wear, and transfer noise into the structure.
Properly fastened clamps, vibration isolators, and cured pipe supports prevent stress on the check valve and fittings.
Regular inspections for loosened brackets, chafing, or sagging piping reduce leaks and premature component failure while minimizing disruptive noise transmission.
Electrical safety and avoiding pump damage
Exercise caution around electrical connections and motor controls to prevent shocks, short circuits, and irreversible pump damage.
The installer should lock out power, verify grounding, and use GFCI protection. Inspect wiring for corrosion, maintain dry junctions, and secure conduit.
Avoid running the pump dry or cycling rapidly; guarantee correct voltage, fuse sizing, and follow manufacturer torque and wiring diagrams to prevent motor failure.
Cost Estimates and When to Hire a Professional
A brief cost overview outlines typical parts and tools—check valve, pipe fittings, sealant, wrenches—usually totaling a modest one-time expense compared with professional rates.
DIY installation commonly takes one to two hours for a competent homeowner, while a licensed plumber may complete the job faster but will add labor and possible service fees.
Professional assistance is recommended for complex discharges, existing electrical connections in the pit, unclear piping configurations, or when local codes require licensed work.
Typical part and tool cost breakdown
Typical installations of a check valve for a sump pump usually involve modest parts and occasional tool purchases: expect the valve itself to range from $15 to $60 depending on material and size, basic PVC fittings and pipe adapters to add $5–$25, and primer/solvent or thread sealant around $5–$10.
| Item | Typical cost |
|---|---|
| Check valve | $15–$60 |
| Fittings/adhesive | $5–$25 |
Time required for DIY installation vs. pro service
How long does installing a check valve on a sump pump take, and how does that compare to hiring a pro?
A competent DIYer typically spends 30–90 minutes including isolation, fitting, and leak checks.
A professional completes the job in 20–45 minutes, often faster due to experience and tools.
Labor costs raise total expense; DIY saves money but requires confidence and basic plumbing skills.
Scenarios where professional plumbing/electrical help is recommended
When a sump pump installation involves complex piping, electrical work, confined spaces, or unclear system issues, homeowners should consider hiring a licensed professional.
Costs vary: simple check valve installs by a plumber typically run $150–$350; combined electrical or sump replacement can reach $500–$1,500.
Hire a pro for permit-required work, persistent backup, corrosion, improperly sized piping, or unsafe wiring to guarantee code compliance and reliability.
Quick Reference Checklist for Installing a Sump Pump Check Valve
A concise checklist helps guarantee a proper and leak-free check valve installation on a sump pump by summarizing required tools, safety steps, and key measurements before work begins.
It guides preparation, verifies compatibility, and reduces rework.
- Confirm valve size and flow direction.
- Gather tools: wrench, PVC primer/solver, Teflon tape.
- Power off and drain pump lines.
- Inspect seals, tighten fittings, test for leaks.
Conclusion
Like a steadfast gatekeeper, the check valve keeps retreating water from reclaiming the pump’s labor, turning frantic cycles into calm efficiency. Proper selection, careful fitting and routine inspection let it perform quietly, a small but essential steward of a dry basement. Avoid rushed shortcuts; heed torque, alignment and safety steps. When doubts loom, call a pro to guarantee the valve’s promise holds, protecting home and peace of mind.