How to Find Your Furnace Filter Size: Quick Methods for Any HVAC System
To quickly find your furnace filter size, check the filter frame for printed dimensions or measure the slot using a tape measure. Before you start, ensure the power is turned off. Measure the length, width, and depth in inches, recording the smallest interior values and noting the frame thickness. For uniquely shaped slots, take multiple measurements and photos for custom cuts. When purchasing replacements, match the dimensions with your preferred MERV rating. More detailed guidance is provided below.
How to Quickly Determine Your Furnace Filter Size

The quickest way to find a furnace filter size is to check the filter frame for printed dimensions, which often list nominal and actual measurements.
If the print is missing, a simple tape measure across length, width, and thickness provides the needed numbers.
The article will also explain how common sizing formats differ—nominal sizes are rounded labels while actual inches are the true cut dimensions.
Fastest method: Read the filter frame for printed dimensions
When a furnace filter has been handled or replaced recently, the quickest way to confirm its size is to inspect the filter frame for stamped or printed dimensions.
Many manufacturers emboss or print length, width, and thickness on the cardboard edge.
Reading these markings is the fastest answer for how to find furnace filter size, avoiding guesses and ensuring the correct replacement is purchased.
Quick measuring technique with a tape measure
If the filter frame lacks legible stamped dimensions or the old filter is unavailable, a quick tape-measure check provides an accurate size in under a minute.
Measure depth, width, and height across the opening from inside edge to inside edge. Record measurements in inches to the nearest eighth.
Repeat once for accuracy. Use those three numbers when purchasing a replacement filter.
How to interpret common sizing formats (nominal vs. actual inches)
Because manufacturers often list filters using nominal dimensions that round to convenient numbers, purchasers must learn to distinguish between nominal and actual sizes.
Nominal sizes (e.g., 20x25x1) are rounded labels; actual dimensions are slightly smaller (often 19.5×24.5×0.75) to fit frames.
Always measure the filter or slot and compare actual inches to product specifications before purchasing.
Step-by-Step Guide to Measuring a Furnace Filter
Before measuring, the technician turns off the HVAC and opens the filter slot to access the filter area safely.
They measure length, width, and depth precisely, note how to handle odd or custom-sized openings, and record the exact dimensions.
Finally, the technician labels and stores the measurements for straightforward future replacements.
Prepare: turn off HVAC and access the filter slot
Shut down the HVAC system and locate the filter access point to guarantee a safe, accurate measurement.
Confirm power is off at the thermostat and, if needed, at the breaker.
Open the access panel or grille carefully, using appropriate tools.
Note filter orientation and any retaining clips or frames.
Remove the filter slowly to avoid dislodging dust into the system.
Measure length, width, and depth accurately
One clear measurement for each dimension—length, width, and depth—ensures a replacement filter fits correctly and performs as designed.
Using a rigid tape measure, record interior slot length and width from edge to edge, not including the frame.
Measure depth from the face to the back stop.
Note measurements in inches to the nearest eighth, and double-check before ordering.
What to do when you have an odd or custom-sized slot
When a furnace slot does not match standard dimensions, the technician should take systematic steps to capture its true size: measure the interior length and width at multiple points to identify variations, record the smallest values to guarantee the replacement fits, measure depth from face to back stop, and note any obstructions, angled edges, or recessed lips that could affect filter seating.
For irregular openings, custom-cut or shop-made filters may be required.
Recording and labeling the size for future replacement
After measuring the slot and noting any irregularities, the technician should immediately record the final dimensions and labeling details to guarantee accurate future replacements.
They document length, width, thickness, filter orientation, and any model numbers. Records go on the unit, in maintenance logs, and digitally with date and technician initials.
Clear labels prevent installation errors and streamline reorder and service.
Identifying Filter Size Without Removing the Filter
When the filter cannot be removed, one method is to measure the slot opening at the return grille or the furnace cabinet to determine length and width.
Photos taken with a smartphone—ideally including a tape measure or known-size object—help capture dimensions and confirm thickness using on-screen measurement tools.
It is important to note when the housing dimensions should be used instead of the visible filter, since some installations space the filter inside a larger frame.
Measuring the filter slot from the return grille or furnace cabinet
Measuring the filter slot from the return grille or furnace cabinet lets a homeowner determine the correct filter dimensions without removing the existing filter.
Using a tape measure, record internal width, height, and depth of the slot at multiple points to account for variation.
Round measurements to the nearest eighth inch or use nominal commercial sizes to select a compatible replacement filter.
Using photos and smartphone tools to capture measurements
If physical measuring from the grille or cabinet is awkward, photographs and smartphone tools provide a precise alternative for estimating filter dimensions without removing the filter.
Stand back for a clear shot including the grille edge and nearby objects as scale. Use a smartphone ruler or measurement app to mark known reference points, then calculate height, width, and thickness from the image for an accurate size estimate.
When to measure the filter housing versus the filter itself
Although the filter itself is the definitive source of size information, the housing often provides the most practical measuring surface when the filter cannot be removed.
Professionals and DIYers should consequently assess whether the grille, cabinet frame, or accessible housing edges yield clearer, unobstructed reference points before attempting any measurement.
Measure visible internal dimensions where the filter rests, note lip thickness, and record depth to match standard replacement sizes accurately.
Matching Filter Dimensions to Filter Types and MERV Ratings
Common filter sizes are linked to specific furnace and HVAC models, so users should verify the dimensions recommended for their system.
Depth—typically 1″, 2″, or 4″—determines both physical fit and airflow resistance, influencing filtration effectiveness and system strain.
MERV selection should balance the unit’s compatibility with higher-efficiency filters against the desired indoor air quality.
Common filter sizes and the systems that use them
Filter dimensions directly influence which HVAC systems can accept them and which filtration media and MERV ratings are practical for a given application. Common sizes like 16×20, 20×25, and 14×20 match residential returns, larger 20×25 suits furnaces and central units, while compact 14×14 fits wall-mounted or window systems.
| Size | Typical system | Common MERV range |
|---|---|---|
| 14×14 | compact/window | 6–8 |
| 16×20 | residential | 8–11 |
| 20×25 | furnace/central | 8–13 |
How depth (1″, 2″, 4″) affects fit and performance
After selecting the correct face dimensions, depth becomes the next key variable influencing both fit and filtration performance.
One-inch filters fit most residential slots but offer limited media and shorter service life.
Two-inch units increase dust-holding capacity without major cabinet changes.
Four-inch and deeper filters provide greater surface area, longer intervals, and lower pressure drop but require compatible housings and space.
Choosing MERV levels based on system compatibility and air quality needs
While selecting the correct dimensions guarantees a physical fit, choosing an appropriate MERV rating aligns filtration efficiency with both system limits and indoor air quality goals.
Higher MERVs capture finer particles but can restrict airflow, stressing older or low-capacity furnaces.
Match MERV to manufacturer recommendations: use MERV 6–8 for basic dust control, 8–11 for allergy concerns, and 12–13+ only if the system supports increased resistance.
Buying Replacement Filters: Where to Find Exact Sizes
When sourcing a replacement filter, the reader should confirm exact dimensions and compatible models listed in product descriptions to guarantee a proper fit.
For uncommon sizes, many online retailers offer custom-cut filters or filters sold by exact inch measurements.
Alternatively, bringing precise measurements to a local HVAC supplier or hardware store can speed selection and avoid ordering errors.
How to read product listings and model compatibility
Although product listings and model compatibility can seem dense, reading them methodically reveals the exact filter dimensions and fit requirements.
Inspect product title for nominal dimensions (length × width × depth), check technical specs for actual measurements, review compatible makes and model numbers, verify filter type (MERV, pleated vs. fiberglass), and confirm mounting orientation.
Cross‑reference OEM numbers and user reviews for fit issues.
Ordering custom-size or uncommon filters online
Where can one find custom-size or uncommon furnace filters without settling for ill-fitting substitutes?
Specialized online retailers and filter manufacturers offer custom-cut options by exact dimensions or model number.
Search marketplaces with filter customization tools, upload measurements, choose MERV rating and frame type, then order.
Compare lead times, return policies, and customer reviews to guarantee correct fit and filtration performance before purchasing.
Bringing measurements to local HVAC or hardware stores
How should a homeowner present measurements to a local HVAC shop or hardware store to guarantee an exact-fit replacement?
They should bring the filter’s length, width, and thickness measured in inches (L×W×H), note whether dimensions are nominal or actual, and include the filter’s model or part number and MERV rating if known.
A photo of the filter and installation slot aids confirmation.
Common Problems and How to Fix Sizing Issues
When a nominal-sized filter fits loosely or appears too small, the homeowner should check actual frame measurements and use foam weatherstripping or a turn-down adapter to seal gaps until a correct replacement is obtained.
Using the wrong depth or an undersized filter can bypass filtration, reduce airflow, and strain the furnace, increasing energy use and component wear.
Temporary fixes may limit immediate damage but should be replaced with properly sized filters promptly to guarantee safe, efficient operation.
What to do if a nominal-sized filter is too small or loose
A nominal-sized filter that fits loosely or measures smaller than the slot can compromise airflow control and allow unfiltered air to bypass the media; addressing this requires diagnosing whether the issue stems from manufacturer sizing variance, incorrect measurement, or a mismatched filter frame.
Solutions include verifying exact slot dimensions, trying a different brand or tighter frame, adding thin gasket tape or foam strips to seal gaps, or replacing the housing adapter.
Risks of using the wrong depth or undersized filters
Loose or incorrectly sized filters not only allow unfiltered bypass but can also create more serious problems when depth or overall dimensions are wrong.
Incorrect depth can compress media, raising pressure drop and reducing airflow, stressing blowers, shortening component life, and impairing heat exchange.
Undersized or ill-fitting filters permit dust accumulation in ducts and coils, degrading efficiency and indoor air quality while increasing maintenance needs.
Temporary fixes and why they should be temporary
Patch and shim solutions, like cardboard spacers, foil tape, or folded filters, are common quick fixes for mismatched furnace filter openings but should remain temporary.
They can cause air bypass, reduced filtration, strain on fans, and safety hazards. Use them only until a proper-sized filter or adapter is obtained.
Permanent corrections include ordering correct filters, installing proper housings, or consulting an HVAC professional.
Maintenance Tips to Keep Track of Your Filter Size and Schedule
Practical maintenance starts with clearly labeling and storing spare filters by size and MERV rating to prevent mix-ups.
A concise schedule—monthly for inexpensive fiberglass, every 3 months for pleated filters, and more frequent changes for homes with pets or allergies—helps maintain performance.
Immediate replacement is warranted if a filter appears warped, clogged, or repeatedly falls out, which may also indicate an incorrect size.
Best practices for labeling and storing spare filters
Organization improves filter maintenance by making sizes and replacement dates immediately visible and reducing the chance of installing the wrong element.
Labels should include size, MERV rating, and install date. Store spares flat in a dry, cool area away from contaminants and sunlight. Rotate stock so oldest used first.
- Label clearly
- Protect packaging
- FIFO rotation
Recommended replacement intervals by filter type and household factors
Many homeowners find that recommended replacement intervals vary by filter type—basic fiberglass every 30 days, pleated filters 60–90 days, and high-efficiency or electrostatic units up to 6–12 months.
Household factors such as pets, occupancy, indoor air quality needs, and local dust levels can shorten those intervals and should be used to adjust the schedule.
Routine checks monthly, documenting changes, and aligning replacements with HVAC service visits maintain performance.
Signs your filter may be the wrong size or needs immediate replacement
After establishing replacement intervals by filter type and household conditions, homeowners should watch for clear signs that a filter is the wrong size or requires immediate replacement.
Indicators include visible dust bypassing edges, difficulty sliding the filter into the slot, reduced airflow, unusual system noise, increased energy bills, or frequent clogging.
Address issues promptly to protect HVAC performance and indoor air quality.
Visual Guides and Tools to Simplify Measurement
Step-by-step photos identify the exact points to measure on common furnace models to reduce guesswork.
Smartphone apps and simple tape-measure techniques are recommended for accurate readings.
A printable measurement checklist is suggested to take along when purchasing replacement filters.
Step photos showing where to measure in common furnace models

Where exactly should measurements be taken depends on the furnace layout, so clear photos indicating the filter slot, orientation arrows, and accessible dimensions remove guesswork.
Step-by-step images for common models (upflow, downflow, horizontal) show where to measure length, width, and depth, include reference rulers, capture door/panel alignment, and note removable trays.
Captions label measurement points and common pitfalls.
Smartphone apps and tape measure tricks for precise results
Photographs that marked the filter slot and measurement points lead naturally to tools that make those dimensions exact: smartphone apps and a few tape-measure techniques remove guesswork and speed the job.
A detached procedure emphasizes repeatable accuracy.
- Use phone ruler/ar measuring apps to get length and depth.
- Capture screenshots with scale overlays.
- Use tape’s hook, tension, and repeat readings for consistency.
Printable measurement checklist to bring when buying filters
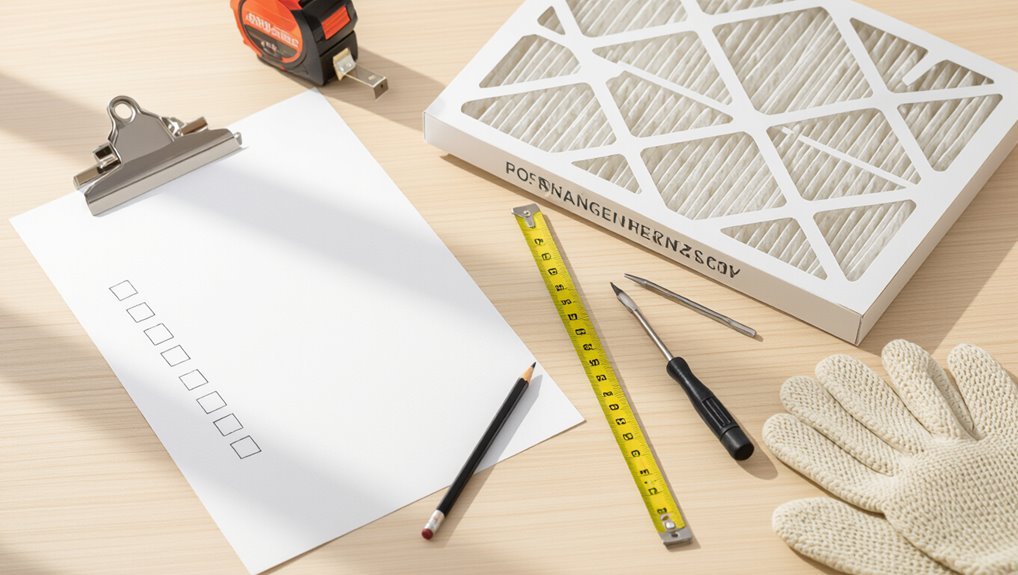
When preparing to buy replacement furnace filters, a simple printable measurement checklist guarantees shoppers bring consistent, store-ready dimensions and notes.
The checklist lists filter type, length, width, depth, frame thickness, model number, furnace location, measurement date, photo checkbox, and retailer compatibility.
It includes space for alternate sizes and MERV rating preference, enabling quick comparisons and confident purchases at the store.
Conclusion
Knowing the right furnace filter size saves time, protects equipment, and preserves air quality; measuring length, width, and depth, checking frame markings, and matching MERV needs offers certainty; keeping receipts, photos, and a spare keeps households ready; buying exact fits from trusted suppliers prevents leaks and strain; replacing on schedule restores efficiency, reduces allergens, and extends life—simple actions that prevent worry, foster comfort, and guarantee breathing easier every season.