How to Run a Propane Gas Line for a Stove: Step-by-Step Safety Guide
To run a propane gas line for a stove safely, you need to plan the installation carefully, obtain necessary permits, and follow local codes. The process involves mapping the route, selecting approved piping (such as CSST, black iron, or a flexible connector), and installing regulators and shutoff valves. It’s crucial to pressure-test the system for leaks, use personal protective equipment (PPE), and have the right tools. For complex installations or concealed runs, hire a licensed professional and ensure the work is inspected. Always adhere to manufacturer guidelines and local regulations for safety. Follow the detailed step-by-step procedures to ensure a successful installation.
Overview of Running a Propane Gas Line for a Stove
Homeowners choose propane lines for stoves to access reliable, high-heat cooking and to use properties without natural gas service.
Decisions about DIY installation versus hiring a licensed plumber or gas fitter hinge on skill level, complexity of the run, and safety risks.
Compliance with local codes, permits, and inspections is mandatory and often determines whether a professional is required.
Why homeowners run a propane line for a stove
Choosing to run a propane line for a stove often stems from practical needs and cooking preferences: propane provides reliable heat, precise flame control favored by many cooks, and can be more economical or available than natural gas in rural areas.
Homeowners choose propane for efficiency, off-grid accessibility, and appliance compatibility.
The guide explains how to run a propane gas line for a stove safely and efficiently.
When to hire a professional vs. DIY considerations
Safety often dictates the line between DIY and professional work: installing a propane line involves pressure-rated fittings, leak testing, and code compliance that demand technical skill and proper tools.
Homeowners with plumbing and gas experience, appropriate tools, and time may handle simple, short runs.
Complex layouts, tight clearances, hidden walls, appliance conversions, or any uncertainty warrant hiring a licensed technician to guarantee safety and reliable performance.
Legal, permitting, and code compliance summary
Compliance with legal, permitting, and code requirements is a non-negotiable element of running a propane gas line for a stove.
The installer must obtain permits, follow national and local codes, use approved materials, and schedule inspections.
Documentation and appliance certification guarantee safety and insurance coverage.
Failure to comply risks fines, voided insurance, and hazardous conditions; consult authorities before starting work.
Safety Essentials Before You Start
Before any work begins, a clear checklist of personal protective equipment and required tools should be assembled.
Key gas safety terms and definitions must be reviewed so homeowners can recognize pressure, regulator, and shutoff concepts.
The existing gas infrastructure should be inspected and basic leak detection procedures practiced to confirm a safe starting point.
Personal protective equipment and tools checklist
Personal protective equipment and the right tools reduce risk and streamline the job: gloves with cut and chemical resistance, eye protection rated for impact, a respirator when working in confined or poorly ventilated areas, and sturdy footwear.
A concise checklist guarantees readiness and safety before any line work begins.
- Adjustable wrench, pipe cutter, flare tool
- Leak detector solution, thread sealant rated for propane
- Torque wrench, fittings, proper fittings storage
Gas safety terms every homeowner should know
With tools checked and protective gear in place, familiarity with key gas safety terms helps homeowners interpret instructions and recognize hazards.
Definitions include combustible, flammable, odorant (mercaptan), pressure (PSI), regulator, shutoff valve, backflow, leak detection, and line purge.
Understanding service connections, fittings, thread types (NPT), and code compliance guarantees accurate communication with professionals and safer, informed decision-making.
Identifying existing gas infrastructure and leak detection basics
A quick survey of the home’s gas layout helps determine whether the stove can tie into an existing line or requires a new run; this includes noting the location of the meter, visible piping, shutoff valves, and any regulators.
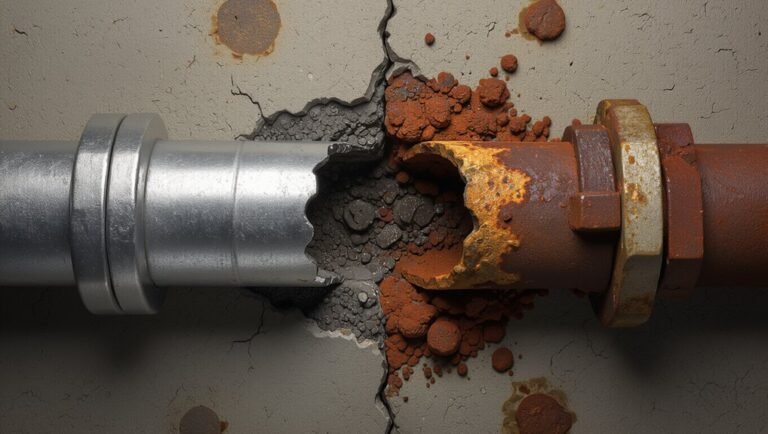
Inspect fittings for corrosion, record pipe materials and routes, and verify accessible shutoffs.
Perform soap-solution or electronic-sniffer checks at connections and report any suspicious odor immediately.
Required Permits, Codes, and Utility Notifications
Before any work begins, the installer should verify local building codes and regulations to determine allowable materials, routing, and pressure requirements.
They must follow permit application procedures and schedule the customary rough and final inspections required by the authority having jurisdiction.
The propane supplier and utility companies should be notified in advance to coordinate service connections, meter set requirements, and any required safety checks.
How to check local building codes and regulations
Why check local building codes and obtain permits before installing a propane line?
Local codes determine allowable materials, routing, setback distances, ventilation, and licensing.
Consult municipal building department, local fire marshal, and utility provider for applicable ordinances and notification requirements.
Review adopted plumbing, mechanical, and fuel-gas codes (e.g., IPC, IFGC) and any municipal amendments to guarantee compliance and avoid fines or unsafe installations.
Permit application steps and typical inspection requirements
When preparing to install a propane line, the homeowner or contractor must submit permit applications that specify the scope of work, pipe materials and sizes, proposed routing, appliance details, and installer credentials.
Most jurisdictions require plans, fee payment, and proof of contractor licensing or certification.
Inspections verify compliance, leak testing, correct pressure, and appliance connections before final approval.
- Permit application with plans
- Rough and final inspections
- Required test and documentation
Notifying propane supplier and utility companies
After securing permits and scheduling inspections, the installer or homeowner must notify the propane supplier and local utilities to coordinate fuel delivery, meter placement, and any required service-line adjustments.
Notifications should include project scope, timeline, site access, and inspection dates.
Confirm provider requirements for setback, piping materials, and leak-testing.
Obtain written confirmations and schedule final hookup only after approvals and clearances are received.
Materials, Tools, and Parts Needed
The discussion now turns to the specific materials, tools, and parts required to run a propane line for a stove.
It should cover the common pipe options (CSST, black iron, flexible corrugated), the appropriate valves, regulators, connectors, and appliance fittings, and the selection criteria for each.
Essential tools for cutting, threading, joining, and pressure testing the system should also be identified.
Types of propane gas lines and fittings (CSST, black iron, flexible corrugated)
Choosing the correct propane line and fittings is essential for a safe, code-compliant installation; common options include corrugated stainless steel tubing (CSST), black iron pipe, and flexible corrugated stainless connectors, each offering different flexibility, durability, and connection methods. Selection depends on routing, accessibility, and local code.
| Type | Strength | Typical Use |
|---|---|---|
| CSST | Flexible | Concealed runs |
| Black iron | Rigid | Main lines |
| Flexible corrugated | Connector | Appliance hookups |
Valves, regulators, connectors, and appliances fittings to choose
Proper selection of valves, regulators, connectors, and appliance fittings is critical to guarantee safe pressure control, leak-free joints, and code compliance for a propane stove installation.
Use a certified two-stage regulator sized for appliance demand, shutoff valves at service points, CSA/UL-listed flare or pipe-thread connectors with proper sealing, flexible appliance connectors rated for LP gas, and appliance-specific inlet fittings per manufacturer instructions.
Tools required for cutting, threading, testing, and installation
Following selection of valves, regulators, connectors, and appliance fittings, attention shifts to the tangible tools and materials required to cut, thread, test, and install the propane line.
Essential items include pipe cutters, threader, torque wrench, leak detector solution, fittings, pipe sealant, flexible connector, and mounting hardware.
Necessary tools:
- Pipe cutter, threader, and reamer
- Leak tester and manometer
- Adjustable wrenches and torque wrench
Pre-Installation Planning and Measurements
Before beginning work, the planner maps the proposed pipe route and measures the total run length to guarantee a straight, code-compliant path.
They calculate required pipe diameter and capacity based on the stove’s BTU rating and the measured run to prevent pressure drop.
They also evaluate outdoor tank placement and regulator location for accessibility, venting, and minimum clearance requirements.
Determining pipe route and measuring run length
How should the route for a propane stove gas line be chosen and measured?
The installer should select the most direct, protected path minimizing bends, avoiding electrical wiring, water lines, and heat sources.
Measure along the planned centerline, include vertical drops, offsets, and entry/exit points.
Account for valve, regulator, and appliance connection locations.
Record total run length and individual segment lengths for materials and fittings.
Calculating pipe size and capacity for stove BTU requirements
When sizing a propane gas line for a stove, the installer determines required capacity by converting the stove’s total BTU rating into a flow rate and matching that to pipe sizing tables while accounting for pressure drop and run length.
The installer selects pipe diameter and material, includes appliance diversity or simultaneous demand, factors fittings and elevation, and verifies final sizing against local code and manufacturer specifications.
Considerations for outdoor tank location and regulator placement
After determining pipe size and capacity, attention turns to the outdoor tank location and regulator placement to guarantee safe, efficient supply and minimal pressure loss.
The tank must sit on a stable, code-compliant pad, clear of ignition sources, and accessible for delivery.
Regulators should be mounted near the tank, protected from weather, with proper venting and within the required distance from building openings to prevent vapor intrusion.
Step-by-Step Installation Process
The installation process begins with shutting off and securing the propane supply before any work near lines or fittings.
Next steps cover installing the main line from the tank or supply point into the home, routing piping safely through walls, floors, and crawlspaces, and installing required valves, regulators, and shutoffs.
Finally, the procedure addresses connecting the stove using either a flexible connector or a hard-piped connection and verifying all joints for leaks.
Shutting off and securing propane supply
Shut down the propane supply at the tank valve and any intermediate shutoffs.
Then verify the system is depressurized by opening a nearby appliance valve or bleed point until no gas escapes.
Cap or plug disconnected fittings with approved plugs or thread sealant.
Tag valves as closed, secure the tank against movement, and keep ignition sources away.
Confirm lockable closures where applicable before proceeding.
Installing the main line from tank or supply point to home
With the supply secured and verified depressurized, work can proceed to run the main propane line from the tank or supply point toward the house.
Position approved steel or CSST tubing along a planned route, install appropriate fittings and shutoff valves, support piping at code spacing, slope for drainage, apply thread sealant rated for gas, and pressure-test the exterior run before final connections to the house inlet.
Routing through walls, floors, and crawlspaces safely
Begin by mapping the exact route through walls, floors, and crawlspaces, identifying studs, joists, insulation, and any existing utilities to avoid interference or damage.
Use approved bore locations, maintain required clearances, and protect the line with sleeves or grommets where it passes framing.
Secure piping with supports, avoid sharp bends, seal penetrations against drafts and pests, and verify accessibility for inspection.
Installing valves, regulators, and shutoffs
Install valves, regulators, and shutoffs in a logical sequence that prioritizes safety and code compliance: first confirm the gas is off at the supply source.
Then mount the pressure regulator near the meter or tank following manufacturer orientation and clearance requirements.
Install a manual shutoff upstream, pressure test the system, and place accessible appliance shutoffs.
Secure all fittings with approved sealant, and label controls per code.
Connecting the stove: flexible connector vs. hard-piped connection
Choose the appropriate connection method—flexible connector or hard-piped line—based on local code, appliance requirements, and accessibility before proceeding.
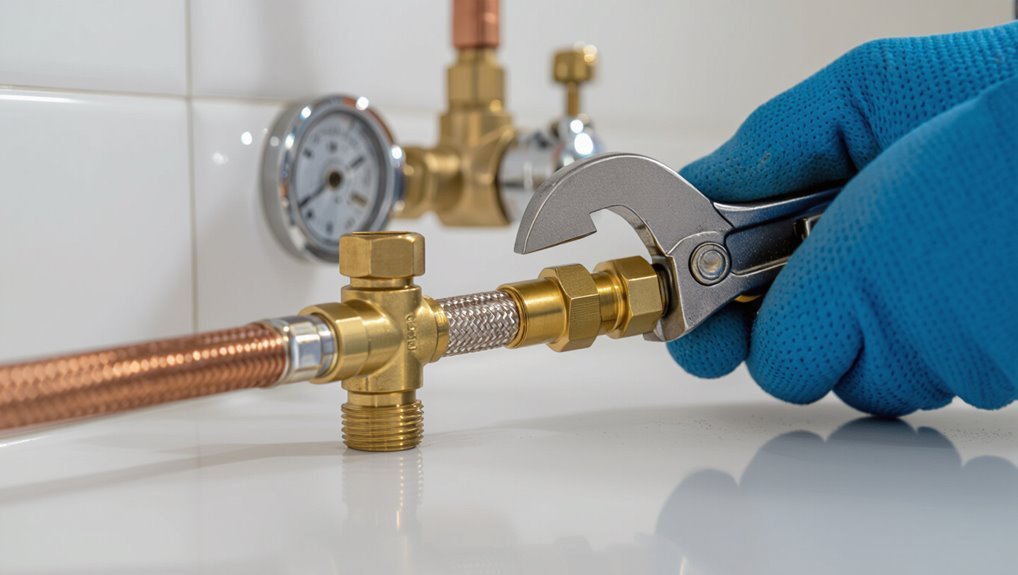
Flexible stainless steel connectors offer vibration isolation and easier servicing but must be short, approved, and routed without kinks.
Hard-piped connections provide permanent, low-profile installations where movement is minimal.
Confirm fittings match thread types and use approved sealants; comply with clearance and support requirements.
Pressure testing and leak testing procedures
Before placing the stove into service, the installer performs a systematic pressure and leak test to verify the integrity of the gas line and all fittings.
The procedure includes isolating downstream appliances, pressurizing the system to prescribed test pressures with dry air or inert gas, monitoring for pressure decay, and applying approved leak-detection solution to joints.
Any leak requires repair and retest until stable.
Final hookup, purge, and initial lighting checklist
With the system confirmed leak-free and pressure-stable, complete the final hookup by connecting the appliance’s regulator and supply line, securing fittings to torque specifications and ensuring the shutoff valve is accessible.
Then perform a controlled purge of air from the line using the manufacturer‑approved procedure and an inert gas or low-pressure propane flow until odorless air is cleared, followed by the initial lighting sequence while observing for correct burner ignition, flame pattern, and any signs of gas odor, unusual noise, or leaks.
Verify appliance pressure, recheck joints with soapy solution, confirm venting, document the procedure, and advise occupant on emergency shutoff and odorant recognition before leaving site.
Testing, Inspection, and Commissioning
The completed gas line must undergo both soap-bubble and electronic leak tests to verify joint integrity and system tightness.
During final inspection, officials check proper sizing, shutoff placement, venting, pressure regulation, and evidence of leak testing.
All test results, diagrams, and permit paperwork should be documented and submitted to obtain official approval before the stove is put into service.
How to perform a soap-bubble and electronic leak test
Begin testing by isolating the appliance and pressurizing the new propane line to the recommended test pressure. Then inspect all joints using both a soap-bubble solution and an electronic gas detector.
Observe bubbles, mark leaks, and verify detector readings. Repair any faults and retest until no bubbles form and detector shows background levels.
- Sweep joints with soap solution
- Scan with electronic detector
- Repair and repeat tests
What inspectors look for during final inspection
Inspectors verify that the installed propane line meets code, manufacturer, and safety standards by evaluating pressure integrity, proper fittings, secure support, correct sizing, and proper termination.
They confirm leak-test results, regulator function, adequate clearances, accessible shutoffs, and correct appliance connections.
They check for proper bonding/grounding, corrosion protection, and adherence to venting and combustion-air requirements before approving system commissioning.
Documenting installation and obtaining approval
Document all testing, inspection, and commissioning steps with clear, dated records that demonstrate compliance with codes, manufacturer instructions, and local permit conditions.
Photographs, pressure test logs, leak check results, appliance serial numbers, and inspector sign-offs should be compiled.
Submit documentation to authorities, address any corrective items promptly, and retain copies for the homeowner.
Final approval confirms safe, code-compliant service activation.
Common Problems and Troubleshooting
The section outlines typical issues encountered after installation, including low or uneven flames and how to correct burner or orifice problems.
It also covers persistent leaks, methods for locating them, and appropriate corrective actions.
Finally, it describes pressure regulator malfunctions, symptoms that indicate replacement is needed, and safe procedures for addressing regulator faults.
Low flame or uneven burners: causes and fixes
Diagnose low flame or uneven burners by checking airflow, gas pressure, and burner condition, since these three factors account for most performance issues.
Inspect burner ports for clogs, clean with compressed air or a soft brush, and realign burners.
Verify regulator pressure and supply line size; adjust or replace faulty regulator.
Guarantee proper venting and orifice size for propane.
Test for consistent flame after each adjustment.
Persistent leaks: diagnosis and corrective actions
After verifying flame quality and regulator function, attention should turn to persistent gas leaks, which pose immediate safety hazards and often stem from fittings, flexible connectors, or damaged tubing.
Technicians should perform soapy-water tests, isolate sections, tighten or replace faulty fittings, swap damaged flex lines, and pressure-test repairs to code.
If the source remains unclear, shut off supply and call a licensed propane professional.
Pressure regulator issues and replacement signs
Inspecting the pressure regulator is critical when stove performance or safety is in question, since regulators govern delivery pressure and their failure can cause low flame, cycling, or gas leakage.
Signs include hissing, inconsistent burner output, difficulty maintaining flame, regulator body corrosion, oil or frost buildup, and audible venting.
Replace regulators showing damage, age, or persistent malfunction; use certified replacements and follow installation torque and leak-test procedures.
Maintenance, Safety Checks, and Seasonal Tips
Routine maintenance emphasizes a scheduled inspection of lines, fittings, and vents, with attention to corrosion, odor, frost buildup, and visible damage.
Outdoor components should be winterized and shielded from freezing, snow, and rodents to prevent disruption and deterioration.
Clear emergency procedures for suspected leaks or appliance malfunctions—shutting off the supply, ventilating the area, and contacting qualified service—are essential.
Regular inspection schedule and what to look for
A clear, consistent inspection schedule—performed at least twice yearly and after any significant weather event or appliance service—helps identify developing issues before they become hazards.
Inspections should document fittings, joints, and visible piping; check for odors, corrosion, dents, or loose connections; and verify regulator and appliance operation. Immediate action is required for leaks or damage.
- Check fittings and joints for tightness and corrosion
- Smell for gas and test with soapy water
- Inspect regulator and visible piping for wear
Winterizing and protecting outdoor components
Because outdoor propane components are exposed to freezing temperatures, moisture, and shifting ground, homeowners should winterize lines and fittings to prevent leaks, blockages, and regulator damage.
Secure buried lines with proper bedding, wrap exposed pipes with heat tape and weatherproof insulation, slope connectors for drainage, protect regulators with ventilated covers, and clear snow/ice promptly.
Schedule pre-winter professional inspections and repair corrosion or loose fittings.
Emergency procedures for suspected leaks or appliance malfunctions
If a propane odor or appliance malfunction is suspected, occupants should act immediately to minimize risk: shut off the appliance and the nearest gas valve if it can be done safely, extinguish open flames, evacuate the building, and avoid operating electrical switches or devices that could spark.
Call emergency services and the propane supplier from a safe location. Do not re-enter until professionals declare it safe, and document the incident.
Cost Estimates and When to Hire a Pro
A concise cost comparison outlines typical materials and permit fees for a DIY propane line versus labor and liability costs charged by professionals.
Clear indicators—complex routing, code requirements, or lack of proper tools—signal when the project exceeds DIY scope and how to locate qualified, licensed contractors.
A short checklist of questions for bids (insurance, references, permit handling, warranty) helps homeowners evaluate estimates and make a safe, cost-effective decision.
Typical cost breakdown for DIY vs. professional installation
Estimating costs for running a propane stove line hinges on scope: a simple indoor hookup using existing lines and basic materials can range from a few hundred dollars for a competent DIYer to $600–$1,200 for a licensed professional, while new outdoor runs, yard trenching, or conversions typically escalate totals to $1,000–$3,000 or more.
| DIY | Pro |
|---|---|
| Materials $50–$300 | Labor $300–$900 |
| Permits $0–$100 | Permits $50–$200 |
Signs a job is beyond DIY and how to find a qualified pro
When project scope, local code requirements, or safety risks push costs above simple DIY estimates, homeowners should consider professional help.
Signs include complex routing through walls/floors, required permits, unfamiliar regulator or tank work, visible corrosion, or persistent leaks.
Seek licensed plumbers or certified gas fitters with insurance, verifiable references, and local code familiarity; prioritize safety inspections and written estimates before hiring.
Questions to ask contractors and checklist for bids
How much should a homeowner expect to pay, and what should be included in every bid?
Estimates should itemize labor, materials, permits, inspection fees, timeline, warranty, and cleanup.
Ask about licensing, insurance, references, and experience with propane lines.
Compare at least three bids and avoid lowest unless documented.
- Licensing, insurance, permit details
- Line materials and labor breakdown
- Warranty, timeline, inspection plan
Accessories, Upgrades, and Energy Efficiency Tips
Selecting a high-efficiency propane stove can reduce fuel consumption and improve cooking performance.
Essential safety accessories—such as excess flow valves and carbon monoxide detectors—should be considered when installing or upgrading a gas line.
Simple operational tips, like proper burner adjustment and routine maintenance, help optimize performance and minimize propane use.
Choosing a high-efficiency propane stove
Why prioritize a high-efficiency propane stove? Homeowners reduce fuel consumption and lower operating costs while maintaining cooking performance.
Select models with sealed burners, precise thermostatic controls, and high AFUE or ENERGY STAR-type ratings when available for propane.
Verify proper BTU matching to household supply, durable materials, and certification by recognized agencies.
Professional installation guarantees optimized efficiency and safe operation.
Adding safety accessories: excess flow valves, carbon monoxide detectors
When adding safety accessories to a propane stove installation, homeowners should prioritize devices that provide active leak protection and early hazard detection.
Install excess flow valves to automatically restrict fuel during sudden line ruptures and situate carbon monoxide detectors near sleeping areas and the kitchen.
Confirm all devices meet local code, are professionally installed or inspected, and receive regular testing and battery replacement.
Tips to optimize stove performance and fuel usage
Optimize stove performance and reduce fuel use by focusing on targeted accessories, routine maintenance, and simple behavioral changes.
Install efficient burners, low-profile grates, and correctly sized cookware.
Keep jets and valves clean, check pressure and regulator function, and adjust flame for blue, steady combustion.
Use lids, match pan size to burner, and preheat minimally to conserve propane and improve cooking consistency.
Resources, Codes, and Further Reading
The article concludes with curated resources linking to applicable model codes and official safety standards for propane installations.
It also lists recommended tools, reputable suppliers, and manufacturer guides needed for compliant installation and maintenance.
Readers are directed to verify local code amendments and consult certified professionals before beginning work.
Links to model codes and official safety standards
Reliable guidance for installing propane gas lines depends on adherence to established model codes and official safety standards that govern design, materials, testing, and inspection.
Relevant authoritative sources include national model codes, industry standards, and government regulations offering mandatory and recommended practices.
Consult official texts and accredited updates:
- NFPA 54 / ANSI Z223.1 (National Fuel Gas Code)
- CSA B149 series (Canada)
- Local building and fire codes
Recommended tools, suppliers, and manufacturer guides
After citing model codes and standards, attention shifts to the practical resources that implement those requirements: the specific tools, reputable suppliers, and manufacturer installation guides that guarantee compliant, safe propane stove installations.
Recommended essentials include torque wrenches, approved gas fittings, and leak detection solutions; source parts from licensed wholesalers; follow appliance manufacturer manuals and NFPA/AGA installation bulletins.
- Torque wrench, pipe cutter, leak detector
- Licensed gas suppliers, HVAC wholesalers
- Manufacturer installation manuals, NFPA/AGA guides
Conclusion
Proper installation and maintenance of a propane stove gas line guarantees safe, efficient cooking and reduces fire risk when done to code. One compelling statistic underscores this: professionally installed propane systems have a leak-related incident rate roughly one-third that of DIY installations, highlighting the value of permits, inspections, and expert oversight. Following the outlined steps, safety checks, and seasonal maintenance guidance helps homeowners enjoy reliable service and peace of mind while minimizing hazards and costly repairs.