How to Run a Gas Line Underground Safely: Step-by-Step Guide for Homeowners
How to Safely Run a Gas Line Underground: A Homeowner’s Guide
To safely run a gas line underground, start by planning your route and obtaining the necessary permits. Always contact 811 to locate existing utilities and ensure compliance with local codes regarding pipe type, depth, and setbacks. Use approved materials like polyethylene (PE) or black steel, along with tracer wire, proper bedding, and warning tape. When excavating, trench with adequate shoring and slope for drainage. Conduct a pressure test before backfilling. For the final hookup and inspection, hire a licensed technician. Keeping thorough documentation and performing routine inspections will help minimize long-term risks. Below, you’ll find a detailed step-by-step guide to assist you in this process.
Overview of Running an Underground Gas Line for Homeowners
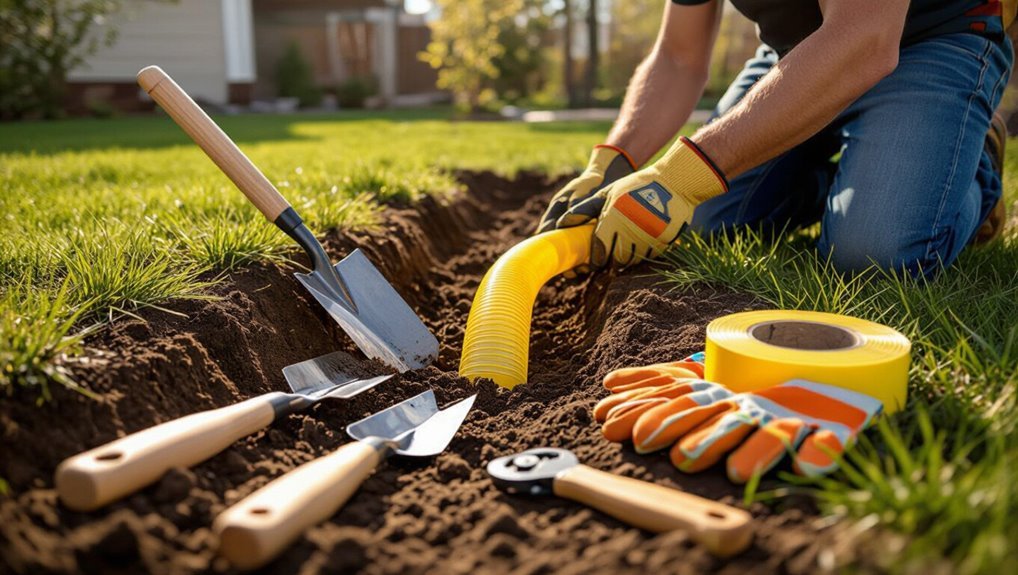
A homeowner undertaking an underground gas line project should understand that it involves trenching, selecting appropriate materials, pressure testing, and coordinating with utility locates and inspections.
Decisions about hiring a licensed professional versus attempting DIY work hinge on the complexity of the run, local code requirements, and the installer’s competence.
Legal obligations and safety considerations—permit acquisition, adherence to codes, and strict gas-handling protocols—take priority throughout the process.
Quick summary of what the project involves
Begin by planning and coordinating with the utility company and local permitting authority to determine the appropriate pipe type, route, depth, and safety clearances.
The project typically involves trenching or directional boring, laying approved polyethylene or coated steel pipe with proper fittings and corrosion protection, installing a gas meter or service connection, pressure testing and purging the line, backfilling with suitable materials and markers, and scheduling final inspection and hookup by a licensed technician.
Homeowners learning how to run a gas line underground should expect site assessment, material selection, safe excavation, testing, and certified inspection before activation.
When to hire a professional vs. DIY considerations
When should a homeowner attempt an underground gas line project and when is professional help required?
Homeowners may handle simple, short runs with basic fittings, clear utility markings, and confidence in plumbing skills.
Hire a licensed pro for complex routing, deep trenches, regulator or meter work, unknown soil conditions, nearby utilities, or any uncertainty.
Professionals guarantee correct materials, pressure testing, and code-compliant installation.
Legal responsibilities and safety priority
Responsibility and safety are inseparable in underground gas line work: homeowners hold legal duties to follow local codes, obtain permits, notify utilities for locates, and guarantee installations meet licensed-inspector standards.
Compliance minimizes liability, mandates proper materials, burial depth, and testing.
Emergency reporting, routine inspections, and retaining certified contractors protect occupants and neighbors while ensuring insurance coverage and regulatory acceptance.
Essential Regulations, Permits, and Codes
Before any excavation begins, the homeowner must identify applicable local ordinances and national codes that govern underground gas piping.
They should follow the prescribed permit application process, noting typical timelines and required documentation.
Authorized inspectors—usually municipal code officers or utility representatives—conduct checkpoints at trenching, pipe installation, and final pressure testing.
Local and national code requirements to check first
Although underground gas work shares common safety goals across jurisdictions, specific requirements vary considerably between local municipalities and national codes.
Homeowners must consult applicable national standards (e.g., NFPA, CSA), state statutes, and municipal ordinances for pipe materials, burial depth, tracer requirements, bonding, and testing.
Utility notification and clearances, excavation safety, and inspection obligations should be identified before planning to guarantee compliance and safety.
Permit application process and typical timelines
After confirming applicable codes and notifying utilities, the next step is securing permits and scheduling inspections, a process that varies by jurisdiction but generally follows a predictable sequence: application submission with plans and fee payment, plan review, permit issuance, and staged inspections during and after installation.
Typical timelines span days to several weeks; complex projects or backlog extend review and approval. Costs and required documentation differ locally.
Inspection checkpoints and who performs them
When installing an underground gas line, jurisdictions require a sequence of inspections at defined checkpoints—typically trenching and bedding, piping and jointing before backfill, pressure testing, and final system commissioning—to verify compliance with code, permit conditions, and safe-work practices.
Inspections are performed by municipal or utility inspectors; licensed gas contractors may request, witness, or conduct certain tests per code. Inspectors document results and approve progression.
Tools, Materials, and Equipment Needed
A concise inventory of required materials and accepted pipe types sets the foundation for a safe underground gas run.
The article then outlines recommended hand and power tools plus essential personal protective equipment.
It concludes by noting when renting specialty gear such as trenchers and compaction equipment is more practical than owning it.
List of required materials and pipe types
Shovels, fittings, and a reliable pressure gauge form the core inventory for installing an underground gas line.
Required materials include approved polyethylene (PE) or black steel pipe, corrosion protection (wraps or conduit), approved compression or flanged fittings, and tracer wire.
Proper joints and testing supplies complete the list.
- PE (MDPE) or black steel pipe
- Compression fittings
- Tracer wire
- Corrosion protection wraps
Recommended tools and safety gear
With materials and pipe types selected, attention turns to the specific tools and safety gear required to install an underground gas line correctly.
Recommended items allow precise work and personal protection, reducing risk during excavation, fitting, and pressure testing.
- Pipe cutters, reamers, and fitting tools
- Adjustable wrenches and torque tools
- Gas leak detector and pressure gauge
- Hard hat, gloves, safety glasses, and respirator
When to rent specialty equipment (trenchers, compaction tools)
When job scope, soil conditions, or local regulations exceed what handheld tools can safely and efficiently handle, renting specialty equipment such as trenchers and compaction tools becomes prudent.
Homeowners should consider trench depth, rock or clay presence, distance, and time constraints. Rent when labor, safety, or permit requirements justify cost.
Choose machines sized for residential use, inspect condition, and get brief operator training.
Preparing the Site Safely
Before any excavation begins, the site should be surveyed to locate existing utilities and a call to 811 placed to confirm buried lines.
The trench route must be clearly marked and measurements taken to verify required depth and clearances are maintained.
Soil type, drainage patterns, and seasonal ground conditions should be assessed to plan for stability and water management.
Locating existing utilities and calling 811
How can a homeowner be sure the proposed route for an underground gas line won’t intersect existing utilities?
The homeowner contacts 811 or the local utility notification center to request a markout. Utilities respond and mark underground lines; wait the required time before digging.
Review utility maps, note marked locations, and document any discrepancies.
Do not excavate until all marks are verified and locates are complete.
Marking the trench path and measuring depth/clearances
Stake out the trench line with visible flags or chalked spray paint, following the locate marks and any site plans. Use a measuring tape and level to confirm the route straightness, slope, and offsets from buildings or other features.
Record required burial depth, maintain minimum clearances from foundations, electrical conduits, and water lines. Mark utility crossings and valve locations clearly for excavators and inspectors.
Soil, drainage, and seasonal considerations
Although soil type and surface water patterns may seem secondary to pipe placement, they determine trench stability, bedding selection, and long-term line protection.
Soil composition, compaction, and frost depth guide pipe bedding and backfill choices. Grade, drainage, and runoff control prevent erosion and pooling.
Seasonal freeze–thaw cycles and wet seasons require deeper burial, added insulation or slope correction to avoid movement and corrosion.
Step-by-Step Guide to Installing an Underground Gas Line
The following section outlines a practical sequence for installing an underground gas line, beginning with route planning and correct pipe sizing.
It covers safe trenching depths and practices, proper bedding, slope and joint techniques for laying pipe, and secure connections to the main supply and appliances.
Finally, it describes protective measures such as conduit, warning tape, and insulation to reduce risks and meet code requirements.
Planning the route and sizing the pipe
When planning the route and sizing the pipe for an underground gas line, one must balance safety, code compliance, and efficiency by choosing a clear, direct path that avoids utilities, obstacles, and future landscaping changes.
At the same time, it’s important to select pipe diameter and pressure ratings that meet demand and regulatory requirements.
Calculate load, account for appliance BTU requirements, friction loss, and fitting equivalents.
Consult utility locates and local codes before finalizing plans.
Excavation: safe trenching practices and depth requirements
Excavation requires meticulous attention to trench location, depth, and safety measures to protect workers, the gas line, and existing underground utilities.
Contractors verify utility markings, use appropriate shoring or sloping for stability, control groundwater, and maintain safe access.
Trench depth follows local code and cover requirements for pipe and frost protection.
Soil is stockpiled clear, and spoil management prevents hazards.
Laying pipe: bedding, slope, and joint methods
Begin by preparing a uniform bedding layer of compacted sand or fine gravel to support the pipe, guarantee consistent slope, and prevent point loads.
Install pipe on that bedding with a continuous fall (typically 1/4″ to 1/2″ per 10 feet) toward vents or meter pits.
Use approved joint methods—mechanical couplings or fusion-welded joints—follow manufacturer specifications and inspect each connection for alignment and integrity.
Connections to appliances and the main supply
Connect the underground main to the meter and individual appliances using properly sized fittings, shutoff valves, and approved connection assemblies to guarantee a secure, code-compliant system.
Verify thread types, pipe materials, and torque specifications.
Install accessible manual shutoffs for each appliance.
Pressure test connections per local code, purge lines safely, and label service points.
Record as-built locations and inspection results for authorities.
Installing protective measures: conduit, warning tape, and insulation
Several protective layers are essential to prevent mechanical damage and aid future location of an underground gas line: rigid conduit where required by code, a continuous warning tape above the pipe, and appropriate thermal or frost insulation in cold climates.
Install conduit for exposed sections, secure tape directly above the pipe centerline, and apply insulation or heat tracing per local requirements to prevent freezing and physical harm.
Backfilling and compaction best practices
After all fittings, leak tests, and protective layers are verified, the trench is ready for systematic backfilling and compaction to restore ground stability and protect the gas line.
Backfill in uniform lifts, using specified native material or clean fill free of large rocks. Compact each lift to required density with appropriate equipment, avoid direct impact on the pipe, maintain marker tape position, and document compaction results.
Final hookup, testing for leaks, and purging procedures
Perform final hookups, then systematically verify integrity and purge air from the line before placing the gas into service.
Qualified personnel tighten fittings to specified torque, install approved test caps, and pressurize the system with inert gas.
Inspect with soap solution or electronic detectors for leaks.
Slowly bleed trapped air via purge manifold until odorant is present at downstream test point, then energize service.
Safety Checks and Testing Procedures
The section covers required pressure testing protocols with their acceptable thresholds to confirm line integrity before commissioning.
It also outlines common leak detection methods and the equipment used to identify and locate faults.
A concise post-installation inspection checklist is provided to verify fittings, bedding, labeling, and regulatory compliance.
Pressure testing protocols and acceptable thresholds
When verifying the integrity of an underground gas line, technicians must follow standardized pressure testing protocols that specify test media, hold times, leak criteria, and documentation requirements.
Tests use inert gas or air at prescribed pressures, maintained for required durations. Acceptable pressure loss thresholds are minimal and code-defined; any exceedance mandates repair and retest.
Detailed records and certification complete the protocol.
Leak detection methods and equipment
Inspectors employ a combination of electronic sensors, combustible gas detectors, and soap-bubble or tracer methods to locate leaks and confirm system integrity.
Ultrasonic detectors identify high-pressure escape noise; flame ionization and catalytic bead sensors measure concentration. Portable gas analyzers, calibrated to methane or propane, verify readings.
Heated-wire and infrared instruments assist in buried-line diagnostics. Equipment calibration, documented procedures, and trained operators guarantee reliable detection.
Post-installation inspection checklist
Although visual and electronic checks begin at the trench, a systematic post-installation inspection checklist guarantees every safety and testing procedure is completed and documented before the line is placed back into service.
Inspect joints, fittings, and corrosion protection; verify proper depth and backfill compaction; confirm pressure test results and regulator settings; validate labeling and as-built drawings; record photos, signatures, and compliance with codes before re-energizing.
Common Problems, Risks, and How to Avoid Them
Common problems with underground gas lines often stem from DIY installation errors such as improper jointing, inadequate bedding, or failure to follow code.
Corrosion, soil movement, and root intrusion each threaten line integrity and require appropriate materials, protective coatings, and correct backfill to mitigate.
Seasonal weather changes and freeze–thaw cycles also affect stress and settlement, so inspection and maintenance schedules should account for local climate patterns.
Typical mistakes made by DIY installers
DIY installers often underestimate the planning and code complexity involved in running a buried gas line, which leads to recurring errors such as improper pipe selection, incorrect trench depth, inadequate bedding and backfill, poor jointing techniques, and failure to obtain permits or locate existing utilities.
Common mistakes include:
- Using incorrect materials or fittings
- Skipping permit and inspection steps
- Poor joint preparation or testing
- Improper trench compaction and marking
Corrosion, shifting soil, and root intrusion mitigation
Because buried gas lines are exposed to chemical, mechanical, and biological threats over time, mitigating corrosion, shifting soil, and root intrusion is essential to long-term safety and reliability.
Use corrosion-resistant pipe or coatings, apply cathodic protection where appropriate, bed pipe in stable granular material, maintain proper burial depth and flexible joints, and keep vegetation and deep-rooted trees well away from the trench line.
How weather and seasonal changes can affect the line
When temperatures fluctuate and precipitation varies by season, buried gas lines face shifting stresses that can cause ground heave, frost heave, soil erosion, and waterlogging. Each of these factors increases the risk of joint strain, displacement, and accelerated corrosion.
Understanding these weather-driven mechanisms is essential to selecting appropriate materials, burial depths, and drainage measures that minimize failure points and maintain system integrity.
Regular inspections, proper bedding, corrosion-resistant coatings, and graded drainage prevent damage.
Maintenance, Monitoring, and Long-Term Care
A clear maintenance plan sets routine inspection intervals and specifies what to check on trenches, fittings, and corrosion-prone areas.
The text outlines common leak indicators—odor, hissing, dead vegetation—and immediate steps to evacuate, shut off gas, and contact emergency services.
Guidance also defines when sealing, replacement, or professional diagnostics are required versus simple homeowner actions.
Routine inspection schedule and what to look for
Regular inspections should be scheduled and documented to detect deterioration, leaks, or shifting before they become hazards.
Inspections occur quarterly for visual checks and annually for detailed assessments by a qualified technician.
Look for soil subsidence, exposed fittings, corrosion at accessible joints, vegetation disturbance, and changes in surface grading.
Record findings, corrective actions, and dates for ongoing tracking and regulatory compliance.
Signs of a gas leak and emergency response steps
Many indicators can signal an underground gas leak and prompt immediate action: a distinct rotten-egg odor, hissing sounds near valve boxes or meter enclosures, dead or dying vegetation above the line, visible soil discoloration or bubbling, and unaccountable increases in gas meter readings.
If suspected, evacuate occupants, avoid ignition sources, shut off appliance valves if safe, notify the gas utility and emergency services, and keep clear until professionals declare it safe.
When to call a professional for repairs or upgrades
After recognizing signs of a leak and taking immediate safety steps, homeowners should understand which situations require professional repair or upgrades to an underground gas line.
Professionals should be called for detected leaks, corrosion, shifting soil or root intrusion, repeated service interruptions, aging or non-code materials, property remodeling affecting line routing, or after excavation near the line.
Permit-required upgrades always need licensed contractors.
Cost Estimates, Timeframes, and Decision Factors
Typical cost breakdowns list materials, permits, and labor as the primary line items that determine overall expense.
Timeframes vary widely, with DIY projects often taking several days to a week while professional installations are usually completed in a day or two plus permit processing time.
Project complexity—such as long runs, rocky soil, utility crossings, or local code requirements—can greatly increase both cost and duration.
Typical cost breakdown for materials, permits, and labor
A clear cost breakdown for an underground gas line project separates expenses into three categories: materials (pipe, fittings, valves, trenching/backfill supplies), permits and inspections, and labor (excavation, welding/connection, testing, and restoration). Typical ranges: materials $200–$1,200; permits $50–$500; labor $500–$3,000. Choices affect total cost and compliance.
| Item | Typical Range |
|---|---|
| Materials | $200–$1,200 |
| Permits/Inspections | $50–$500 |
| Labor | $500–$3,000 |
| Contingency | 10–20% |
Time required for DIY vs. professional installation
How long it will take to install an underground gas line depends largely on whether a homeowner tackles the job or hires a licensed professional.
DIY projects often require several weekends for trenching, pipe laying, and inspections, plus scheduling delays.
Professionals typically complete work in a day or two, backed by crew efficiency and permit handling.
Decision factors include skill, available time, and risk tolerance.
Factors that increase complexity and cost
Several factors drive up the complexity and cost of installing an underground gas line, including trench depth and length, soil conditions, local permitting and inspection requirements, the need to relocate utilities, and whether rigid or flexible materials and specialized fittings are required.
Additional drivers include restoration of landscaping and hardscaping, distance from source, required safety setbacks, skilled labor rates, and material availability affecting project time and budget.
Alternatives and Upgrades to Consider
The article compares trenching and directional boring by outlining typical costs, surface disruption, and suitability for different soil and obstacle conditions.
It also considers material upgrades such as polyethylene piping or coated steel for durability and corrosion resistance.
Finally, attention is given to coordinating installation choices with planned landscaping or future construction to minimize rework.
Trenching vs. directional boring comparison
When installing an underground gas line, homeowners and contractors must weigh trenching against directional boring to choose the method that best matches site conditions, budget, and disruption tolerance. Trenching is cheaper and simpler but more disruptive; boring preserves landscaping, costs more, and suits obstacles. Choose based on access, soil, and permits.
| Trenching | Directional Boring |
|---|---|
| Cost-effective | Higher cost |
| Simple equipment | Specialized equipment |
| More surface damage | Minimal surface impact |
| Faster for short runs | Better for long/obstructed runs |
| Easier DIY limits | Usually requires professionals |
Upgrading to polyethylene or coated steel options
Consider upgrading to polyethylene (PE) or coated steel gas lines to improve corrosion resistance, flexibility, and longevity compared with unprotected metal pipe.
PE offers chemical resistance, ease of fusion joining, and reduced leak risk.
Coated steel combines strength with external corrosion protection for higher-pressure runs.
Both require approved fittings, proper bedding, tracer wire, and adherence to local codes and inspector acceptance.
Integrating with future landscaping or construction plans
Upgrading to polyethylene or coated steel should be planned with future landscaping and construction in mind so lines are not repositioned or damaged by later work.
Homeowners should map utilities, set sufficient setback and burial depth, and mark corridors for irrigation, decks, or additions.
Consider conduit sleeves for future rerouting, coordinate with contractors, and document locations to prevent accidental disruption during subsequent projects.
Practical Tips and Best Practices for Homeowners
Before beginning any excavation, a concise checklist should be completed to verify permits, utility locates, materials, and safety gear.
Careful planning must also address the presence of children, pets, and neighbors by establishing clear barriers, supervision, and communication.
After work is finished, owners should retain permits, inspection reports, and as-built documentation for future reference and resale.
Checklist to follow before starting work
Although underground gas work may seem straightforward, a clear, itemized checklist guarantees safety, compliance, and efficiency; it should include verifying local codes and permits, confirming utility locates, reviewing site-specific soil and drainage conditions, selecting approved materials and fittings, arranging skilled inspections, and preparing emergency shutoff procedures.
- Verify permits and code requirements
- Obtain utility locates
- Inspect soil, drainage, and easements
- Schedule qualified inspections and emergency plan
Working safely around children, pets, and neighbors
When work begins, homeowners should establish clear boundaries and routines to keep children, pets, and neighbors safely away from the site.
Post visible signage, use temporary fencing, and assign an adult lookout during active excavation.
Communicate schedules with neighbors, restrict play and pet access, secure tools and materials, and promptly remove trip hazards.
Enforce rules consistently until work and initial testing are complete.
Documentation to keep after completion (permits, inspection reports)
Documentation provides the legal and practical record needed after underground gas-line work is finished.
Homeowners should retain permits, inspector reports, contractor invoices, as-built drawings, and photos. Store originals and digital copies in a safe, accessible place.
These documents prove compliance, simplify future repairs or property transfers, and support warranty or insurance claims.
Periodically review and update records if modifications occur.
Conclusion
Installing an underground gas line demands careful planning, adherence to codes, and professional oversight to protect property and lives. Like a well-charted river, the project channels energy safely beneath the surface, requiring clear permits, proper materials, and routine inspection to prevent unseen danger. Homeowners should weigh costs, alternatives, and maintenance commitments, and when doubt arises, rely on licensed contractors to guarantee the work meets regulations and endures responsibly.