How to Detect Water Leaks in Underground Pipes: Proven Methods, Tools, and Cost Guide
To detect water leaks in underground pipes, look for surface indicators like wet spots, sinkholes, or unusually lush areas. Unexplained spikes in your water bill, continuous flow on the meter, and low water pressure are also key signs. Start with basic checks, such as meter isolation and visual inspections, before employing advanced techniques like acoustic listening, thermal imaging, or ground-penetrating radar (GPR). Costs for detection methods range from affordable DIY kits to professional services, typically between $300 and $1,500, with repairs varying from simple fixes to trenchless relining. For detailed step-by-step methods, tools, and cost insights, continue reading.
How to Tell if an Underground Pipe Is Leaking
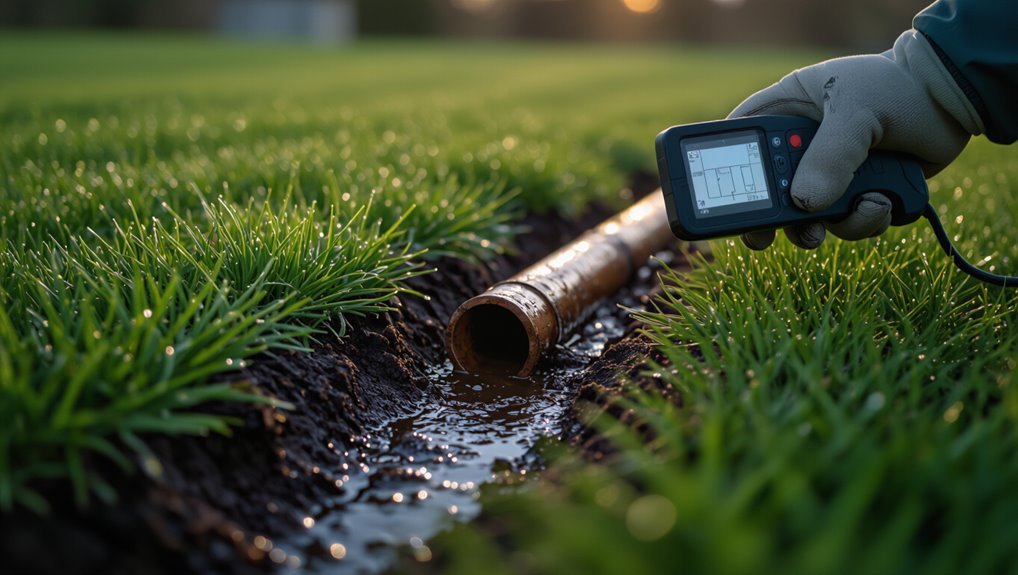
Visible surface clues such as wet spots, sinkholes, or unusually lush patches can signal an underground leak.
Changes in water pressure, unexpected spikes in the water bill, and sensory signs like odors, tastes, or discoloration provide additional evidence.
Differentiating municipal from private supply leaks often depends on meter readings, neighborhood patterns, and the location of the affected infrastructure.
Common signs above ground (wet spots, sinkholes, lush patches)
A patch of unusually green grass or a damp depression in otherwise dry soil can signal a leak in an underground pipe.
Observers should note persistent wet spots, sudden sinkholes, soggy depressions, or unusually lush patches over time.
Such visible clues assist homeowners and technicians in how to detect water leaks in underground pipes, directing targeted inspection and reducing unnecessary excavation.
Water bill and pressure clues
Beyond surface signs like soggy depressions or unusually green patches, changes in water usage and pressure provide clear indicators of an underground leak.
Sudden unexplained spikes in the water bill, continuous meter flow with all fixtures off, or persistent low pressure suggest hidden loss.
Monitoring usage trends, conducting a meter test, and noting pressure drops during off-peak hours help confirm subterranean leaks.
Smell, taste, and discoloration indicators
Odors, tastes, and water color changes can offer early, practical clues to an underground leak.
Foul or metallic odors suggest contamination pathways; chlorine loss or earthy taste indicates soil interaction.
Rusty, brown, or cloudy water points to pipe corrosion or sediment ingress.
Intermittent discoloration after repairs or heavy use strengthens suspicion.
Record occurrences, sample safely, and consult a professional for testing and source tracing.
When to suspect municipal vs. private supply leaks
Noting smell, taste, or discoloration patterns can help narrow where contamination or intrusion is occurring, but distinguishing whether the leak originates on the municipal side or a private service line requires different clues and actions.
Municipal leaks often affect multiple nearby properties, show street-level wetness, and correlate with utility reports.
Private leaks present localized pressure loss, isolated discoloration, meter-side wet spots, and require homeowner inspection or plumber intervention.
Basic Principles of Underground Leak Detection
Leaks migrate through soil and into groundwater along paths of least resistance, creating pressure and moisture anomalies detectable at the surface or via borehole sensors.
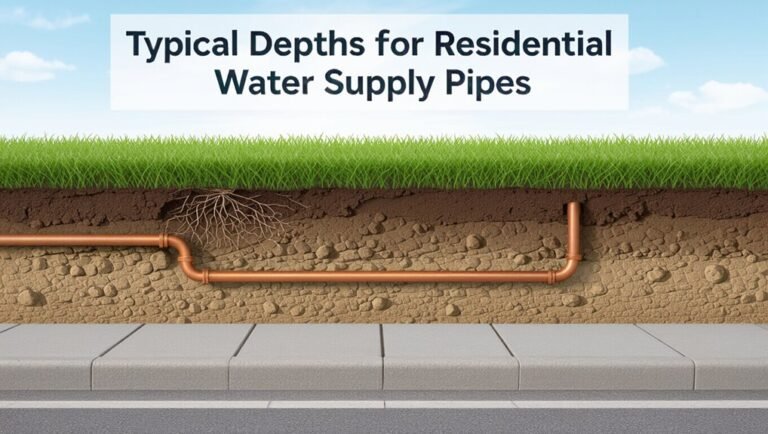
Detectability depends on pipe material, burial depth, soil type and saturation, and ambient noise that can mask acoustic signals.
Before inspection, safety protocols and regulatory permits must be confirmed to protect personnel and comply with local requirements.
How leaks behave in soil and groundwater
When a pressurized pipe develops a breach, water exits into surrounding soil and follows paths dictated by gravity, soil permeability, and existing moisture gradients.
Fine-grained soils tend to hold water near the source while coarse, permeable soils transmit it rapidly.
Leaked water raises local saturation, migrates downward to groundwater, forms preferential flow channels, and can create surface expression or subsidence depending on volume and hydraulic gradients.
Factors affecting detectability (pipe material, depth, soil type, ambient noise)
Because detectability depends on interactions between the pipe, the surrounding medium, and ambient conditions, assessments must consider pipe material and diameter, burial depth, soil texture and moisture, and background noise sources.
Metallic pipes transmit acoustic signals differently than plastic; shallow pipes are easier to detect.
Dry, coarse soils attenuate signals more than moist, fine soils.
Traffic, machinery, and wind mask leak sounds and reduce detection range.
Safety and regulatory considerations before inspection
Before any inspection begins, a formal safety and regulatory check must be completed to protect personnel, the public, and the environment.
Inspectors confirm permits, utility locates, confined-space protocols, PPE requirements, traffic control, and environmental safeguards.
Compliance with local codes, notification of stakeholders, and documentation of risk assessments and emergency procedures is mandatory.
Noncompliance halts work until corrective measures and approvals are obtained.
Visual and Low-Tech Detection Methods
The section outlines practical, low-technology approaches for locating underground leaks, beginning with a surface and landscape inspection checklist to identify visible signs such as wet spots, sinkholes, or unusually lush vegetation.
It then covers simple diagnostic techniques—dye testing and tracer methods, meter isolation with baseline consumption testing—to confirm and narrow suspected leak locations.
Finally, basic acoustic approaches, including listening with simple devices and stethoscopes, are presented as inexpensive tools for localizing flow noise.
Surface and landscape inspection checklist
A systematic surface and landscape inspection begins with a walked perimeter survey to identify visual cues of underground leaks—saturated or unusually lush vegetation, depressions or sinkholes, unexpected wet patches, and persistent muddy areas.
This is followed by targeted checks of joints, valves, and meter boxes for corrosion or seepage. Inspectors then record findings and prioritize repairs using checklist items:
- Vegetation and soil anomalies
- Surface pooling and erosion
- Hardware corrosion and dampness
Dye testing and tracer methods
Employs simple, observable markers to trace flow paths. Dye testing and tracer methods provide low-tech, cost-effective ways to confirm leaks and connections in underground piping systems.
Colored dyes, fluorescent tracers, or non-toxic food-grade additives are introduced into suspected lines or upstream manholes. Observers watch downstream drains, vents, and sinkholes for emergence, timing appearance to estimate flow paths and approximate leak locations.
Meter isolation and baseline consumption testing
Meter isolation and baseline consumption testing offer straightforward, low-tech ways to pinpoint underground leaks by comparing expected and actual water use.
Technicians shut off all fixtures, record meter readings over a set period, then isolate meter zones to locate anomalies. Sudden continuous flow or unexplained baseline consumption indicates leaks.
Results guide targeted excavation or advanced detection, reducing time and cost.
Listening with simple acoustic devices and stethoscopes
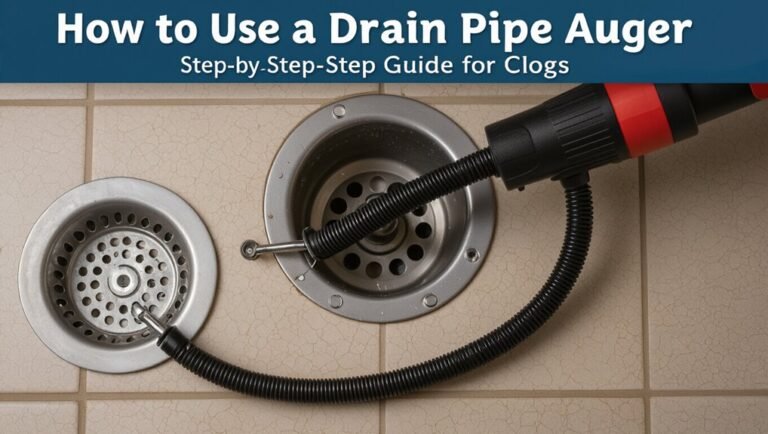
When technicians listen along pipe runs with simple acoustic devices or stethoscopes, subtle sounds—continuous hissing, rhythmic dripping, or low-frequency vibration—reveal the presence and approximate location of underground leaks.
Practitioners tap fittings, compare tones at intervals, and isolate sections to narrow the source. This low-cost method requires quiet conditions, steady technique, and experience to distinguish leak noise from ambient or mechanical interference.
Electronic and Instrument-Based Detection Techniques
Electronic and instrument-based methods use sensitive listening and electromagnetic tools to locate and characterize leaks with greater precision than visual approaches.
Acoustic correlators, pipe listening devices, ground microphones, and amplified listening equipment capture and analyze leak noise, while electronic correlators compare signals across multiple sensors. Single-channel detectors monitor individual points.
Complementary techniques such as electromagnetic and eddy current testing assess pipe wall integrity to identify corrosion, cracks, or thinning that may indicate or precede leakage.
Acoustic correlators and pipe listening devices how they work
Acoustic correlators and pipe listening devices detect and analyze the sound signatures of escaping water to pinpoint leaks without excavation.
Correlators compare timing and phase differences between sensors placed along a pipe to calculate distance to a leak.
Portable listening tools amplify and filter vibrations on valves or fittings for operator interpretation.
Both require technician calibration, knowledge of pipe material, flow conditions, and signal isolation for accurate results.
Ground microphone detection and amplified listening equipment
Many utilities rely on ground microphones and amplified listening gear to translate faint pipe vibrations into audible signals that indicate leak location.
Operators place contact sensors on valves, fire hydrants, or pavement, then amplify and filter noise to distinguish leaks from traffic.
Portable units offer directional cues and sensitivity adjustment.
Effective deployment requires quiet conditions, trained listeners, and systematic listening grids to pinpoint defects.
Electronic leak noise correlators vs. single-channel detectors
While amplified listening tools locate and characterize leak sounds at single points, correlators and single-channel detectors offer different approaches to converting those sounds into precise pipe locations. Correlators use time-delay analysis between sensors for accurate pinpointing over distances; single-channel units rely on operator movement and signal strength, suited for accessible sections and quick scans.
| Correlator | Single-channel |
|---|---|
| Time-delay analysis | Signal strength |
| High accuracy | Fast scans |
| Multiple sensors | Portable |
| Best for long runs | Best for short runs |
| Requires setup | Minimal setup |
Pipe wall integrity testing (electromagnetic/eddy current methods)
Inspecting pipe wall integrity with electromagnetic and eddy current methods evaluates metal condition and detects defects without excavation.
Technicians scan coatings and joints to identify corrosion, pitting, cracks, and wall-thickness loss. Portable and inline instruments generate localized eddy currents; anomalies alter signals and map defects.
Useful for ferrous pipes, these methods reduce surprise failures, inform targeted repairs, and complement acoustic and tracer techniques.
Advanced Detection Technologies
Advanced detection technologies expand the toolkit for locating underground leaks with higher precision and coverage.
Methods include thermal imaging and infrared surveys, ground-penetrating radar for mapping buried pipes, tracer gas techniques with helium or hydrogen and sniffers, plus satellite and aerial remote sensing.
Integrating smart meter analytics with networks of acoustic sensors enables continuous monitoring and rapid anomaly detection.
Thermal imaging and infrared surveys
Thermal imaging and infrared surveys detect temperature differences on surfaces above buried pipes to infer subsurface moisture anomalies indicative of leaks.
Trained technicians scan pavements, lawns, and structures during ideal thermal contrast periods, using handheld or drone-mounted cameras.
Results highlight cooler, wetter zones for targeted excavation or further testing.
Limitations include depth sensitivity, surface insulation, and seasonal constraints requiring complementary methods.
Ground-penetrating radar (GPR) for locating buried pipes
When subsurface conditions permit, ground-penetrating radar (GPR) provides a noninvasive method for mapping buried pipes by transmitting high-frequency electromagnetic pulses into the ground and recording reflections from material interfaces.
GPR identifies pipe depth, orientation, and voids where leaks may accumulate, with effectiveness influenced by soil conductivity, moisture, and pipe materials.
Skilled operators interpret radargrams and integrate GPS for accurate, rapid localization.
Tracer gas methods (helium, hydrogen) and sniffers
Although sensitive to site conditions, tracer gas techniques use small, nonreactive gases—most commonly helium or hydrogen—to pinpoint leaks by releasing gas into a pipeline or manhole and detecting its escape at the surface with specialized sniffers.
Technicians monitor concentration gradients, triangulate leak locations, and assess leak severity.
Advantages include high sensitivity and minimal excavation; limitations involve soil permeability, background interference, and safety protocols for hydrogen handling.
Satellite and aerial remote sensing applications
Employing satellite and aerial remote sensing, utilities and investigators detect and monitor underground water leaks by observing surface and near-surface signatures—such as thermal anomalies, moisture patterns, vegetation stress, and ground deformation—using instruments on drones, aircraft, and satellites.
Multispectral, thermal, LiDAR, and interferometric SAR data enable leak localization, prioritization, and monitoring over large areas, supplementing ground verification and reducing survey time and costs.
Smart meter data analytics and acoustic sensor networks
Beyond broad-area remote sensing, localized, data-driven systems provide complementary precision for detecting leaks close to the distribution network.
Smart meter analytics identify anomalous consumption patterns and night flow spikes, flagging probable leaks.
Acoustic sensor networks triangulate leak sounds, offering real-time alerts and location estimates.
Integrated platforms fuse meter and acoustic data, reducing false positives and prioritizing targeted excavation for cost-effective repair.
Step-by-Step Procedure for Locating an Underground Leak
The procedure begins with a site preparation and safety checklist to secure personnel and equipment.
The team then isolates the suspect zone using meters and valves before conducting sequential tests—pressure testing, acoustic scanning, and tracer or thermal methods.
Once a potential leak is identified it is marked and verified to confirm the exact location prior to excavation.
Preparing the site and safety checklist
Begin by securing the work area and confirming that all necessary permits, utility clearances, and personal protective equipment are in place before any excavation or testing begins.
Inspect site access, traffic control, and overhead hazards. Verify gas, electrical and communication locates.
Assemble shoring, barricades, first-aid kit, and spill containment.
Brief personnel on roles, emergency procedures, and communication protocols prior to work commencement.
Isolating the suspect zone with meter and valves
With the site secured and crews briefed, attention shifts to isolating the suspect zone using meters and valves.
Technicians record baseline meter readings, then systematically close sectional valves to segment the network. Each closure is confirmed by meter response and pressure stabilization.
Isolated segments are tagged and documented. Communication maintains valve sequence and prevents accidental service interruptions while preparing for diagnostic testing.
Sequential testing: pressure test, acoustic scan, tracer/thermal
Proceeding methodically, technicians carry out sequential diagnostic tests—pressure testing, acoustic scanning, and tracer/thermal detection—to confirm and pinpoint leaks within the isolated segment.
Pressure tests reveal loss rates and approximate location; acoustic scans localize turbulence with correlators and ground microphones; tracer gas or thermal injectants verify leak paths and surface expressions.
Results narrow search areas for targeted excavation and repair planning.
Marking and verifying the leak location before excavation
Technicians transfer acoustic and tracer findings onto the surface using permanent, weather-resistant markers and spray paint, creating a clear excavation plan that integrates utility maps and safety setbacks.
They verify location with correlating measurements, ground-penetrating radar or potholing, and test digs at safe offsets. Confirmed coordinates are documented, photographed, and communicated to crews; permits and traffic controls are finalized before excavation begins.
Tools and Equipment List with Use Cases
The section outlines essential tools for homeowners and basic technicians, such as acoustic listening devices, pressure gauges, and pipe locators, and explains their typical use cases.
It contrasts professional-grade equipment—thermal cameras, correlators, and advanced tracer systems—and clarifies scenarios in which hiring a licensed leak-detection specialist is advisable.
It also summarizes factors for renting versus buying, with expected cost ranges and considerations like frequency of use, maintenance, and training.
Essential tools for homeowners and basic pros
When identifying underground water leaks, homeowners and entry-level professionals benefit from a compact set of tools that balance affordability with effectiveness. This core kit typically includes a soil probe or metal rod for locating wet zones, a handheld acoustic listening device for detecting pipe sounds, a quality digital pressure gauge to spot drops, and a basic camera or borescope for internal inspection.
- Soil probe — pinpoint damp areas.
- Listening device — localize leak noise.
- Pressure gauge — confirm system loss.
Professional-grade equipment and when to hire a pro
Moving beyond the compact kit favored by homeowners, professionals rely on higher-precision instruments and specialized services for complex underground leak detection.
Recommended professional gear and use cases include:
- Acoustic correlators — pinpoint leaks on pressurized mains in noisy environments.
- Ground-penetrating radar — map pipe location and voids before excavation.
- Thermal imaging and tracer gas systems — confirm leak paths and detect small seepage.
Rental vs. purchase decision factors and expected costs
Deciding whether to rent or buy leak-detection equipment hinges on project frequency, budget, and technical requirements. Occasional users benefit from rentals; frequent users justify purchases. Consider training, maintenance, and resale value. Expect rental rates from $50–$200/day; purchase costs vary: $300–$10,000+ depending on device sophistication.
| Option | Typical cost |
|---|---|
| Rental | $50–$200/day |
| Purchase | $300–$10,000+ |
Cost Guide and Time Estimates
Typical price ranges for leak detection span from low-cost DIY kits and simple acoustic devices to several hundred or thousands of dollars for professional electronic and geophysical methods.
Costs and time estimates depend on factors such as pipe depth, access difficulty, material, and terrain, which can increase diagnostic and excavation expenses.
The expected timeline from initial detection to completed repair varies widely based on findings and permitting or excavation needs, so stakeholders should budget for both immediate testing and possible extended repair work.
Typical price ranges for common detection methods (DIY to professional)
When evaluating underground pipe leak detection, cost and time vary widely by method and site conditions; simple DIY leak tracing with dye or pressure gauges can cost under $50–$200 and be completed in hours, while professional acoustic, thermal imaging, or tracer gas services typically range from $300 to $1,500 for a single-location survey and may require a few hours to a full day depending on access and complexity.
| Method | Typical Price |
|---|---|
| Dye/pressure | $0–$200 |
| Electronic listening | $300–$900 |
| Thermal imaging | $350–$1,000 |
| Tracer gas | $500–$1,500 |
Factors that influence cost: depth, access, pipe type, terrain
Several key factors—depth of the pipe, site access, pipe material and diameter, and surrounding terrain—directly shape both the cost and time required for underground leak detection.
Deeper pipes and poor access raise labor and equipment needs. Fragile or mixed materials require cautious techniques.
Rocky, root-filled, or paved sites increase difficulty and specialized tools, driving higher inspection and localization fees.
Timeframe from detection to repair and excavation considerations
A clear timeline from leak detection to permanent repair depends on inspection thoroughness, permitting, and site conditions: quick fixes (e.g., clamp or epoxy) can be completed within hours, while full excavations and pipe replacement commonly span one to several days once materials and crews are mobilized.
Emergency repairs compress scheduling; complex sites require soil testing, shoring, traffic control, and utility locates, extending duration and cost.
Repair Options After Detection
After a leak is located, repair choices range from non‑invasive pipe lining and sealing to targeted spot repairs or full pipe replacement.
The decision between trenchless methods and excavation depends on pipe condition, access, and cost considerations.
Each option has distinct expected costs and service lifespans that influence long‑term asset management.
Non-invasive fixes: pipe lining and sealing techniques
Pipe lining and sealing techniques offer minimally disruptive alternatives to full pipe replacement by restoring the interior surface and sealing leaks without extensive excavation.
Cured-in-place pipe (CIPP), epoxy coating, and inflatable packer-applied sealants address cracks, corrosion, and joint leaks.
These methods suit continuous runs and access-limited sites, reducing surface restoration costs and service interruptions while extending pipe life; suitability depends on pipe material, diameter, and damage extent.
Spot repairs and pipe replacement options
Choose targeted interventions when localized damage or access constraints make full relining impractical.
Small sections can be excavated for patching, sleeve inserts, or spot replacement of fittings and joints.
For severely degraded segments, short-run replacement using minimally invasive digs restores integrity.
Selection depends on pipe material, soil conditions, traffic disruption, and budget; prioritize durable connections and corrosion-resistant materials to prevent recurrence.
When full excavation is required and trenchless alternatives
In cases where damage is extensive, access is limited, or soil and structural conditions rule out trenchless methods, full excavation becomes the necessary course of action.
Full excavation allows direct replacement, thorough inspection, and proper bedding and backfill to restore integrity.
Trenchless alternatives—like pipe bursting or cured-in-place lining—remain preferable when feasible, but limitations in alignment, diameter, or surrounding utilities may mandate open-cut repair.
Expected costs and lifespan of repair methods
Although repair costs vary with method, material, and site conditions, homeowners and managers can expect a broad range of outlays tied to the chosen technique and project complexity. Typical options include spot repairs, pipe relining, and full replacement; expected lifespans and cost brackets differ. Consider durability, warranties, and access for budgeting.
| Method | Typical Cost | Lifespan |
|---|---|---|
| Spot repair | $200–$2,000 | 5–15 years |
| Relining | $1,000–$10,000 | 20–50 years |
| Full replace | $3,000–$25,000+ | 40–100 years |
Common Mistakes and How to Avoid False Positives
Common errors that lead to false positives include misinterpreting background noise or natural water features, relying solely on one detection technique, and mishandling excavation or site preparation.
Practitioners should cross-check acoustic and tracer data, verify signals against environmental baselines, and follow proper excavation protocols.
Addressing these points reduces unnecessary repairs and improves diagnostic accuracy.
Misinterpreting background noise and natural water features
How can technicians distinguish a true leak signal from ambient sounds and natural water features?
Technicians should catalog site-specific noises—traffic, wind, wildlife, groundwater flow—and compare frequency, rhythm, and persistence.
Use spectrum analysis, controlled isolation tests, and time-of-day measurements.
Correlate acoustic findings with visual signs, moisture mapping, and historical data to reduce false positives and prioritize likely leak locations.
Overreliance on a single detection method
Distinguishing leak signals from ambient noise is only one part of reliable detection; relying on a single technique creates a different set of risks.
Practitioners may accept false positives or miss subtle leaks when using only acoustic, thermal, or tracer methods.
Combining complementary technologies, corroborating findings, and validating with targeted inspections reduces misidentification and improves confidence while minimizing unnecessary interventions and costs.
Pitfalls during excavation and site preparation
Excavation and site preparation introduce their own set of risks that can produce false positives if crews are not careful: disturbed soil can mimic leak signatures, temporary water accumulation from dewatering or recent rain can be mistaken for seepage, and mechanical damage to adjacent utilities may create secondary leaks.
Crews should document baseline conditions, schedule work around weather, use controls to isolate sources, and verify findings with noninvasive tests.
Choosing a Professional Leak Detection Service
When selecting a professional leak detection service, homeowners should verify credentials and certifications and prepare targeted questions for prospective contractors.
Comparing detailed quotes, evaluating warranty terms, and checking references helps guarantee value and accountability.
Brief case examples illustrating successful detections and repairs can clarify realistic expectations and outcomes.
Credentials, certifications, and questions to ask contractors
Why choose a certified technician for underground leak detection? Certification signals training, standardized methods, and liability coverage.
Ask contractors about credentials, experience, and equipment. Verify licenses, insurance, and references before hiring.
- Certifications (ASNT, NDT, or industry-specific)
- Proof of insurance and state licensing
- Specific methods, recent job references, and warranty scope
How to evaluate quotes and warranty offerings
Compare quotes and warranty terms carefully to guarantee like-for-like services and predictable costs.
Review scope, exclusions, labor rates, material charges, and mobilization fees.
Request itemized estimates and confirmation of diagnostic, repair, and restoration responsibilities.
Compare warranty length, coverage limits, transferability, and claims process.
Favor providers offering written guarantees, clear repair timelines, and documented remedies for post-repair failures to reduce risk.
Case examples of successful leak detection projects
Although each project presents unique challenges, clear examples of successful underground leak detection illustrate how methodical assessment, appropriate technology, and experienced technicians combine to minimize disruption and cost.
Case studies highlight rapid acoustic pinpointing under paved areas, tracer gas locating beneath foundations, and correlating flow data with CCTV inspection.
Clients reported reduced excavation, faster repairs, transparent reporting, and warranty-backed follow-up, validating professional selection criteria.
Preventive Measures and Long-Term Monitoring
Preventive measures and long-term monitoring combine scheduled inspections, smart sensors, and targeted maintenance to reduce the frequency and impact of underground pipe leaks.
Attention to durable pipe materials and proper installation practices further minimizes failure risk.
Funding and risk-transfer options, including insurance coverage and municipal reimbursement programs, influence which preventive strategies are feasible for owners and managers.
Regular inspection schedules and smart monitoring options
When a consistent inspection cadence is established, underground pipe networks show markedly fewer undetected leaks and deterioration.
Scheduled visual checks, acoustic surveys, and periodic flow/pressure analysis identify anomalies early.
Complementary smart monitoring—remote sensors, IoT pressure transmitters, and automated leak detection algorithms—provides continuous alerts and trend data.
Combining routine inspections with targeted smart systems optimizes maintenance scheduling, reduces emergency repairs, and extends asset lifespan.
Pipe materials and installation practices that reduce leaks
Selecting durable materials and applying proven installation practices greatly reduce the incidence of leaks in underground pipe systems.
Specifying corrosion-resistant polymers, ductile iron with protective coatings, or HDPE, plus quality fittings and gasketed joints, minimizes failure.
Proper bedding, compaction, slope control, and pressure testing during commissioning prevent stress points.
Routine cathodic protection and joint inspection extend service life and reduce leak probability.
Insurance, municipal programs, and reimbursement considerations
Although upfront investment in durable infrastructure reduces leak risk, financial mechanisms such as insurance policies, municipal incentive programs, and reimbursement schemes play a critical role in enabling ongoing preventive measures and long-term monitoring.
These tools allocate risk, lower barriers to adopting advanced detection technologies, and provide funding pathways for repairs, replacements, and data-driven maintenance regimes.
Stakeholders should evaluate coverage limits, program eligibility, documentation requirements, and cost-sharing to maximize benefit.
Quick Reference Checklist for Homeowners
The homeowner should follow a short set of immediate steps when a leak is suspected, such as shutting off the main valve, documenting visible damage, and minimizing water use.
They should record key details for technicians and insurers, including the time discovered, meter readings, photos, and any unusual sounds or wet areas.
This checklist helps speed response, supports accurate diagnosis, and preserves evidence for claims.
Immediate steps to take if you suspect a leak
Acting quickly can limit damage and cost when a homeowner suspects an underground water leak; this checklist provides clear, prioritized steps to confirm the issue, protect property, and engage professional help.
- Shut off main water supply, record visible symptoms, and stop irrigation.
- Inspect for surface pooling, soft ground, or sinkholes; document locations.
- Contact a licensed leak detection specialist promptly and avoid heavy surface traffic.
What information to record for technicians and insurers
When documenting an underground water leak, homeowners should compile concise, factual records that technicians and insurers can use immediately.
Include location, timing, and visible damage; preserve utility readings and photos; note temporary actions taken.
Provide contact details and access instructions.
- Photos, meter readings, timestamps
- Property diagrams, utility maps, access points
- Repair estimates, invoices, contractor contacts
Conclusion
Detecting underground pipe leaks combines observation, basic diagnostics, and increasingly sophisticated tools to protect property and resources. Like a detective following faint clues, homeowners and professionals piece together sounds, moisture patterns, pressure changes, and advanced sensor data to pinpoint problems before they worsen. Careful method selection, avoidance of common pitfalls, and timely professional help minimize damage and cost. Regular monitoring and preventive maintenance turn reactive repairs into proactive asset preservation.