How to Replace a Shower Mixing Valve: Step-by-Step Guide for DIYers and Plumbers
To replace a shower mixing valve, follow these essential steps: First, shut off the water supply and remove the trim. Next, isolate the water lines and disconnect them. Install a compatible cartridge, pressure-balance, or thermostatic valve to the rough-in, ensuring all connections are secured with proper seals. Finally, test for leaks, set temperature limits, and flush out any debris. For a successful replacement, use the right tools, adhere to local codes, and consider any optional upgrades. Continue reading for detailed instructions and useful tips.
Quick overview: When and why to replace a shower mixing valve
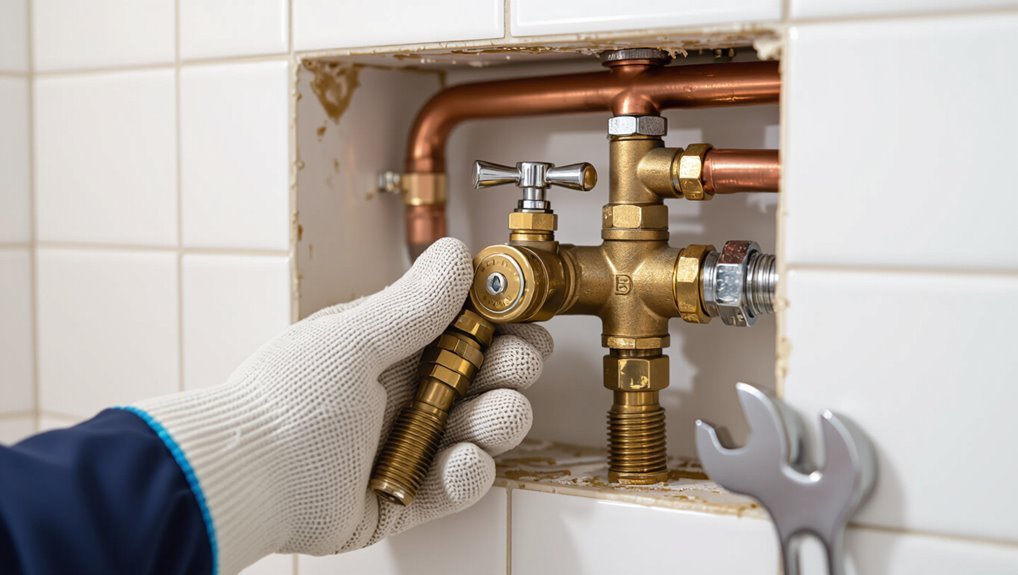
A homeowner should consider replacing a shower mixing valve when persistent temperature swings, visible leaks, or corrosion compromise performance.
Different valve types—pressure-balancing, thermostatic, and thermostatic-pressure combination—are available from common brands such as Moen, Delta, and Kohler, each with distinct installation and reliability profiles.
Replacement decisions must also account for safety and legal factors, including local plumbing codes and anti-scald requirements.
Signs you need a new mixing valve (temperature swings, leaks, corrosion)
Confidence in a shower’s performance often depends on the condition of its mixing valve.
Persistent temperature swings, sudden scalding or cold surges, visible leaks at trim or behind walls, mineral buildup, and corrosion indicate failure.
Noisy operation or reduced flow also signal wear.
If these occur, the homeowner or plumber should consider how to replace mixing valve shower to restore safe, reliable control.
Types of mixing valves and common valve brands
When signs such as temperature swings, leaks, or corrosion appear, identifying the type of mixing valve and reputable brands helps determine whether replacement or repair is appropriate.
Common valve types include cartridge, ball, pressure-balance, and thermostatic. Cartridge and ball valves are typical for repairs; pressure-balance and thermostatic valves offer anti-scald protection.
Notable brands: Moen, Delta, Kohler, Grohe, and Pfister.
Safety and legal considerations (local codes, anti-scald requirements)
Because shower mixing valves directly affect water temperature and safety, homeowners and professionals must follow local plumbing codes and anti-scald regulations before replacing or upgrading a valve.
Compliance guarantees proper thermostat settings, pressure-balancing or thermostatic devices, and certified parts.
Permits, inspections, and licensed installers may be required.
Failure risks scalding, liability, and code violations; verify local requirements prior to work.
Tools, materials, and parts checklist
A concise checklist helps guarantee the job proceeds smoothly, listing required tools for both DIYers and professionals—wrenches, screwdrivers, cartridge pullers, soldering or crimp tools, and leak-detection supplies.
Selection guidance for replacement valves should cover single- and dual-handle types as well as pressure-balancing versus thermostatic models to match performance and safety needs.
Optional items to evaluate include shutoff valves, escutcheons, and compatible trim kits to complete the installation and avoid surprises.
Required tools for DIY and professional jobs
Before beginning the valve replacement, gather a concise set of tools, materials, and spare parts to guarantee the job proceeds efficiently and safely.
Recommended items include basic hand tools, sealing materials, diagnostic gauges, and replacement hardware. Proper PPE and shutdown fittings are essential.
- Adjustable wrench set and basin wrench
- Screwdrivers, hex keys, and pliers
- Plumber’s tape, silicone, and thread sealant
- Pressure gauge, shutoff caps, spare trim screws
Parts and replacement valve selection guide (single-handle, dual-handle, pressure-balancing, thermostatic)
With tools and shutdown fittings at hand, attention turns to selecting the correct replacement valve and matching parts for the job.
The technician considers cartridge type, inlet/outlet configuration, and mounting depth. Choose single- or dual-handle bodies, pressure-balancing for basic scald protection, or thermostatic for precise temperature control.
Confirm material compatibility, thread standards, and replacement cartridges and seals to verify fit and function.
Optional supplies and parts to consider (shutoff valves, escutcheons, trim kits)
Although not strictly required for every repair, several optional supplies—shutoff valves, escutcheons, and trim kits—can simplify installation, improve appearance, and future-proof the assembly.
Shutoff valves enable isolated service without draining systems. Escutcheons conceal rough-in openings and prevent moisture intrusion.
Trim kits match finish, control ergonomics, and may include cartridges, screws, and seals. Select compatible sizes and finishes for reliable operation.
Preparing for the job: shutoff, access, and safety
Before any work begins, the water supply to the shower must be located and shut off at the local shutoff or main valve to prevent flooding.
The trim should be removed and an access point created or opened in the wall to reach the mixing valve and piping.
The work area should be checked for electrical hazards, mold, and structural issues and appropriate precautions taken before proceeding.
How to locate and shut off water supply to the shower
Locate the shower’s water supply lines and main shutoff before any tool is lifted; this guarantees control over water flow and reduces risk of flooding.
Identify local shutoffs near the shower or the house main; shut both hot and cold.
Verify isolation by opening a shower valve and a nearby faucet.
If no local stop exists, turn off the house main and drain residual water.
Creating or accessing the valve access point (remove trim, open wall access)
Begin by removing the shower trim and escutcheon to expose the valve body; this typically involves unscrewing the handle, pulling off decorative covers, and unsnapping or unthreading the trim plate.
Inspect surrounding tile or drywall for an existing access panel. If none, cut a neat opening aligned with the valve using a stud finder and straightedge, preserving framing and allowing clear valve removal and replacement.
Safety precautions (electrical, mold, structural)
With the valve exposed and wall opening established, attention turns to safety: confirm water and power are shut off, assess for mold, and verify the wall and surrounding structure are sound.
Wear gloves, eye protection and an N95 respirator if mold exists.
Use a non-contact voltage tester for wiring, secure loose framing, and stop work to remediate significant mold or structural damage before proceeding.
Step-by-step removal of the old mixing valve
The technician begins by removing the trim, handle, and escutcheon plate to expose the valve.
After draining the lines and clearing the work area, the technician disconnects the supply and outlet connections—whether sweat, threaded, or push-fit.
Finally, the old valve body is extracted and the rough-in area is cleaned and inspected for repairs.
Remove trim, handle, and escutcheon plate
To access the mixing valve, the trim, handle, and escutcheon plate must be removed in a specific order to avoid damaging finishes or internal components.
First, remove the handle set screw and slide the handle off.
Next, unscrew and carefully pry the escutcheon plate, noting any caulk or adhesive.
Protect the wall, keep fasteners organized, and inspect for corrosion before proceeding.
Drain lines and prepare the work area
Shut off the main water supply and open nearby faucets to verify the system is depressurized before beginning any work.
Drain residual water from exposed lines and the tub via faucet, towels, or a shallow container.
Lay down waterproof drop cloths and absorbent pads.
Clear the access area, arrange tools within reach, and guarantee adequate lighting and ventilation for safe, efficient valve removal.
Disconnect supply and outlet pipes (sweat, threaded, or push-fit)
Begin by identifying each connection type—sweat, threaded, or push-fit—and noting which pipe serves hot, cold, and the outlet to the shower.
Shut off water, relieve pressure, and remove escutcheon access.
For sweat joints, cut or unwrap solder with a tubing cutter or saw.
For threaded fittings, unscrew with pipe wrenches.
For push-fit, depress collar and pull pipe free.
Cap or plug temporarily.
Extract the old valve body and clean the rough-in area
Loosen any remaining mounting screws and remove trim pieces to expose the valve body fully.
Then support the valve while undoing its pipe connections or mounting clips.
Extract the valve straight out to avoid damaging surrounding studs or supply lines.
Scrape away old solder, sealant and debris.
Inspect the rough-in for corrosion or rot, and file or re-square edges to guarantee a clean, level installation surface.
Installing the new mixing valve: detailed procedure
The installer first confirms the rough-in dimensions and positions the new valve so its ports align with the supply and outlet locations.
The valve is then secured to the framing or a support bracket and the hot and cold supply lines are connected using the appropriate method (solder, threaded, or push-fit), followed by attachment of the shower and tub outlets to verify alignment.
Finally, the trim, handle, and escutcheon are installed and the temperature limit stop is set before pressure-testing the assembly.
Verify rough-in dimensions and position the new valve
Measure the rough-in depth and center-to-center spacing of the supply and outlet pipes to confirm they match the new valve’s specifications.
Then position the valve so cartridge access aligns with finished wall opening, ensuring inlets/outlets orient correctly for hot, cold, and mixed lines.
Verify valve depth allows proper trim installation and that inlet fittings seat without stress or misalignment before proceeding.
Secure valve to framing or support bracket
Begin by aligning the valve body so its mounting ears or bracket holes sit flush against a stud or approved support, ensuring the valve remains square to the finished wall and the cartridge access faces the planned trim opening.
Fasten with corrosion-resistant screws or bolts into framing or a manufacturer bracket, verify level and depth, and add blocking or shims to prevent movement during trim installation and use.
Connect hot and cold supply lines (solder, threaded, or push-fit techniques)
Attach the hot and cold feeds to the valve using the method appropriate for the existing plumbing—soldering copper, threading pipe fittings, or employing push-fit connectors—ensuring each connection is clean, properly sized, and oriented to maintain correct flow direction.
Use flux and proper silver solder for copper, thread sealant or tape on male threads, or fully seat push-fit tubing until retention is confirmed.
Connect shower and tub outlets and test for alignment
Position the valve so the labeled outlet ports align with the shower and tub piping, then connect each outlet using the same method as the supply lines—solder, threaded fittings, or push-fit—ensuring proper orientation and full engagement.
Secure connections, support piping to prevent stress, and open water briefly to check for any misalignment or leaks. Adjust as needed before finalizing rough-in depth.
Install trim, handle, and escutcheon; set temperature limit stop
With the valve secured and rough-in depth confirmed, the installer proceeds to fit the escutcheon, handle, and trim and then sets the temperature limit stop.
The escutcheon is sealed with plumber’s putty or silicone and fastened. The handle is aligned with splines and secured.
The temperature limit stop is adjusted to cap maximum hot flow, tested, and fine-tuned for safety.
Testing and commissioning the new valve
The installer begins commissioning by performing leak tests, using a pressure check and close visual inspection of joints and connections.
Once watertight integrity is confirmed, temperature and pressure-balance settings are adjusted to meet desired output and scald-protection requirements.
Finally, the valve and lines are flushed, and water quality (clarity and temperature stability) is verified before returning the shower to service.
How to perform leak tests (pressure test and visual inspection)
Begin by restoring water supply slowly and observing system pressure to verify the new mixing valve holds under normal operating conditions.
Monitor for pressure drops on the gauge. Inspect all joints, cartridge seals, and sweat or threaded connections for visible drips.
Operate handles and cycle hot/cold several times while checking for weeps.
Recheck after a 15–30 minute dwell to guarantee no slow leaks develop.
Adjusting temperature and pressure-balance settings
After confirming there are no leaks and the system holds pressure, proceed to set temperature limits and verify pressure-balance response.
Adjust the anti-scald stop or temperature stop to preferred maximum, then test hot/cold range with a thermometer at the shower outlet.
Simulate pressure fluctuation by briefly shutting a downstream faucet; guarantee outlet temperature remains stable and handle return meets specification.
Final flush and water quality check
Flush the system thoroughly to remove debris and verify water quality before finalizing installation.
Run hot and cold separately, then mixed, until water is clear and free of particles.
Check for discolouration, sediment, or pressure fluctuations.
Test thermostatic response and anti-scald function.
If contaminants appear, repeat flushing and inspect supply lines; document results and confirm stable, clean output before closing access panels.
Troubleshooting common problems after installation
After commissioning, the installer should check for persistent leaks at connections or the valve body and address any loose fittings or damaged seals.
They must verify temperature stability and anti-scald function, correcting cartridge settings or pressure-balancing issues if hot spikes occur.
Low flow, air in the lines, and trim or handle misalignment should be diagnosed and fixed by purging lines, clearing debris, and adjusting or refitting the trim.
Persistent leaks at connections or valve body
Persistent leaks at the mixing valve or its fittings often indicate installation errors, damaged seals, or improper pipe connections that allow water to escape under pressure.
The installer should isolate the supply, inspect fittings, tighten connections to manufacturer torque, replace O-rings or cartridges, reapply correct thread sealant, and verify solder joints or compression ferrules.
Test at working pressure and monitor for recurrence.
Temperature instability or scalding risk
How can a newly installed mixing valve cause sudden temperature swings or create a scalding hazard?
Improper cartridge alignment, incorrect thermostatic calibration, or missing temperature limit stops can permit disproportionate hot-water flow.
Cross‑connections, debris obstructing sensor ports, or incompatible replacement parts also compromise temperature regulation.
Verify model-specific settings, reinstall cartridge correctly, flush lines, and test with a calibrated thermometer to confirm stable, safe output.
Low flow or air in lines
Bleeding the lines and checking flow paths can resolve most cases of low water pressure or sputtering after a mixing valve replacement.
The installer should isolate individual supply lines, open nearby fixtures to purge trapped air, and verify shutoff and check valves aren’t partially closed.
Inspect inlet screens and debris traps for blockages, and confirm cartridge orientation and seals are correct to restore steady flow.
Trim fitment or handle alignment issues
Check the trim and handle installation for misalignment, gaps, or binding that can hinder operation or allow leaks.
Confirm escutcheon plate sits flush, screws are snug but not over‑tightened, and handle cartridges align with valve stem splines.
Adjust shims or trim spacers to eliminate binding.
Verify full range of motion, smooth temperature control, and secure sealing to prevent water intrusion behind the wall.
When to call a professional plumber
When rough-in complications, copper soldering, or inaccessible valves are present, a professional plumber should be considered.
Situations requiring code compliance, permits, or inspections often mandate licensed work to avoid fines or failed approvals.
Comparing DIY time and parts costs with a plumber’s labor and warranty helps determine whether hiring a pro is the more practical choice.
Complex rough-in issues, copper soldering, or inaccessible valves
Recognize that certain situations exceed typical DIY skill: complex rough-in configurations, copper soldering, or valves hidden behind finished walls demand professional expertise.
Licensed plumbers handle intricate fittings, replace corroded sections, and perform soldering to guarantee watertight connections.
They can safely access concealed valves without damaging finishes, diagnose atypical supply layouts, and prevent leaks or code-related problems that arise from improper repairs.
Code compliance, permit, and inspection scenarios
After complex rough-in work or any repair that alters plumbing routes or fixture connections, code requirements and local permit rules often determine whether a licensed plumber must be engaged.
Homeowners should verify local codes, required permits, and inspection schedules.
When work impacts potable water, backflow prevention, seismic bracing, or multi-family systems, hiring a licensed professional guarantees compliance, proper documentation, and passed inspections.
Cost comparison: DIY vs. professional replacement
Many homeowners weigh the upfront savings of a DIY shower mixing valve replacement against the risks and potential extra costs of mistakes; a clear cost-benefit comparison helps decide when to call a professional plumber. Below is a concise breakdown.
| Item | Typical Cost |
|---|---|
| DIY parts/tools | $50–$200 |
| Professional labor | $150–$600 |
| Potential repair after error | $100–$800 |
| Permit/inspection | $0–$200 |
Maintenance tips to extend valve life and prevent future failures
Regular maintenance can substantially extend a shower mixing valve’s service life and reduce the risk of sudden failures.
Annual flushing and cleaning of the cartridge and inlet strainers, attention to water quality with filters installed when necessary, and watching for early warning signs form the core recommendations.
A concise inspection checklist covering leaks, temperature stability, and flow changes helps homeowners catch problems before they require replacement.
Flushing and cleaning cartridge/strainers annually
Flush and clean the cartridge and strainers once a year to remove mineral deposits and debris that reduce flow and accelerate wear.
Shut off water, remove trim and cartridge, then rinse parts and strainers under clean water.
Soak stubborn buildup in mild vinegar solution, scrub gently with a soft brush, inspect O-rings and seals, replace damaged components, and reassemble.
Test for proper operation and leaks.
How water quality affects valve longevity and when to install filters
Cleaning cartridges and strainers helps remove deposits, but understanding water quality factors explains why buildup recurs and how to prevent it.
Hard water, high mineral content, and corrosive pH accelerate valve wear and seals’ failure.
Install sediment and scale-reduction filters where supply water is hard or turbid.
Test water annually; softeners or reverse osmosis extend valve life in problematic supplies.
Signs to watch for and routine inspection checklist
Because early detection prevents costly failures, homeowners should watch for a set of clear warning signs—fluctuating water temperature, reduced flow, unusual noises, persistent leaks at the trim or wall, and difficulty turning the handle—that indicate a mixing valve is degrading.
Routine inspection checklist and maintenance recommendations follow:
- Inspect for leaks and mineral buildup quarterly
- Test temperature stability monthly
- Operate handle to detect stiffness
- Replace worn cartridges promptly
Cost breakdown and time estimates
Typical parts and labor cost ranges vary by valve type, with basic cartridge valves often costing less in parts and labor than pressure-balancing or thermostatic units.
Estimated time for replacement ranges from one to three hours for experienced DIYers, while professionals typically complete the job in one to two hours depending on access and complications.
Readers should weigh parts quality and labor rates when budgeting and deciding between a DIY approach or hiring a plumber.
Typical parts and labor cost ranges for common valve types
When estimating costs and time for replacing a shower mixing valve, homeowners should expect a wide range driven by valve type, brand, and the complexity of the installation. Typical cost ranges: basic compression or cartridge valves cost $20–$120 in parts; pressure-balancing or thermostatic units run $80–$400. Labor varies by region and access.
| Valve type | Typical parts cost |
|---|---|
| Basic cartridge | $20–$120 |
| Thermostatic | $80–$400 |
Estimated time required for DIYers vs. professionals
Although skill level and access to the valve greatly affect duration, replacing a shower mixing valve generally falls into two clear time brackets: a competent DIYer with basic tools and clear access can complete most cartridge or compression-valve swaps in 2–4 hours, while a professional plumber typically finishes the same job in 1–2 hours.
More complex thermostatic units, concealed installations, or situations requiring tile removal, soldering, or valve box modifications can extend DIY time to a full day or more and professional time to 2–4 hours.
DIYers should budget extra for troubleshooting, parts delays, and cleanup; professionals factor travel, diagnostics, and permit work into estimates.
Related upgrade options and finishing touches
After replacing the mixing valve, consideration of related upgrades can improve performance and appearance.
Options include swapping to a thermostatic or pressure-balancing valve, updating the trim kit, showerhead, and tub spout for a coordinated finish, and installing accessibility features like lever handles or anti-scald settings.
Each choice affects comfort, safety, and final cost, so selection should match user needs and budget.
Upgrading to thermostatic or pressure-balancing valves
Several homeowners opt to upgrade to thermostatic or pressure‑balancing valves to improve shower safety and comfort.
These valves stabilize temperature during pressure fluctuations and prevent scalding. Thermostatic units maintain set temperature; pressure‑balancing valves adjust flow to balance hot and cold.
Selection depends on plumbing layout, budget, and code requirements.
Professional installation guarantees proper function, warranty compliance, and reliable performance.
Replacing trim kit, showerhead, and tub spout for a coordinated finish
When finishing a valve replacement, swapping the trim kit, showerhead, and tub spout creates a cohesive look and assures compatible function; matching finishes and flow specifications also simplify maintenance and future upgrades.
Select trim that fits valve cartridge dimensions, verify showerhead flow rates and connection size, and confirm tub spout type (slip-on or threaded).
Proper alignment and secure seals prevent leaks and guarantee longevity.
Accessibility upgrades (lever handles, anti-scald settings)
Coordinating trim and fixtures often leads homeowners to contemplate accessibility upgrades that improve safety and ease of use; swapping standard knobs for lever handles and setting anti-scald limits are common finishing touches.
Lever handles require minimal force and benefit users with limited dexterity.
Anti-scald thermostatic or pressure‑balancing valves limit maximum temperature; adjust per local codes, test thoroughly, and label controls for occupants.
Visual aids and reference resources
Helpful video tutorials and manufacturer installation guides are recommended to illustrate step-by-step techniques and model-specific requirements.
Clear diagrams should be provided to identify common valve types and typical connection methods.
Together, these visual aids and references reduce guesswork and help guarantee correct installation.
Recommended video tutorials and manufacturer installation guides
Although videos and manufacturer guides serve different purposes, both are essential visual aids for replacing a shower mixing valve. Video tutorials demonstrate step-by-step procedures and common pitfalls in real time, while manufacturer installation guides provide model-specific specifications, torque values, and warranty requirements.
Reliable sources, version dates, and matching model numbers guarantee accuracy.
- Official manufacturer installation PDFs
- Factory-recommended video walkthroughs
- Independent professional plumber tutorials
- Forum threads with verified photos
Diagrams to identify valve types and common connection methods
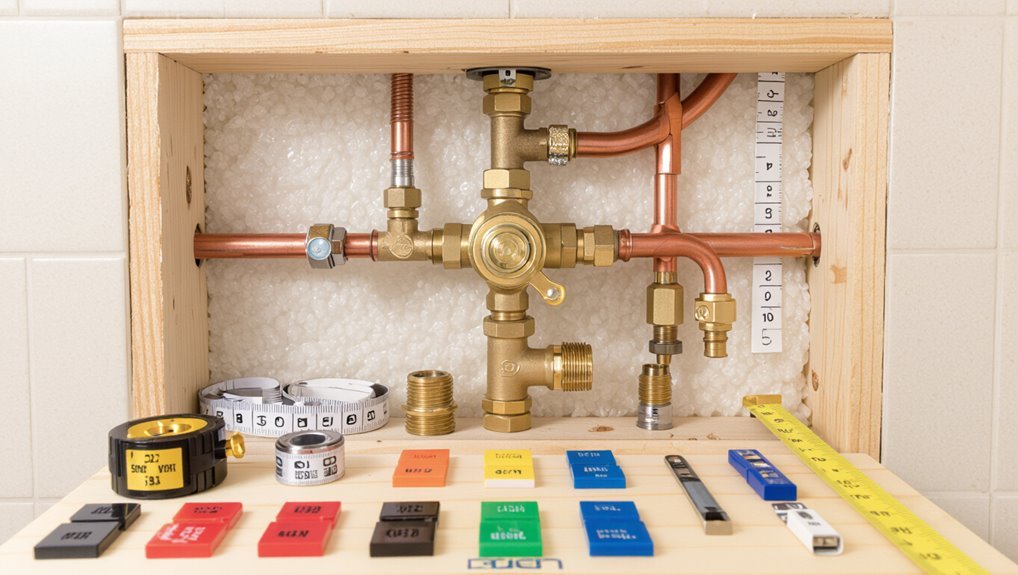
When identifying shower mixing valves, clear, labeled diagrams showing faceplates, cartridge shapes, and inlet/outlet orientations quickly distinguish common types (single-handle cartridge, pressure-balancing, thermostatic, and dual-valve systems).
Include exploded views, connection symbols (sweat, threaded, compression, PEX), and dimensional references.
Offer legended color-coding for hot/cold lines, mounting brackets, and trim clearances.
Provide printable scale templates and manufacturer cross-reference charts.
Conclusion
Replacing a shower mixing valve restores comfort and safety, and with basic tools many DIYers can complete the job in under two hours; professionals typically charge $150–$400. One striking statistic: faulty mixing valves contribute to nearly 20% of residential scalding incidents, underscoring the safety imperative of timely replacement. Proper preparation, correct parts, and attention to seals and pressure balance prevent recurrence, making this a high-impact, cost-effective home maintenance task.