How to Clean Black Sinks: Simple, Safe Methods to Remove Stains and Restore Shine
To clean black sinks and restore their shine, start by rinsing the sink and using a mild dish soap with a soft cloth. Rinse and dry to prevent water spots. For tougher stains, you can use a baking soda paste, diluted hydrogen peroxide, or a pH-neutral cleaner with a non-scratch pad; always test these on an inconspicuous area first. Be sure to follow specific care instructions based on the sink’s material—whether porcelain, granite composite, or coated stainless steel. Continue reading for more detailed methods and product recommendations.
What Causes Stains and Dullness in Black Sinks
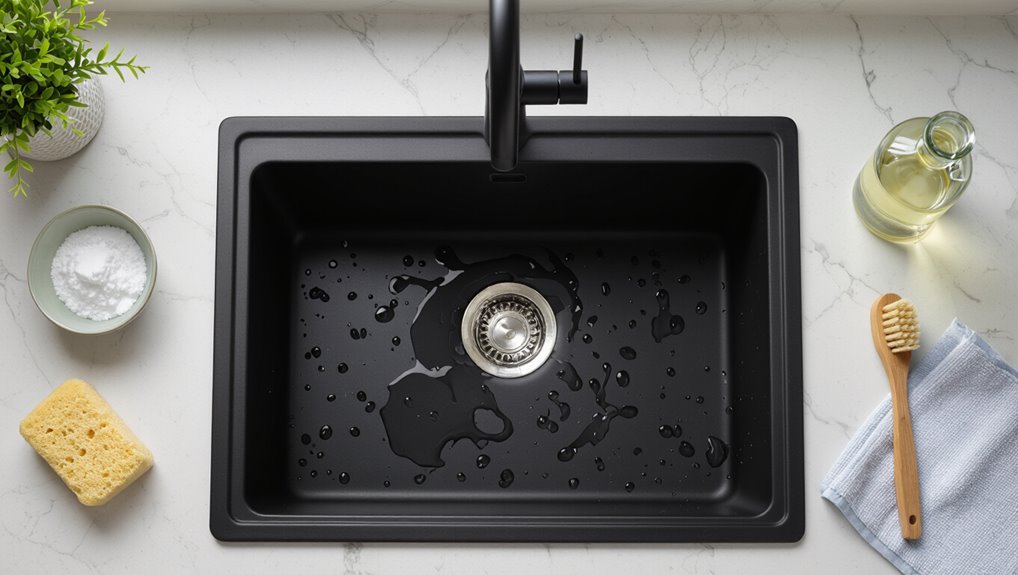
Black sinks come in various materials and finishes—porcelain, granite composite, and stainless steel with black coatings—each with different susceptibility to staining.
Common blemishes include water spots and mineral deposits, soap scum, hard water rings, rust, and food stains.
Surface texture and finish influence how easily these marks adhere and how readily the sink regains shine after cleaning.
Common materials and finishes for black sinks (porcelain, granite composite, stainless with black finish)
Sinks finished in deep tones come in several common materials—porcelain enamel, granite composite, and stainless steel with a black coating—each with distinct surface properties that affect appearance and maintenance.
Porcelain is smooth but chip-prone; granite composite is durable yet porous; coated stainless resists impact but can scratch.
Understanding these materials guides how to clean black sinks safely and effectively.
Typical stain types (water spots, mineral deposits, soap scum, hard water rings, rust, food stains)
Accumulation of everyday residues—water, soap, minerals and food—creates the most common blemishes on black sink surfaces.
Water spots appear as pale rings from evaporated droplets; mineral deposits build cloudy films; soap scum leaves streaky residue; hard water rings concentrate minerals near edges; rust forms from metal contact or iron-rich water; food stains darken and stain pores, reducing apparent shine and uniformity.
How surface texture and finish affect cleaning and shine
Surface texture and finish determine how light interacts with the surface and how easily residues adhere, so they play a central role in both stain formation and perceived shine.
Smooth, glossy finishes repel grime and are easier to wipe, preserving reflections.
Matte or textured surfaces trap oils, minerals, and soap, dulling appearance and requiring gentler abrasion or specialized cleaners to restore uniform luster.
Quick Safe Method to Restore Shine
A concise checklist of materials and tools sets the stage for a quick, safe shine restoration.
The procedure begins with preparing the sink and workspace, rinsing away loose debris, then applying a mild cleaner to handle daily stains.
A final thorough rinse and careful drying prevents water spots and preserves the restored luster.
Materials and tools needed
For this quick, safe restoration, gather only gentle, nonabrasive items that will remove grime without dulling the finish: microfiber cloths, a soft-bristled brush or toothbrush, mild dish soap, white vinegar, baking soda, a spray bottle, and a silicone or rubber sink mat to protect the basin during work.
- Cloths and brush
- Soap and vinegar
- Baking soda
- Spray bottle and mat
Preparing the sink and workspace
Clear the area around the black sink and remove dishes, drain stoppers, and any removable accessories to create an unobstructed workspace.
Wipe surrounding countertops, secure nearby items, and guarantee good lighting and ventilation.
Protect surfaces with towels or a silicone mat.
Lay out chosen cleaning supplies and gloves within reach.
Confirm water source and waste container availability before beginning the cleaning process.
Step 1 Rinse and remove loose debris
Begin by running lukewarm water over the sink to loosen food particles, soap scum, and debris.
Then use a soft cloth or a non-abrasive brush to gently dislodge remaining residue into the drain.
Rinse thoroughly, checking corners, the overflow, and around the faucet.
Pat dry with a microfiber cloth to prevent water spots and to reveal areas needing deeper attention.
Step 4 Apply mild cleaner for daily stains
Apply a gentle, pH-neutral cleaner to tackle everyday stains and restore the sink’s shine without harming the finish.
The cleaner is applied with a soft cloth or sponge, worked in gentle circular motions over stained areas. Allow brief dwell time per product instructions, then agitate stubborn spots lightly.
Avoid abrasive pads and strong chemicals to preserve color and surface integrity.
Step 5 Rinse thoroughly and dry to prevent water spots
After cleaning, rinse the sink thoroughly with warm water to remove all cleaner residue and loosened debris.
Then use a soft cloth or microfiber towel to dry every surface, including corners and the drain area, preventing mineral deposits and water spots.
Pat and buff gently for an even, streak-free finish.
Proper drying preserves the black sink’s appearance and reduces future buildup.
Expected time and frequency
Once the sink is rinsed and dried, the Quick Safe Method to restore shine typically requires only a short, regular investment of time: most users can complete the routine in 5–10 minutes per session.
Perform this once weekly for routine maintenance; increase to twice weekly if the sink sees heavy use.
Occasional monthly deep cleans remain beneficial to address stubborn buildup and preserve finish.
Deep Cleaning for Tough Stains
For persistent discoloration, the article outlines how to assess stain severity and select an appropriate treatment.
It then reviews gentle chemical cleaners and specific home remedies—baking soda paste, vinegar or lemon solutions, and hydrogen peroxide—with exact ratios and contact times, plus safe use instructions.
Finally, it covers mechanical techniques using soft brushes or non‑scratch pads and methods to remove rust and mineral buildup without harming the finish.
Identifying stain severity and choosing the right approach
How severe the stains on a black sink determines whether a routine wipe will suffice or a more intensive deep clean is required.
Assess discoloration, texture, and spread: surface smudges, mineral buildup, or ingrained staining.
Test a small inconspicuous area for finish sensitivity.
For minor marks, use gentle scrubbing; for widespread or etched stains, plan staged treatments, prioritizing preservation of finish and avoiding abrasive methods.
Non-abrasive chemical options and how to use them safely
When stains resist mechanical cleaning, non‑abrasive chemical agents provide targeted softening and lift without scratching the sink’s surface.
- Choose pH‑balanced cleaners labeled safe for the sink material.
- Test on an inconspicuous area for colorfastness.
- Apply sparingly, allow manufacturer‑recommended dwell time, then rinse thoroughly.
- Use gloves, ventilation, and neutralizing rinse; avoid mixing products to prevent hazardous reactions.
Natural/home remedies (baking soda, vinegar, lemon, hydrogen peroxide) with exact ratios and timings
Apply gentle, well‑measured household ingredients to lift stubborn stains from black sinks without abrasive damage:
Combine baking soda and water into a paste (3 parts baking soda to 1 part water), sprinkle it over the stain, let sit 10–15 minutes, then scrub lightly with a soft cloth.
For mineral deposits or soap scum, mist white vinegar (undiluted) over the baking soda for a fizzing lift, wait 5–10 minutes, then rinse.
For organic stains, rub lemon juice directly or use a 1:1 lemon juice-to-water soak for 10–20 minutes before rinsing.
For deep discoloration, apply 3% hydrogen peroxide undiluted or mixed 1:1 with water to the spot, cover with the baking soda paste, leave 10–20 minutes, then rinse and dry—always test an inconspicuous area first and ventilate the space.
- Baking soda paste: 3:1, 10–15 min
- Vinegar mist: undiluted, 5–10 min
- Lemon: undiluted or 1:1, 10–20 min
- Hydrogen peroxide: 3% or 1:1, 10–20 min
Mechanical methods (soft brush, non-scratch pad) and safe technique
After using gentle, measured household cleaners to loosen stains, mechanical methods finish the job by physically removing residue without scratching the black finish.
Use a soft-bristled brush or a non-scratch pad with light pressure, working in circular motions. Rinse frequently to check progress.
Avoid steel wool, harsh scrubbing, and aggressive scraping.
Dry and buff with a microfiber cloth for uniform sheen.
Removing rust and mineral buildup without damaging finish
Tackle rust and mineral buildup with targeted, low-abrasion methods that dissolve deposits without harming the black finish.
Apply a paste of baking soda and water or a diluted white vinegar solution to affected areas, let sit briefly, then gently scrub with a soft brush.
Rinse thoroughly and dry.
For stubborn rust, use a commercial, non-abrasive rust remover made for coated sinks, following label instructions.
Cleaning Methods by Sink Material
Different sink materials require specific cleaning approaches to preserve finish and prevent damage. The following table summarizes key care rules for common black sink types, followed by brief guidance for each material. Readers should follow the material-specific tips to maintain appearance and longevity.
| Sink Material | Key Care Rule |
|---|---|
| Porcelain enamel | Use nonabrasive cleaners and soft cloths; avoid metal scouring pads. |
| Granite composite | Clean with mild detergent and soft sponge; reseal if recommended. |
| Matte black stainless/coated metal | Use gentle, nonabrasive cleaners and wipe dry to prevent water spots. |
| Acrylic/resin | Avoid harsh solvents and abrasive pads; use mild soap and soft cloth. |
Porcelain enamel care rules
Porcelain enamel sinks combine a glossy finish with durable metal beneath, but their surface can chip or stain if cleaned incorrectly; use gentle, nonabrasive cleaners and soft cloths to preserve the glaze.
Avoid alkaline bleach or harsh scrubbing pads.
Remove stains with mild detergent, baking soda paste, or vinegar diluted with water.
Rinse thoroughly and dry to prevent water spots and mineral buildup.
Granite composite care rules
After covering porcelain enamel, attention turns to granite composite sinks, which blend crushed stone with resin and require different care to preserve their matte finish and color.
Clean with mild dish soap and a soft cloth; avoid abrasive pads and harsh chemicals.
For stains, use a baking soda paste or manufacturer-approved cleaners.
Rinse thoroughly and dry to prevent mineral buildup and water spots.
Matte black stainless or coated metal care rules
Handle matte black stainless and coated metal sinks with care to preserve their finish and prevent scratches or uneven wear.
Use mild, nonabrasive cleaners and soft cloths or sponges. Rinse and dry promptly to avoid water spots and mineral buildup.
Avoid bleach, harsh scourers, and abrasive pads.
For stubborn marks, test a manufacturer-recommended cleaner on an inconspicuous area first.
Acrylic and resin sink care rules
Moving from matte black metals to softer surfaces, acrylic and resin sinks require gentler care because their finishes can scratch, stain, or discolor if treated with abrasive products.
Use mild dish soap, warm water, and a soft cloth or sponge. Avoid scouring pads, bleach, and harsh solvents.
Rinse thoroughly, dry to prevent water spots, and polish occasionally with a manufacturer-approved product.
Preventive Maintenance to Keep Black Sinks Shiny
To keep a black sink looking its best, a clear routine of daily rinsing and weekly gentle cleaning prevents buildup and stains.
Regular drying and light polishing with recommended sealants or sink-specific polishes—applied according to manufacturer frequency—preserves shine.
Abrasive cleaners, harsh chemicals, and abrasive tools should be avoided to prevent surface damage.
Daily and weekly routines to avoid stains
A simple daily rinse and a brief weekly cleanse prevent most stains on black sinks; regular attention stops grime from etching the surface and keeps the finish uniform.
- Rinse after use to remove soap and food particles.
- Wipe with a soft cloth daily to avoid water spots.
- Weekly mild cleanser application loosens buildup.
- Inspect drains and seals, addressing mineral deposits promptly.
Best drying and polishing practices
Several simple finishing steps preserve a black sink’s luster: thorough drying immediately after use, gentle polishing with the right products, and routine buffing to remove watermarks and light residue.
After washing, towel-dry corners and fixtures to prevent mineral spotting.
Use a soft microfiber for polishing in circular motions.
Buff weekly or as needed to maintain uniform sheen and prevent dull patches.
Products to use regularly (sealants, polish) and how often
Routine application of a protective sealant and occasional polishing are the most effective preventives for black sinks.
Use a manufacturer-recommended stone or composite sealant every 6–12 months.
Apply a non-abrasive, water-repellent polish monthly to restore luster.
For daily upkeep, use a gentle pH-neutral cleaner.
Follow product instructions, allow full curing, and test in an inconspicuous spot first.
What to avoid: abrasive cleaners, harsh chemicals, and tools
Avoid using abrasive cleaners, harsh chemicals, or rough tools on black sinks, as they can quickly dull the finish, cause micro-scratches, or strip protective coatings.
Instead, avoid bleach, oven cleaners, scouring powders, steel wool, and metal brushes. Do not use acidic drain cleaners or prolonged contact with solvent-based products.
Rinse spills promptly and choose soft cloths, mild detergents, and recommended gentle polishes.
Troubleshooting Common Problems
When common issues persist despite regular care, diagnosing the cause helps determine the right fix.
Typical problems include stubborn water spots, quickly returning dullness, and light surface scratches that may be repaired or touched up.
Clear signs of permanent discoloration require different solutions and may indicate the need for professional repair or replacement.
Removing persistent water spots after regular cleaning
Sometimes persistent water spots remain even after regular cleaning, indicating mineral buildup or surface etching rather than simple residue.
To remove spots, dilute white vinegar with equal parts water, apply briefly, then rinse and dry.
For stubborn marks, use a paste of baking soda and water, rub gently, rinse, and dry.
Test inconspicuously and avoid abrasive pads on coated finishes.
Addressing dullness that resurfaces quickly
Recognize that dullness returning quickly often signals an underlying issue—worn surface coatings, residual film from cleaners, or hard-water deposits—that simple wiping won’t fix.
Inspect finish and recent products used. Rinse thoroughly after cleaning, remove mineral buildup with a nonabrasive descaler, and neutralize residues with distilled water.
If protective coatings are depleted, recommend professional refinishing or applying manufacturer-approved sealant to restore lasting luster.
Repairing light surface scratches and touch-up options
A quick inspection after addressing dullness will often reveal fine surface scratches that mar a black sink’s finish; these are usually superficial and repairable without full refinishing.
Light abrasions respond to gentle polishing with a nonabrasive paste or a microfiber pad.
For deeper scratches, matching touch-up kits or manufacturer repair pens can blend edges.
Always test any product in an inconspicuous area first.
When discoloration indicates permanent damage
When staining persists after thorough cleaning and gentle polishing, it often signals permanent damage to the sink’s surface rather than a removable deposit.
Such discoloration may indicate faded finish, burned or chemically etched areas, or deep mineral infiltration.
Restoration then requires refinishing, professional reglazing, or replacement.
Assess cost versus outcome; refinishing restores appearance but may not fully recover original durability or color uniformity.
Safe Product Recommendations and Ingredients to Avoid
Safe, effective maintenance begins with choosing the right cleaner for each sink material and avoiding ingredients that damage black finishes.
Recommended options include:
- Mild liquid dish soap for daily cleaning
- pH-neutral cleaners for composite and stone sinks
- Non-abrasive cream cleaners for stainless steel matte finishes
- Manufacturer-formulated products for coated surfaces
Readers should check product labels for pH, abrasive particles, bleach, and strong acids or alkalis to confirm compatibility.
Recommended cleaners for each sink type
Although cleaning products vary widely in formulation and strength, choosing the right cleaner for each black sink material—porcelain, cast iron, stainless steel, composite granite, or enameled metals—prevents damage and preserves finish.
Use mild dish soap and soft cloths for daily cleaning, baking soda paste for gentle abrasion, diluted vinegar for mineral deposits on stainless, and manufacturer-recommended granite cleaners for composite surfaces.
Avoid abrasive pads.
Ingredients and products that can harm black finishes
Because dark finishes show damage and residue more readily, certain chemicals and rough abrasives can permanently dull, stain, or etch black sinks; acids like undiluted vinegar or lemon juice, strong alkalis such as oven cleaners and drain openers, bleach and chlorine-based products, abrasive powders or steel wool, and solvent-heavy degreasers should be avoided unless the manufacturer specifically permits them.
Additionally, hydrogen peroxide concentrates, antibacterial wipes with alcohol, and acidic rust removers may discolor or damage coatings.
How to read labels to ensure compatibility
After outlining which chemicals and abrasives can harm black finishes, attention turns to reading product labels to confirm compatibility.
The reader evaluates active ingredients, pH level, and warnings for use on matte or coated surfaces.
Look for manufacturer claims like “safe for coated/enameled/black sinks.”
Avoid products listing bleach, ammonia, or strong acids.
When unsure, test in an inconspicuous area first.
Step-By-Step Weekly and Monthly Care Schedules
A clear weekly checklist helps busy households maintain the finish and prevent buildup with minimal time investment.
A separate monthly deep-clean checklist outlines a step-by-step timeline, required supplies, and targeted actions for stains, mineral deposits, and hardware care.
Together these schedules guarantee consistent appearance and prolong the sink’s life.
Simple weekly checklist for busy households
One clear weekly checklist keeps black sinks looking their best with minimal effort: rinse and wipe after each heavy use, apply a gentle non-abrasive cleaner once a week, inspect and clear the drain and faucet areas, and dry the surface to prevent water spots.
- Rinse and quick wipe daily.
- Gentle cleaner weekly.
- Check and clear drains.
- Dry and polish surfaces.
Monthly deep-clean checklist with timeline and supplies
Monthly deep-clean routines give black sinks a thorough refresh beyond weekly upkeep, targeting buildup, stains, and hidden grime with a clear timeline and specific supplies.
A monthly checklist: inspect drain and sealant; apply gentle abrasive cleaner to stains; disinfect with diluted vinegar or hydrogen peroxide; scrub with nylon brush; rinse and dry; polish with microfiber.
Supplies: cleaner, brush, cloths, gloves, sealant.
When to Call a Professional
If stains, chips, deep scratches, persistent discoloration, or structural damage persist despite regular cleaning, professional restoration or replacement may be necessary.
Professionals typically assess the sink, perform repairs such as refinishing or sealing, and can advise on replacement if damage is irreparable.
Costs vary by scope and material but often range from modest repair fees to several hundred dollars for refinishing and higher for full replacement.
Signs that require professional restoration or replacement
Several clear signs indicate that a black sink needs professional restoration or replacement rather than DIY cleaning.
Deep, irreparable scratches, extensive chips or cracks, persistent staining that resists approved treatments, structural warping, or undermined drainage suggest material failure.
Repeated resurfacing attempts, visible substrate exposure, or leaks at seams also warrant expert assessment to determine whether restoration suffices or full replacement is necessary.
What a professional service typically does and expected costs
Contacting a professional is recommended when damage goes beyond surface stains or when prior DIY fixes have failed. Technicians assess the sink, determine whether refinishing or replacement is appropriate, and outline a remediation plan.
Services include deep cleaning, sanding, reglazing or powder-coating, sealant application, and, if needed, removal plus installation.
Typical costs range from $150–$600 for refinishing and $300–$1,200 for replacement, varying by material and labor.
Quick Reference Cheat Sheet
A one-page cheat sheet lists clear do’s and don’ts for each black sink material to simplify routine care.
It highlights safe cleaners, prohibited abrasives, and quick stain-removal steps tailored to surfaces like stainless steel, cast iron, and composite.
This compact guide enables fast, confident decisions without re-reading the full article.
One-page summary: do’s and don’ts for each sink material
This quick-reference cheat sheet lists clear do’s and don’ts for cleaning black sinks by material—porcelain, stainless steel, composite granite, cast iron, and fireclay—so users can match methods and products to their sink type and avoid common mistakes that cause staining, scratching, or finish loss.
| Do’s | Don’ts |
|---|---|
| Mild cleanser, soft cloth | Abrasives, bleach |
| Vinegar rinse, polish | Steel wool |
| Gentle soap, seal periodically | Harsh acids |
| Dry after use, touch-up enamel | Leave standing water |
Conclusion
Like a well-tended blacksmith’s blade that regains its mirror edge, a cared-for black sink reflects diligence and restraint. Regular gentle cleaning, occasional deeper work for stubborn marks, and mindful product choices together keep surfaces lustrous without risking harm. By matching methods to material, following simple weekly and monthly routines, and calling in professionals when needed, the sink endures—ready again to catch life’s small messes with quiet, restored dignity.