How to Repair a Little Giant Condensate Pump: Step-by-Step Troubleshooting and Fixes
To repair a Little Giant condensate pump, start by cutting power and inspecting the wiring, float switch, housing, and tubing. Manually test the motor and impeller for free movement. Common repairs include replacing clogged discharge tubing, a faulty one-way valve, corroded terminals, or a seized motor assembly. After reassembly, conduct a leak test and calibrate to float specifications. Routine maintenance and simple upgrades can help prevent future issues. For detailed step-by-step diagnostics and repairs, continue following the outlined guidance.
Understanding Little Giant Condensate Pumps and When Repair Is Needed
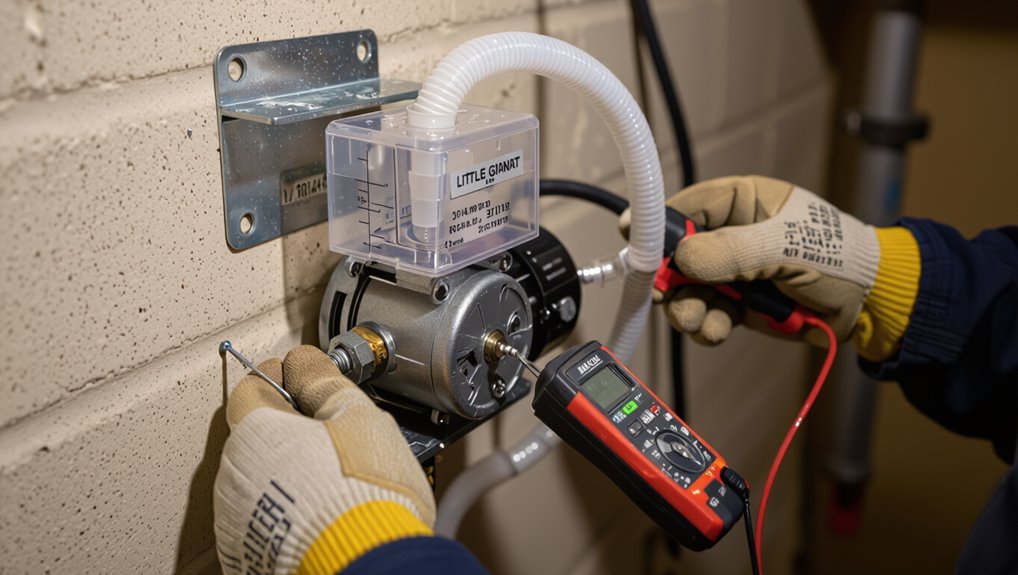
A Little Giant condensate pump removes moisture condensate from HVAC systems and appliances, routing it to a safe drain or discharge point.
Signs of pump failure include persistent water backups, unusual noises, frequent cycling, or failure to activate.
Before inspecting or repairing, power should be disconnected and the area cleared to prevent electrical shock and water damage.
What a condensate pump does in HVAC and appliances
Condensate pumps collect and move the water produced by HVAC systems and certain appliances to a suitable drain when gravity alone is insufficient.
A Little Giant unit traps condensate in a reservoir, activates a small motor and discharge line, and prevents overflow or damage.
Proper maintenance and knowing how to repair Little Giant condensate pump guarantees reliable operation and protects equipment from moisture-related issues.
Common symptoms that indicate pump failure
How can one tell when a Little Giant condensate pump is failing? Indicators include constant running or failure to start, frequent cycling, unusual noises (clanking, grinding), visible leaks or pooling, slow or no discharge, tripped float switch, and persistent water alarms.
Reduced drainage efficiency, burning odors, or electrical faults also signal malfunction and warrant inspection or repair.
Safety precautions before inspecting or repairing
Noting the warning signs of a failing Little Giant condensate pump leads naturally to safety steps before any inspection or repair.
The technician should disconnect power, shut off related HVAC systems, and depressurize lines if present.
Wear protective gloves and eye protection, guarantee proper ventilation, and avoid standing water contact.
Verify lockout/tagout and consult the manual for model-specific warnings before proceeding.
Quick triage: Determine if repair or replacement is appropriate
A quick triage begins with a visual inspection for cracked housings, corroded fittings, clogged lines, or loose wiring.
Next, a listener should note unusual noises and run simple functional checks—power, float switch action, and pump activation—to gauge serviceability.
If damage is structural, electrical, or beyond basic tests, a professional should be called; routine cleaning and replacing small parts can be a DIY task.
Visual inspection checklist for obvious damage
Quick visual assessment of a condensate pump should focus on obvious signs that dictate whether a repair is feasible or replacement is required.
Inspect the housing for cracks, melted plastic, or warping. Check inlet/outlet fittings and tubing for splits or corrosion.
Look for burned wiring, scorched components, seized float, heavy mineral buildup, and persistent leaks; note parts that appear irreparably damaged.
Listening and basic functional tests to run
Begin by listening and performing simple operational checks to quickly separate minor faults from terminal damage. Note motor hum, grinding, or silence.
Verify pump primes, inlet/outlet flow, and float switch movement. Test with manual activation and observe discharge and shutoff.
Check for airlocks, leaks, or blocked intake. Record anomalies to guide further repair or replacement decisions.
When to call a professional vs. DIY
When should a homeowner attempt a condensate pump repair, and when is a professional warranted?
A homeowner may handle basic cleaning, float checks, and simple part swaps if comfortable with tools and electrical safety.
Call a professional for persistent leaks, motor failure, complex wiring, inaccessible installations, or warranty concerns.
If diagnostic uncertainty or safety risks exist, seek certified HVAC or plumbing service immediately.
Tools, parts, and materials needed for DIY repair
A concise tools list and parts inventory helps guarantee a safe, efficient condensate pump repair.
The section will cover essential hand and diagnostic tools, common replacement components for Little Giant models (such as impellers, switches, and tubing), and practical tips for confirming part compatibility and model numbers.
Clear identification and correct sourcing reduce the risk of improper repairs.
Essential tools checklist
Before opening the pump housing, gather a compact set of tools and replacement parts to complete the repair efficiently: slip-joint pliers, a small adjustable wrench, Phillips and flathead screwdrivers, needle-nose pliers, a multimeter, plumber’s tape, a utility knife, and a wet/dry vacuum for clearing condensate lines.
Essential toolkit imagery:
- Tightening fasteners
- Probing electrical contacts
- Clearing tubing clogs
- Sealing threaded joints
Common replacement parts for Little Giant pumps
With the toolkit assembled, attention shifts to the specific replacement parts most commonly needed for Little Giant condensate pumps.
Essential items include wear components, seals, and electrical spares ready for straightforward swaps.
- Replacement impeller
- Motor assembly or capacitor
- Rubber grommets and O-rings
- Float switch or sensor module
Compatibility and model identification tips
Identifying the correct Little Giant model and compatible parts starts with locating the nameplate or stamped model number on the pump housing.
Then cross-reference that exact code with manufacturer documentation or parts diagrams. Common tools for this step include a flashlight, magnifying loupe or smartphone camera for small markings, and access to the pump’s manual or the Little Giant online parts lookup.
Verify serial, revision, and motor specs. Note pump capacity, check connector types, and match gasket, float, and relay part numbers to confirm interchangeability.
Step-by-step troubleshooting and repair process
The troubleshooting and repair process proceeds through a logical sequence of checks and fixes beginning with verification of power and condensate supply.
Next come mechanical cleanings and component tests—clearing clogs, cleaning the reservoir, and evaluating the float switch.
Finally, electrical connections are inspected and restored before the motor is tested and replaced if necessary.
Step 1 Power and supply verification
Begin by confirming that the condensate pump is receiving proper power and a steady condensate supply before proceeding with further diagnostics.
Inspect the power cord, plug, and fuse or breaker for continuity and correct voltage.
Verify float switch operation and wiring connections.
Observe incoming condensate flow to the reservoir; note leaks, kinks, or disconnected drain lines that could interrupt supply to the pump.
Step 2 Clearing clogs and cleaning the reservoir
Proceed to clear obstructions and scrub the reservoir to restore reliable flow and prevent future blockages.
Drain remaining water, remove the pump head and tubing, then inspect and remove debris, algae, and mineral buildup with a soft brush and mild detergent.
Flush thoroughly with clean water, flush tubing with a thin brush or compressed air, and reassemble only after all passages are clear and dry.
Step 3 Testing and replacing the float switch
Inspecting the float switch confirms whether the condensate pump responds to rising water levels or if a faulty switch is causing failures.
The technician raises the float manually to observe activation, listens for pump engagement, and checks for sticky movement or corrosion.
If intermittent or nonfunctional, the float assembly is removed and replaced with the manufacturer-specified part, ensuring proper float travel and secure mounting.
Step 4 Checking and restoring electrical connections
With the float switch verified or replaced, attention shifts to the electrical connections that power the pump and control circuitry.
The technician inspects wiring for corrosion, loose terminals, frayed insulation, and proper strain relief. Power is disconnected before tightening screws, re-seating connectors, and replacing damaged wires.
Continuity and voltage are measured at terminals; any faulty connectors are replaced with appropriate gauge and secure fittings.
Step 5 Inspecting, testing, and replacing the motor
Begin by isolating the motor from the system power and removing any housing or access panels to expose the motor, shaft, and mounting.
Inspect for corrosion, burnt wiring, or seized bearings.
Manually rotate the shaft to check freedom.
Use a multimeter to test winding continuity and insulation.
If readings fail or mechanical damage exists, remove and replace the motor with the correct Little Giant specification.
Step 6 Replacing the check valve and discharge tubing
Replace the check valve and discharge tubing when leaks, backflow, clogs, or brittle tubing are detected, as these components directly affect pump performance and prevent condensate from draining properly.
Disconnect power, remove old tubing and valve, note flow direction, clean fittings, install correct-size tubing and a one-way valve, secure with clamps, and guarantee smooth, unobstructed flow before progressing.
Step 7 Reassembling, leak testing, and calibration
Reassemble the pump housing and fittings carefully, then perform a systematic leak test and calibration to confirm proper operation.
Secure all clamps and fasteners to specified torque.
Fill reservoir, cycle pump, inspect for drips at seals and connections.
Verify float switch activation points and discharge flow rate.
Adjust float or sensor gap per manufacturer specs, retest cycles, and document results.
Diagnosing and fixing specific failure modes
The section addresses common failure modes and their remedies, including situations where the pump runs but does not move water and where it fails to run at all.
It covers electrical troubleshooting, intermittent or false cycling caused by float and switch problems, noisy bearings or motors and mounting fixes, and guidance on leaks from housings or seals with repair-versus-replacement criteria.
Each problem is presented with likely causes and concise, practical corrective steps.
Pump runs but does not move water causes and fixes
Inspecting a condensate pump that runs but fails to move water requires methodical diagnosis of flow-blocking issues, mechanical faults, and electrical anomalies.
Check inlet/outlet tubing for clogs, kinks, or improper slope; clear debris and replace tubing if collapsed.
Verify pump impeller or diaphragm integrity, coupling wear, and impeller rotation.
Confirm check valve function and proper venting to restore flow.
Pump does not run at all electrical troubleshooting
Often a condensate pump that doesn’t run at all points to electrical faults rather than mechanical ones, so begin troubleshooting with safe, systematic isolation of power, controls, and wiring.
Check mains voltage at the pump, inspect fuses and breakers, verify wiring continuity and secure terminals, test the motor with a known-good supply, and confirm the control relay or transformer output.
Replace faulty components.
Intermittent operation or false cycling float and switch issues
Diagnose intermittent operation or false cycling by focusing on the float assembly and switch mechanisms, since most erratic behavior stems from stuck, misaligned, or electrically noisy level sensors.
Inspect for debris, corrosion, or binding; clean or replace the float.
Verify switch contacts with a multimeter, reseat connectors, and secure wiring.
Adjust float travel and replace faulty switches to restore reliable activation.
Noisy pump bearing, motor, and mounting solutions
Begin by isolating the source of the noise—bearing rumble, motor whining, or mounting vibration—so each component can be evaluated independently.
Inspect bearings for play and corrosion; lubricate if serviceable or replace sealed bearings.
Check motor for worn brushes or imbalance; tighten rotor or replace motor.
Secure mounting brackets, add rubber isolators, and retest to confirm noise elimination.
Leaks from housing or seals repair vs. replacement
Leaks from the condensate pump housing or its seals require a focused assessment to determine whether a targeted repair will restore integrity or a full component replacement is warranted.
Inspect for cracks, warped flanges, or degraded O-rings.
Minor seal failures often respond to gasket or O-ring replacement and proper torque; structural cracks or corrosion necessitate housing replacement to prevent recurrence and guarantee leak-free operation.
Testing and verifying a successful repair
The technician should perform immediate functional tests—power cycling, float switch actuation, and a controlled water fill—to confirm the pump starts, runs, and discharges correctly.
The system should then be monitored for 24 to 72 hours to verify repeatable operation under normal condensate loads and to catch intermittent faults.
Persistent slow discharge, frequent short-cycling, unusual noises, or error codes indicate unresolved issues requiring further inspection.
Functional tests to run after repair
After completing repairs, a series of functional tests confirm the condensate pump operates reliably under normal and fault conditions.
Technician fills reservoir to activate float switch, verifies pump starts and stops promptly, checks discharge flow and hose for leaks, inspects check valve operation, confirms alarm and safety cutoff function by simulating overfill, and records voltage/current to guarantee motor draws within specified range.
Monitoring over 24 to 72 hours to ensure reliability
Following the functional checks, technicians should monitor the condensate pump continuously for 24 to 72 hours to confirm consistent performance under typical operating cycles and intermittent loads.
Log run times, cycle frequency, float activation, and any noise or vibration.
Verify inlet/outlet flow and guarantee automatic restart after power interruptions.
Document findings, note environmental factors, and schedule follow-up if anomalies or repeat faults appear.
What readings or behaviors indicate unresolved issues
Several measurable readings and repeatable behaviors signal that a condensate pump repair remains incomplete: persistent high float activation without discharge, intermittent motor hum or failure to start, elevated water level on the sight glass, abnormal current draw on the motor, frequent cycling under normal load, visible leaks, and recurring error codes.
Documented recurrence within 24–72 hours indicates further inspection or component replacement is required.
Preventive maintenance to extend pump life
A clear preventive maintenance plan can prolong condensate pump service life by combining a routine cleaning schedule with defined steps for removing debris, checking float operation, and flushing lines.
Seasonal checks—especially before cooling and heating seasons—should verify drain routing, test alarms, and inspect condensate pans for corrosion or biofilm.
Consider upgrades and accessories such as screened strainers, check valves, and remote float switches to reduce failures and simplify future maintenance.
Routine cleaning schedule and steps
Establish a routine cleaning schedule based on the condensate pump’s operating hours and the local environment.
Inspect weekly for visible debris; wipe exterior and remove dust.
Monthly, disconnect power, empty reservoir, clean float, inlet and outlet with mild detergent and soft brush, flush lines with distilled water.
Quarterly, check tubing for algae, replace filters, and document actions and dates for trend tracking.
Seasonal checks for HVAC condensate systems
After routine cleaning schedules are in place, seasonal checks align maintenance tasks with changing HVAC demands and environmental conditions.
Inspect float switches, test pump activation, clear condensate lines and traps, verify venting and condensate pan integrity, and check electrical connections and hose routing for kinks.
Record findings, replace worn components, and schedule professional inspection if anomalies persist to prevent failures and extend pump life.
Upgrades and accessories that reduce failures
Several targeted upgrades and accessories can meaningfully reduce condensate pump failures and extend service life.
Recommended additions improve reliability, simplify maintenance, and prevent common faults:
- Float switch guards and dual-switch redundancy to prevent false shutoffs
- Inline filters or strainers to block debris and algae
- Automatic condensate drain treatment dispensers for biofilm control
- Vibration isolators and soft mounts to reduce wear and noise
Replacement considerations and buying guidance
When repair costs approach or exceed the price of a new unit, replacement is often the more practical option.
Selection should focus on capacity, head height, reliability, and compatibility, whether choosing a Little Giant model or a suitable alternative.
Installation factors—electrical requirements, mounting orientation, discharge plumbing, and access for future service—must be confirmed before purchase.
When replacement is more cost-effective than repair
If repair costs approach or exceed half the price of a new condensate pump, replacement often presents the better long-term value.
Replacement is recommended when repeated failures occur, corrosion or motor damage is extensive, OEM parts are unavailable, or labor-intensive diagnostics exceed practical expense.
Consider warranty, energy efficiency, and downtime impact; document total repair estimates before deciding to replace for predictable cost control.
How to choose the right Little Giant model or alternative
Evaluate system requirements and site constraints to select a condensate pump model that matches capacity, head height, voltage, and installation space. Consider reliability, warranty, noise, and compatibility with existing float switches; compare OEM Little Giant models to reputable alternatives based on performance and parts availability.
| Feature | Consideration |
|---|---|
| Capacity | GPH rating |
| Head | Max lift (ft) |
| Voltage | 115V/230V |
| Noise | dB level |
| Warranty | Length and coverage |
Installation considerations for a new pump
After selecting a model that meets capacity, head, voltage, and compatibility needs, attention turns to practical installation considerations for replacing a condensate pump.
Verify inlet/outlet sizing and orientation, electrical requirements, and available mounting space.
Confirm condensate line slope and trap placement, guarantee proper venting and backflow prevention, and plan for access for maintenance.
Consider warranty, spare parts availability, and professional installation if unsure.
Troubleshooting scenarios and real-world examples
The section presents three common troubleshooting scenarios: a clogged condensate line causing overflow, a float switch that failed after a power surge, and motor failure following years of use.
Each case includes symptoms, diagnostic steps, and practical repair or replacement options.
Readers are encouraged to compare these examples to their own situation to identify the appropriate next steps.
Case 1 Clogged condensate line causing overflow
When a condensate line becomes clogged, water backs up into the pump reservoir and triggers overflow conditions that can shut down the air handler or cause water damage.
Technicians should recognize common symptoms—gurgling sounds, slow drainage, or frequent pump cycling—and proceed with targeted inspection of the drain trap, PVC runs, and any accessible P-trap for blockages or biological growth.
Clear debris, flush with water, and use a wet/dry vacuum or short snake.
Case 2 Failed float switch after power surge
Moving from clogged lines to electrical faults, a power surge can damage a condensate pump’s float switch so it fails to open or close properly, leaving the reservoir unable to signal water level changes.
Technicians should isolate power, test the switch with a multimeter, inspect wiring and surge protection, replace a burned or stuck float switch, and verify proper operation before restoring service.
Case 3 Motor failure after years of use
A motor that grinds, hums without spinning, or fails outright after years of service often indicates worn bearings, seized shaft, or internal electrical degradation from heat and vibration.
Technicians should first confirm power delivery, then isolate the pump and perform a bench test to distinguish electrical failure from mechanical seizure before deciding on repair or replacement.
If bearings or rotor damage are confirmed, replacement is usually more cost-effective than rewind.
Safety, warranty, and disposal
Before beginning repairs, the technician should follow basic electrical and refrigerant safety precautions, including disconnecting power and avoiding exposure to refrigerant.
They should verify Little Giant warranty terms and available service or replacement options to determine whether professional support or authorized service is required.
Finally, guidance on proper disposal and recycling of old pumps and components should be consulted to comply with local regulations and environmental best practices.
Electrical and refrigerant safety reminders
Several key precautions must be observed when working near condensate pumps to prevent electrical shock and unintended refrigerant exposure.
Technicians should de-energize circuits, verify lockout/tagout, and use insulated tools and PPE.
Avoid puncturing lines; handle refrigerant only with certified equipment.
Dispose of refrigerants per regulations and document actions.
Follow local codes to protect personnel and preserve system integrity.
Checking Little Giant warranty and service options
After observing electrical and refrigerant safety protocols, technicians should verify the condensate pump’s warranty status and available Little Giant service options to guarantee repairs and disposals are handled correctly.
Consult the original purchase documentation and serial number to confirm coverage period and terms.
Contact Little Giant support or an authorized service center for OEM parts, warranty repair authorization, or guidance on approved service providers and claim procedures.
Proper disposal and recycling of old pumps
Dispose old condensate pumps in accordance with local regulations and manufacturer guidance to minimize environmental impact and liability.
The owner should document disposal, remove batteries or oil, and check warranty transfer or recycling programs. Certified e-waste centers or HVAC suppliers often accept units; retain receipts for records and compliance.
- Corroded metal
- Contaminated fluids
- Electrical components
- Recyclable plastics
Conclusion
In the end, the Little Giant condensate pump, like a misplaced key found beside the door, reminds the homeowner that small fixes often restore larger order. Coincidence of a clog cleared at the precise moment a season changes suggests care timed with need. Practical steps, routine maintenance, and informed replacement choices converge, showing that attention pays off: problems shrink, systems hum, and ordinary vigilance becomes the quiet maintenance of comfort and continuity in the home.