How to Start an Electric Water Heater Safely: Step-by-Step Guide for Beginners
To safely start an electric water heater, follow these steps: First, turn off the power at the circuit breaker and lock or tag it to prevent accidental reactivation. Confirm there is no voltage at the tank. Next, close the cold water inlet and open a hot faucet to release any trapped air. Slowly refill the tank while checking for leaks. Only restore power once the tank is full, set the thermostat to 120°F (49°C), and monitor the initial heating cycle for any issues. Detailed steps and safety precautions are provided below.
Can You Start an Electric Water Heater Yourself?
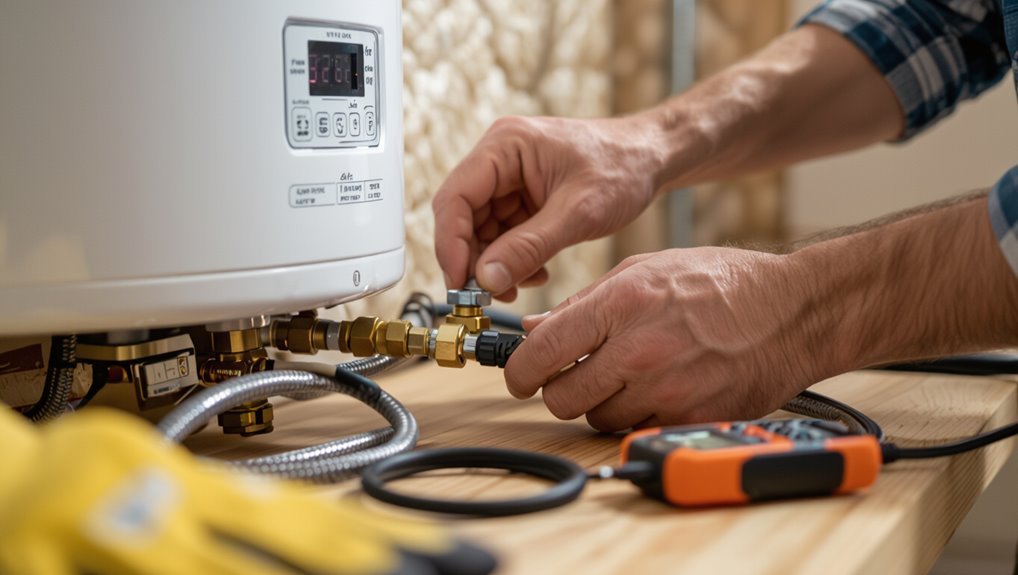
A basic electric water heater can often be started by a homeowner following clear manufacturer instructions and simple safety checks.
If the unit shows signs of electrical problems, leaks, unusual noises, or if the homeowner is uncomfortable with circuit breakers and wiring, a licensed technician should be called.
Professional assistance is also recommended for complex issues, older systems, or when local codes require certified work.
Short direct answer for beginners
Yes—most homeowners can start an electric water heater themselves if they follow basic safety steps, shut off power, and confirm wiring and controls are in good condition.
However, tasks involving electrical connections, tripped breakers, or suspected damage should be left to a licensed electrician.
A concise beginner should learn how to start an electric water heater by checking breakers, valves, pilot/indicators, and following manufacturer startup steps.
When to call a professional
When should a homeowner step back and call a professional?
If wiring is unknown, breaker trips persist, elements leak, unusual noises occur, or temperature control fails, a licensed electrician or plumber should be engaged.
Complex repairs, gas connections (if hybrid), or local code questions also warrant professional assessment.
Prioritize safety; improper work risks shock, fire, or water damage.
Basic Understanding What Is an Electric Water Heater and How It Works
An electric water heater consists of a tank, heating elements, a thermostat, and a dedicated circuit breaker that together store and regulate hot water.
When powered, electricity flows to the elements, which convert electrical energy into heat that raises the water temperature under thermostat control.
Residential units are typically tank-style, tankless (on-demand), or heat-pump models, each using the same basic electrical heating principles with different storage and efficiency characteristics.
Main components (tank, elements, thermostat, breaker)
A residential electric water heater is composed of four core elements that together store, heat, regulate, and protect the water supply: the insulated tank, heating elements, thermostat, and circuit breaker.
The tank holds and insulates water. Heating elements convert electrical energy to heat. The thermostat controls temperature setpoint and cycling.
The circuit breaker provides overcurrent protection and allows safe shutdown for maintenance.
How electricity heats the water (simple explanation)
Electric current passes through the heater’s resistive elements, which convert electrical energy into heat; that heat transfers into the surrounding water by conduction and convection inside the insulated tank.
Thermostats monitor temperature and cycle power to maintain setpoints. Heat rises, promoting circulation so colder water contacts elements.
Insulation reduces loss, preserving stored hot water until use.
Common types of residential electric water heaters
Although many models share the same basic principle of using resistive heating elements to warm stored water, residential electric water heaters come in several common types—tank, tankless (on-demand), heat pump (hybrid), and point-of-use—each with distinct installation, efficiency, and capacity characteristics.
Tanks store 20–80 gallons; tankless supplies continuous flow; heat pumps transfer ambient heat for higher efficiency; point-of-use serves single fixtures.
Safety Overview Risks and Legal Considerations
The following section outlines the primary safety risks associated with electric water heaters, including electrical shock hazards and potential scalding from overheated or overpressurized systems.
It also highlights the importance of observing local building codes, obtaining required permits, and understanding how improper installation or unauthorized repairs can affect warranties.
Readers are encouraged to prioritize professional inspection or certified workmanship when risks or legal requirements are unclear.
Electrical hazards and shock risk
Any work on a water heater carries a real risk of electrical shock, which can cause serious injury or death if precautions are not followed.
Individuals must de-energize circuits, verify with a meter, and use insulated tools and PPE.
Damaged wiring, improper grounding, and wet conditions increase risk.
Only qualified persons should handle live diagnostics; local electrical codes and permits apply.
Scalding and pressure risks
Many incidents involving electric water heaters stem from scalding or excessive pressure, both of which can cause severe burns, appliance failure, or explosions if safeguards are missing.
Proper thermostat settings, anti-scald devices, and pressure relief valves reduce risk.
Regular testing, routine maintenance, and immediate repair of leaks or faulty parts prevent dangerous temperature spikes and pressure buildup, protecting occupants and property.
Local codes, permits, and warranty implications
Beyond preventing scalding and pressure failures, compliance with local building codes and permit requirements shapes how an electric water heater may be installed and maintained.
Inspectors, permits, and approved materials guarantee safety and legal occupancy. Ignoring codes risks fines, mandatory rework, voided warranties, and insurance denials.
Verify local regulations, obtain permits when required, and document professional installations to preserve warranty coverage and liability protection.
Tools, Materials, and PPE You Need Before Starting
Before beginning, a concise inventory of essential hand and diagnostic tools—such as a multimeter, insulated screwdrivers, pipe wrenches, and a voltage tester—should be confirmed.
Replacement parts and materials like heating elements, thermostats, gaskets, Teflon tape, and appropriate piping fittings ought to be on hand to address common faults without delay.
Personal protective equipment—insulated gloves, safety glasses, and protective footwear—should be checked against a simple safety checklist to verify readiness.
Essential tools list
A compact inventory of tools, materials, and personal protective equipment (PPE) is essential to start an electric water heater safely.
The technician verifies necessary items before work begins:
- Multimeter, insulated screwdrivers, adjustable wrench.
- Voltage tester, needle-nose pliers, pipe wrench.
- Safety gloves, eye protection, rubber-soled footwear.
Items focus on diagnostics, basic adjustments, and personal protection; specialized replacement parts are excluded.
Replacement parts and materials to have on hand
Having verified tools and PPE, the technician should also stock commonly needed replacement parts and consumables to handle typical failures without delay.
Essential items include thermostats, heating elements, and sacrificial anode rods; plumbing fittings and Teflon tape; electrical connectors and terminal lugs.
Recommended inventory:
- Heating elements and thermostats
- Anode rods and fittings
- Connectors, wire, and sealing materials
Personal protective equipment and safety checklist
Don proper protective gear and confirm a concise safety checklist is completed before energizing or servicing an electric water heater: insulated gloves, safety goggles, flame-resistant clothing, and nonconductive footwear; a voltage tester or multimeter, lockout/tagout devices, and a GFCI or portable circuit interrupter; plus a clear workspace, fire extinguisher rated for electrical fires, and a partner or communication plan in case of emergency.
- Verify deenergized circuits.
- Inspect PPE condition.
- Maintain clear egress and communication.
Pre-Start Checklist Inspect and Prepare
Before any work begins, the operator confirms the breaker is off and verifies the unit shows no visible damage, leaks, or corrosion.
Electrical checks follow to guarantee correct voltage, wiring, and capacity for the heater.
Finally, drainage and the water shut-off are prepared and tested to allow safe isolation if needed.
Confirm power is off at breaker
Turn off the circuit breaker supplying the water heater and verify the power is de-energized before any work begins. The technician confirms zero voltage and secures the panel.
Steps:
- Lock or tag the breaker and note its position.
- Use a multimeter at the heater terminals to confirm 0 V.
- Re-check the panel and surroundings before proceeding.
Check for visible damage, leaks, and corrosion
Inspect the heater and surrounding components for visible damage, leaks, and corrosion, documenting any abnormalities before restoring power.
Examine tank seams, fittings, valves, and pressure-relief assembly for dampness, crusting, or rust.
Check nearby piping, drain pan, and floor for staining.
Note hairline cracks, bulges, or clear leaks.
Tag defects and delay energizing until repairs or a qualified inspection occur.
Verify correct voltage, wiring, and capacity
Confirm voltage, wiring, and capacity match the heater’s nameplate and local code requirements before energizing the unit.
A qualified individual should verify supply voltage, correct circuit breaker size, conductor gauge, and grounding.
Ascertain wiring connections are tight, terminals clean, and any junction boxes accessible.
Verify the panel can handle the load without overloading other circuits and document any discrepancies for correction.
Drainage and water shut-off preparation
With electrical connections verified and documented, attention shifts to the water side: isolating the supply and preparing for controlled drainage.
The cold-water shutoff valve is closed, a pressure-relief line is secured, and a hose is attached to the drain valve routed to a safe discharge point.
The tank is depressurized slowly via an open hot faucet; leaks and valve function are confirmed before proceeding.
Step-by-Step Guide to Starting an Electric Water Heater Safely
The procedure begins with powering down the unit and shutting off the cold-water supply to guarantee safety before any work.
Next, electrical connections should be inspected and tested, the tank refilled and air purged, then power restored and the thermostat set.
The initial heating cycle must be monitored for leaks, unusual noises, tripped breakers, or improper temperature rise.
Step 1 Turn off power and water supply
Begin by shutting off the circuit breaker that supplies the water heater and closing the cold-water inlet valve at the tank; this isolates electrical and water sources so the unit can be serviced or started without risk of shock or flooding.
- Verify breaker OFF and label if needed.
- Close inlet valve until fully seated.
- Open a hot faucet to relieve pressure and confirm isolation.
Step 2 Inspect and test electrical connections
Inspect electrical connections visually and with appropriate test tools before restoring power to verify safe operation.
Examine wiring for loose terminals, corrosion, melted insulation, and correct gauge.
Use a multimeter to confirm circuit continuity and absence of voltage with power off, then verify proper supply voltage at the thermostat terminals.
Tighten connections to manufacturer torque specs and replace damaged components before proceeding.
Step 3 Refill and purge air from the tank
With electrical connections verified and secure, attention shifts to refilling the tank and removing trapped air to prevent dry firing and guarantee consistent heating.
Close the drain valve, open a nearby hot faucet to allow air escape, then slowly open the cold-water supply.
Observe faucet flow until steady water appears, check for leaks, and close the faucet when purging completes.
Step 4 Restore power and set thermostat
Restore power only after confirming the tank is full and all valves and fittings are dry; then switch the circuit breaker back on or reinstall the fuse to energize the heater.
Next, set the thermostat to the recommended temperature (typically 120°F/49°C) to balance comfort and safety.
Verify indicator lights or thermostatic response; document settings and leave access clear for future adjustments.
Step 5 Monitor first heating cycle (what to watch for)
After power is applied and the thermostat is set, the first heating cycle should be observed closely for at least 30–60 minutes to confirm normal operation.
The observer watches for steady heating, absence of unusual noises, no electrical smells or tripping breakers, and no water leaks around fittings.
Note steady temperature rise and inspect tank and connections for any unexpected signs.
Step 6 Test hot water temperature and safety devices
At this stage, the installer verifies actual outlet temperatures and confirms all safety devices function correctly by performing systematic tests on the thermostat, pressure-relief valve, and any installed high-limit or anti-scald controls.
The technician measures mixed and tank temperatures, adjusts thermostat setpoints to safe levels (typically 120°F/49°C), actuates the T&P valve per code, and confirms electronic safety cutoffs and tempering valves respond reliably.
Troubleshooting Common Startup Problems
When startup problems occur, the guide outlines quick checks for no power or a unit that fails to heat, including breakers, wiring, and thermostats.
It also covers common first-heat noises, where to inspect for leaks after startup, and likely causes of inconsistent temperature or slow recovery.
Each point directs the reader to simple diagnostics and next steps for safe resolution.
No power / unit doesn’t heat
Many common startup failures stem from a lack of power or a malfunctioning heating element, leaving the unit cold despite appearing operational.
Check safely and systematically:
- Verify breaker and disconnect are on, test with a multimeter at the heater terminals.
- Inspect thermostat settings and reset switches; replace faulty thermostats.
- Test heating elements for continuity; replace burned or shorted elements promptly.
Strange noises during first heat-up
Although uncommon in modern units, unfamiliar sounds during the initial heat-up often signal trapped air, sediment buildup, or minor component movement rather than imminent failure.
- Bleed a small hot-water faucet to purge air and note if popping stops.
- Flush the tank briefly to remove loose sediment causing rumbling.
- Inspect fasteners and panels; tighten loose parts causing vibration without opening sealed components.
Leaks after startup where to check
If leaks appear after the first startup, a systematic check of obvious fittings and components can quickly identify the source before water causes damage.
Inspect inlet and outlet unions, drain valve, temperature-pressure relief valve, and pipe connections for drips.
Check tank seams and fittings for corrosion or weeps.
Tighten loose connections, replace faulty valves or seals, and turn off power and water before repairs.
Inconsistent temperature or slow recovery
Detecting inconsistent water temperature or slow recovery after a new electric water heater is powered on requires a focused troubleshooting approach, since these symptoms often point to element failure, incorrect thermostat settings, or plumbing issues.
Examine thermostats for correct setpoints and wiring, test heating elements for continuity and proper wattage, inspect dip tube and circulation for cross-connections, check recovery rate against tank capacity, and repair or replace faulty components.
Common Mistakes Beginners Make
Beginners often make critical errors that compromise safety and system performance.
Common mistakes include failing to shut off power before work, skipping an air purge or refilling the tank improperly, setting thermostats too high and risking scalding, and using incorrect replacement parts or temporary fixes.
Recognizing these pitfalls helps prevent damage and injury.
Forgetting to shut off power
One common and dangerous oversight is starting work on an electric water heater without shutting off its power supply. Exposure to live wiring can cause electrocution, burned components, and equipment damage.
A verified electrical disconnect and use of a noncontact tester prevent accidental contact. Confirming power-off at the circuit breaker and locking/tagging circuits eliminates guesswork and guarantees safer maintenance.
Skipping air purge or improper refilling
After confirming the power is off, attention must turn to the tank’s fill and venting procedures.
Failure to purge air or refill slowly can trap pockets, causing sputtering taps, uneven heating, pressure spikes, or noisy operation.
Properly open a hot faucet, slowly admit water until steady flow appears, then close the faucet and inspect for leaks before restoring power.
Incorrect thermostat settings and risk of scalding
While adjusting the thermostat may seem straightforward, setting it too high is a common mistake that dramatically raises the risk of scalding and increases energy use.
Beginners often ignore recommended temperature ranges; 120°F (49°C) balances safety and efficiency.
Failure to verify thermostat accuracy or to test faucet output can leave occupants exposed to dangerously hot water and higher utility bills.
Using wrong replacement parts or temporary fixes
Choosing incorrect replacement parts or relying on temporary fixes can compromise an electric water heater’s safety and lifespan.
Beginners may install mismatched thermostats, elements, or nonrated fittings that fail under pressure or heat. Temporary patches hide leaks, promote corrosion, and void warranties.
Professionals recommend using manufacturer-approved components, following specifications, and scheduling proper repairs to guarantee reliable operation and reduce hazard risk.
Best Practices and Maintenance to Prevent Startup Issues
A consistent maintenance routine can prevent most startup problems and extend the heater’s service life.
Recommended actions include scheduled inspections, periodic tank flushing to remove sediment, and annual testing of the pressure relief valve and thermostat.
The discussion will also cover signs that indicate it is more cost-effective or safer to upgrade or replace the unit.
Regular inspection schedule
Regular inspections establish a predictable rhythm of checks that catch wear, leaks, and electrical issues before they impede safe startup.
A concise monthly-to-annual schedule balances safety and effort:
- Monthly: visual leak, thermostat, and power connection checks.
- Quarterly: pressure relief valve and insulation inspection.
- Annual: professional electrical and element testing, documenting findings and corrective actions for safe, reliable startups.
Flushing the tank and sediment management
Flush the tank periodically to remove sediment that reduces heating efficiency and accelerates element corrosion.
Before draining, power and cold-water supply are shut off, and a hose attaches to the drain valve directing water to a safe location.
Brief flushes remove loose deposits; full drains clear stubborn buildup.
Inspect and replace anode rods when heavily corroded to limit future sediment accumulation.
Testing pressure relief valve and thermostat annually
After sediment is cleared and the tank refilled, attention should turn to the pressure relief valve and thermostat, which directly affect safe operation and temperature control.
Annually, lift the relief valve lever briefly to confirm immediate, full flow and reseal; replace if leaking or sluggish.
Verify thermostat settings and functionality with a thermometer; recalibrate or replace faulty units to maintain safe, consistent water temperatures.
When to upgrade or replace the unit
When should an electric water heater be replaced rather than repaired?
The unit warrants replacement if it’s over 10–15 years old, suffers recurrent leaks, has extensive corrosion, shows declining efficiency or frequent element failures, or no longer meets household capacity needs.
Upgrading to a more efficient model reduces energy costs, improves reliability, and guarantees compatibility with modern safety standards and controls.
Comparison DIY Start vs. Hiring a Professional
A concise comparison of a DIY start versus hiring a professional highlights trade-offs in cost, time, safety, and warranty implications to help readers choose the right approach. The table below outlines key contrasts to visualize those differences quickly.
| Factor | DIY Start | Hiring a Professional |
|---|---|---|
| Cost | Lower upfront, potential hidden expenses | Higher upfront, predictable pricing |
| Time | May take longer for learning and troubleshooting | Faster completion by an experienced technician |
| Safety & Warranty | Risk to personal safety and possible warranty void | Safer execution and typically preserves warranty |
Cost, time, safety, and warranty trade-offs
Although some homeowners opt for a DIY electric water heater start to save money and time, the choice hinges on evaluating cost, time, safety, and warranty implications:
DIY reduces labor expense and may be faster but risks improper wiring, injury, or voided warranties.
Hiring a professional increases upfront cost and duration but guarantees code compliance, safer execution, documented work, and preserved manufacturer or installation warranties.
Quick Safety Reminders and Final Checklist Before Leaving the Job Site
Several quick checks can prevent accidents and callbacks after an electric water heater installation.
Inspect connections, confirm proper grounding, and verify thermostat and pressure relief operation.
Test for leaks and restore power only after safe clearance.
Guarantee area is clean and tools removed.
Document settings and advise the owner on emergency shutoff.
- Verify electrical and plumbing integrity.
- Test safety devices.
- Clean and document.
Conclusion
The electric water heater, likened to a patient waking in dawn’s hush, requires cautious hands and clear rules. Like a lighthouse keeper checking lenses, one must inspect valves, confirm power isolation, and honor regulations before igniting warmth. Neglect becomes fog; preparation becomes beacon. In that practiced ritual—tools gathered, checklist complete—the appliance shifts from idle metal to dependable hearth, offering steady heat only because respect and procedure guided its first breath.